RHEL安装oracle客户端(版本为11.2)
RHEL安装oracle客户端(版本为 11.2)
1、获取超级管理员
命令:su -
输入root密码
2、安装依赖包:
命令:yum install -y binutils compat-libstdc++ elfutils-libelf elfutils-libelf-devel ksh gcc gcc-c++ glibc glibc-common glibc-devel glibc-headers libaio libaio-devel libgcc libstdc++ libstdc++-devel make sysstat unixODBC unixODBC-devel
3、增加一个oracle用户组,分配id为5000
# groupadd -g 5000 oinstall
4、增加一个dba用户组,分配id为5001
# groupadd -g 5001 dba
5、将oracle用户添加到组中。-g 设置的是用户的主用户组,这些信息记录在/etc/passwd中;-G 设置的是用户附加组,记录在/etc/group中。
# useradd -g oinstall -G dba oracle
6、
# service iptables stop
7、
# chkconfig --list iptables
8、修改
# vi /etc/selinux/config
	修改:
    # This file controls the state of SELinux on the system.
    # SELINUX= can take one of these three values:
    #    enforcing - SELinux security policy is enforced.
    #    permissive - SELinux prints warnings instead of enforcing.
    #    disabled - No SELinux policy is loaded.
    SELINUX=disabled
    # SELINUXTYPE= can take one of three two values:
    #    targeted - Targeted processes are protected,
    #    minimum - Modification of targeted policy. Only selected processes are protected.
    #    mls - Multi Level Security protection.
    SELINUXTYPE=targeted

PS:将SELINUX的值设置为deisabled
9、
# vi /etc/security/limits.conf
	添加:
    ## Oracle user
     oracle soft nofile 1024
     oracle hard nofile 65536
     oracle soft nproc 16384
     oracle hard nproc 16384
     oracle soft stack 10240
     oracle hard stack 32768
     oracle hard memlock 13217728
     oracle soft memlock 134217728
    # End of file
10、
# cat >>  /etc/pam.d/login <<eof
session required /lib64/security/pam_limits.so
session required pam_limits.so
 eof
11
# cat >> /etc/sysctl.conf << eof
fs.file-max = 6815744
kernel.sem = 250 32000 100 128
kernel.shmmni = 4096
kernel.shmall = 1073741824
kernel.shmmax = 4398046511104
kernel.panic_on_oops = 1
net.core.rmem_default = 262144
net.core.rmem_max = 4194304
net.core.wmem_default = 262144
net.core.wmem_max = 1048576
fs.aio-max-nr = 1048576
net.ipv4.ip_local_port_range = 9000 65500
eof
12、执行此命令使内核配置生效
# /sbin/sysctl -p
13、在根目录中创建文件夹
# mkdir -p /u01/11.2/client
14、将/u01目录下所有文件的拥有者改为oracle
# chown -R oracle /u01
15、将/u01目录下所有文件的权限设置为775
# chmod -R 775 /u01
16、找到本地的linux_x64_11gR2_client.zip目录,移动到/home/oracle目录下
# cd /home/tmn
# mv linux_x64_11gR2_client.zip /home/oracle
17、
# chown oracle: oinstall /home/oracle/linux_x64_11gR2_client.zip
18、
# chmod 775 /home/oracle/linux_x64_11gR2_client.zip
19、登录到oracle用户
# su - oracle
20、查看用户组的id设置
$ id
21、解压linux_x64_11gR2_client.zip到当前目录
$ unzip linux_x64_11gR2_client.zip
22、编辑.bash_profile文件,配置环境变量
$  vi .bash_profile
export PATH
export ORACLE_HOME=/u01/11.2/client
export ORACLE_BASE=/u01/11.2
export PATH=$PATH:$ORACLE_HOME/bin
23、执行.bash_profile文件,使配置生效
$ source .bash_profile
24、进入解压后的目录,准备安装oracle客户端
$ cd client/
PS:之后的步骤需要在有显示器的条件下执行。
25、开始安装
$ ./runInstaller
PS1:执行安装时,客户端都是方框框的时候,在root下执行命令:
	命令:# export LANG="en_US.UTF-8"
PS2:安装时报错为--无法使用命令/usr/bin/xdpyinfo 自动检查显示器颜色。请检查是否设置了DISPLAY变量。
    1. 进入root用户,执行命令 # xdpyinfo | more; 记录下name of display: 后的字符串,如127.0.0.1:1.0
    2. 退出多页显示后执行命令 # xhost+
       返回结果为 access control disabled, clients can connect from any host
    3. 切换到oracle用户,执行命令 # su - oracle
    4. 添加环境变量,执行命令 $ export DISPLAY=:1.0
    5. 执行命令 $ xdpyinfo, 可以正常显示
PS3:安装时报错[INS-06101]IP address of localhost could not be determined。解决方案如下:
	1. 查看主机名称 # hostname,结果为John
	2. 修改/etc/hosts文件,添加ip与主机名称
		命令vi /etc/hosts
        添加:
        10.1.1.1 John
26、选择Administrator类型

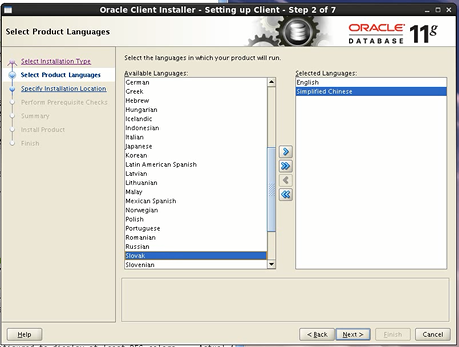
27、添加简体中文(simplified Chinese)
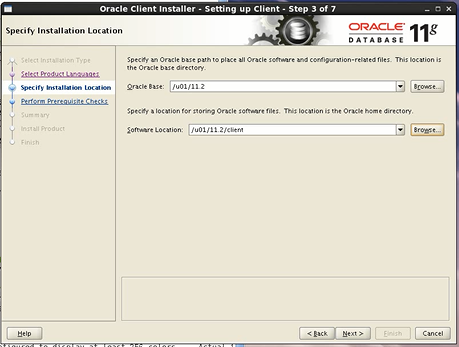
28、选择路径
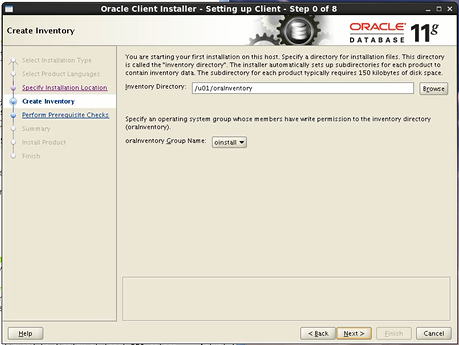
29、选择详单目录
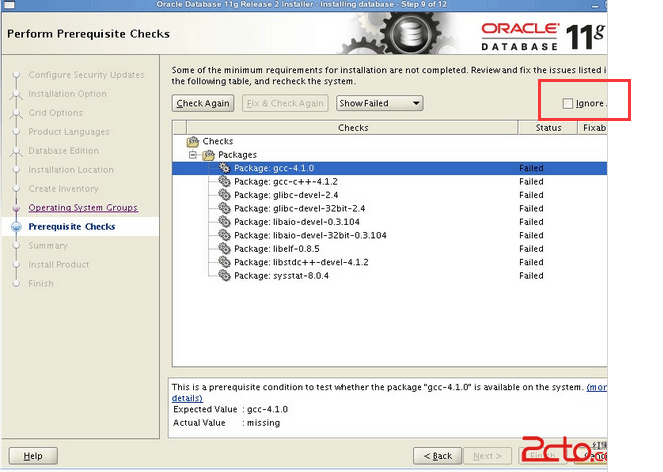
30、检查依赖包

在这个步骤中,在安装的oracle客户端为x86_64版本时,如果检查出来的所有缺少的包都是i386的时候,例如:
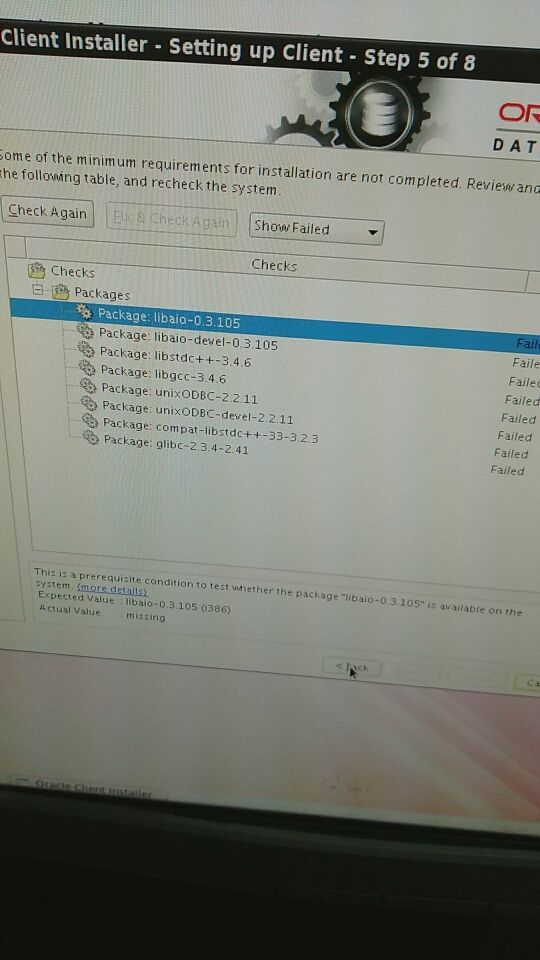
可以点击右上角的Ignore All,进入下一步安装
31、需要先执行两个脚本,脚本路径在弹出的对话框中,其中第二个脚本在选择目录时直接按回车
32、点击finsh,完成安装。

 浙公网安备 33010602011771号