使用CocoaPods创建自己的私有库-iOS组件化第一步
目前iOS组件化常用的解决方案是Pod+路由+持续集成,通常架构设计完成后第一步就是将原来工程里的模块按照架构图分解为一个个独立的pod工程(组件),今天我们就来看看如何创建一个Pod私有库。
新建:pod lib create
假设我们需要创建的库名为TestLib,下面我们使用Pod官方提供的创建模板:
首先进入我们的工作目录,如workspace,输入命令
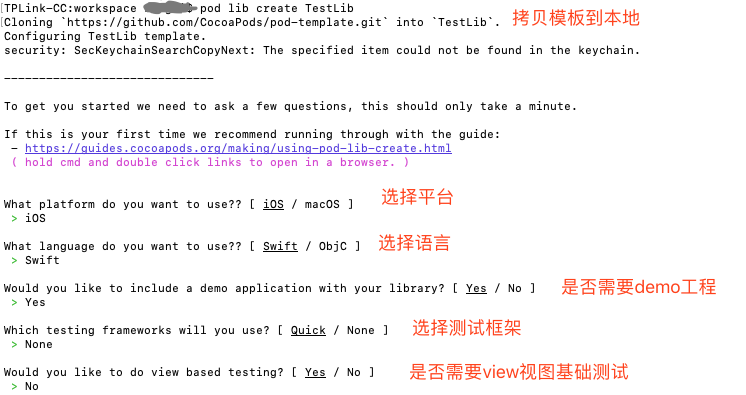
pod lib create TestLib
创建过程中需要填写几个问题,如下图所示,按个人所需填写:
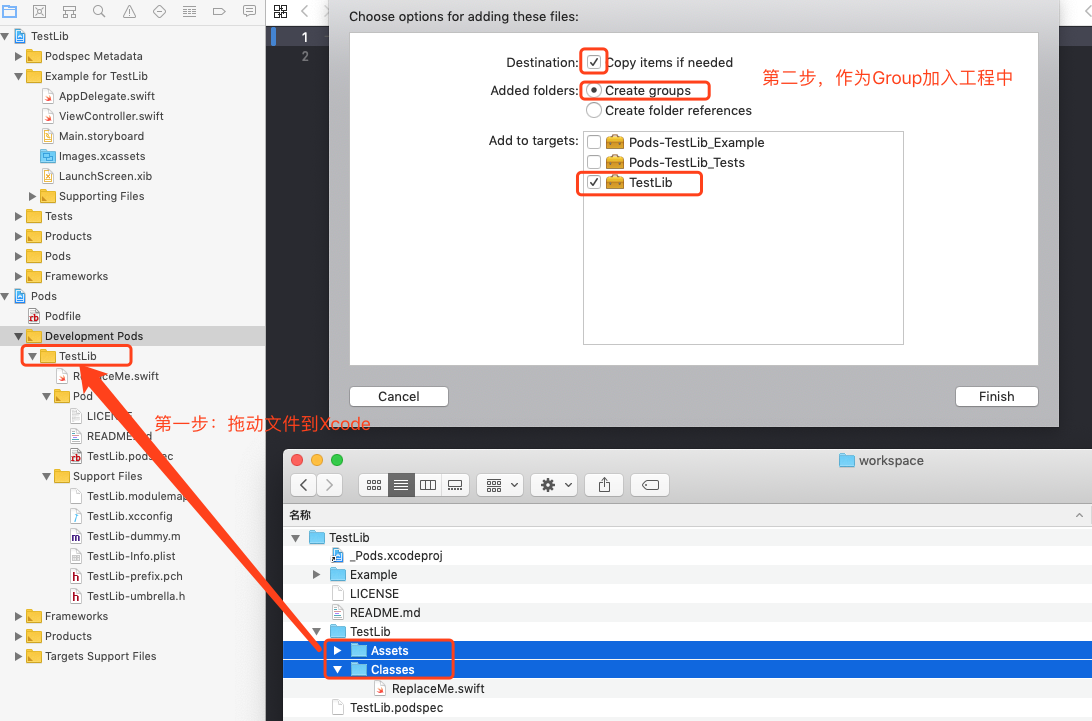
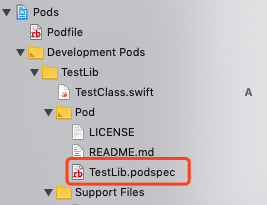
创建完成以后工程会自动打开,Xcode目录和实际路径有一定区别,截图如下:

解决这个问题也很简单,将文件夹作为Group拖动到Xcode中即可:(如果Xcode工程中本身已经包含Classes目录,可以忽略这一步)
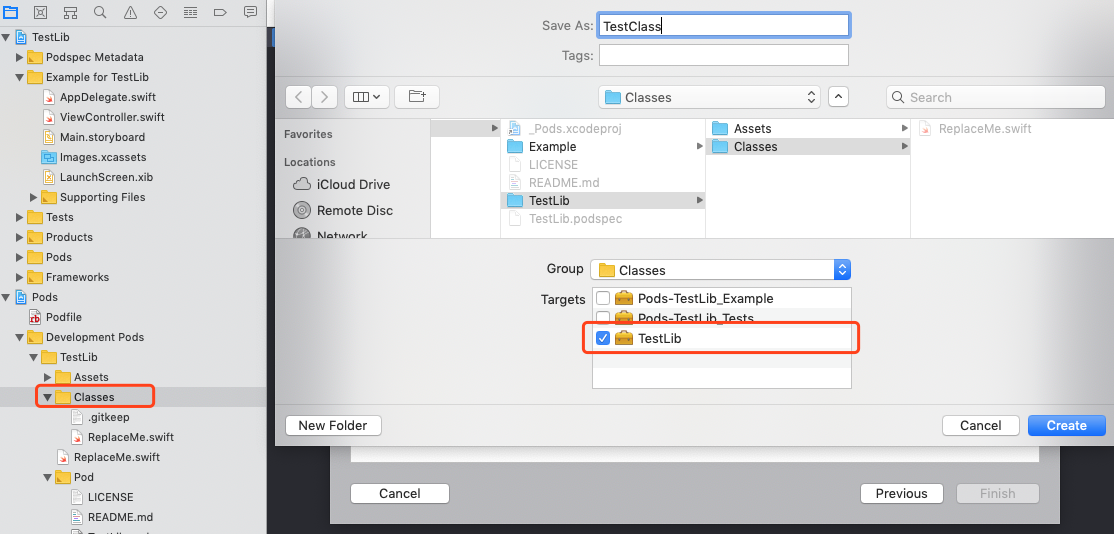
然后删除ReplaceMe.swift文件,在Class目录创建一个名为TestClass的swift文件:
在TestClass中定义ClassA和ClassB,注意其中一个是public的
import Foundation

public class ClassA {   //这是public类,可被外部工程访问
    public let name = "ClassA"
    let age = 18
}

class ClassB {  //不是public类,不能被外部工程访问
    let name = "ClassB"
}
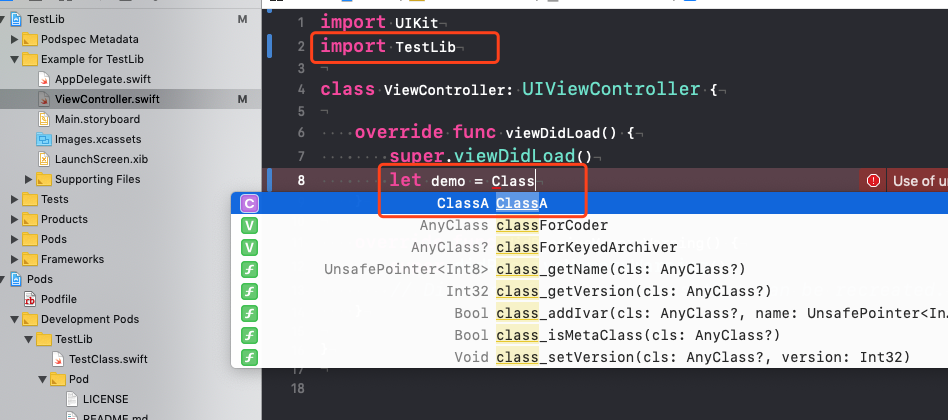
重要:为了让改动生效,一定要重启Xcode一次,然后在Example工程下执行(有时Xcode不会更新Pod代码,需要重启)
pod install
就可以在代码中调用新写的类,注意到只能调用public修饰的属性
到这里使用Pod新建一个私有库就完成了。
验证: pod lib lint (podspec配置文件说明)
新建完成后,我们还需要验证,需要修改配置文件,通过下面的截图路径找到新建的私有库的配置文件:
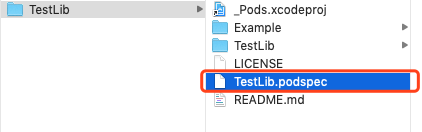
或者在Xcode里的:
文件内容:
#
# Be sure to run `pod lib lint TestLib.podspec' to ensure this is a
# valid spec before submitting.
#
# Any lines starting with a # are optional, but their use is encouraged
# To learn more about a Podspec see https://guides.cocoapods.org/syntax/podspec.html
#

Pod::Spec.new do |s|

  # 名称、版本号、概述
  s.name             = 'TestLib'
  s.version          = '0.1.0'
  s.summary          = 'A short description of TestLib.'

# This description is used to generate tags and improve search results.
#   * Think: What does it do? Why did you write it? What is the focus?
#   * Try to keep it short, snappy and to the point.
#   * Write the description between the DESC delimiters below.
#   * Finally, don't worry about the indent, CocoaPods strips it!

# 详细描述
  s.description      = <<-DESC
TODO: Add long description of the pod here.
                       DESC

  # 主页、截图、license证书、作者信息、源代码地址、社交地址
  s.homepage         = 'https://github.com/xxx/TestLib'
  # s.screenshots     = 'www.example.com/screenshots_1', 'www.example.com/screenshots_2'
  s.license          = { :type => 'MIT', :file => 'LICENSE' }
  s.author           = { 'xxx' => 'xxx@xxx.com' }
  s.source           = { :git => 'https://github.com/xxx/TestLib.git', :tag => s.version.to_s }
  # s.social_media_url = 'https://twitter.com/<TWITTER_USERNAME>'

  # iOS版本
  s.ios.deployment_target = '8.0'

  # 源码所在路径
  s.source_files = 'TestLib/Classes/**/*'

  # 资源文件所在地址
  # s.resource_bundles = {
  #   'TestLib' => ['TestLib/Assets/*.png']
  # }

  # 对外公开的h文件地址,swift一般用不到
  # s.public_header_files = 'Pod/Classes/**/*.h'

  # 包含的系统framework
  # s.frameworks = 'UIKit', 'MapKit'

  # 包含的第三方pod
  # s.dependency 'AFNetworking', '~> 2.3'
end
更详细的介绍可以访问官网https://guides.cocoapods.org/syntax/podspec.html
配置好以后我们需要做一次验证,在工程目录下使用命令
pod lib lint
初次验证可能遇到的几个问题:
Could not find a `ios` simulator (valid values: ). Ensure that Xcode -> Window -> Devices has at least one `ios` simulator listed or otherwise add one.
这个问题是pod依赖的组件fourflusher与xcode版本不匹配造成的,可以使用如下命令更新
1.sudo gem uninstall fourflusher
2.sudo gem install fourflusher
必要的话还需要更新pod
sudo gem update cocoapods
[!] TestLib did not pass validation, due to 3 warnings (but you can use `--allow-warnings` to ignore them).
pod验证发现3个及以上的warning就会报这个错,如果只是验证一下工程,能确保对外发布之前能修复,可以使用--allow-warnings
pod lib lint --allow-warnings
如果验证通过,会看到TestLib passed validation.,到这一步既完成验证
版本:iOS和Swift管理
通过pod官方模板做出来的工程iOS版本为8.0,Swift版本为4.0,我们有时需要根据需要修改版本号,需要在spec文件中添加:
  # iOS版本
  s.ios.deployment_target = '9.0'

  # Swift版本
  s.swift_versions = '5.0'
然后执行pod install更新工程即可
Git上传到私有库
现在私有Git服务器创建TestLib项目,然后回到工程目录,使用Git初始化命令:
git init
git remote add origin http://私有仓库地址/TestLib.git
git add .
git commit -m 'init'
git push -u origin master
然后修改spec文件内容
  # 主页、截图、license证书、作者信息、源代码地址、社交地址
  s.homepage         = 'http://私有库地址/TestLib.git'
  # s.screenshots     = 'www.example.com/screenshots_1', 'www.example.com/screenshots_2'
  s.license          = { :type => 'MIT', :file => 'LICENSE' }
  s.author           = { 'xxx' => 'xxx@xxx.com' }
  s.source           = { :git => 'http://私有库地址/TestLib.git', :tag => s.version.to_s }
如果需要对外发布版本时需打tag,然后创建同名branch
git tag -a 0.1.0 -m '0.1.0'
git branch 0.1.0
打包:pod package
有时我们不希望提供源代码,只提供framework给外部调用,可以使用package,首先安装pod插件:
sudo gem install cocoapods-packager
package参数:
| 参数名 | 注释 |
|---|---|
| --force | 覆盖之前的文件 |
| --no-mangle | 1.表示不使用name mangling技术,pod package默认是使用这个技术的。我们能在用pod package生成二进制库的时候会看到终端有输出Mangling symbols和Building mangled framework。表示使用了这个技术。2.如果你的pod库没有其他依赖的话,那么不使用这个命令也不会报错。但是如果有其他依赖,不使用--no-mangle这个命令的话,那么你在工程里使用生成的二进制库的时候就会报错:Undefined symbols for architecture x86_64。 |
| --embedded | 生成静态framework |
| --library | 生成静态.a |
| --dynamic | 生成动态framework |
| --bundle-identifier | 动态framework需要的签名 |
| --exclude-deps | 不包含依赖的符号表,生成动态库的时候不能包含这个命令,动态库一定需要包含依赖的符号表 |
| --configuration | 表示生成的库是debug还是release,默认是release。--configuration=Debug |
| --subspecs | 如果你的pod库有subspec,那么加上这个命名表示只给某个或几个subspec生成二进制库,--subspecs=subspec1,subspec2。生成的库的名字就是你podspec的名字,如果你想生成的库的名字跟subspec的名字一样,那么就需要修改podspec的名字。 这个脚本就是批量生成subspec的二进制库,每一个subspec的库名就是podspecName+subspecName。 |
| --spec-sources=private,https://github.com/CocoaPods/Specs.git | 一些依赖的source,如果你有依赖是来自于私有库的,那就需要加上那个私有库的source,默认是cocoapods的Specs仓库。--spec-sources=private,https://github.com/CocoaPods/Specs.git。 |
可以使用下面的命令打包:
pod package TestLib.podspec --force

 浙公网安备 33010602011771号