一、MDI窗体的设计
1.MDI简介
MDI(Multiple Document Interface)就是所谓的多文档界面,与此对应就有单文档界面 (SDI), 它是微软公司从Windows 2.0下的Microsoft Excel电子表格程序开始引入的,Excel电子表格用户有时需要同时操作多份表格,MDI正好为这种操作多表格提供了很大的方便,于是就产生了MDI程序
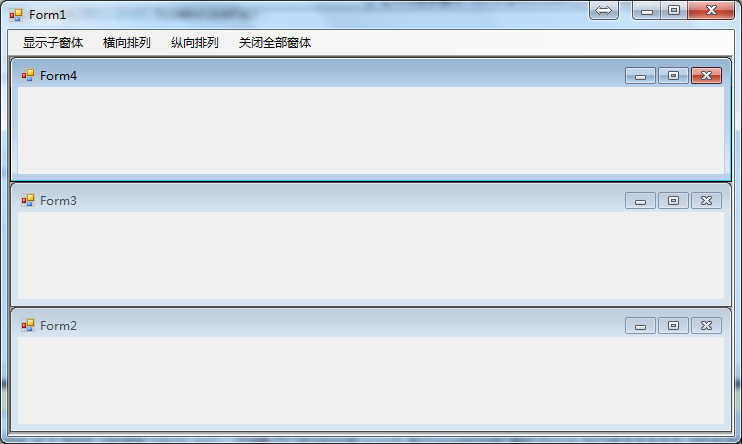
2.效果图:
如下图所示,多窗体嵌套,其中一个是父窗体,其条是子窗体。

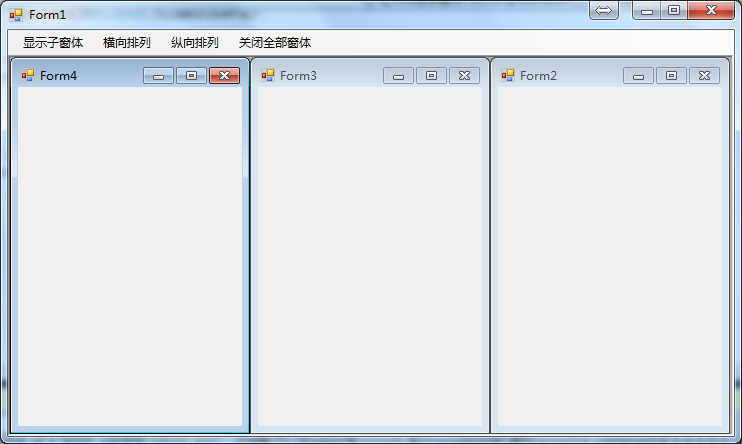
横向排列下面的窗体:
纵向排列下面的窗体:
关闭全部子窗体:

3.实现过程
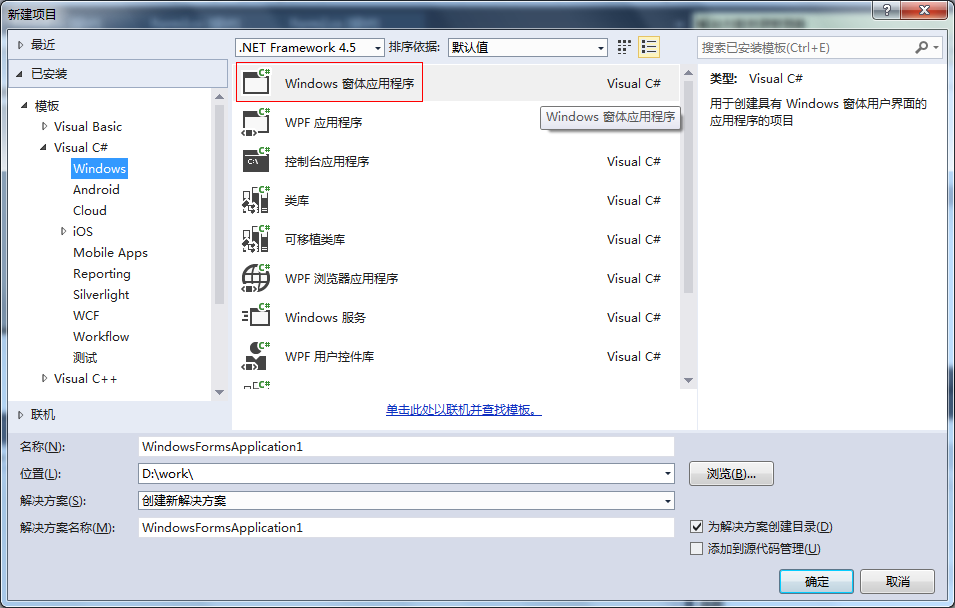
1)、新建一个window窗体程序
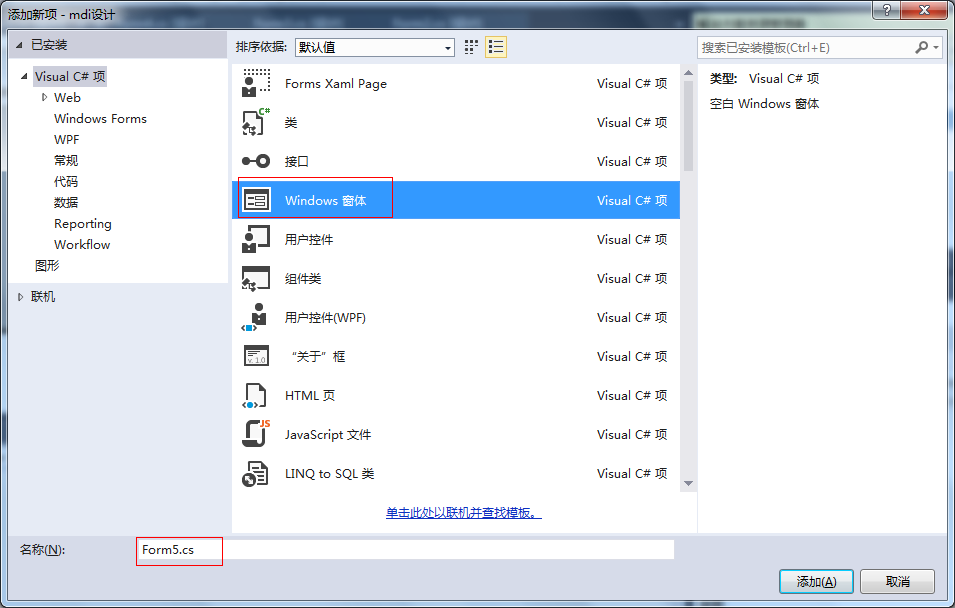
2)新建4个form

3)、后端实现代码
using System;
using System.Collections.Generic;
using System.ComponentModel;
using System.Data;
using System.Drawing;
using System.Linq;
using System.Text;
using System.Threading.Tasks;
using System.Windows.Forms;

namespace mdi设计
{
    public partial class Form1 : Form
    {
        public Form1()
        {
            InitializeComponent();
        }

        private void 显示子窗体ToolStripMenuItem_Click(object sender, EventArgs e)
        {
            Form f2 = new Form2();
            f2.MdiParent = this;//指定其mdi父窗体
            f2.Show();


            Form f3 = new Form3();
            f3.MdiParent = this;
            f3.Show();

            Form f4 = new Form4();
            f4.Show();
            f4.MdiParent = this;


        }

        private void 横向排列ToolStripMenuItem_Click(object sender, EventArgs e)
        {
            LayoutMdi(MdiLayout.TileHorizontal);
        }

        private void 纵向排列ToolStripMenuItem_Click(object sender, EventArgs e)
        {
            LayoutMdi(MdiLayout.TileVertical);
        }

        private void 关闭全部窗体ToolStripMenuItem_Click(object sender, EventArgs e)
        {
            foreach (Form f in this.MdiChildren)
            {
                f.Close();
            }

        }
    }
}
全部源码实现:https://github.com/amosli/CSharp/tree/mdi
其中菜单选项用的是MenuStrip控件,其使用也是非常简单方便的,如下所示:
二、MenuStrip控件
新建一个MenuStrip控件,然后写入名称即可,双击可以定义其事件,如上面的横向排列和纵向排列。

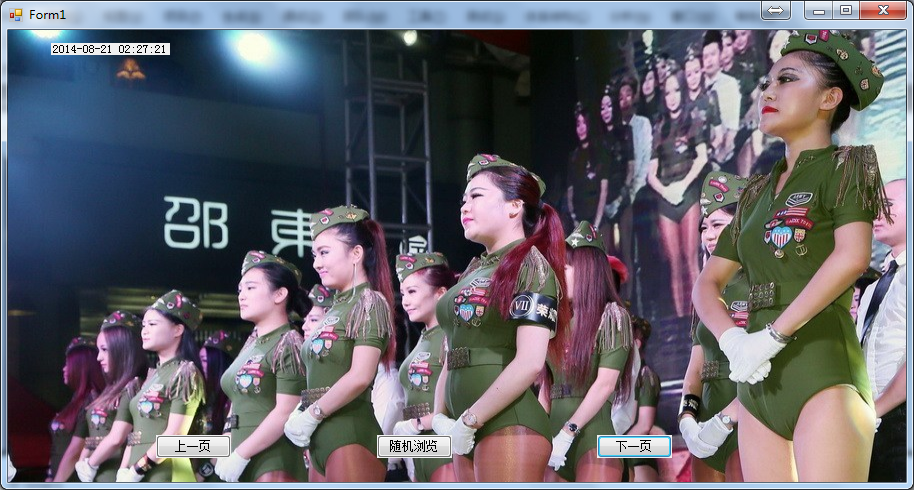
三、PictureBox控件和Timer控件
1.先看效果图:


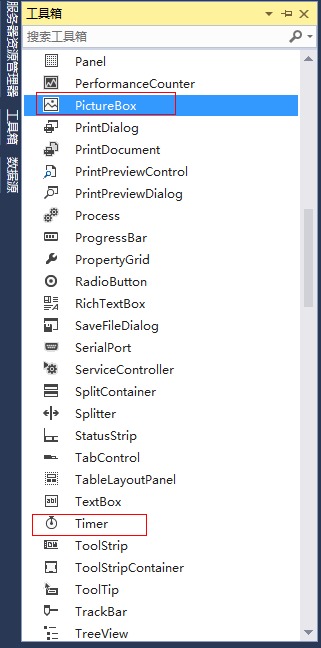
2.实现过程
新建PictureBox和timer的控件
为了实现PictureBox控件的相对大小,这里要注意更改Anchor布局为全部勾选!

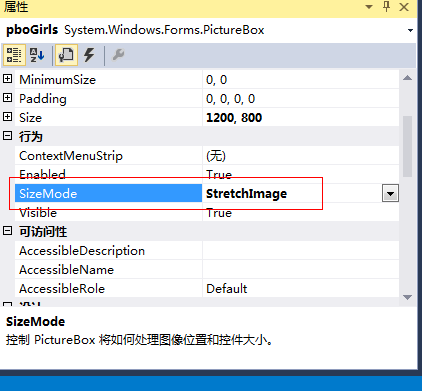
设置图片显示的格式:
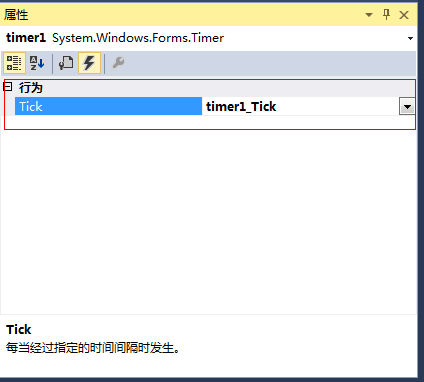
【timer控件】间隔时间设置:

间隔执行的事件:
3.后台实现代码
using System;
using System.Collections.Generic;
using System.ComponentModel;
using System.Data;
using System.Drawing;
using System.IO;
using System.Linq;
using System.Text;
using System.Threading.Tasks;
using System.Windows.Forms;

namespace PictureBox控件学习
{
    public partial class Form1 : Form
    {
        public Form1()
        {
            InitializeComponent();
        }

        /// <summary>
        /// timer更改时间
        /// </summary>
        /// <param name="sender"></param>
        /// <param name="e"></param>
        private void timer1_Tick(object sender, EventArgs e)
        {
            lbTime.Text = DateTime.Now.ToString("yyyy-MM-dd HH:mm:ss");
        }

        public static String ImgDirPath = @"C:\work\img";
        String[] imgPaths = Directory.GetFiles(ImgDirPath, "*.jpg");
        public static int ImgNum = 0;
        /// <summary>
        /// 实现上一页按钮
        /// </summary>
        /// <param name="sender"></param>
        /// <param name="e"></param>
        private void btnPrevious_Click(object sender, EventArgs e)
        {
            ImgNum--;
            if (ImgNum < 0)
            {
                ImgNum = imgPaths.Length-1;
            }
            pboGirls.ImageLocation = imgPaths[ImgNum];

        }

        /// <summary>
        /// 实现下一页按钮
        /// </summary>
        /// <param name="sender"></param>
        /// <param name="e"></param>
        private void btnNext_Click(object sender, EventArgs e)
        {
            ImgNum++;
            if (ImgNum >= imgPaths.Length)
            {
                ImgNum = 0;
            }
            pboGirls.ImageLocation = imgPaths[ImgNum];
        }

        /// <summary>
        /// 随机浏览
        /// </summary>
        Random rnd = new Random();
        private void button1_Click(object sender, EventArgs e)
        {
            pboGirls.ImageLocation = imgPaths[rnd.Next(imgPaths.Length)];
        }
    }
}
全部源码:https://github.com/amosli/CSharp/tree/picturebox

 浙公网安备 33010602011771号