

SpringBoot中的数据访问(JDBC、Druid、Mybatis整合)
对于数据访问层,无论是 SQL 还是 NOSQL,Spring Boot 底层都是采用 Spring Data 的方式进行统一处理各种数据库,
Spring Data 也是 Spring 中与 Spring Boot、Spring Cloud 等齐名的知名项目。
JDBC
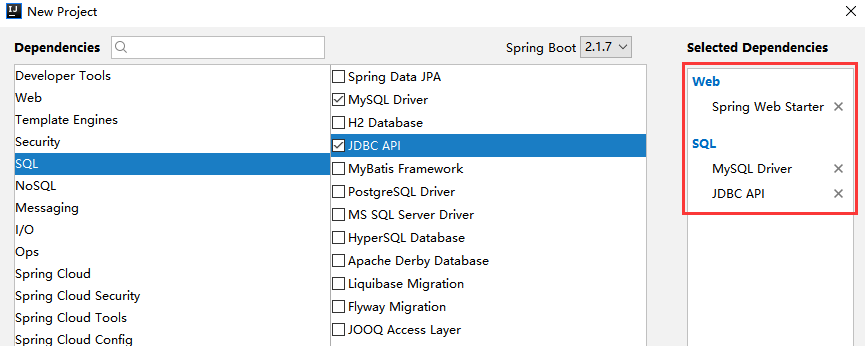
创建项目时引入JDBC模块
默认自动导入了以下依赖
 <dependency>
            <groupId>org.springframework.boot</groupId>
            <artifactId>spring-boot-starter-jdbc</artifactId>
</dependency>
<dependency>
            <groupId>mysql</groupId>
            <artifactId>mysql-connector-java</artifactId>
            <scope>runtime</scope>
</dependency>
IDEA连接上数据库后,在yaml中加入数据源配置即可
spring:
  datasource:
    username: root
    password: 123456
    url: jdbc:mysql://localhost:3306/mybatis?serverTimezone=UTC&useUnicode=true&characterEncoding=utf-8
    driver-class-name: com.mysql.jdbc.Driver
springboot2.0以上版本默认使用 com.zaxxer.hikari.HikariDataSource 数据源,
Spring本身也对原生的JDBC 做了轻量级的封装,即 org.springframework.jdbc.core.JdbcTemplate
JdbcTemplate 的自动配置原理是依赖 org.springframework.boot.autoconfigure.jdbc 包下的
org.springframework.boot.autoconfigure.jdbc.JdbcTemplateAutoConfiguration 类
测试使用
@RestController
public class JdbcController {

    //JdbcTemplate 是 core 包的核心类,用于简化 JDBC操作,还能避免一些常见的错误,如忘记关闭数据库连接
    //Spring Boot 默认提供了数据源,默认提供了 org.springframework.jdbc.core.JdbcTemplate
    //JdbcTemplate 中会自己注入数据源,使用起来也不用再自己来关闭数据库连接
    @Autowired
    JdbcTemplate jdbcTemplate;

    //查询student表中所有数据
    //List 中的1个 Map 对应数据库的 1行数据
    //Map 中的 key 对应数据库的字段名,value 对应数据库的字段值
    @GetMapping("/userList")
    public List<Map<String, Object>> userList(){
        String sql = "select * from user";
        List<Map<String, Object>> maps = jdbcTemplate.queryForList(sql);
        return maps;
    }
}
Druid
Druid 是阿里巴巴开源平台上一个数据库连接池实现,结合了 C3P0、DBCP、PROXOOL 等 DB 池的优点,同时加入了日志监控。
Druid 可以很好的监控 DB 池连接和 SQL 的执行情况,天生就是针对监控而生的 DB 连接池。
确认导入如下依赖
        <dependency>
            <groupId>com.alibaba</groupId>
            <artifactId>druid</artifactId>
            <version>1.1.12</version>
        </dependency>
        <dependency>
            <groupId>org.springframework.boot</groupId>
            <artifactId>spring-boot-starter-jdbc</artifactId>
        </dependency>
        <dependency>
            <groupId>mysql</groupId>
            <artifactId>mysql-connector-java</artifactId>
            <scope>runtime</scope>
        </dependency>
        <dependency>
            <groupId>log4j</groupId>
            <artifactId>log4j</artifactId>
            <version>1.2.17</version>
        </dependency>
编辑yml配置文件,修改数据源相关配置
spring:
 datasource:
  username: root
  password: 123456
  url: jdbc:mysql://localhost:3306/mybatis?serverTimezone=UTC&useUnicode=true&characterEncoding=utf-8
  driver-class-name: com.mysql.cj.jdbc.Driver
  type: com.alibaba.druid.pool.DruidDataSource

  #Spring Boot 默认是不注入这些属性值的,需要自己绑定
  #druid 数据源专有配置
  initialSize: 5
  minIdle: 5
  maxActive: 20
  maxWait: 60000
  timeBetweenEvictionRunsMillis: 60000
  minEvictableIdleTimeMillis: 300000
  validationQuery: SELECT 1 FROM DUAL
  testWhileIdle: true
  testOnBorrow: false
  testOnReturn: false
  poolPreparedStatements: true

  #配置监控统计拦截的filters,stat:监控统计、log4j:日志记录、wall:防御sql注入
  #如果允许时报错  java.lang.ClassNotFoundException: org.apache.log4j.Priority
  #则导入 log4j 依赖即可,Maven 地址: https://mvnrepository.com/artifact/log4j/log4j
  filters: stat,wall
  maxPoolPreparedStatementPerConnectionSize: 20
  useGlobalDataSourceStat: true
  connectionProperties: druid.stat.mergeSql=true;druid.stat.slowSqlMillis=500
新建配置类,应用数据源配置文件,注入容器,
配置Druid监控,Druid提供了一个 web 界面方便用户查看,类似路由器配置页面
所以第一步需要设置 Druid 的后台管理页面,比如 登录账号、密码 等;配置后台管理;
@Configuration
public class DruidConfig {
    /*
   将自定义的 Druid数据源添加到容器中,不再让 Spring Boot 自动创建
   绑定全局配置文件中的 druid 数据源属性到 com.alibaba.druid.pool.DruidDataSource从而让它们生效
   @ConfigurationProperties(prefix = "spring.datasource"):作用就是将 全局配置文件中
   前缀为 spring.datasource的属性值注入到 com.alibaba.druid.pool.DruidDataSource 的同名参数中
 */
    @ConfigurationProperties(prefix = "spring.datasource")
    @Bean
    public DataSource druidDataSource() {
        return new DruidDataSource();
    }

    //配置 Druid 监控管理后台的Servlet;
    //内置 Servlet 容器时没有web.xml文件,所以使用 Spring Boot 的注册 Servlet 方式
    @Bean
    public ServletRegistrationBean statViewServlet() {
        ServletRegistrationBean bean = new ServletRegistrationBean(new StatViewServlet(), "/druid/*");

        Map<String, String> initParams = new HashMap<>();
        initParams.put("loginUsername", "admin"); //后台管理界面的登录账号
        initParams.put("loginPassword", "123456"); //后台管理界面的登录密码

        //后台允许谁可以访问
        //initParams.put("allow", "localhost"):表示只有本机可以访问
        //initParams.put("allow", ""):为空或者为null时,表示允许所有访问
        initParams.put("allow", "");
        //deny:Druid 后台拒绝谁访问
        //initParams.put("alan", "192.168.1.20");表示禁止此ip访问

        //设置初始化参数
        bean.setInitParameters(initParams);
        return bean;
        //这些参数可以在 com.alibaba.druid.support.http.StatViewServlet 的父类 com.alibaba.druid.support.http.ResourceServlet 中找到
    }
}
配置web监控的filter
这个过滤器的作用就是统计 web 应用请求中所有的数据库信息,比如 发出的 sql 语句,
sql 执行的时间、请求次数、请求的 url 地址、以及session 监控、数据库表的访问次数 等等
    //配置 Druid 监控 之  web 监控的 filter
    //WebStatFilter:用于配置Web和Druid数据源之间的管理关联监控统计
    @Bean
    public FilterRegistrationBean webStatFilter() {
        FilterRegistrationBean bean = new FilterRegistrationBean();
        bean.setFilter(new WebStatFilter());

        //exclusions:设置哪些请求进行过滤排除掉,从而不进行统计
        Map<String, String> initParams = new HashMap<>();
        initParams.put("exclusions", "*.js,*.css,/druid/*");
        bean.setInitParameters(initParams);

        //"/*" 表示过滤所有请求
        bean.setUrlPatterns(Arrays.asList("/*"));
        return bean;
    }
整合mybatis
导入mybatis依赖
        <dependency>
            <groupId>org.mybatis.spring.boot</groupId>
            <artifactId>mybatis-spring-boot-starter</artifactId>
            <version>2.1.0</version>
        </dependency>
创建pojo类
public class User {
    private int id;
    private String name;
    private String pwd;
//get set 有参无参构造方法 tostring
}
创建dao类
@Mapper  //mybatis注册 或在启动类中配置mapperscan
@Repository //注入容器
public interface UserDao {
    //选择全部用户
    List<User> selectUser();

}
创建controller类
@RestController
public class UserController {
    @Autowired
    private UserDao userDao;
    //选择全部用户
    @GetMapping("/selectUser")
    public List<User> selectUser(){
        List<User> users = userDao.selectUser();
        return users;
    }
}
创建mapping配置文件
<?xml version="1.0" encoding="UTF-8" ?>
<!DOCTYPE mapper
        PUBLIC "-//mybatis.org//DTD Mapper 3.0//EN"
        "http://mybatis.org/dtd/mybatis-3-mapper.dtd">

<mapper namespace="com.alan.mybatis.dao.UserDao">

    <select id="selectUser" resultType="User">
        select * from user
    </select>

</mapper>
编写application.properties,配置数据源、mapping配置文件映射、mapping配置文件中pojo类
spring.datasource.username=root
spring.datasource.password=123456
spring.datasource.url=jdbc:mysql://localhost:3306/mybatis?serverTimezone=UTC&useUnicode=true&characterEncoding=utf-8
spring.datasource.driver-class-name=com.mysql.cj.jdbc.Driver
#resources目录下
mybatis.mapper-locations=classpath:mybatis/mapping/*.xml
mybatis.type-aliases-package=com.alan.mybatis.pojo
测试数据源
@SpringBootTest
class SpringbootMybatisApplicationTests {

    @Autowired
    DataSource dataSource;

    @Test
    void contextLoads() throws SQLException {
        System.out.println("数据源>>>>>>" + dataSource.getClass());
        Connection connection = dataSource.getConnection();
        System.out.println("连接>>>>>>>>>" + connection);
        System.out.println("连接地址>>>>>" + connection.getMetaData().getURL());
        connection.close();
    }

}
启动应用测试


 浙公网安备 33010602011771号