nexus3
Nexus3安装启动说明
Nexus3 官网https://help.sonatype.com/repomanager3/product-information/download
Oss版免费
1. 下载后(目录结构)
(1) 
(2) 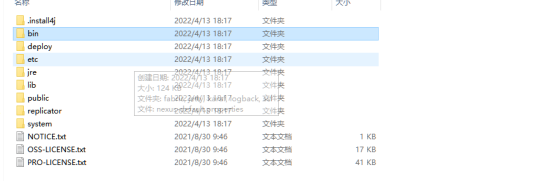
(3) 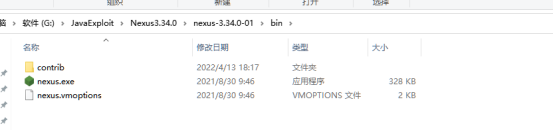
2. 用管理员身份打开cmd进入到 bin下
(1) 
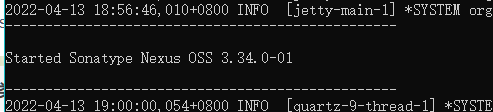
3. 执行nexus.exe /run (直接启动)
4. 将nexus添加到 服务中(执行前关闭第3步的cmd)
(1) 已管理员身份打开新的cmd
(2) 进入到bin
(3) 执行nexus /install nexus3
① 成功提示Installed service 'nexus3'.
② 已有提示 Service is already stopped. Installed service 'nexus'
③ 没有已管理员权限打开提示 Could not open SCManager
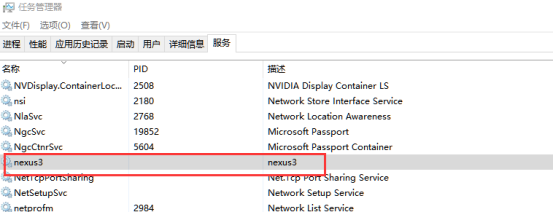
④ 打开任务管理器查看是否存在
⑤ 卸载服务执行 nexus /uninstall nexus3
⑥ 启动服务 nexus /start nexus
⑦ 停止服务 nexus /stop nexus
5. 默认端口8081 浏览器访问http://localhost:8081/
6.点击左上角登录 默认账号admin 密码在G:\JavaExploit\Nexus3.34.0\sonatype-work\nexus3目录下admin.password文件中 输入登录后按提示修改密码
(1) 
7. 说明
(1) 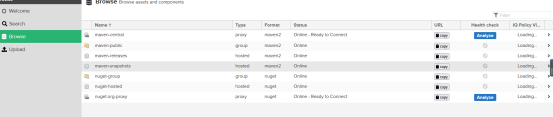
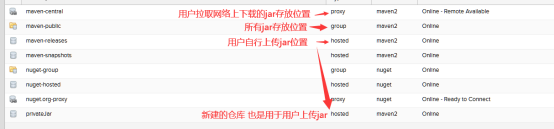
(2) Type列中
① Proxy:(远程代理仓库)
这种类型的仓库,可以设置一个远程仓库的链接。当用户向 proxy 类型仓库请求下载一个依赖构件时,就会先在自己的库里查找,如果找不到的话,就会从设置的远程仓库下载到自己的库里,然后返回给用户,相当于起到一个中转的作用。
② Group(聚合仓库)在 Maven 里没有这个概念,是 Nexus 特有的。目的是将多个仓库聚合,对用户暴露统一的地址,这样用户就不需要配置多个地址,只要统一配置 group 的地址就可以了。group 仓库的聚合成员可以在仓库设置中添加和移除。仓库组的概念,目的是将多个仓库聚合,对用户暴露统一的地址,当需要获取某一个依赖包时,请求的是Group的地址,系统将会根据Group配置的仓库顺序依次查找。例如 maven-public 是一个 group 类型的仓库,通过引用这个地址,可以访问组内成员仓库的所有构件。
8. jar包上传方式
mvn deploy:deploy-file -DgroupId=aspose-cells -DartifactId=aspose-cells -Dversion=8.5.2 -Dpackaging=jar -Dfile="G:\临时\jar\aspose-cells-8.5.2.jar" -DpomFile="G:\临时\jar\aspose-cells-8.5.2.pom" -Durl=http://win2019-server:8081/repository/maven-releases/ -DrepositoryId=maven-central
参数分别对应
DgroupId: groupId 如图1
Dversion: artifactId 如图1
Dversion: version 如图1
Dfile:jar包位置 如图2
DpomFile :pom位置 如图2
Durl:上传nexus的地址 要选择 type=hosted的
DrepositoryId:maven中 settings.xml中配置的id 如图3
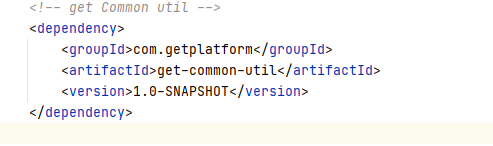
图1
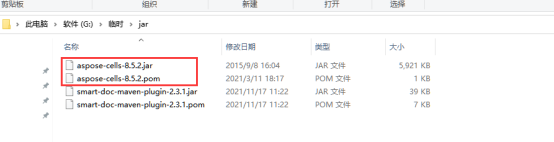
图2
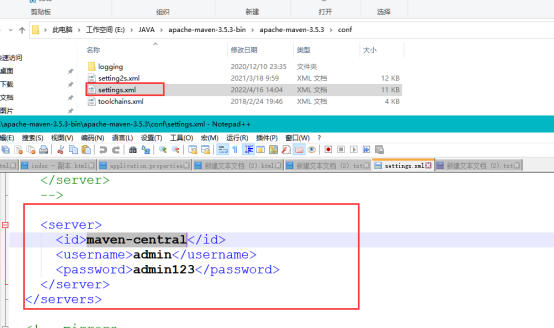
图3
<server>
<id>maven-central</id>
<username>admin</username>
<password>admin123</password>
</server>
Id 自定义 账号密码为nexus分配的账号密码
9. jar拉取方式
一种在项目pom中配置
一种在maven中配置
这边使用maven中配置就无需修改程序代码
Maven conf下 settings.xml文件
|
<?xml version="1.0" encoding="UTF-8"?>
<settings xmlns="http://maven.apache.org/SETTINGS/1.0.0" xmlns:xsi="http://www.w3.org/2001/XMLSchema-instance" xsi:schemaLocation="http://maven.apache.org/SETTINGS/1.0.0 http://maven.apache.org/xsd/settings-1.0.0.xsd">
<localRepository>E:\jar\repository</localRepository>
<pluginGroups>
</pluginGroups>
<proxies>
</proxies>
<servers>
<server> <id>myRepository</id> <username>admin</username> <password>admin123</password> </server> </servers>
<mirrors>
<mirror> <id>myRepository</id> <mirrorOf>central</mirrorOf> <name>myRepository</name> <url>http://win2019-server:8081/repository/maven-public/</url> </mirror> </mirrors>
<profiles>
<profile> <id>nexusProfile</id> <repositories> <repository> <id>nexus</id> <name>nexus Repository</name> <url>http://win2019-server:8081/repository/maven-public/</url> <layout>defult</layout> <releases> <enabled>true</enabled> </releases> <!-- snapshots默认是关闭的false,必须显示的打开 --> <snapshots> <enabled>true</enabled> </snapshots> </repository> </repositories> </profile> </profiles>
<activeProfiles> <activeProfile>nexusProfile</activeProfile> </activeProfiles> </settings>
|
该jar包能被下载到:
当某个包引入不到项目 先看看本地maven仓库下是否存在,若是存在看看.jar文件大小是否大于1kb 大于就删除当前目录下除了.jar 和 .pom的文件
其他情况删除整个文件夹项目中重新下载


 浙公网安备 33010602011771号