Win10上模拟LoongArch虚拟机并搭建Qt5开发环境
家里曾买了一台逸珑,是龙芯2F cpu,然并非LoongArch架构。要尝鲜LoongArch的开发环境,除了买一台实体机或租一台龙芯云主机外,目前就只有qemu虚拟机方案。本次实验是采用qemu在win10 x64上模拟LoongArch的虚拟机,并引导loongnix社区带gui的最新版系统。
注:Loongnix目前内核为4.19,仍为旧世界ABI1.0,建议直接用wsyu网上的新世界archlinux,早日转向LoongArch新世界ABI2.0的开发。
一、软件准备
1、下载QEMU7.2,地址:https://qemu.weilnetz.de/w64/2022/qemu-w64-setup-20221230.exe
2、下载引导固件,地址:https://mirrors.wsyu.edu.cn/loongarch/archlinux/images/QEMU_EFI_7.2.fd
3、下载loongnix社区预制系统,地址:http://pkg.loongnix.cn/loongnix/isos/Loongnix-20.3/Loongnix-20.3.mate.gui.loongarch64.cn.qcow2
二、虚拟机配置
1、我将QEMU7.2安装到D:/app/qemu。
2、将QEMU_EFI_7.2.fd和Loongnix-20.3.mate.gui.loongarch64.cn.qcow2文件放到了D:/app/LoongArch目录。
3、新建startup.bat脚本,为了博客\换行好看,实际脚本要将\换行去掉,直接用一行脚本,双击脚本启动,系统密码是 Loongson20 。
cd /d %~dp0
D:/app/qemu/qemu-system-loongarch64  -m 8G -cpu la464-loongarch-cpu \
-machine virt -smp 4 -bios ./QEMU_EFI_7.2.fd -serial stdio \
-device virtio-gpu-pci -net nic -net user \
-device nec-usb-xhci,id=xhci,addr=0x1b \
-device usb-tablet,id=tablet,bus=xhci.0,port=1 \
-device usb-kbd,id=keyboard,bus=xhci.0,port=2 \
-hda ./Loongnix-20.3.mate.gui.loongarch64.cn.qcow2

三、安装Qt5 SDK及IDE
su root
apt update && apt upgrade -y
apt install gcc g++ gdb git qtdeclarative5-dev qtbase5-private-dev \
qtdeclarative5-private-dev libqt5opengl5-dev qtwebengine5-private-dev \
qtwebengine5-dev qtscript5-dev qtquickcontrols2-5-dev \
qml-module-qtquick-controls qml-module-qtquick-controls2 qtcreator
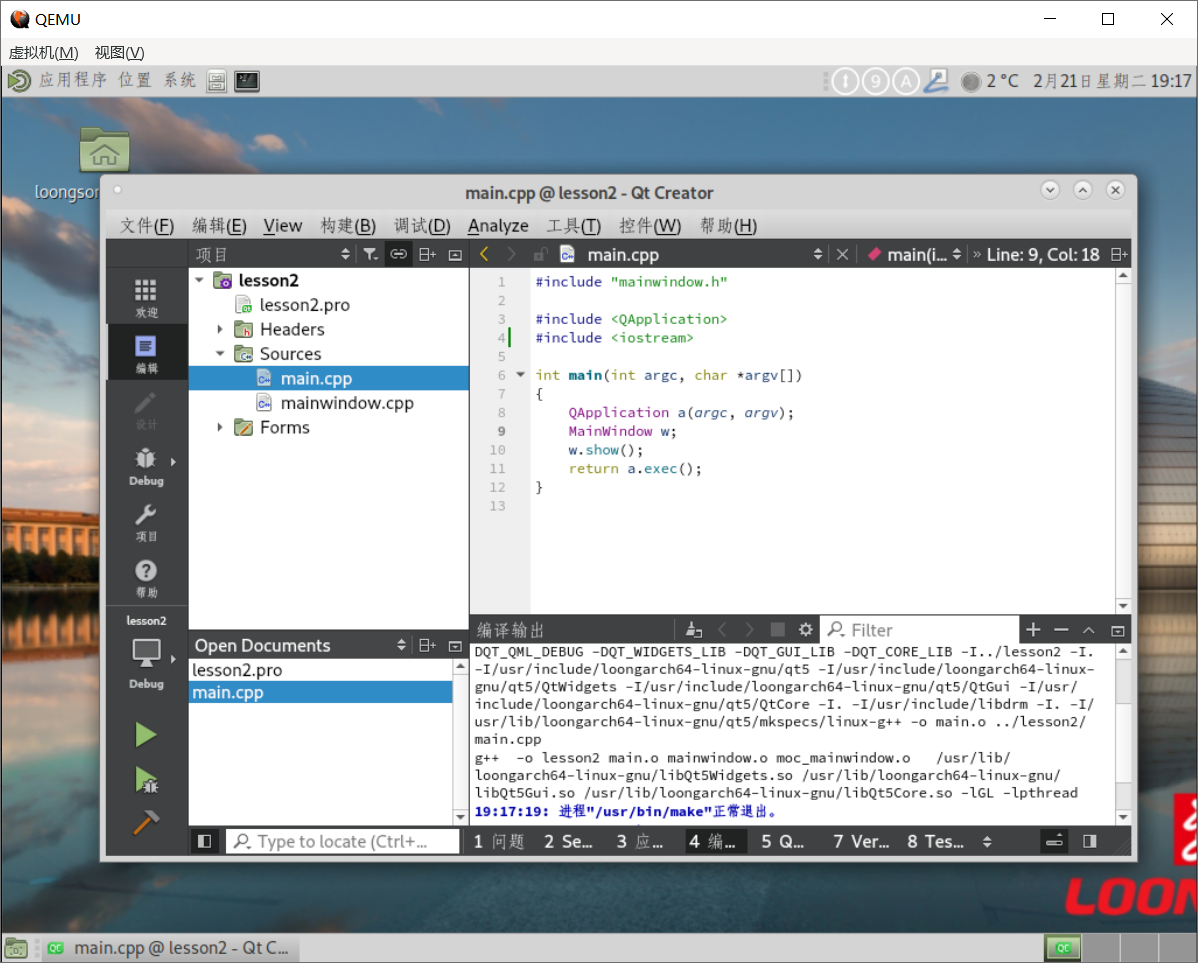
至此,龙芯上的qt5开发环境就搭建完成了。此外,为了下载数据,建议安装scp和wget。
四、磁盘扩容(此步骤为后期维护)
1、物理扩容,采用qemu-img工具
qemu-img info "D:\app\LoongArch\archlinux-mate-2022.12.03-loong64.qcow2"
qemu-img resize "D:\app\LoongArch\archlinux-mate-2022.12.03-loong64.qcow2" +10G
2、分区扩容,采用系统内自带工具
partprobe  /dev/vda
parted /dev/vda
resizepart num 100%     #最后一个分区编号num:按p查看;所有未分区结束点 end:100% ;gpt fix
resize2fs /dev/vda2

 浙公网安备 33010602011771号