RecycleView分割线、分组、粘性布局之ItemDecoration
我们在使用 ListView 的时候要设置分割线只要在xml文件中,使用android:divider就可以了,但是在RecyclerView 却没有直接的设置方法。ListView中要实现分组效果、粘性布局,绝大多数都会使用PinnedSectionListView、StickyListHeaders等开源框架来实现这个功能,那么在RecycleView中该怎么使用呢?接下来就通过RecycleView的ItemDecoration来实现这些功能。
ItemDecoration类主要包含三个方法:
- public void getItemOffsets(Rect outRect, View view, RecyclerView parent, State state)
- public void onDraw(Canvas c, RecyclerView parent, State state)
- public void onDrawOver(Canvas c, RecyclerView parent, State state)
方法一:可以实现类似padding的效果。
方法二:可以实现类似绘制背景的效果,内容在底部。
方法三:可以绘制在内容的上面,覆盖内容。
需要注意的是onDraw在绘制ItemView之前绘制,onDrawOver会在绘制ItemView之后绘制,使用onDraw可以实现分割线效果,使用onDrawOver可以实现蒙层效果,二者可以混合使用,也可以实现一样的效果,实际使用中应该选择合适的。
一、RecycleView的下划线
1、获取下划线的Drawable对象
这里使用Android自带的android.R.attr.listDivider下划线样式,在构造方法里面得到Drawable:
-
final TypedArray a = context.obtainStyledAttributes(android.R.attr.listDivider);
-
mDivider = a.getDrawable(0);
-
a.recycle();
2、设置padding
getItemOffsets方法中设置Margin:
-
outRect.set(0, 0, 0, mDivider.getIntrinsicHeight());
-
或者:
-
outRect.bottom = mDivider.getIntrinsicHeight();
3、绘制
-
//获取Recycleview的left、right
-
final int left = parent.getPaddingLeft();
-
final int right = parent.getWidth() - parent.getPaddingRight();
-
//获取Recycleviewitem个数
-
final int childCount = parent.getChildCount();
-
//遍历每一个item,给ItemDecoration绘制线条
-
for (int i = 0; i < childCount; i++) {
-
final View child = parent.getChildAt(i);
-
final RecyclerView.LayoutParams params = (RecyclerView.LayoutParams) child
-
.getLayoutParams();
-
final int top = child.getBottom() + params.bottomMargin;
-
final int bottom = top + mDivider.getIntrinsicHeight();
-
mDivider.setBounds(left, top, right, bottom);
-
mDivider.draw(c);
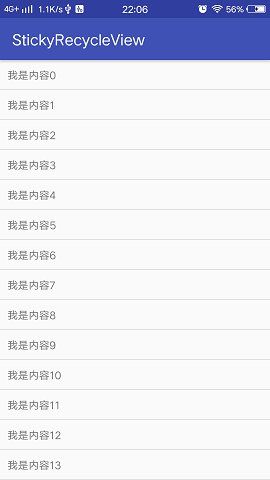
在Activity加入:
recycleview.addItemDecoration(new DividerDecoration(this));运行效果:
完整代码:
-
public class DividerDecoration extends RecyclerView.ItemDecoration {
-
private static final int[] ATTRS = new int[]{
-
android.R.attr.listDivider
-
};
-
-
private Drawable mDivider;
-
-
public DividerDecoration(Context context) {
-
final TypedArray a = context.obtainStyledAttributes(ATTRS);
-
mDivider = a.getDrawable(0);
-
a.recycle();
-
}
-
-
-
-
public void getItemOffsets(Rect outRect, View view, RecyclerView parent, RecyclerView.State state) {
-
outRect.set(0, 0, 0, mDivider.getIntrinsicHeight());
-
}
-
-
-
public void onDraw(Canvas c, RecyclerView parent, RecyclerView.State state) {
-
final int left = parent.getPaddingLeft();
-
final int right = parent.getWidth() - parent.getPaddingRight();
-
final int childCount = parent.getChildCount();
-
for (int i = 0; i < childCount; i++) {
-
final View child = parent.getChildAt(i);
-
final RecyclerView.LayoutParams params = (RecyclerView.LayoutParams) child
-
.getLayoutParams();
-
final int top = child.getBottom() + params.bottomMargin;
-
final int bottom = top + mDivider.getIntrinsicHeight();
-
mDivider.setBounds(left, top, right, bottom);
-
mDivider.draw(c);
-
}
-
}
-
}
二、RecyclerView分组
通过RecycleView的下划线的设置方法,下一步扩展RecyclerView,使其显示为分组的效果,原理也类似,绘制分组首先需要绘制一个分组的View,和绘制一个文字的View,也就是说View需要两个,那么就需要定义两个画笔进行绘制。同时分组也需要一个分组的依据,这里根据以日期为例进行分组,同一日期的为一组。
1、定义分组的依据接口
-
public interface DecorationCallback {
-
String getData(int position);
-
}
2、初始化绘制文字的画笔和分组背景画笔。
这里初始化画笔也需要在构造方法里进行:
(1)View的画笔初始化
-
Paint paint = new Paint();
-
paint.setColor(ContextCompat.getColor(context, R.color.bg_header));
(2)文字画笔的初始化
-
Paint textPaint = new TextPaint();
-
textPaint.setTypeface(Typeface.DEFAULT_BOLD);//普通字体
-
textPaint.setFakeBoldText(false);//不加粗
-
textPaint.setAntiAlias(true);//抗锯齿
-
textPaint.setTextSize(40);//文字大小
-
textPaint.setColor(Color.BLACK);//背景颜色
-
textPaint.setTextAlign(Paint.Align.LEFT);//绘制起始位置
3、设置分组的padding
分组的padding用于显示分组的head布局,绘制背景颜色、绘制文字等需求,这里需要明白那些部分需要设置padding,上面说过咱们是依据日期分组的,那个就要根据日期判断,日期相同的为一组,不同的视为不同的分组。
(1)分组依据
如果是第一个则视为新的分组,记录当前的日期,然后将后面的和上一个日期对比,一样则为同一个分组,不一样则为不同的分组。
-
private boolean isHeader(int pos) {
-
if (pos == 0) {
-
return true;
-
} else {
-
String preData = callback.getData(pos - 1);
-
String data = callback.getData(pos);
-
return !preData.equals(data);
-
}
-
}
(2)设置padding
-
-
public void getItemOffsets(Rect outRect, View view, RecyclerView parent, RecyclerView.State state) {
-
super.getItemOffsets(outRect, view, parent, state);
-
//获取绘制的item所在的位置
-
int pos = parent.getChildAdapterPosition(view);
-
String data = callback.getData(pos);
-
if (TextUtils.isEmpty(data)) {
-
return;
-
}
-
//不同组、和第一个才添加padding,其他的不处理
-
if (pos == 0 || isHeader(pos)) {
-
outRect.top = topHead;
-
} else {
-
outRect.top = 0;
-
}
-
}
3、绘制
矩形的绘制比较简单,这里着重介绍下TextView的绘制。一般而言,绘制的起始位置是所画图形对应的矩形的左上角点。但在drawText中是非常例外的,y所代表的是基线的位置,只要x坐标、基线位置、文字大小确定以后,文字的位置就确定的了,所以这边需要处理基线位置,才能使文字垂直居中,基线的处理如下:
-
Paint.FontMetrics fontMetrics = textPaint.getFontMetrics();
-
float baseline = (rect.bottom + rect.top - fontMetrics.bottom - fontMetrics.top) / 2;
绘制原理看代码备注:
-
-
public void onDraw(Canvas c, RecyclerView parent, RecyclerView.State state) {
-
super.onDraw(c, parent, state);
-
//获取绘制起始点
-
int left = parent.getPaddingLeft();
-
//获取绘制终点
-
int right = parent.getWidth() - parent.getPaddingRight();
-
//获取RecyclerView中item的个数
-
int childCount = parent.getChildCount();
-
for (int i = 0; i < childCount; i++) {
-
//获取item的View
-
View view = parent.getChildAt(i);
-
//获取所在位置
-
int position = parent.getChildAdapterPosition(view);
-
//获取回调日期
-
String textLine = callback.getData(position);
-
if (TextUtils.isEmpty(textLine)) {
-
return;
-
}
-
//绘制分组日期
-
if (position == 0 || isHeader(position)) {
-
float top = view.getTop() - topHead;
-
float bottom = view.getTop();
-
//绘制矩形
-
Rect rect = new Rect(left, (int) top, right, (int) bottom);
-
c.drawRect(rect, paint);
-
//绘制文字基线,文字的的绘制是从绘制的矩形底部开始的
-
Paint.FontMetrics fontMetrics = textPaint.getFontMetrics();
-
float baseline = (rect.bottom + rect.top - fontMetrics.bottom - fontMetrics.top) / 2;
-
textPaint.setTextAlign(Paint.Align.CENTER);//文字居中
-
//绘制文本
-
c.drawText(textLine, rect.centerX(), baseline, textPaint);
-
}
-
}
-
}
这样这个分组就完成了,在Activity中进行使用,注意ItemDecoration是可以叠加的:
-
recycleview.addItemDecoration(new DividerDecoration(this));
-
recycleview.addItemDecoration(new SectionDecoration(this, new SectionDecoration.DecorationCallback() {
-
-
public String getData(int position) {
-
return mDataList.get(position).data;
-
}
-
}));
效果如下:
源码地址:https://github.com/yoonerloop/StickyRecycleView 点击打开链接
三、RecyclerView粘性布局
粘性头布局要求头常驻布局最上面,和RecycleView滑动与不滑动没有关系,并且随着RecycleView的滑动header的数据依据特定的分组变化,在这种情况下显然onDrawOver更加合适,因此需要重写onDrawOver方法,在这个方法里面处理,而不是在Draw方法里面进行处理。构造方法与getItemOffsets方法保持不变,和上面分组的一致。onDrawOver方法重写的如下:
-
-
public void onDrawOver(Canvas c, RecyclerView parent, RecyclerView.State state) {
-
super.onDrawOver(c, parent, state);
-
//获取当前可见的item的数量,不包括分组项,注意区分下面的
-
int childCount = parent.getChildCount();
-
//获取所有的的item个数,源码中不建议使用Adapter中获取
-
int itemCount = state.getItemCount();
-
//考虑padding,得到绘制的x轴起始点和终点的坐标
-
int left = parent.getLeft() + parent.getPaddingLeft();
-
int right = parent.getRight() - parent.getPaddingRight();
-
//获取上一个和当前的日期
-
String preDate;
-
String currentDate = null;
-
//注意:这里不能使用itemCount
-
for (int i = 0; i < childCount; i++) {
-
View view = parent.getChildAt(i);
-
int position = parent.getChildAdapterPosition(view);
-
String textLine = callback.getData(position);
-
//前一个Date作为preDate
-
preDate = currentDate;
-
//获取当前的currentDate
-
currentDate = callback.getData(position);
-
//日期相同,跳出本次循环
-
if (TextUtils.isEmpty(currentDate) || TextUtils.equals(currentDate, preDate)) {
-
continue;
-
}
-
if (TextUtils.isEmpty(textLine)) {
-
continue;
-
}
-
int viewBottom = view.getBottom();
-
float textY = Math.max(topHead, view.getTop());
-
//下一个和当前不一样,item小于header的高度时候移动当前的header
-
if (position + 1 < itemCount) {
-
String nextData = callback.getData(position + 1);
-
if (!currentDate.equals(nextData) && viewBottom < textY) {
-
textY = viewBottom;
-
}
-
}
-
//不断的触发Canvas绘制,生成动态效果
-
Rect rect = new Rect(left, (int) textY - topHead, right, (int) textY);
-
c.drawRect(rect, paint);
-
//绘制文字基线,文字的的绘制是从绘制的矩形底部开始的
-
Paint.FontMetrics fontMetrics = textPaint.getFontMetrics();
-
float baseline = (rect.bottom + rect.top - fontMetrics.bottom - fontMetrics.top) / 2;
-
textPaint.setTextAlign(Paint.Align.CENTER);//文字居中
-
//绘制文本
-
c.drawText(textLine, rect.centerX(), baseline, textPaint);
-
}
-
}
原理总结:
浮在itemView上层的header被顶上去和被拉下来的效果,只需要当每组最后一个Item的bottom小于header的height时,让header跟随这个item就行,换句话说就是此时让header的bottom等于即将消失的Item的bottom。这里的核心代码如下:
-
int viewBottom = view.getBottom();
-
float textY = Math.max(topHead, view.getTop());
-
//下一个和当前不一样,item小于header的高度时候移动当前的header
-
if (position + 1 < itemCount) {
-
String nextData = callback.getData(position + 1);
-
if (!currentDate.equals(nextData) && viewBottom < textY) {
-
textY = viewBottom;
-
}
-
}
-
//不断的触发Canvas绘制,生成动态效果
-
Rect rect = new Rect(left, (int) textY - topHead, right, (int) textY);
1、viewBottom:即每个item的bottom距离屏幕的最上边的距离。
2、textY:在设定的header的高度与每个item的top距离屏幕的最上边的距离之间取最大的。如果header<top会导致存在间隙;如果header>top,会存在下拉延迟,所以一般情况下topHead和view.getTop()相等。
3、viewBottom < textY:滑动的viewBottom的距离小于header的距离,才使得header的y坐标发生变化,使得header的y坐标动态的等于viewBottom,这样就能实现上推效果。
源码地址:https://github.com/yoonerloop/StickyRecycleView 记得start点赞哦 点击打开链接
--------------------- 本文来自 一杯清泉 的CSDN 博客 ,全文地址请点击:https://blog.csdn.net/yoonerloop/article/details/80444523?utm_source=copy

 浙公网安备 33010602011771号