Spring整合MQ
1. 搭建生产者工程

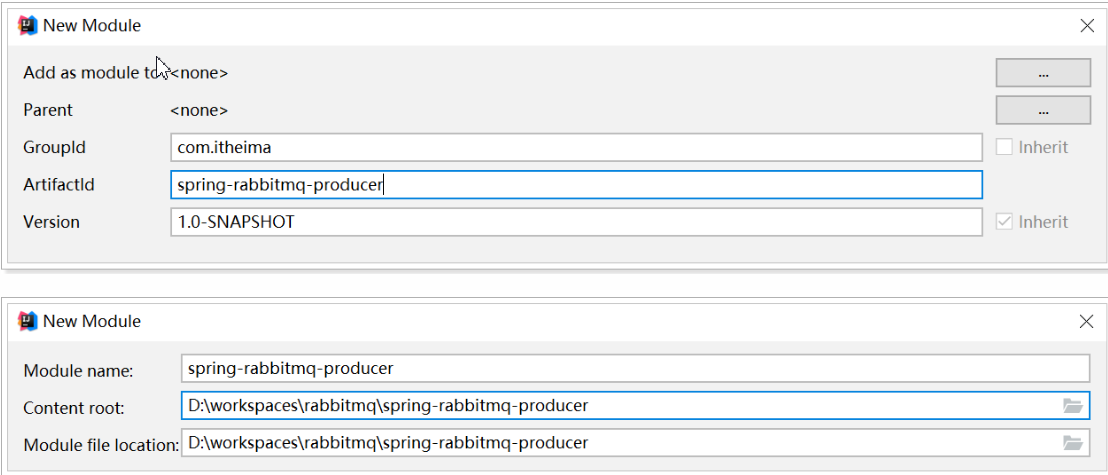
1.1. 创建工程
1.2. 添加依赖
修改pom.xml文件内容为如下:


 1  <dependencies>
 2         <!--1.spring的上下文-->
 3         <dependency>
 4             <groupId>org.springframework</groupId>
 5             <artifactId>spring-context</artifactId>
 6             <version>5.1.7.RELEASE</version>
 7         </dependency>
 8
 9         <!--2.spring整合amqp-->
10         <dependency>
11             <groupId>org.springframework.amqp</groupId>
12             <artifactId>spring-rabbit</artifactId>
13             <version>2.1.8.RELEASE</version>
14         </dependency>
15
16         <!--3.junit测试-->
17         <dependency>
18             <groupId>junit</groupId>
19             <artifactId>junit</artifactId>
20             <version>4.12</version>
21         </dependency>
22
23         <!--4.单元测试-->
24         <dependency>
25             <groupId>org.springframework</groupId>
26             <artifactId>spring-test</artifactId>
27             <version>5.1.7.RELEASE</version>
28         </dependency>
29
30         <dependency>
31             <groupId>org.slf4j</groupId>
32             <artifactId>slf4j-simple</artifactId>
33             <version>1.7.26</version>
34             <scope>test</scope>
35         </dependency>
36     </dependencies>
37     <build>
38         <plugins>
39             <!--5.编译插件-->
40             <plugin>
41                 <groupId>org.apache.maven.plugins</groupId>
42                 <artifactId>maven-compiler-plugin</artifactId>
43                 <version>3.8.0</version>
44                 <configuration>
45                     <source>1.8</source>
46                     <target>1.8</target>
47                 </configuration>
48             </plugin>
49         </plugins>
50     </build>
1.3. 配置整合
-
创建
spring-rabbitmq-producer\src\main\resources\properties\rabbitmq.properties连接参数等配置文件;
rabbitmq.host=192.168.200.128
rabbitmq.port=5672
rabbitmq.username=guest
rabbitmq.password=guest
rabbitmq.virtual-host=/
-
创建
spring-rabbitmq-producer\src\main\resources\spring\spring-rabbitmq.xml整合配置文件;
1 <?xml version="1.0" encoding="UTF-8"?> 2 <beans xmlns="http://www.springframework.org/schema/beans" 3 xmlns:xsi="http://www.w3.org/2001/XMLSchema-instance" 4 xmlns:context="http://www.springframework.org/schema/context" 5 xmlns:rabbit="http://www.springframework.org/schema/rabbit" 6 xsi:schemaLocation="http://www.springframework.org/schema/beans 7 http://www.springframework.org/schema/beans/spring-beans.xsd 8 http://www.springframework.org/schema/context 9 https://www.springframework.org/schema/context/spring-context.xsd 10 http://www.springframework.org/schema/rabbit 11 http://www.springframework.org/schema/rabbit/spring-rabbit.xsd"> 12 <!--加载配置文件--> 13 <context:property-placeholder location="classpath:rabbitmq.properties"/> 14 15 <!-- 定义rabbitmq connectionFactory --> 16 <rabbit:connection-factory id="connectionFactory" host="${rabbitmq.host}" 17 port="${rabbitmq.port}" 18 username="${rabbitmq.username}" 19 password="${rabbitmq.password}" 20 virtual-host="${rabbitmq.virtual-host}"/> 21 <!--定义管理交换机、队列--> 22 <rabbit:admin connection-factory="connectionFactory"/> 23 24 <!--定义持久化队列,不存在则自动创建;不绑定到交换机则绑定到默认交换机 25 默认交换机类型为direct,名字为:"",路由键为队列的名称 26 --> 27 <!-- 28 id:bean的名称 29 name:queue的名称 30 auto-declare:自动创建 31 auto-delete:自动删除。 最后一个消费者和该队列断开连接后,自动删除队列 32 exclusive:是否独占 33 durable:是否持久化 34 --> 35 <!--~~~~~~~~~~~~~~~~~~~~~~~~~1.工作队列模式~~~~~~~~~~~~~~~~~~~~~~~~~~~~~~~~~~~--> 36 <rabbit:queue id="spring_queue" name="spring_queue" auto-declare="true"/> 37 38 39 40 <!-- ~~~~~~~~~~~~~~~~~~~~~~~~~~~~2.广播;所有队列都能收到消息~~~~~~~~~~~~~~~~~~~~~~~~~~~~ --> 41 <!--定义广播交换机中的持久化队列,不存在则自动创建--> 42 <rabbit:queue id="spring_fanout_queue_1" name="spring_fanout_queue_1" auto-declare="true"/> 43 44 <!--定义广播交换机中的持久化队列,不存在则自动创建--> 45 <rabbit:queue id="spring_fanout_queue_2" name="spring_fanout_queue_2" auto-declare="true"/> 46 47 <!--定义广播类型交换机;并绑定上述两个队列--> 48 <rabbit:fanout-exchange id="spring_fanout_exchange" name="spring_fanout_exchange" auto-declare="true"> 49 <rabbit:bindings> 50 <rabbit:binding queue="spring_fanout_queue_1" /> 51 <rabbit:binding queue="spring_fanout_queue_2"/> 52 </rabbit:bindings> 53 </rabbit:fanout-exchange> 54 55 <!--<rabbit:direct-exchange name="aa" > 56 <rabbit:bindings> 57 <!–direct 类型的交换机绑定队列 key :路由key queue:队列名称–> 58 <rabbit:binding queue="spring_queue" key="xxx"></rabbit:binding> 59 </rabbit:bindings> 60 61 </rabbit:direct-exchange>--> 62 63 64 65 <!-- ~~~~~~~~~~~~~~~~~~~~~~~~~~~~3.通配符;*匹配一个单词,#匹配多个单词 ~~~~~~~~~~~~~~~~~~~~~~~~~~~~ --> 66 <!--定义广播交换机中的持久化队列,不存在则自动创建--> 67 <rabbit:queue id="spring_topic_queue_star" name="spring_topic_queue_star" auto-declare="true"/> 68 <!--定义广播交换机中的持久化队列,不存在则自动创建--> 69 <rabbit:queue id="spring_topic_queue_well" name="spring_topic_queue_well" auto-declare="true"/> 70 <!--定义广播交换机中的持久化队列,不存在则自动创建--> 71 <rabbit:queue id="spring_topic_queue_well2" name="spring_topic_queue_well2" auto-declare="true"/> 72 73 <rabbit:topic-exchange id="spring_topic_exchange" name="spring_topic_exchange" auto-declare="true"> 74 <rabbit:bindings> 75 <rabbit:binding pattern="heima.*" queue="spring_topic_queue_star"/> 76 <rabbit:binding pattern="heima.#" queue="spring_topic_queue_well"/> 77 <rabbit:binding pattern="itcast.#" queue="spring_topic_queue_well2"/> 78 </rabbit:bindings> 79 </rabbit:topic-exchange> 80 81 <!--定义rabbitTemplate对象操作可以在代码中方便发送消息--> 82 <rabbit:template id="rabbitTemplate" connection-factory="connectionFactory"/> 83 </beans>
1.4. 发送消息
创建测试文件 spring-rabbitmq-producer\src\test\java\com\itheima\rabbitmq\ProducerTest.java
 1 @RunWith(SpringJUnit4ClassRunner.class)
 2 @ContextConfiguration(locations = "classpath:spring-rabbitmq-producer.xml")
 3 public class ProducerTest {
 4
 5     //1.注入 RabbitTemplate
 6     @Autowired
 7     private RabbitTemplate rabbitTemplate;
 8
 9
10     @Test
11     public void testHelloWorld(){
12         //2.发送消息
13         rabbitTemplate.convertAndSend("spring_queue","hello world spring....");
14     }
15
16
17     /**
18      * 发送fanout消息
19      */
20     @Test
21     public void testFanout(){
22         //2.发送消息
23         rabbitTemplate.convertAndSend("spring_fanout_exchange","","spring fanout....");
24     }
25
26
27     /**
28      * 发送topic消息
29      */
30     @Test
31     public void testTopics(){
32         //2.发送消息
33         rabbitTemplate.convertAndSend("spring_topic_exchange","heima.hehe.haha","spring topic....");
34     }
35 }
2. 搭建消费者工程
2.1. 创建工程
2.2. 添加依赖
修改pom.xml文件内容为如下:
 1     <dependencies>
 2         <dependency>
 3             <groupId>org.springframework</groupId>
 4             <artifactId>spring-context</artifactId>
 5             <version>5.1.7.RELEASE</version>
 6         </dependency>
 7
 8         <dependency>
 9             <groupId>org.springframework.amqp</groupId>
10             <artifactId>spring-rabbit</artifactId>
11             <version>2.1.8.RELEASE</version>
12         </dependency>
13
14         <dependency>
15             <groupId>junit</groupId>
16             <artifactId>junit</artifactId>
17             <version>4.12</version>
18         </dependency>
19
20         <dependency>
21             <groupId>org.springframework</groupId>
22             <artifactId>spring-test</artifactId>
23             <version>5.1.7.RELEASE</version>
24         </dependency>
25     </dependencies>
26
27     <build>
28         <plugins>
29             <plugin>
30                 <groupId>org.apache.maven.plugins</groupId>
31                 <artifactId>maven-compiler-plugin</artifactId>
32                 <version>3.8.0</version>
33                 <configuration>
34                     <source>1.8</source>
35                     <target>1.8</target>
36                 </configuration>
37             </plugin>
38         </plugins>
39     </build>
2.3. 配置整合
-
创建
spring-rabbitmq-consumer\src\main\resources\properties\rabbitmq.properties连接参数等配置文件;
rabbitmq.host=192.168.200.128
rabbitmq.port=5672
rabbitmq.username=guest
rabbitmq.password=guest
rabbitmq.virtual-host=/itcast
-
创建
spring-rabbitmq-consumer\src\main\resources\spring\spring-rabbitmq.xml整合配置文件;
 1 <?xml version="1.0" encoding="UTF-8"?>
 2 <beans xmlns="http://www.springframework.org/schema/beans"
 3        xmlns:xsi="http://www.w3.org/2001/XMLSchema-instance"
 4        xmlns:context="http://www.springframework.org/schema/context"
 5        xmlns:rabbit="http://www.springframework.org/schema/rabbit"
 6        xsi:schemaLocation="http://www.springframework.org/schema/beans
 7        http://www.springframework.org/schema/beans/spring-beans.xsd
 8        http://www.springframework.org/schema/context
 9        https://www.springframework.org/schema/context/spring-context.xsd
10        http://www.springframework.org/schema/rabbit
11        http://www.springframework.org/schema/rabbit/spring-rabbit.xsd">
12     <!--加载配置文件-->
13     <context:property-placeholder location="classpath:rabbitmq.properties"/>
14
15     <!-- 定义rabbitmq connectionFactory -->
16     <rabbit:connection-factory id="connectionFactory" host="${rabbitmq.host}"
17                                port="${rabbitmq.port}"
18                                username="${rabbitmq.username}"
19                                password="${rabbitmq.password}"
20                                virtual-host="${rabbitmq.virtual-host}"/>
21
22     <bean id="springQueueListener" class="com.itheima.rabbitmq.listener.SpringQueueListener"/>
23     <!--<bean id="fanoutListener1" class="com.itheima.rabbitmq.listener.FanoutListener1"/>
24     <bean id="fanoutListener2" class="com.itheima.rabbitmq.listener.FanoutListener2"/>
25     <bean id="topicListenerStar" class="com.itheima.rabbitmq.listener.TopicListenerStar"/>
26     <bean id="topicListenerWell" class="com.itheima.rabbitmq.listener.TopicListenerWell"/>
27     <bean id="topicListenerWell2" class="com.itheima.rabbitmq.listener.TopicListenerWell2"/>
28 -->
29     <rabbit:listener-container connection-factory="connectionFactory" auto-declare="true">
30         <rabbit:listener ref="springQueueListener" queue-names="spring_queue"/>
31        <!-- <rabbit:listener ref="fanoutListener1" queue-names="spring_fanout_queue_1"/>
32         <rabbit:listener ref="fanoutListener2" queue-names="spring_fanout_queue_2"/>
33         <rabbit:listener ref="topicListenerStar" queue-names="spring_topic_queue_star"/>
34         <rabbit:listener ref="topicListenerWell" queue-names="spring_topic_queue_well"/>
35         <rabbit:listener ref="topicListenerWell2" queue-names="spring_topic_queue_well2"/>-->
36     </rabbit:listener-container>
37 </beans>
2.4. 消息监听器
1)队列监听器
创建 spring-rabbitmq-consumer\src\main\java\com\itheima\rabbitmq\listener\SpringQueueListener.java
public class SpringQueueListener implements MessageListener { public void onMessage(Message message) { try { String msg = new String(message.getBody(), "utf-8"); System.out.printf("接收路由名称为:%s,路由键为:%s,队列名为:%s的消息:%s \n", message.getMessageProperties().getReceivedExchange(), message.getMessageProperties().getReceivedRoutingKey(), message.getMessageProperties().getConsumerQueue(), msg); } catch (Exception e) { e.printStackTrace(); } } }
2)广播监听器1
创建 spring-rabbitmq-consumer\src\main\java\com\itheima\rabbitmq\listener\FanoutListener1.java
1 public class FanoutListener1 implements MessageListener { 2 public void onMessage(Message message) { 3 try { 4 String msg = new String(message.getBody(), "utf-8"); 5 6 System.out.printf("广播监听器1:接收路由名称为:%s,路由键为:%s,队列名为:%s的消息:%s \n", 7 message.getMessageProperties().getReceivedExchange(), 8 message.getMessageProperties().getReceivedRoutingKey(), 9 message.getMessageProperties().getConsumerQueue(), 10 msg); 11 } catch (Exception e) { 12 e.printStackTrace(); 13 } 14 } 15 }
3)广播监听器2
创建 spring-rabbitmq-consumer\src\main\java\com\itheima\rabbitmq\listener\FanoutListener2.java
1 public class FanoutListener2 implements MessageListener { 2 public void onMessage(Message message) { 3 try { 4 String msg = new String(message.getBody(), "utf-8"); 5 6 System.out.printf("广播监听器2:接收路由名称为:%s,路由键为:%s,队列名为:%s的消息:%s \n", 7 message.getMessageProperties().getReceivedExchange(), 8 message.getMessageProperties().getReceivedRoutingKey(), 9 message.getMessageProperties().getConsumerQueue(), 10 msg); 11 } catch (Exception e) { 12 e.printStackTrace(); 13 } 14 } 15 }
4)星号通配符监听器
创建 spring-rabbitmq-consumer\src\main\java\com\itheima\rabbitmq\listener\TopicListenerStar.java
1 public class TopicListenerStar implements MessageListener { 2 public void onMessage(Message message) { 3 try { 4 String msg = new String(message.getBody(), "utf-8"); 5 6 System.out.printf("通配符*监听器:接收路由名称为:%s,路由键为:%s,队列名为:%s的消息:%s \n", 7 message.getMessageProperties().getReceivedExchange(), 8 message.getMessageProperties().getReceivedRoutingKey(), 9 message.getMessageProperties().getConsumerQueue(), 10 msg); 11 } catch (Exception e) { 12 e.printStackTrace(); 13 } 14 } 15 } 16
5)井号通配符监听器
创建 spring-rabbitmq-consumer\src\main\java\com\itheima\rabbitmq\listener\TopicListenerWell.java
1 public class TopicListenerWell implements MessageListener { 2 public void onMessage(Message message) { 3 try { 4 String msg = new String(message.getBody(), "utf-8"); 5 6 System.out.printf("通配符#监听器:接收路由名称为:%s,路由键为:%s,队列名为:%s的消息:%s \n", 7 message.getMessageProperties().getReceivedExchange(), 8 message.getMessageProperties().getReceivedRoutingKey(), 9 message.getMessageProperties().getConsumerQueue(), 10 msg); 11 } catch (Exception e) { 12 e.printStackTrace(); 13 } 14 } 15 }
6)井号通配符监听器2
创建 spring-rabbitmq-consumer\src\main\java\com\itheima\rabbitmq\listener\TopicListenerWell2.java
1 public class TopicListenerWell2 implements MessageListener { 2 public void onMessage(Message message) { 3 try { 4 String msg = new String(message.getBody(), "utf-8"); 5 6 System.out.printf("通配符#监听器2:接收路由名称为:%s,路由键为:%s,队列名为:%s的消息:%s \n", 7 message.getMessageProperties().getReceivedExchange(), 8 message.getMessageProperties().getReceivedRoutingKey(), 9 message.getMessageProperties().getConsumerQueue(), 10 msg); 11 } catch (Exception e) { 12 e.printStackTrace(); 13 } 14 } 15 }

 浙公网安备 33010602011771号