制作pip包
本文是带你制作自己的开源模块,以后所有人都可方便的使用pip安装你的模块:如
pip install 模块名
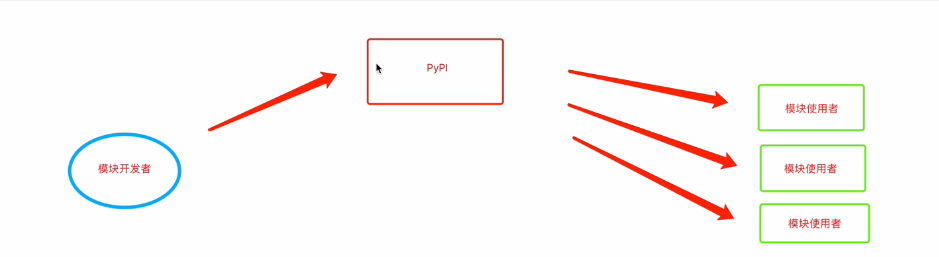
对于模块开发者本质上需要做3件事:
- 编写代码
- 将模块进行打包
- 上传至PyPI(需要先注册PyPI账号)
对于模块的使用者来说,只需要2件事:
- 通过 pip install 模块名 去安装模块
- 调用模块
假设,现在我们要做一个名称叫 joe 的模块,跟着下面的步骤一步一步的操作。
第一步 项目文件夹
根据要求创建如下文件,并填写内容
joe
├── LICENSE     # 声明,给模块使用者看,说白了就是使用者是否可以免费用于商业用途等。
├── README.md    # 模块介绍
├── demos      # 使用案例
├── joe       # 模块代码目录
│   └── __init__.py   # 必须有
└── setup.py    # 给setuptools提供信息的脚本(名称、版本等)
1.1 Liscense
LICENSE文件就是咱们模块的许可证,给模块使用者看,说白了就是使用者是否可以免费用于商业用途等。
一般开源的软件会选择相对宽泛许可证MIT,即:作者保留版权,无其他任何限制。
Copyright (c) 2018 The Python Packaging Authority

Permission is hereby granted, free of charge, to any person obtaining a copy
of this software and associated documentation files (the "Software"), to deal
in the Software without restriction, including without limitation the rights
to use, copy, modify, merge, publish, distribute, sublicense, and/or sell
copies of the Software, and to permit persons to whom the Software is
furnished to do so, subject to the following conditions:

The above copyright notice and this permission notice shall be included in all
copies or substantial portions of the Software.

THE SOFTWARE IS PROVIDED "AS IS", WITHOUT WARRANTY OF ANY KIND, EXPRESS OR
IMPLIED, INCLUDING BUT NOT LIMITED TO THE WARRANTIES OF MERCHANTABILITY,
FITNESS FOR A PARTICULAR PURPOSE AND NONINFRINGEMENT. IN NO EVENT SHALL THE
AUTHORS OR COPYRIGHT HOLDERS BE LIABLE FOR ANY CLAIM, DAMAGES OR OTHER
LIABILITY, WHETHER IN AN ACTION OF CONTRACT, TORT OR OTHERWISE, ARISING FROM,
OUT OF OR IN CONNECTION WITH THE SOFTWARE OR THE USE OR OTHER DEALINGS IN THE
SOFTWARE.
更多其他许可证参见:https://choosealicense.com/
1.2 readme
readme就是对于当前模块的描述信息,一般用于markdown格式编写,如:
joe是一款......
此文件也可以写模块的简单使用手册,如果手册太复杂建议再创建一个doc文件夹存放使用手册
1.3 demos目录
demos一般会写一些该模块使用的示例,用于使用者快速可以将模块应用到生成中
1.4 setup.py
setup.py文件其实是一个配置文件,用于给setuptools提供一些模块相关的信息,如:模块名称、模块版本、适用的Python版本、作者、github地址等
import setuptools

with open("README.md", 'r') as fh:
    long_description = fh.read()

setuptools.setup(
    name="joe",            # 模块名称
    version="1.0",          # 当前版本
    author="joe",           # 作者
    author_email="邮箱",        # 作者邮箱
    description="一个很NB的包",    # 模块简介
    long_description=long_description,          # 模块详细介绍
    long_description_content_type="text/markdown",  # 模块详细介绍格式
    url="github地址",                    # 模块github地址
    packages=setuptools.find_packages(),        # 自动找到项目中导入的模块
    # 模块相关的元数据(更多的描述)
    classifiers=[
        "Programming Language :: Python :: 3",
        "License :: OSI Approved :: MIT License",
        "Operating System :: Independent",
    ],
    # 依赖模块
    install_requires=[
        "pillow"
    ],
  # python版本
    python_requires=">=3",
)
1.5 joe目录
插件内容,可以将相关代码在此编写:如 wp.py
def func():
    print("一个神奇的包")
最后我们的文件夹如下:
joe
├── LICENSE
├── README.md
├── demos
├── joe
│   ├── __init__.py
│   └── wp.py
└── setup.py
第二步 代码打包&上传
上述步骤中将文件夹和代码编写好之后,就需要对代码打包处理
2.1 安装打包工具(已有无需重复安装)
打包代码需要先安装setuptools和wheel两个工具,可以单独安装,也可以安装pip,从而自动安装这两个工具。
2.2 打包代码
# 执行
python setup.py sdist bdist_wheel
之后就会出现以下目录
joe
├── LICENSE
├── README.md
├── joe
│    ├── __init__.py
│    └── wp.py
├── joe.egg-info
│   ├── PKG-INFO
│   ├── SOURCES.txt
│   ├── dependency_links.txt
│   └── top_level.txt
├── build
│   ├── bdist.macosx-10.6-intel
│   └── lib
│        └── joe
│             │── __init__.py
│             └── wp.py
├──demos
├──dist
│   │── joe-0.0.1-py3-none-any.whl
│   └── joe-0.01.tar.gz
└── setup.py
2.3 发布模块(上传)
文件打包完毕后,需要将打包之后的文件上传到PyPI,如果想要上传是需要先去http://pypi.org/ 注册一个账号。
- 安装用于发布模块的工具:twine【已安装的无需重复安装】
python -m pip install --upgrade twine
或者
pip install --upgrade twine
- 发布(上传)
python -m twine upload --repository-url https://upload.pypi.org/legacy/  dist/*
或
twine upload --repository-url https://upload.pypi.org/legacy/  dist/*
提示需要输入PyPI的用户名和密码。
第三步:安装使用
pip install 模块名

 浙公网安备 33010602011771号