使用 Hypercorn HTTP/2 ASGI 部署 FastAPI
Another ASGI web server that supports HTTP/2 and HTTP/3 specifications

我已经介绍了很多关于 FastAPI 的教程,其中服务器部署了 Uvicorn,一个快速的 ASGI Web 服务器。在撰写本文时,Uvicorn 目前仅支持 HTTP/1.1 和 WebSockets。根据官方文档,计划支持 HTTP/2,但没有预计完成时间。
HTTP/2 是旧 HTTP/1 的继承者,它在减少延迟的同时保持相同的高级语义(方法、标头字段、状态代码等)。基于维基百科,它通过以下方式改进了网页的加载:
- data compression of HTTP headers
- HTTP/2 Server Push
- pipelining of requests
- fixing the head-of-line blocking problem in HTTP 1.x
- multiplexing multiple requests over a single TCP connection
This articles covers FastAPI server deployment for HTTP/2 using another ASGI web server called Hypercorn. For your information, Hypercorn is
… an ASGI web server based on the sans-io hyper, h11, h2, and wsproto libraries and inspired by Gunicorn. Hypercorn supports HTTP/1, HTTP/2, WebSockets (over HTTP/1 and HTTP/2), ASGI/2, and ASGI/3 specifications. Hypercorn can utilise asyncio, uvloop, or trio worker types.
Let’s proceed to the next section and start installing the necessary modules.
Setup
It is highly recommended to create a virtual environment before you continue with the installation. Activate the virtual environment and continue installing the necessary packages via pip install.
FastAPI
Run the following command to install FastAPI:
pip install fastapi
Hypercorn
Install Hypercorn as follows:
pip install hypercorn
Implementation
In this section, you will learn to write a simple FastAPI script and run it using Hypercorn.
FastAPI Server
Let’s create a new Python file called myapp.py in the same working directory with the following code:
from fastapi import FastAPIapp = FastAPI()@app.get("/")
async def root():
    return {"message": "Hello world!"}
Deploying with Hypercorn
Next, run the following command at the terminal to start your server. By default, it will run as localhost on port 8000.
hypercorn myapp:app
Similar to Uvicorn, Hypercorn uses the following syntax
hypercorn <module_name>:<variable_name>
module_name— name of the module (filename)variable_name— name of the variable defined for FastAPI
Binding to Specific Address
However, the configuration or available options are a lot different compared to Uvicorn. For example, you have to use the bind option for specifying the host and port as follows:
# Hypercorn
hypercorn myapp:app --bind 0.0.0.0:8080# Uvicorn
uvicorn myapp:app --host 0.0.0.0 --port 8080
Binding to Multiple Addresses
In fact, you can bind it to multiple servers and serve them simultaneously. This is extremely useful when you need to serve the server on both IPv4 and IPv6. For example:
hypercorn myapp:app --bind "0.0.0.0:5000" --bind "[::]:5000"
Other Configurations Options
Furthermore, you can use the following options when running Hypercorn in the command line as well.
--access-logformat— The log format for the access log, see Logging.--access-logfile— The target logger for access logs, use-for stdout.--backlog—The maximum number of pending connections.--ca-certs— Path to the SSL CA certificate file.--certfile— Path to the SSL certificate file.--cipher— Ciphers to use for the SSL setup.--debug— Enable debug mode, i.e. extra logging and checks.--error-logfile --log-file— The target location for the error log, use — for stderr.--graceful-timeout— Time to wait after SIGTERM or Ctrl-C for any remaining requests (tasks) to complete.--keep-alive— Seconds to keep inactive connections alive before closing.--keyfile— Path to the SSL key file.--log-config— A Python logging configuration file.--log-level— The (error) log level.--pid— Location to write the PID (Program ID) to.--reload—Enable automatic reloads on code changes.--worker-class— The type of worker to use. Options include asyncio, uvloop (requirespip install hypercorn[uvloop]), and trio (requirespip install hypercorn[trio]).--workers—The number of workers to spawn and use.
Result
Assuming that you have ran the following command:
hypercorn myapp:app
You should get the following output at the console when you run it:
[2021-07-10 21:24:19 +0800] [5464] [INFO] Running on http://127.0.0.1:8000 (CTRL + C to quit)
Open up a browser and head over to the following URL mentiond in the console:
http://localhost:8000/
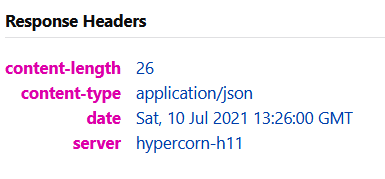
The output should be as follows:
{"message":"Hello world!"}
However, the server indicated in the response headers is hypercorn-h11 which refers to HTTP/1.1
This is mainly because HTTP/2 requires a mandatory encryption. You have to serve it with certificates even if you are running it as localhost.
Generate a Self-signed Certificate
Let’s create a temporary self-signed certificate using rsa for 365 days. Run the following command in your command line:
openssl req -x509 -newkey rsa:4096 -keyout key.pem -out cert.pem -days 365 -nodes
如果您在读取文件时遇到openssl.cnf如下问题:
Can't open .../openssl.cnf for reading. No such file or directory
它只是意味着它无法找到配置文件。如果你已经安装了 openssl 附带的 Git,只需将其指向openssl.cnf使用-config选项的位置。例如:
openssl req -x509 -newkey rsa:4096 -keyout key.pem -out cert.pem -days 365 -nodes -config "C:\Program Files\Git\usr\ssl\openssl.cfg"
它将生成两个新文件:
- key.pem
- cert.pem
- 密钥.pem
- 证书.pem
接下来,将这两个文件放在与 myapp.py 相同的目录中,并使用--keyfile和--certfile命令运行它:
hypercorn --keyfile key.pem --certfile cert.pem myapp:app
在您的浏览器上,重新加载页面,但这次使用 https 代替:
https://localhost:8000/
它应该提示一个警告页面表明(如果您使用的是自签名证书,这是正常的):
localhost:8000 uses an invalid security certificate.

The certificate is not trusted because it is self-signed.
接受风险并继续访问请求的 URL。您应该获得以下响应标头:
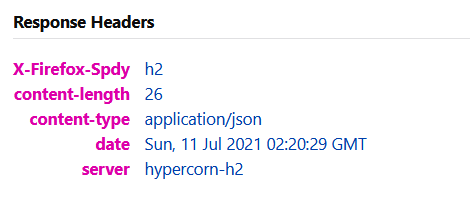
hypercorn-h2表示服务器正在运行 HTTP/2。对于生产服务器,建议改用有效证书。您可以使用Let's Encrypt为您的网站获取免费证书。
结论
让我们回顾一下您今天所学的内容。
本文以对 HTTP/2 的简要说明开始。它还涵盖了对 Uvicorn 和 Hypercorn ASGI 服务器的 HTTP/2 支持。
然后,它通过pip install.
它继续使用 FastAPI 服务器的标准样板并在本地主机上运行它。除此之外,它还介绍了使用 Hypercorn 部署 FastAPI 服务器时可用的配置。
本教程还包括一个关于生成自签名证书的简单部分,因为 HTTP/2 在部署期间需要强制证书。

 浙公网安备 33010602011771号