

在 Keil 上使用 TVM 在 AVH 环境下运行 Paddle 模型
1 简介
截止至目前为止,在裸机设备上运行机器学习任务是比较困难的,其难点我认为主要集中在运行性能有限、跨设备难度高、跨框架难度高这两点上。在裸机上部署机器学习任务时,除了芯片产商自带的推理框架外,比较经典的跨设备框架就是 TFLite,但是 TFLite 也有其自己的缺点,那就是不能跨框架。TVM 推出了 microTVM 很好的解决了上述问题(即使性能上对比 TFLite 确实还有所差距),为任何人轻松快速地实现这一目标奠定开源基础。
microTVM 在性能上虽然和 TFLite 还有所差距,但是其兼顾了性能、跨设备、跨框架三个痛点问题,已经逐渐成为了裸机设备上部署机器学习模型的新宠。TVM 的官方教程使用的也是 AVH,但是其没有提供 Keil 例程,对个人开发者不太友好,这里介绍一下如何移植 TVM 项目到 Keil 上。
2 前期准备
为了便捷开发,我使用的是 AVH 来运行代码。在继续开始之前,请至少浏览以下文章,保证你对 TVM 和如何在 Keil 上运行 AVH 程序有一定的了解。
【Keil&AVH】使用Keil新建Arm Visual Hardware(AVH)项目
3 使用 TVM 编译模型并生成代码
我对 Paddle 模型比较熟悉,因此我以 Paddle 模型作为例子来展示如何编译。
# Download paddlepaddle model
wget "https://paddle-imagenet-models-name.bj.bcebos.com/dygraph/inference/PPLCNet_x0_75_infer.tar"
tar -xf PPLCNet_x0_75_infer.tar
# Export paddlepaddle model to onnx model
paddle2onnx --model_dir  "${PWD}/PPLCNet_x0_75_infer" \
            --model_filename inference.pdmodel \
            --params_filename inference.pdiparams \
            --save_file inference.onnx
# Convert onnx model to tvm model
python3 -m tvm.driver.tvmc compile --target=cmsis-nn,c \
    --target-cmsis-nn-mcpu=cortex-m55 \
    --target-c-mcpu=cortex-m55 \
    --runtime=crt \
    --executor=aot \
    --executor-aot-interface-api=c \
    --executor-aot-unpacked-api=1 \
    --pass-config tir.usmp.enable=1 \
    --pass-config tir.usmp.algorithm=hill_climb \
    --pass-config tir.disable_storage_rewrite=1 \
    --pass-config tir.disable_vectorize=1 \
    inference.onnx \
    --output-format=mlf \
    --model-format=onnx \
    --input-shapes x:[1,3,224,224] \
    --module-name=cls \
    --output=cls.tar
tar -xvf cls.tar
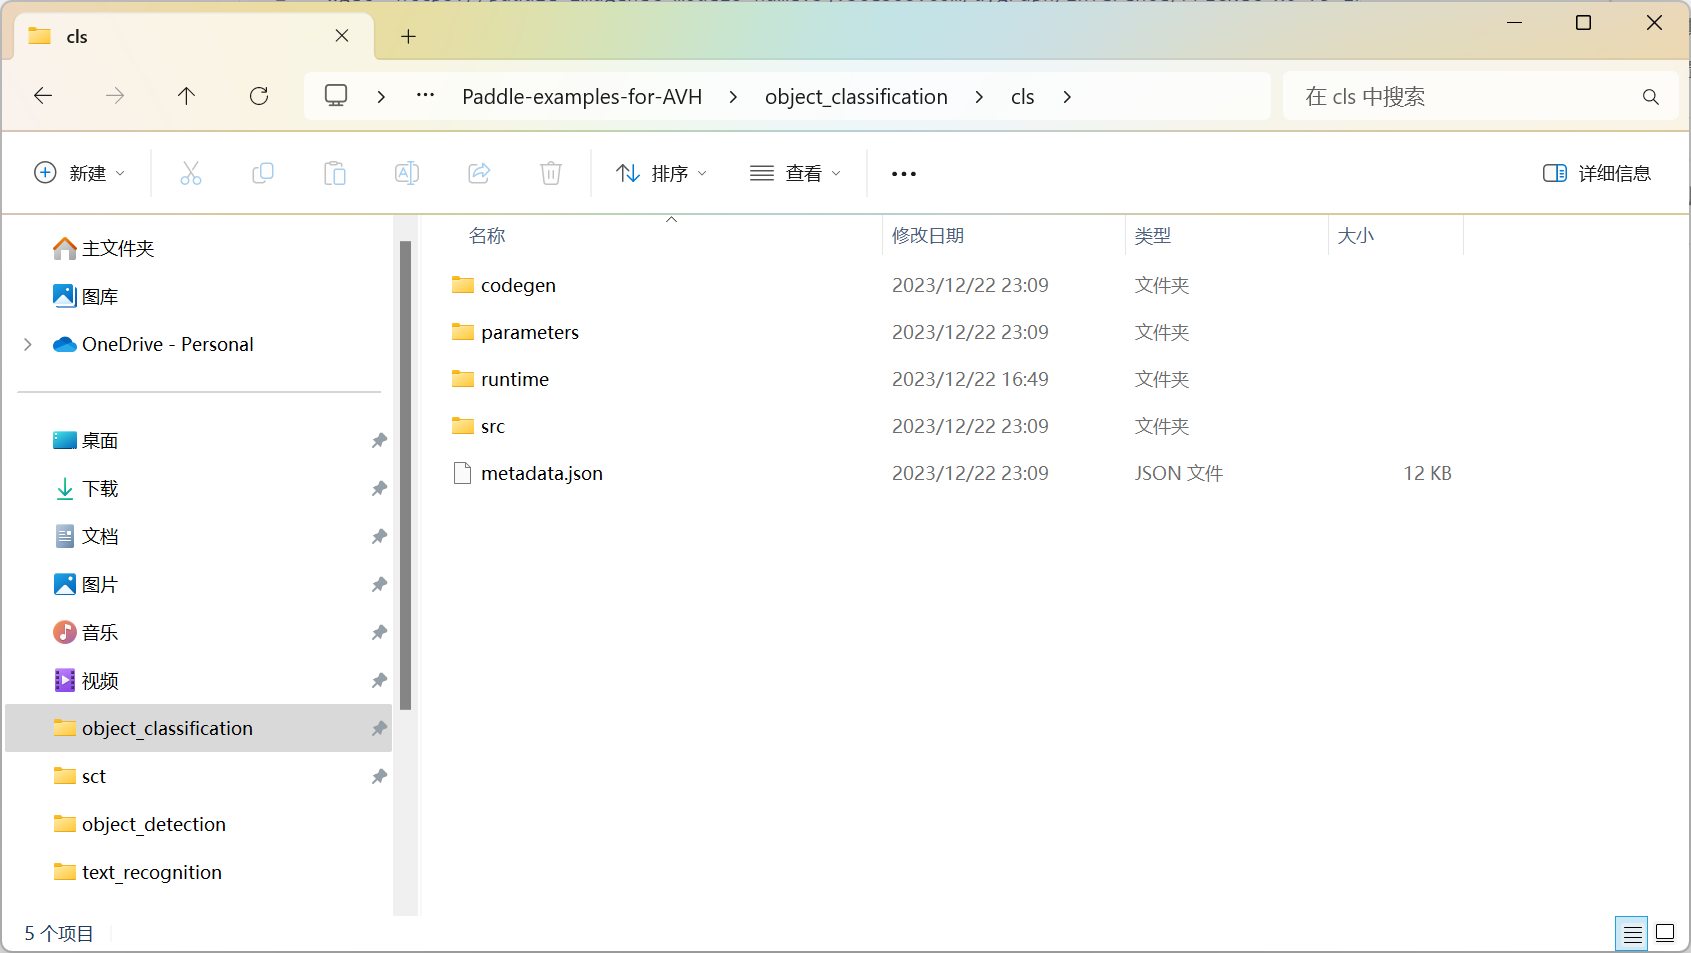
接下来你会得到 cls 文件夹,将其拷贝到 Keil 项目的根目录下,文件夹中的内容如下:
4 构建辅助数组
TVM 帮助我们解决了模型的推理工作,我们要自己设置模型的输入和输出。笔者编写了几个 Python 脚本用于处理模型的输入以及输出。
4.1 获取模型输入输出数组
convert_image.py 用于构建模型的输入和输出数组,我特别对齐了 PaddleClas 中对模型输入的处理,执行该脚本后,include文件夹 下将生成 inputs.h 和 output.h。
import pathlib
import sys
import cv2
import numpy as np


def decode_image(img_bgr):
    img_rgb = cv2.cvtColor(img_bgr, cv2.COLOR_BGR2RGB)
    return img_rgb


def resize_image(im_rgb, resize_short=256):
    img_h = im_rgb.shape[0]
    img_w = im_rgb.shape[1]
    percent = float(resize_short) / min(img_w, img_h)
    w = int(round(img_w * percent))
    h = int(round(img_h * percent))
    resize_img = cv2.resize(im_rgb, (w, h), cv2.INTER_LINEAR)
    return resize_img


def crop_image(im_rgb, size=224):
    if type(size) is int:
        size = (size, size)
    else:
        size = size  # (h, w)
    w, h = size
    img_h, img_w = im_rgb.shape[:2]
    w_start = (img_w - w) // 2
    h_start = (img_h - h) // 2

    w_end = w_start + w
    h_end = h_start + h
    return im_rgb[h_start:h_end, w_start:w_end, :]


def normalize_image(im_rgb, mean, std):
    im_rgb = im_rgb.astype('float32')
    im_rgb = im_rgb * 0.00392157
    shape = (1, 1, 3)
    mean = np.array(mean).reshape(shape).astype('float32')
    std = np.array(std).reshape(shape).astype('float32')
    im_rgb = (im_rgb.astype('float32') - mean) / std
    return im_rgb.astype('float32')


def resize_norm_img(img):
    image = np.array(img)
    image = decode_image(image)
    image = resize_image(image)
    image = crop_image(image)
    image = normalize_image(image, [0.485, 0.456, 0.406], [0.229, 0.224, 0.225])
    image = np.transpose(image, [2, 0, 1])
    return image


def create_header_file(name, tensor_name, tensor_data, output_path):
    """
    This function generates a header file containing the data from the numpy array provided.
    """
    file_path = pathlib.Path(f"{output_path}/" + name).resolve()
    # Create header file with npy_data as a C array
    raw_path = file_path.with_suffix(".h").resolve()
    with open(raw_path, "w+") as header_file:
        header_file.write(
            "\n"
            + f"const size_t {tensor_name}_len = {tensor_data.size};\n"
            + f'__attribute__((section(".data.tvm"), aligned(16))) float {tensor_name}[] = '
        )

        header_file.write("{")
        for i in np.ndindex(tensor_data.shape):
            header_file.write(f"{tensor_data[i]}, ")
        header_file.write("};\n\n")


def create_headers(img_path):
    """
    This function generates C header files for the input and output arrays required to run inferences
    """
    # Create input header file
    # Resize image to 32x320
    img = cv2.imread(img_path)
    img = resize_norm_img(img)
    img_data = img.astype("float32")
    # Add the batch dimension, as we are expecting 4-dimensional input: NCHW.
    img_data = np.expand_dims(img_data, axis=0)
    create_header_file("inputs", "input", img_data, "include")

    # Create output header file
    output_data = np.zeros([1000], np.float32)
    create_header_file("outputs", "output", output_data, "include")


if __name__ == "__main__":
    create_headers(sys.argv[1])
4.2 获取模型的 labels 数组
分类模型的后处理中一般都会有一个label来存储类别信息,convert_labels.py 用于构建模型的类别数组,执行该脚本后,include文件夹 下将生成 labels.h。
# Licensed to the Apache Software Foundation (ASF) under one
# or more contributor license agreements.  See the NOTICE file
# distributed with this work for additional information
# regarding copyright ownership.  The ASF licenses this file
# to you under the Apache License, Version 2.0 (the
# "License"); you may not use this file except in compliance
# with the License.  You may obtain a copy of the License at
#
#   http://www.apache.org/licenses/LICENSE-2.0
#
# Unless required by applicable law or agreed to in writing,
# software distributed under the License is distributed on an
# "AS IS" BASIS, WITHOUT WARRANTIES OR CONDITIONS OF ANY
# KIND, either express or implied.  See the License for the
# specific language governing permissions and limitations
# under the License.

import os
import pathlib
import sys

def create_labels_header(labels_file, section, output_path):
    """
    This function generates a header file containing the ImageNet labels as an array of strings
    """
    labels_path = pathlib.Path(labels_file).resolve()
    file_path = pathlib.Path(f"{output_path}/labels.h").resolve()
    with open(labels_path) as f:
        labels = f.readlines()
    with open(file_path, "w+") as header_file:
        header_file.write(f'char* labels[] __attribute__((section("{section}"), aligned(16))) = {{')

        for _, label in enumerate(labels):
            header_file.write(f'"{label.rstrip()}",')
        header_file.write("};\n")

if __name__ == "__main__":
    create_labels_header(sys.argv[1], ".data.tvm", "./include")
4.3 构建 TVM 配置模板代码
使用 microTVM 需要配置一些 TVM 相关的模板代码,这里参考了 TVM 官方例程来编写。
请在include新建 tvm_runtime.h 并输入以下内容:
#include <stdarg.h>
#include <stdio.h>
#include <stdlib.h>
#include <tvm/runtime/c_runtime_api.h>
#include <tvm/runtime/crt/stack_allocator.h>

#ifdef __cplusplus
extern "C" {
#endif

void __attribute__((noreturn)) TVMPlatformAbort(tvm_crt_error_t error_code) {
  printf("TVMPlatformAbort: %d\n", error_code);
  printf("EXITTHESIM\n");
  exit(-1);
}

tvm_crt_error_t TVMPlatformMemoryAllocate(size_t num_bytes, DLDevice dev, void** out_ptr) {
  return kTvmErrorFunctionCallNotImplemented;
}

tvm_crt_error_t TVMPlatformMemoryFree(void* ptr, DLDevice dev) {
  return kTvmErrorFunctionCallNotImplemented;
}

void TVMLogf(const char* msg, ...) {
  va_list args;
  va_start(args, msg);
  vfprintf(stdout, msg, args);
  va_end(args);
}

TVM_DLL int TVMFuncRegisterGlobal(const char* name, TVMFunctionHandle f, int override) { return 0; }

#ifdef __cplusplus
}
#endif
请在include新建 crt_config.h 并输入以下内容:
/*
 * Licensed to the Apache Software Foundation (ASF) under one
 * or more contributor license agreements.  See the NOTICE file
 * distributed with this work for additional information
 * regarding copyright ownership.  The ASF licenses this file
 * to you under the Apache License, Version 2.0 (the
 * "License"); you may not use this file except in compliance
 * with the License.  You may obtain a copy of the License at
 *
 *   http://www.apache.org/licenses/LICENSE-2.0
 *
 * Unless required by applicable law or agreed to in writing,
 * software distributed under the License is distributed on an
 * "AS IS" BASIS, WITHOUT WARRANTIES OR CONDITIONS OF ANY
 * KIND, either express or implied.  See the License for the
 * specific language governing permissions and limitations
 * under the License.
 */

/*!
 * \file tvm/runtime/crt_config.h.template
 * \brief Template for CRT configuration, to be modified on each target.
 */
#ifndef TVM_RUNTIME_CRT_CRT_CONFIG_TEMPLATE_H_
#define TVM_RUNTIME_CRT_CRT_CONFIG_TEMPLATE_H_
/*! Log level of the CRT runtime */
#define TVM_CRT_LOG_LEVEL TVM_CRT_LOG_LEVEL_DEBUG
#endif  // TVM_RUNTIME_CRT_CRT_CONFIG_TEMPLATE_H_
5 构建主函数
这部分比较简单,主要是设置输入输出数据,推理,后处理。
#include <stdint.h>
#include <stdio.h>
#include <crt_config.h>
#include <tvm_runtime.h>
#include <tvmgen_cls.h>

#include "labels.h"

#include "inputs.h"
#include "outputs.h"
#include "stdout_USART.h"

#if defined (__ARMCC_VERSION) && (__ARMCC_VERSION >= 6010050)
__asm("  .global __ARM_use_no_argv\n");
#endif

int main(){
    stdout_init();
    struct tvmgen_cls_inputs cls_inputs = {
        .x = input,
    };
    struct tvmgen_cls_outputs cls_outputs = {
        .output = output,
    };

    tvmgen_cls_run(&cls_inputs, &cls_outputs);
    int index = 0;
    for(int i = 0; i < output_len;i++){
        if(output[i] > output[index]){
            index = i;
        }
    }
    printf("Index is %d; Confidence is %f; Label is %s\n", index, output[index], labels[index]);
    printf("EXITTHESIM\r\n");
}
6 配置 Keil 项目
在前期准备中,笔者已经介绍了从零在 Keil 中配置一个 AVH 项目,这里需要修改一个简单的修改。
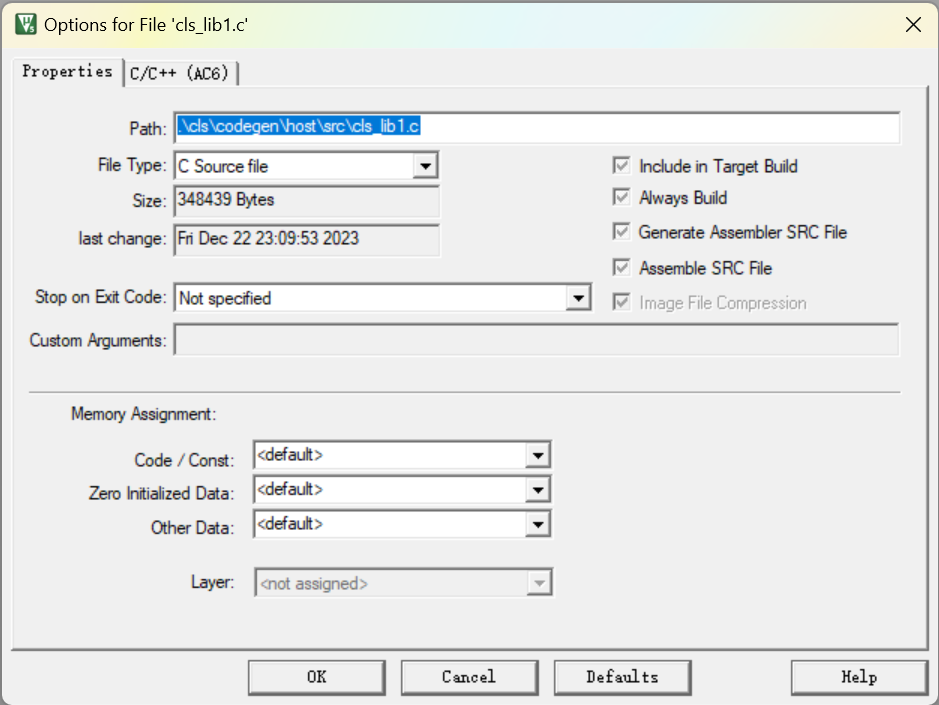
6.1 导入项目文件
需要导入的项目文件主要有以下几个部分组成:
main.c:控制主函数运行
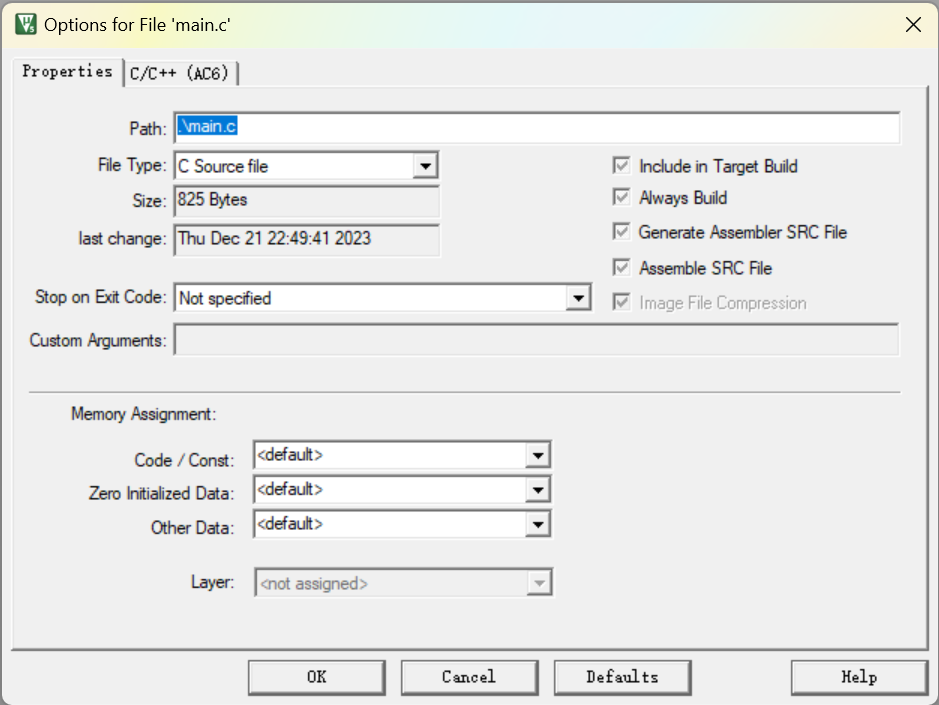
cls_lib0.c:存放了模型的各种参数
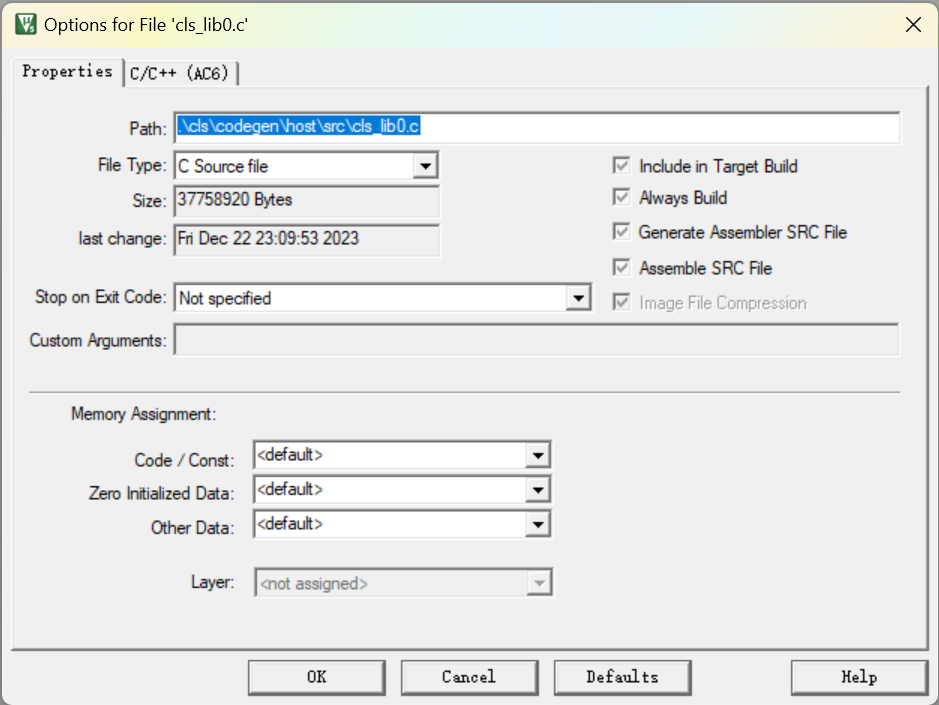
cls_lib1.c:调用后端并执行各种模型推理任务
crt_backend_api.c:后端核心推理框架代码
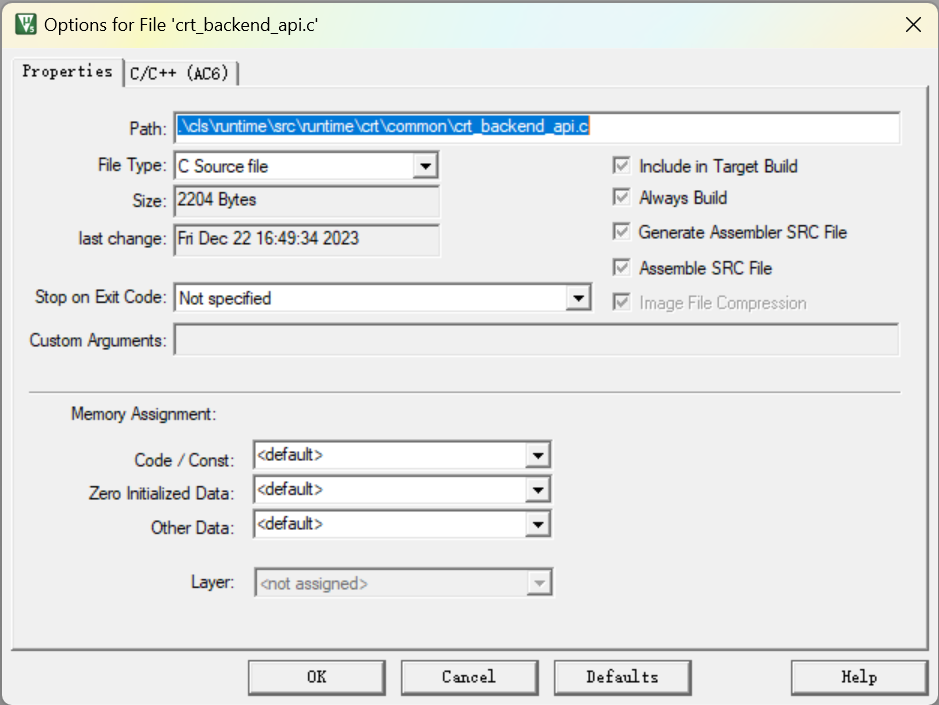
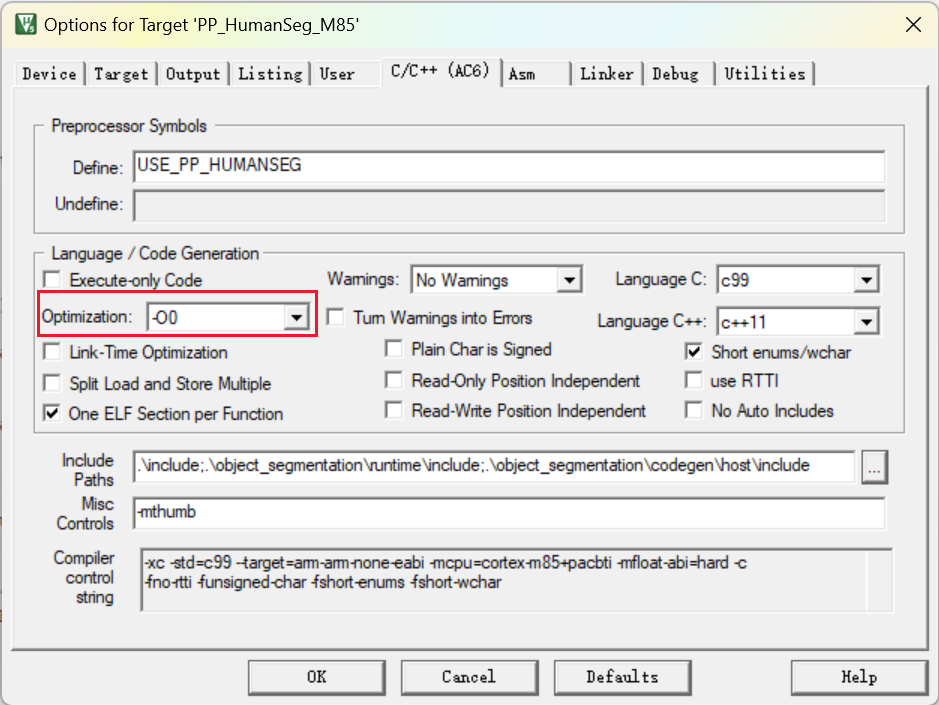
6.2 修改代码优化级别
把代码优化级别改为不优化,否则可能因为优化执行顺序而产生错误。
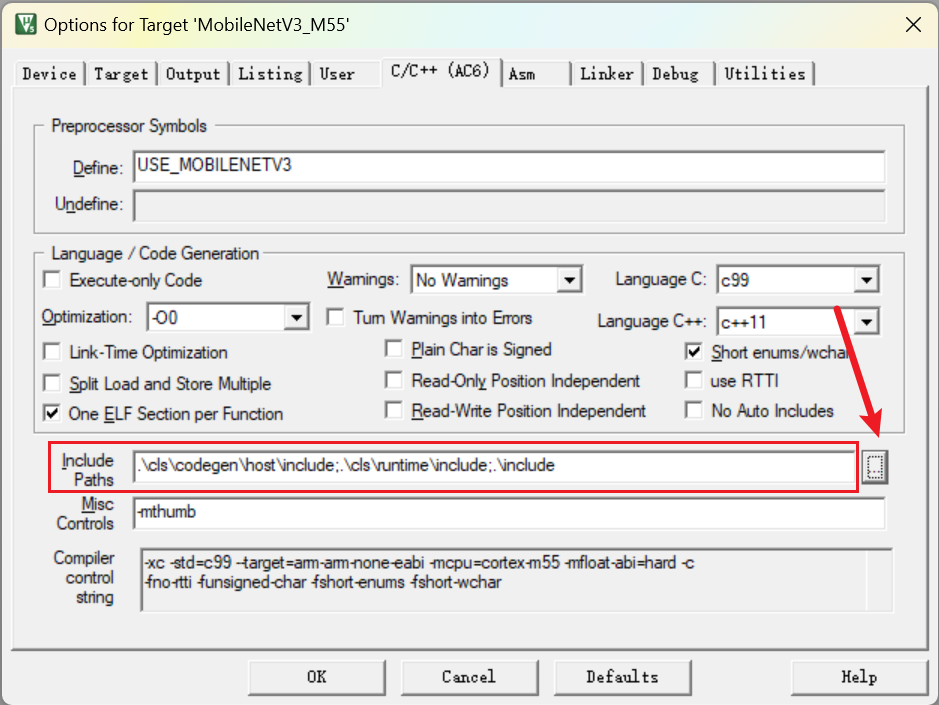
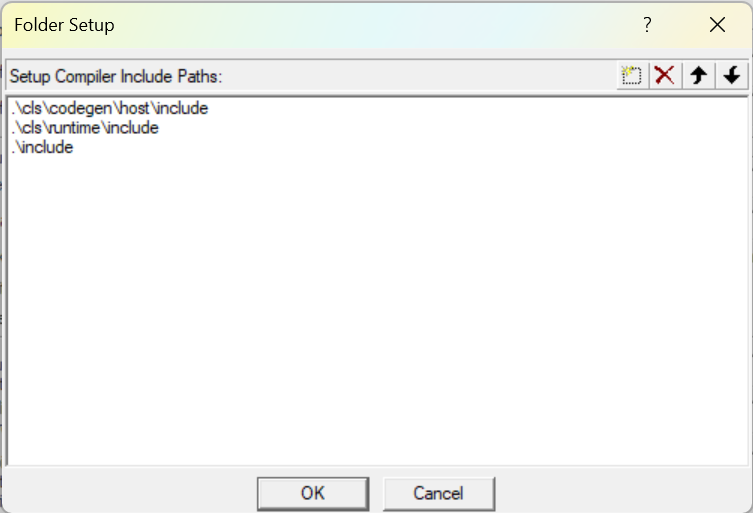
6.3 设置头文件文件夹路径
6.4 导入 CMSIS-DSP 和 CMSIS-NN
在Keil中导入 CMSIS-DSP 和 CMSIS-NN

6.5 配置 sct 文件
TVM 的例程中使用的是 ld 文件的形式来定义变量储存在什么位置,Keil 中则是用 sct 文件的形式来定义该内容。
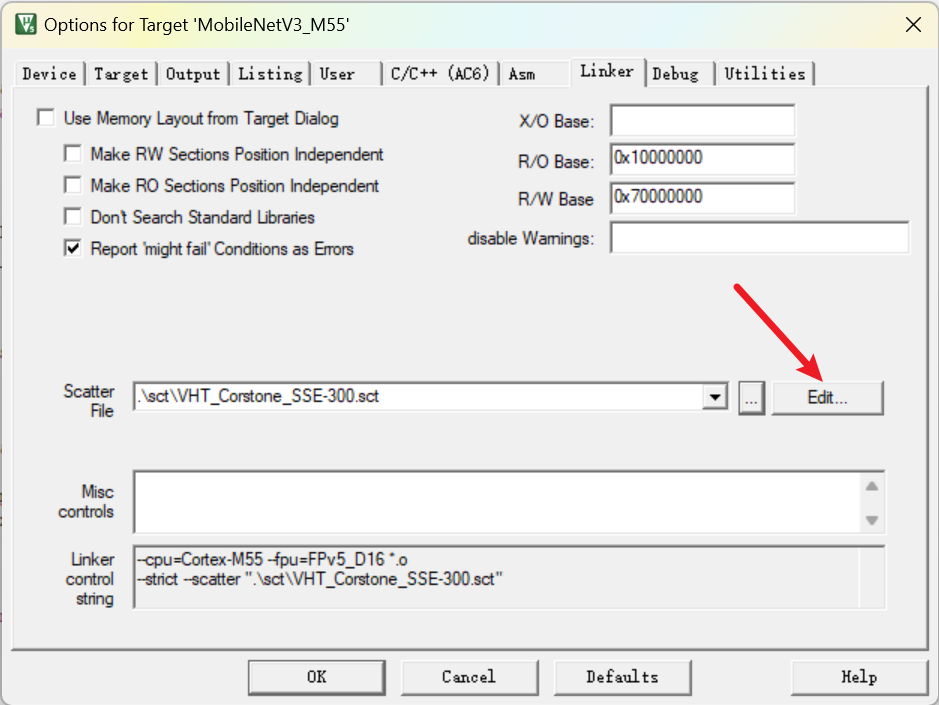
如果你使用的模拟器是 VHT_MPS3_Corstone_SSE-300,修改 sct 文件如下:
#! armclang --target=arm-arm-none-eabi -march=armv8.1-m.main -E -xc
LOAD_REGION_0       0x00000000                  0x00080000
{
    ; ITCM is used for code
    itcm.bin        0x00000000                  0x00080000
    {
        *.o (RESET, +First)
        .ANY (+RO)
    }

    ; DTCM is used for any other RW or ZI data.
    dtcm.bin        0x20000000                  0x00060000
    {
        .ANY(+ZI +RW)
    }

    ; 32 kiB of stack space within the DTCM region.
    ARM_LIB_STACK   0x20060000 EMPTY ALIGN 8    0x00008000
    {}

    ; This region should have 3 cycle read latency from both Cortex-M55 and Ethos-U NPU
    isram.bin       0x31000000  UNINIT ALIGN 16 0x00200000
    {
    }
}

; Second load region (DDR)
LOAD_REGION_1       0x60000000                  0x02000000
{
    ; 32 MiB of DDR space for neural network model input vectors and labels.
    ddr.bin        0x60000000 ALIGN 16         0x02000000
    {
        *.o (.bss.noinit.*)
        *.o (.rodata.tvm)
        *.o (.data.tvm)
    }

    ; First 256kiB of BRAM (FPGA SRAM) used for RO data.
    bram.bin        0x11000000          ALIGN 8 0x00040000
    {
        ; RO data (incl. unwinding tables for debugging)
        ;.ANY (+RO-DATA)
    }

    ; 768 KiB of remaining part of the 1MiB BRAM used as heap space.
    ARM_LIB_HEAP    0x11040000 EMPTY ALIGN 8    0x000C0000
    {

    }

    ; 32 MiB of model space for run-time load of model
    runtime_model   0x90000000 EMPTY ALIGN 16   0x02000000
    {

    }

    ; 16 MiB of IFM space for run-time loading (FVP only)
    runtime_ifm     0x92000000 EMPTY ALIGN 16   0x01000000
    {}

    ; 16 MiB of OFM space for run-time loading (FVP only)
    runtime_ofm     0x93000000 EMPTY ALIGN 16   0x01000000
    {}
}
如果你使用的模拟器是 VHT_Corstone_SSE-310,修改 sct 文件如下:
LOAD_REGION_0       0x11000000                  0x00200000
{
    bram.bin        0x11000000                  0x00080000
    {
        *.o (RESET, +First)
        .ANY (+RO)
    }

    data.bin        0x11080000 ALIGN 8          0x00080000
    {
        .ANY(+ZI +RW)
    }

    ARM_LIB_HEAP    0x11100000 EMPTY ALIGN 8    0x000C0000
    {}

    ARM_LIB_STACK   0x30000000 EMPTY ALIGN 8    0x00008000
    {}

    isram.bin       0x31000000  UNINIT ALIGN 16 0x00200000
    {
    }
}

LOAD_REGION_1       0x70000000                  0x02000000
{
    ddr.bin        0x70000000 ALIGN 16         0x02000000
    {
        *.o (.bss.noinit.*)
        *.o (.rodata.tvm)
        *.o (.data.tvm)
    }

    runtime_model   0x90000000 EMPTY ALIGN 16   0x02000000
    {}

    runtime_ifm     0x92000000 EMPTY ALIGN 16   0x01000000
    {}

    runtime_ofm     0x93000000 EMPTY ALIGN 16   0x01000000
    {}
}
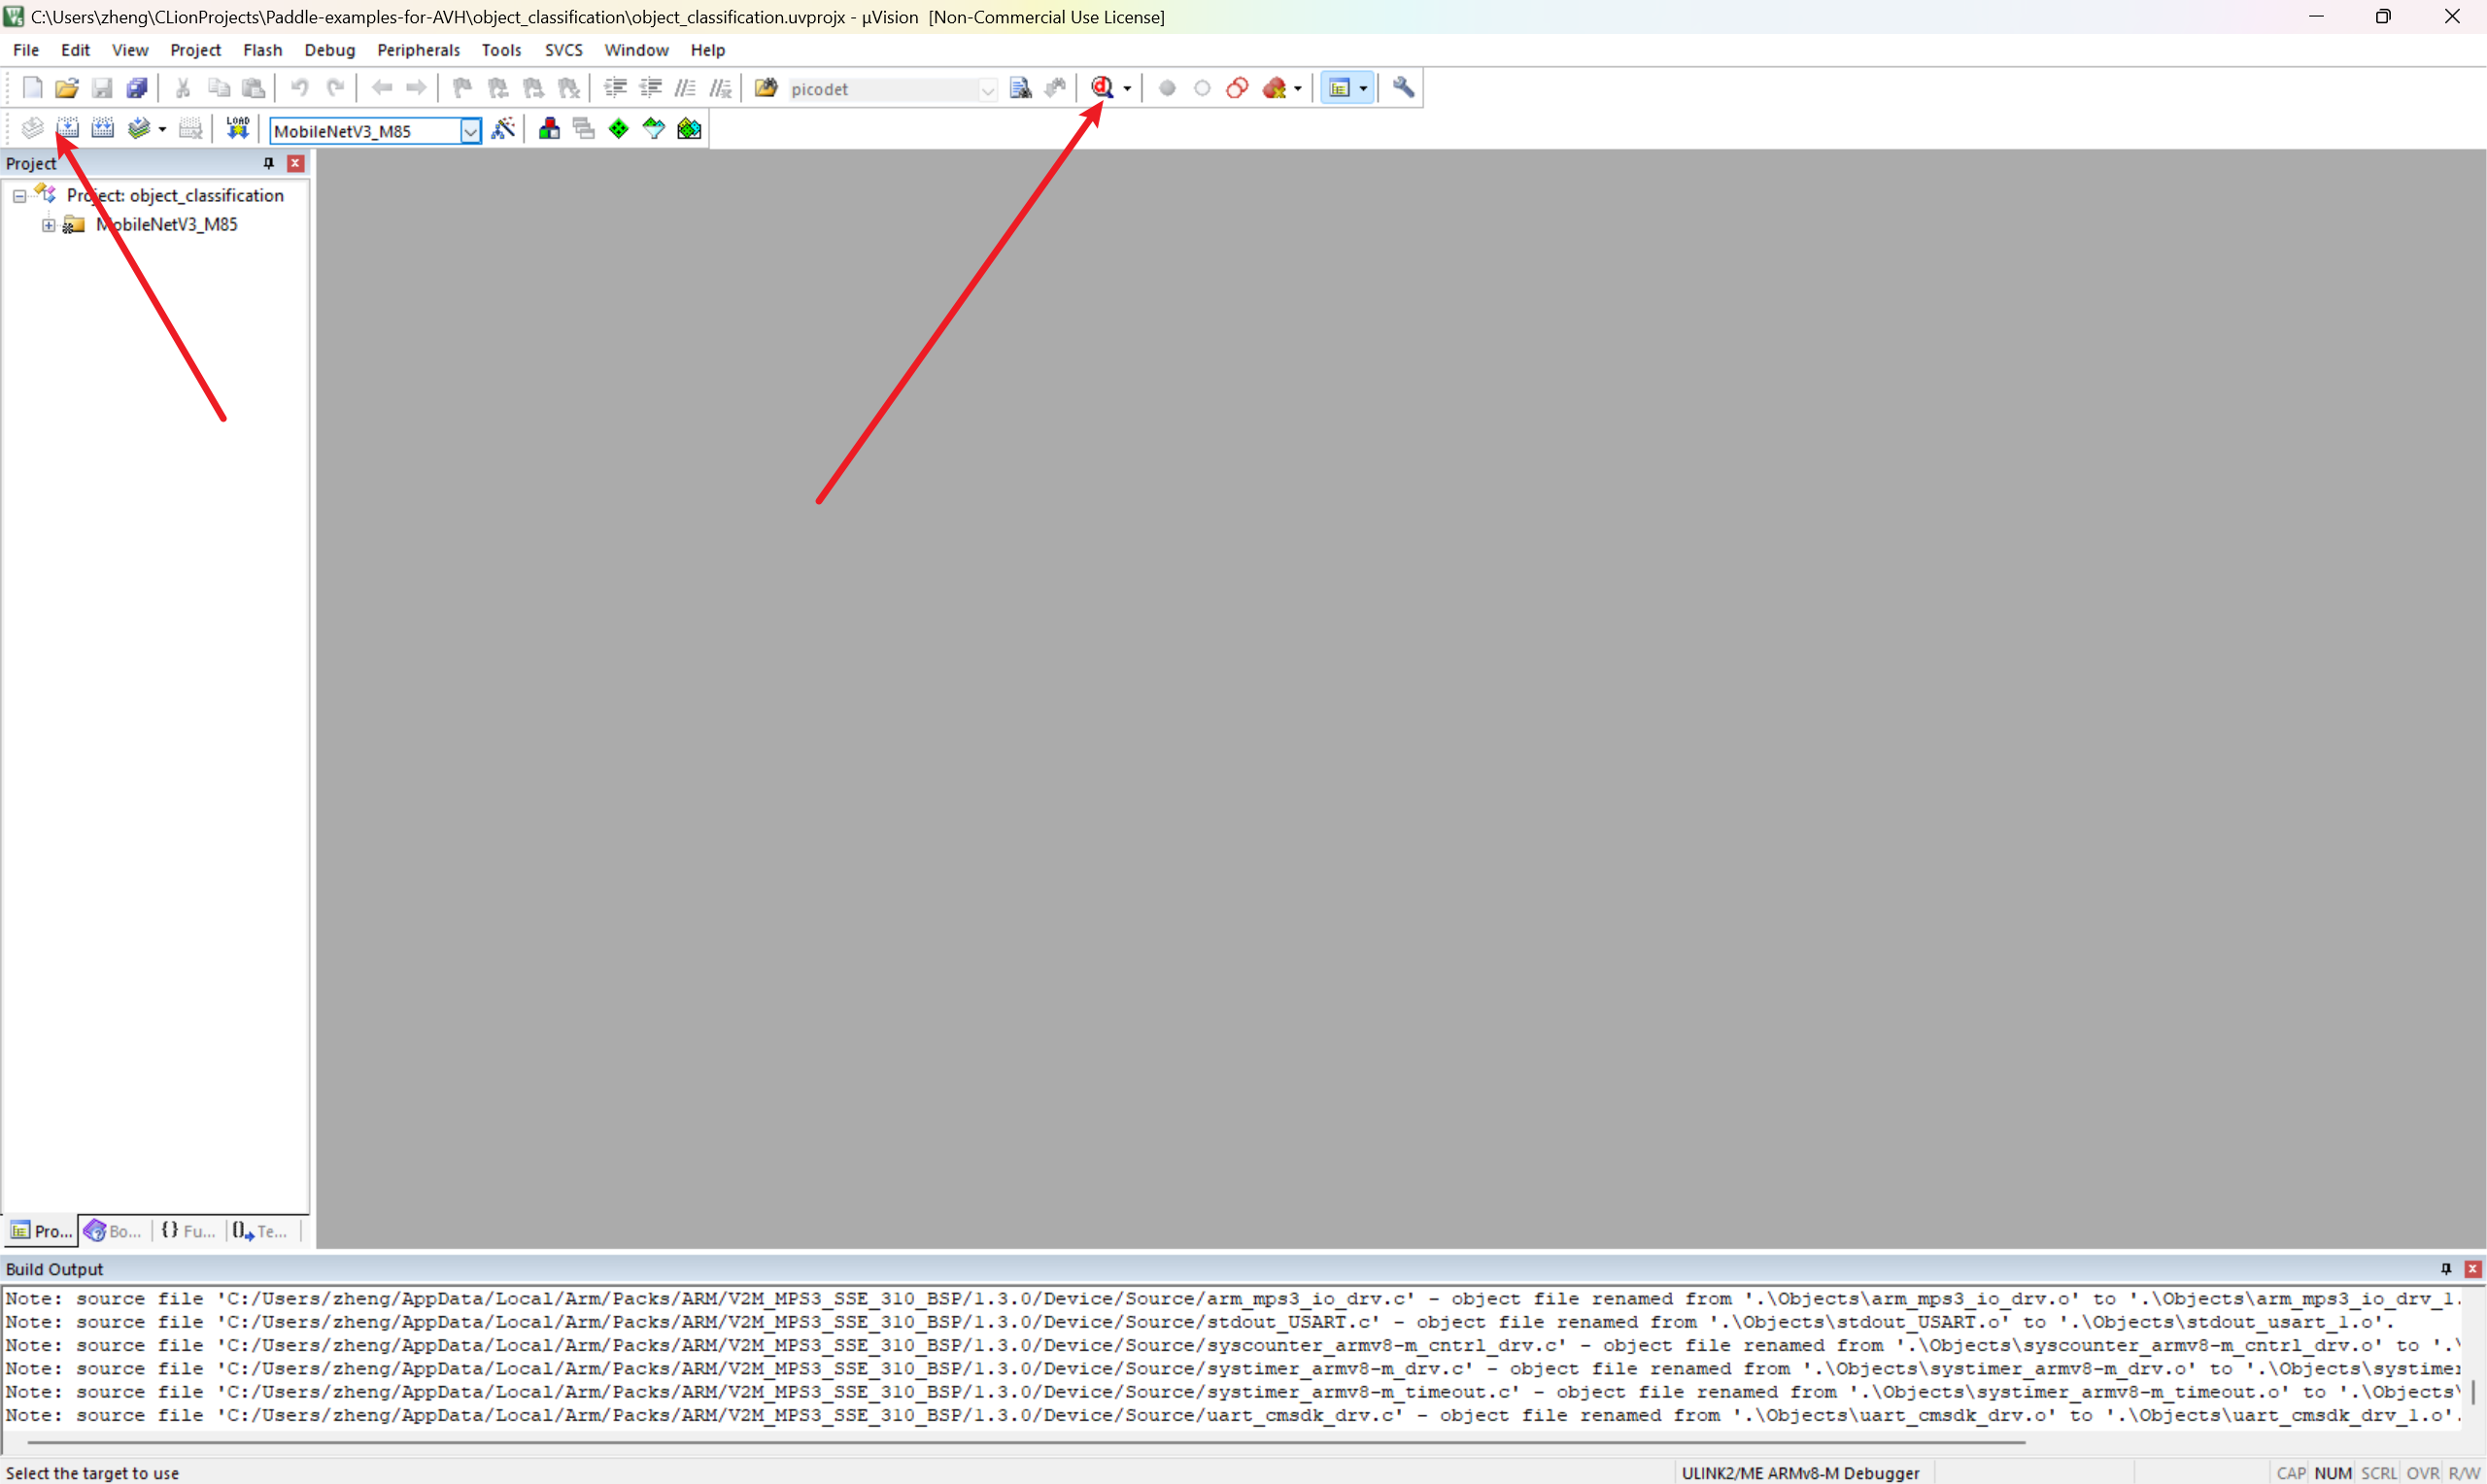
7 编译并运行代码
点击编译并进入 Debug 模型
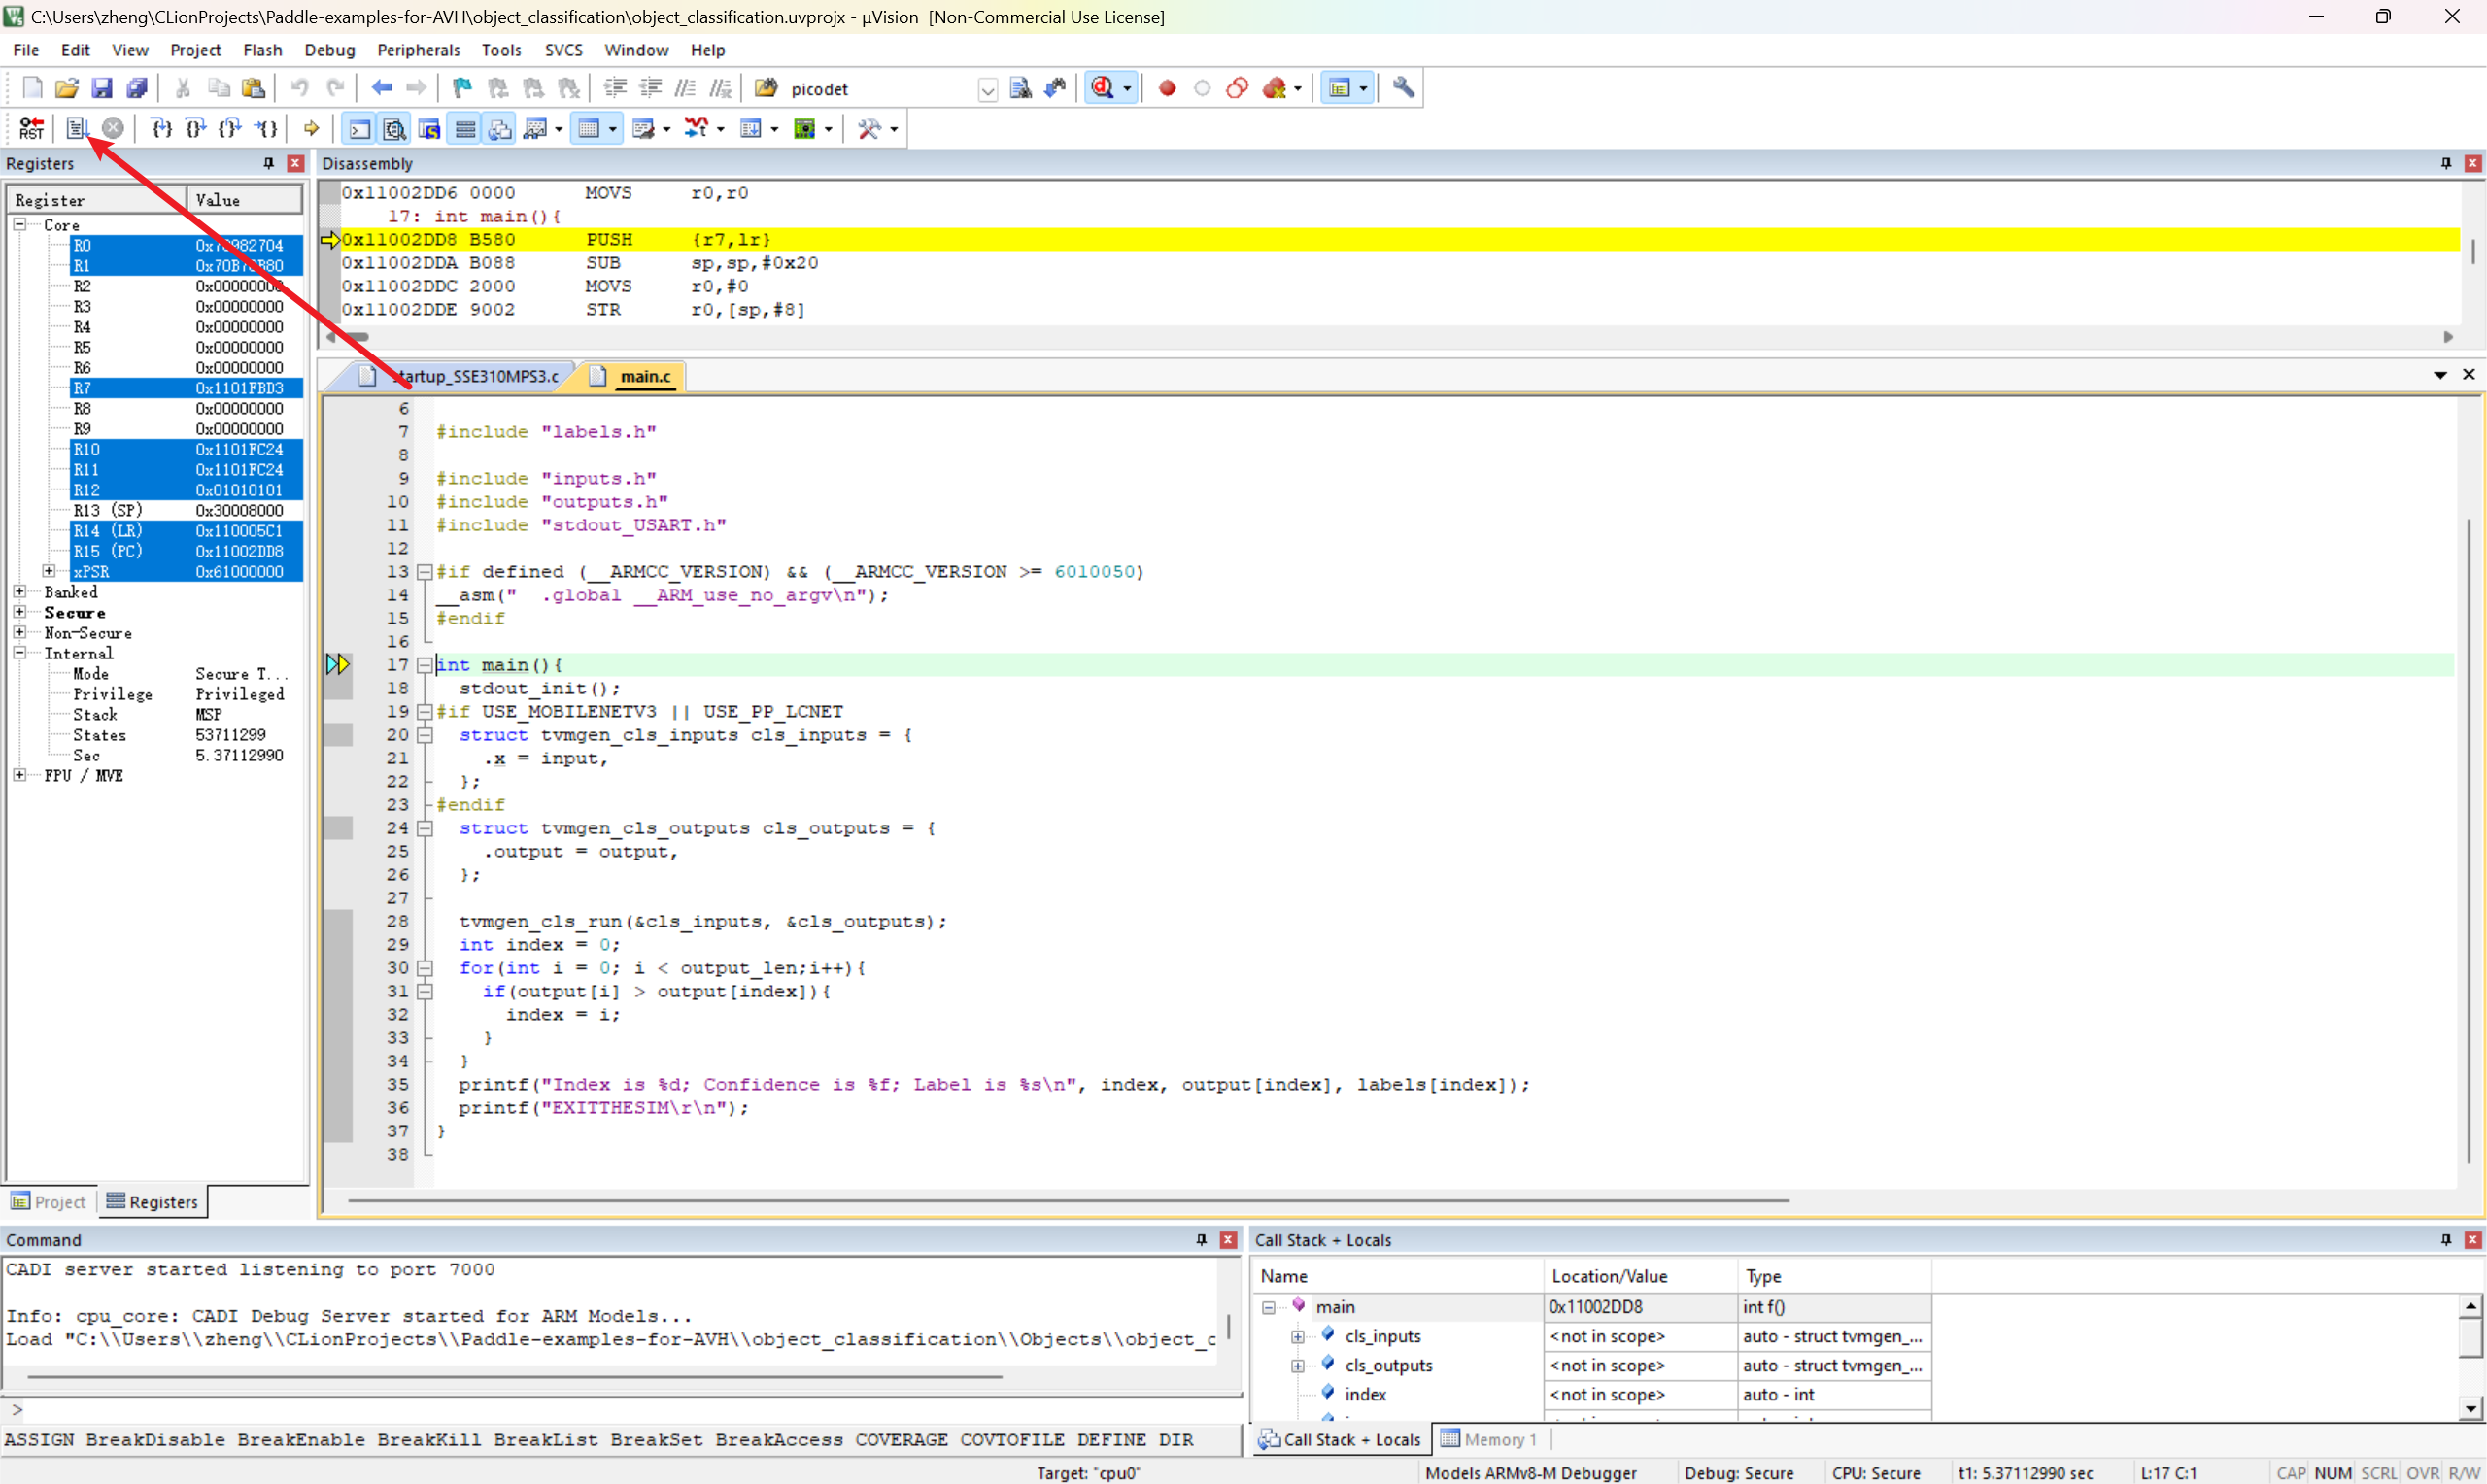
开始执行代码
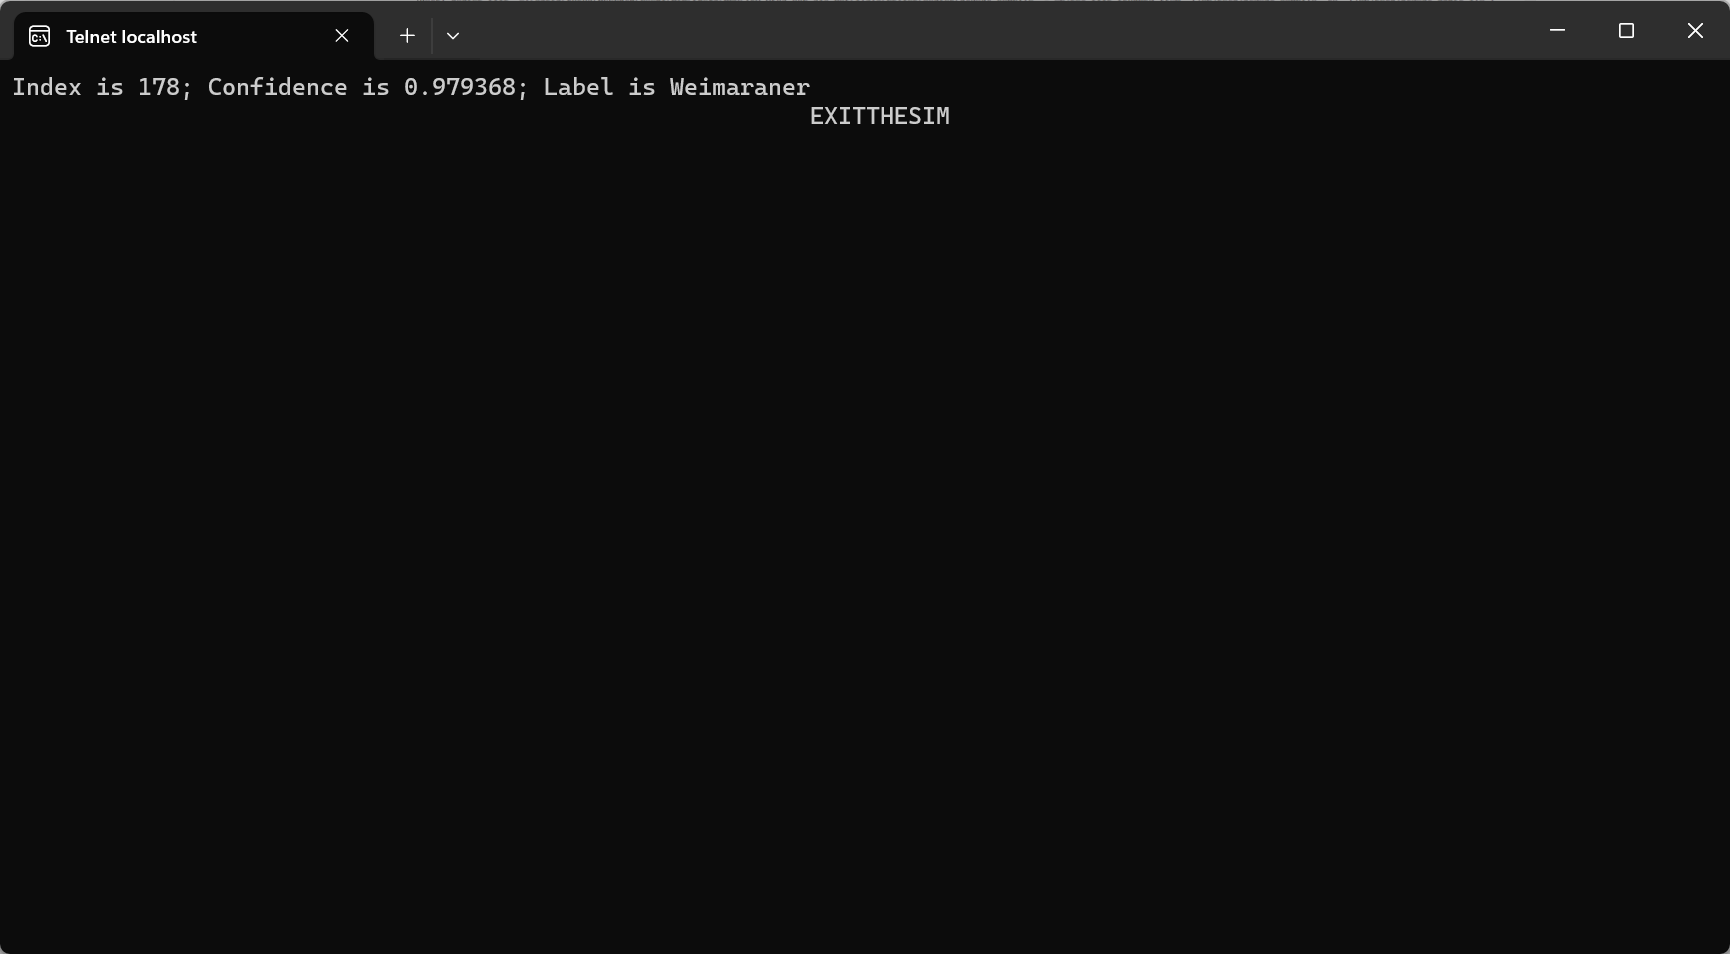
模拟器成功输出类别信息
8 参考资料
以下资料可能会帮助到你
- TVM TinyML Optimization
- tvm/apps/microtvm/cmsisnn at main · apache/tvm
- mlek-cmsis-pack-examples/object-detection at main · Arm-Examples/mlek-cmsis-pack-examples
- GitHub - ArmDeveloperEcosystem/Paddle-examples-for-AVH: 🤖 Use PaddlePaddle for OCR and Object Detection on Arm Cortex-M with Arm Virtual Hardware (AVH)
- GitHub - apache/tvm: Open deep learning compiler stack for cpu, gpu and specialized accelerators

 浙公网安备 33010602011771号