
对nacos 的启动配置加载源码解析
nacos 源码的个人随笔记录
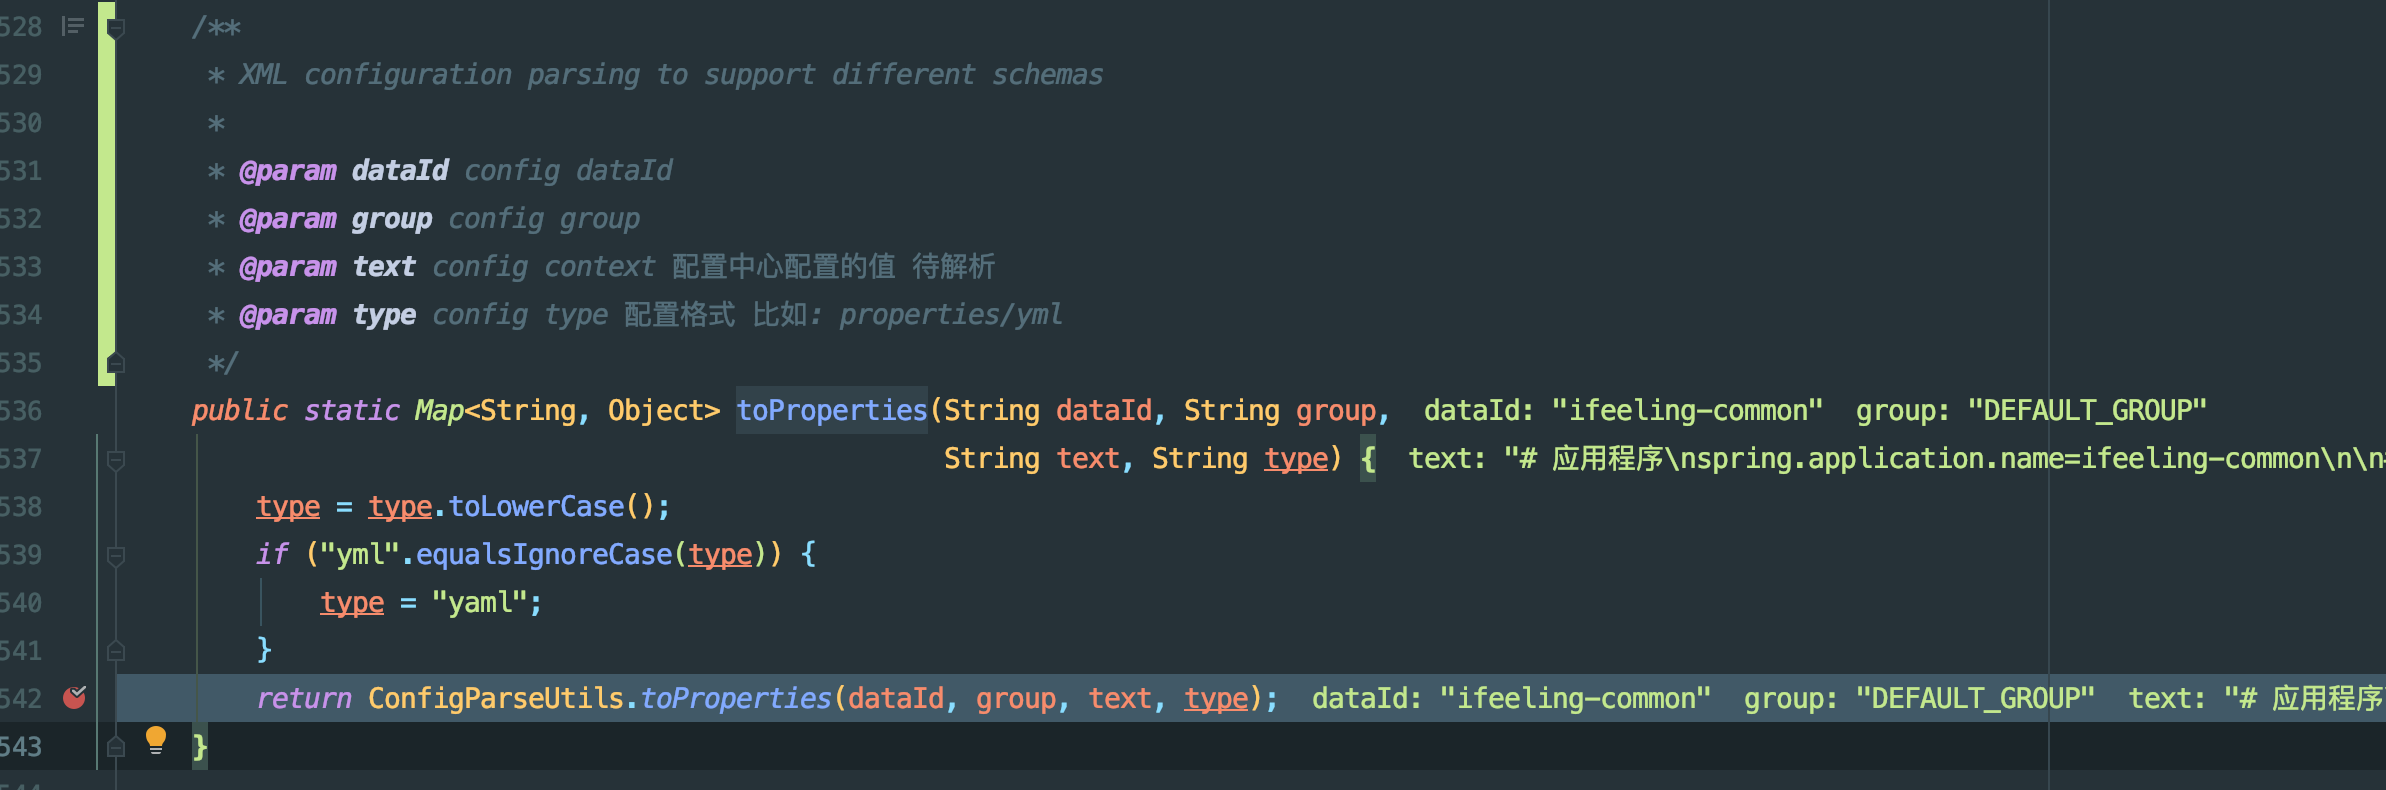
com.alibaba.nacos.spring.util.NacosUtils#toProperties(java.lang.String, java.lang.String, java.lang.String, java.lang.String)
com.alibaba.nacos.spring.util.ConfigParseUtils
配置文本解析的工具类
nacos配置中心配置的内容,被nacos读取后,最原始是一个文本,解析这个文本nacos是定义了一个解析接口 com.alibaba.nacos.spring.util.ConfigParse
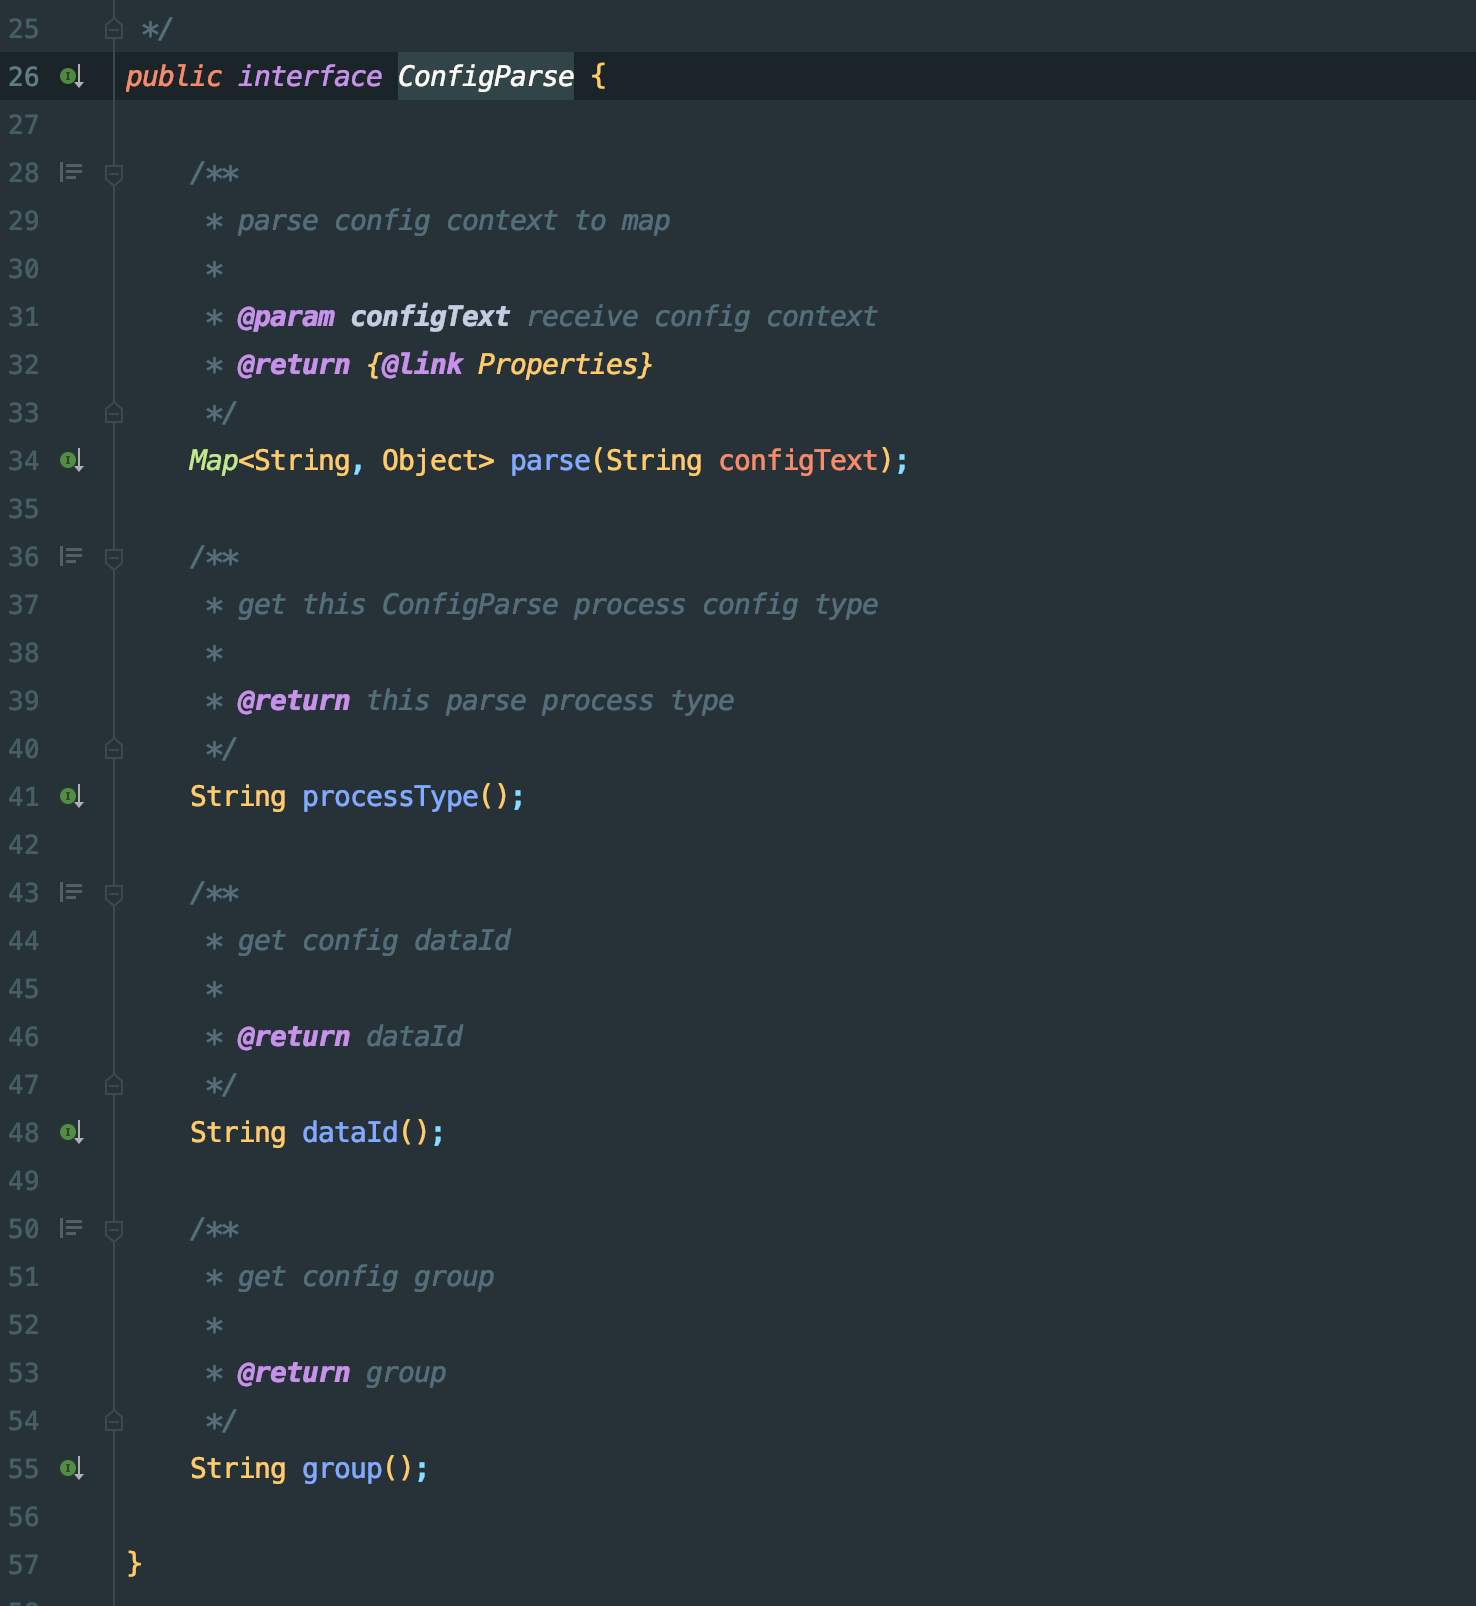
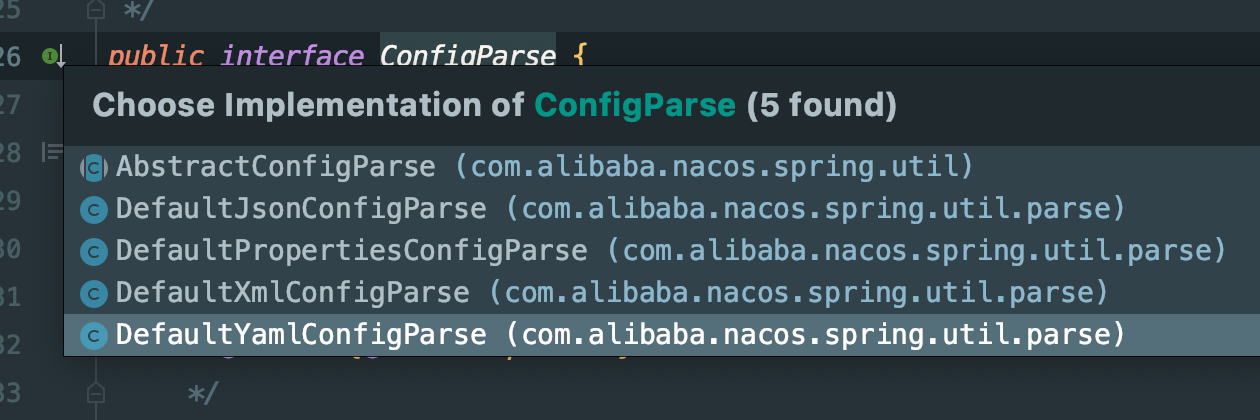
核心方法就是parse方法,传入的String类型configText 就是读取到原始的配置文本。nacos 默认配置了4中解析方式,分别是 json properties xml yaml 格式解析器
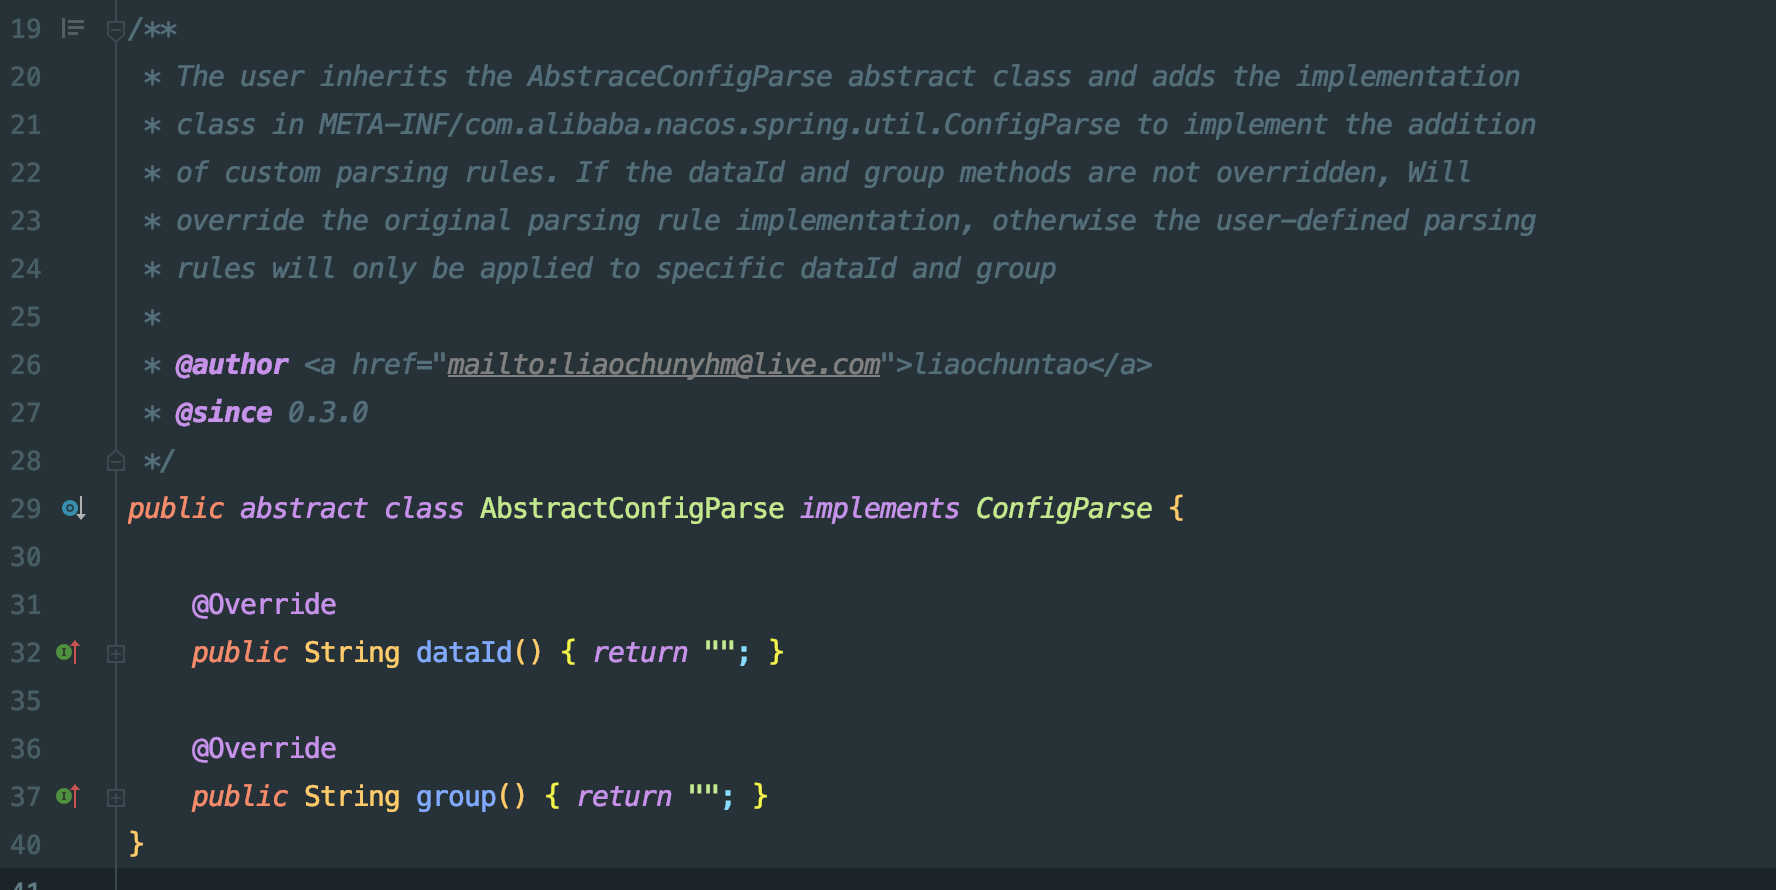
AbstractConfigParse 这是一个抽象接口,作用看类上注释,用户可以继承,自己实现自定义的解析器,只需要把自己实现的解析器方法类目录
META-INF/services/com.alibaba.nacos.spring.util.ConfigParse 这个文件下,主要原理还是 使用的Java SPI
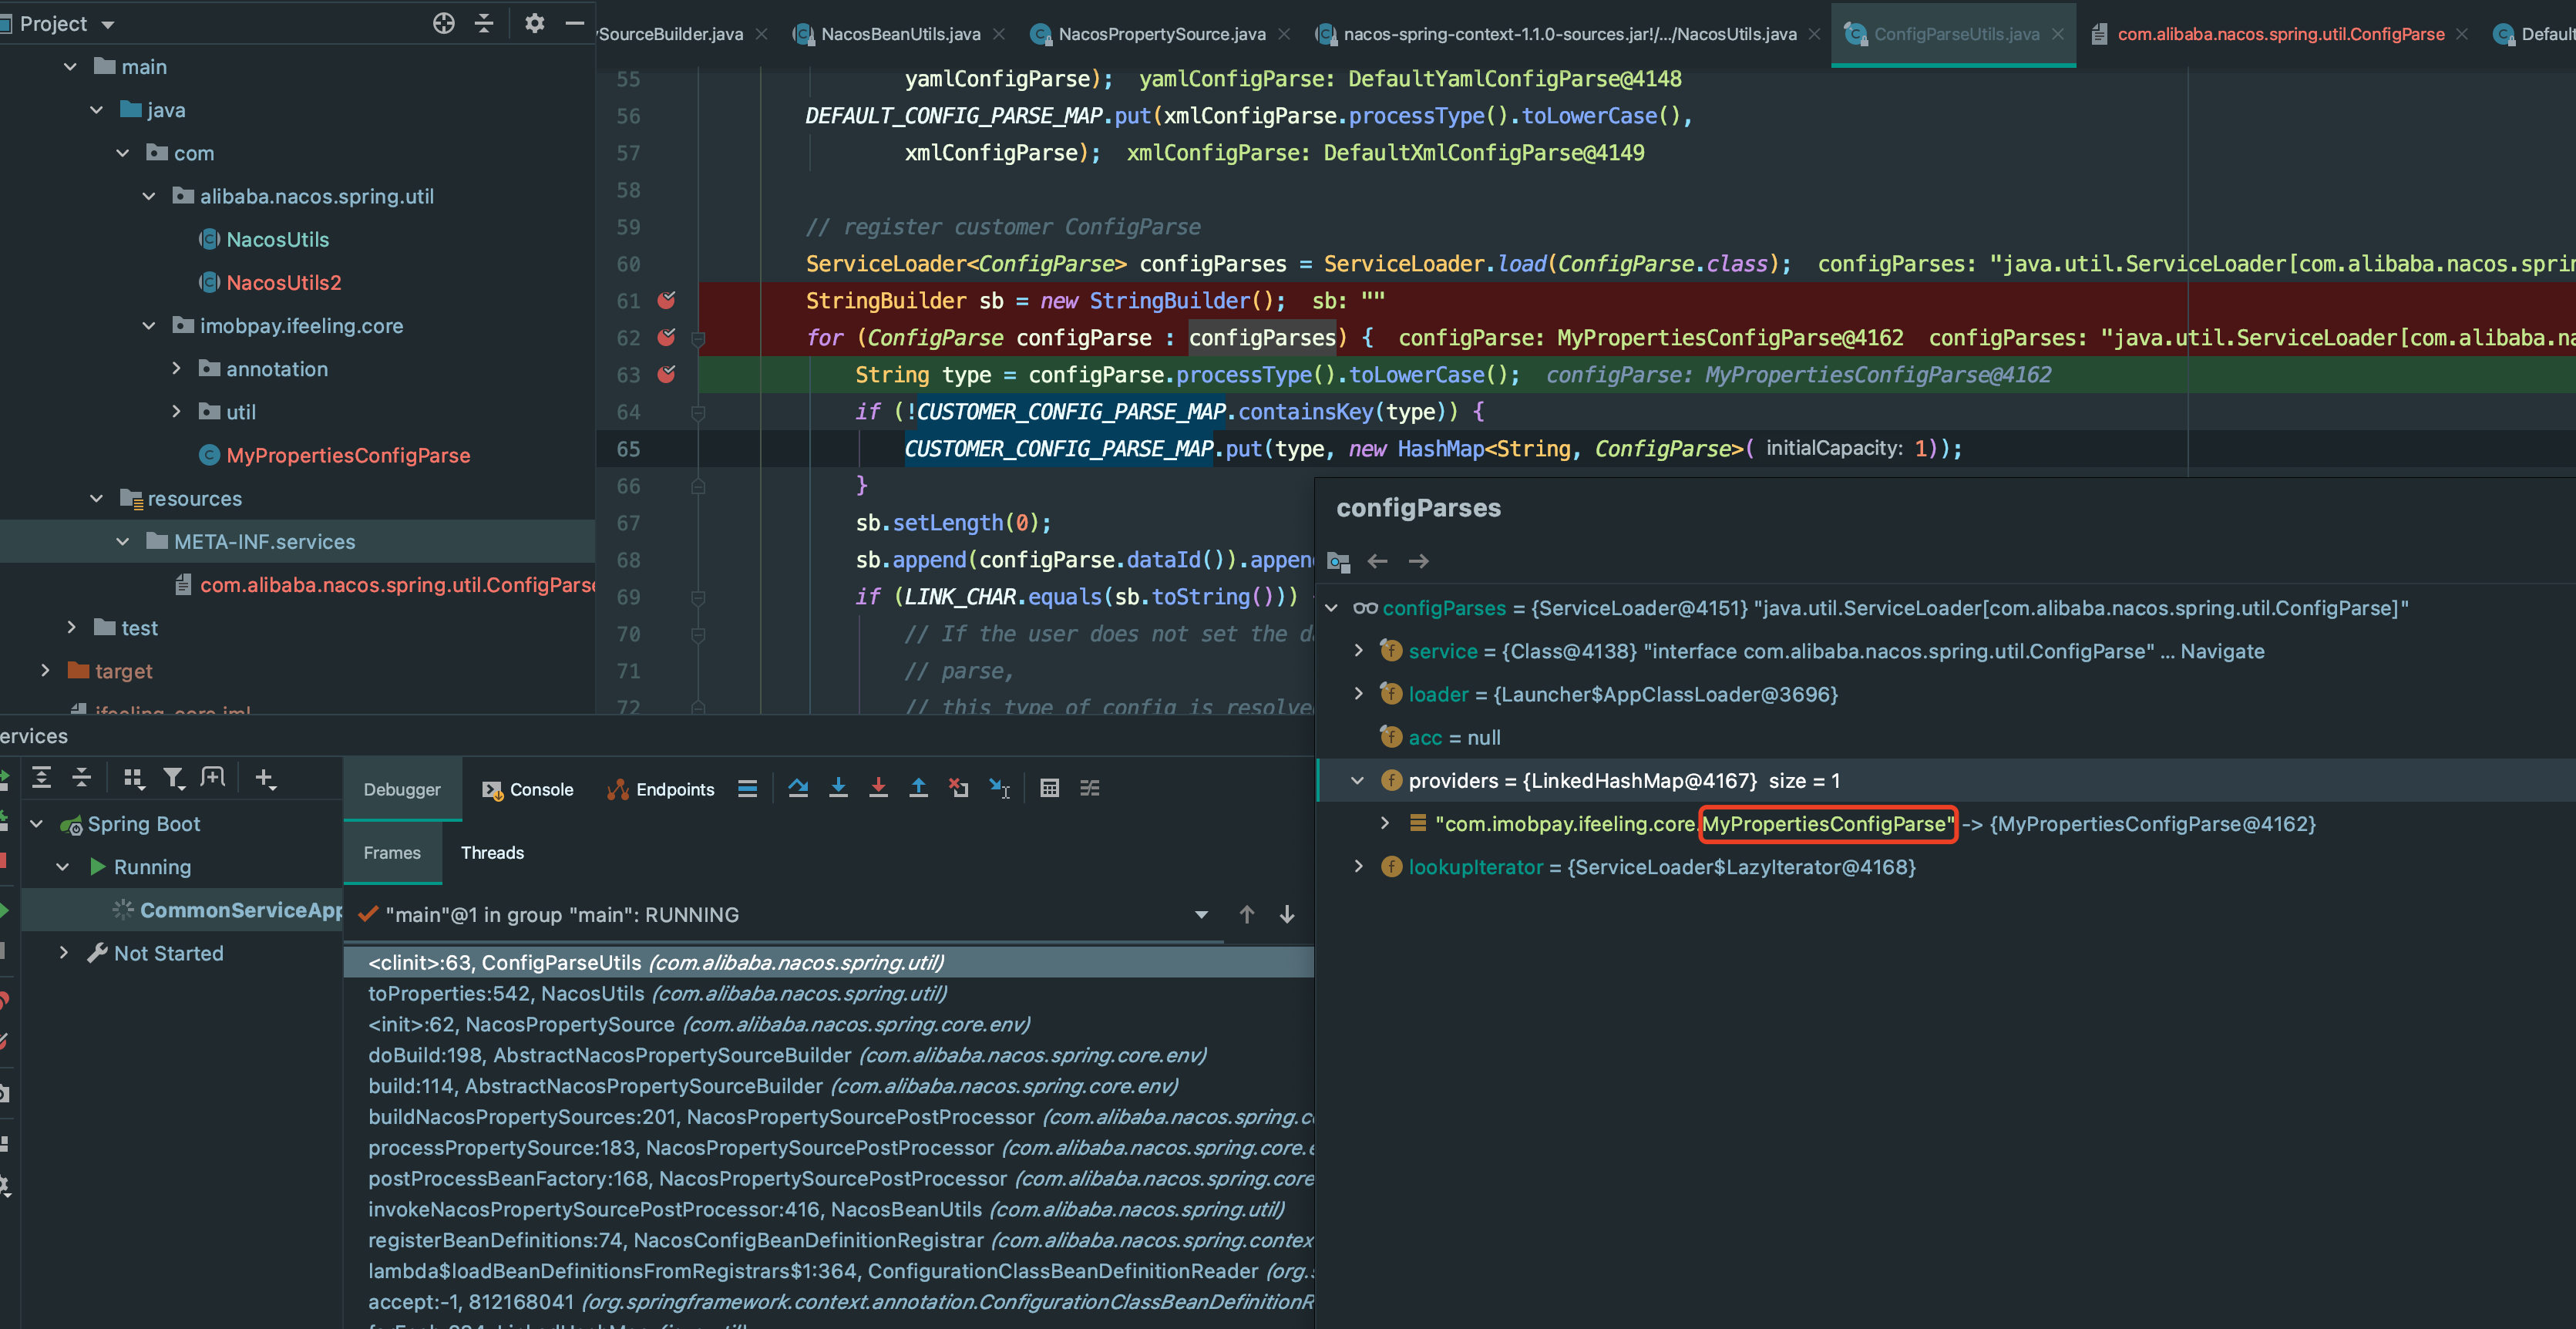
自定义的解析器也是在com.alibaba.nacos.spring.util.ConfigParseUtils 类中使用静态代码块进行加载,加载到CUSTOMER_CONFIG_PARSE_MAP 这个变量中

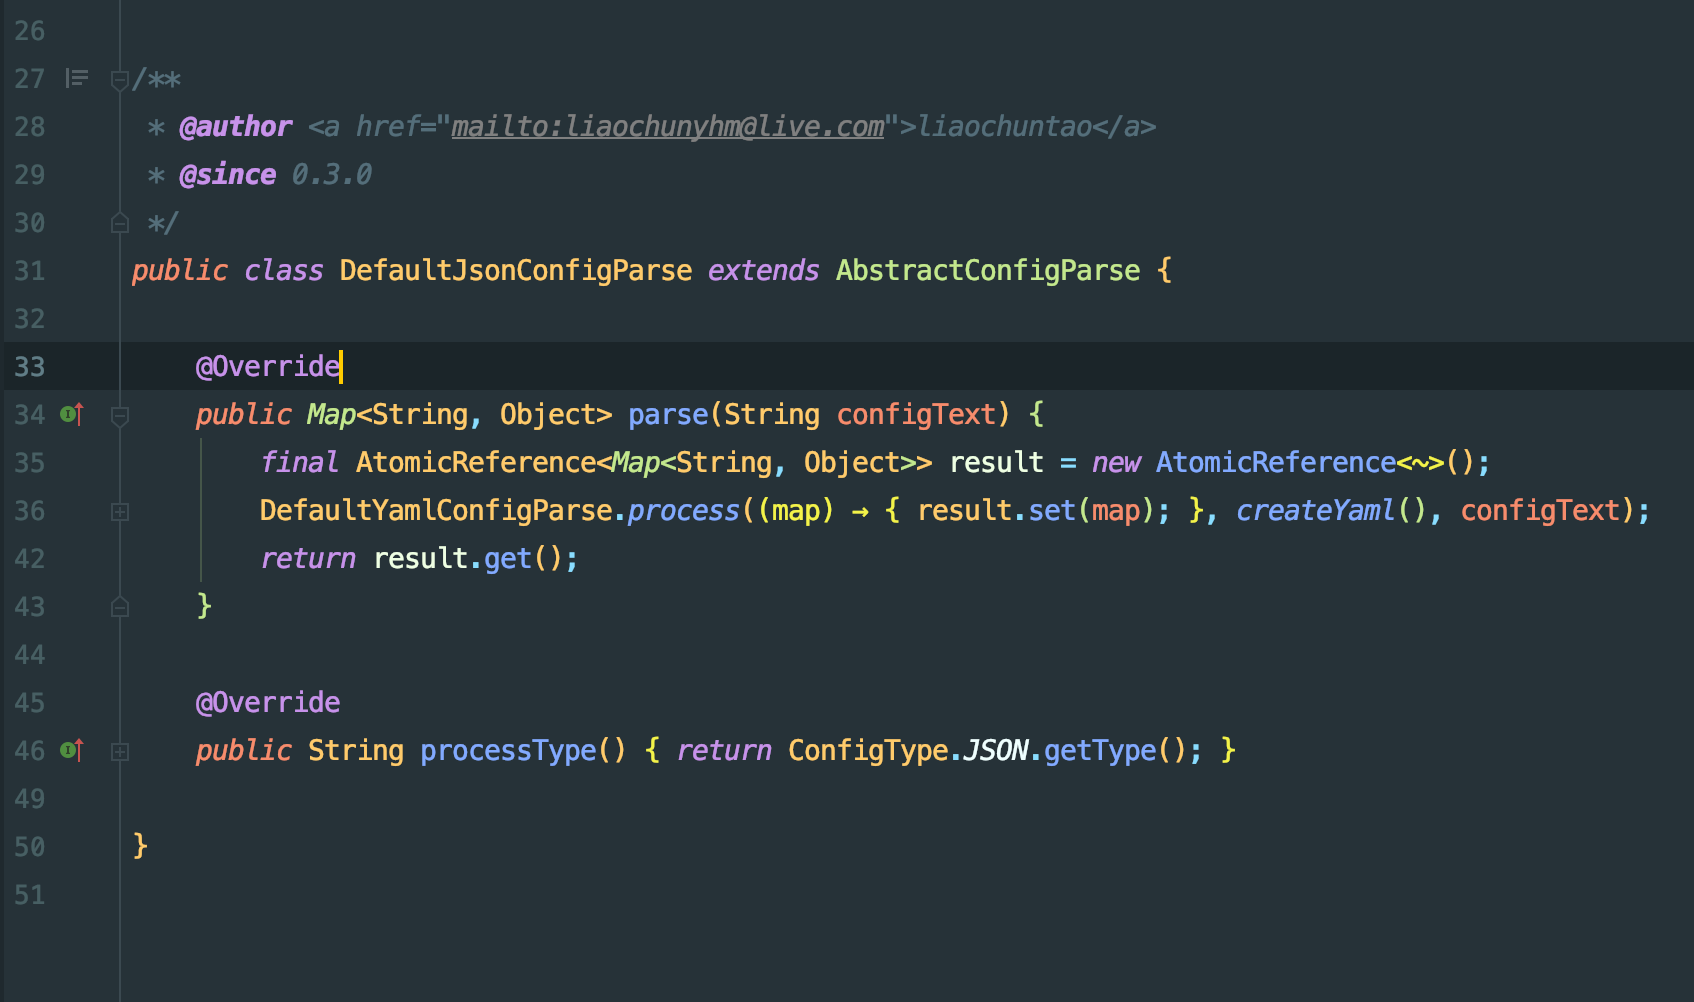
可以随便看一个内置的解析器是如何编写的
加载到自定义解析器如何使用呢?
还是在 com.alibaba.nacos.spring.util.ConfigParseUtils 这个类中 com.alibaba.nacos.spring.util.ConfigParseUtils#toProperties(java.lang.String, java.lang.String, java.lang.String, java.lang.String) 这样一个方法,这个类整体比较简单,直接把完整代码贴出来
public final class ConfigParseUtils {

   private static final String LINK_CHAR = "#@#";
   private static Map<String, ConfigParse> DEFAULT_CONFIG_PARSE_MAP = new HashMap(8);
   private static Map<String, Map<String, ConfigParse>> CUSTOMER_CONFIG_PARSE_MAP = new HashMap(
         8);

   static {

      DefaultJsonConfigParse jsonConfigParse = new DefaultJsonConfigParse();
      DefaultPropertiesConfigParse propertiesConfigParse = new DefaultPropertiesConfigParse();
      DefaultYamlConfigParse yamlConfigParse = new DefaultYamlConfigParse();
      DefaultXmlConfigParse xmlConfigParse = new DefaultXmlConfigParse();

      // register nacos default ConfigParse
      DEFAULT_CONFIG_PARSE_MAP.put(jsonConfigParse.processType().toLowerCase(),
            jsonConfigParse);
      DEFAULT_CONFIG_PARSE_MAP.put(propertiesConfigParse.processType().toLowerCase(),
            propertiesConfigParse);
      DEFAULT_CONFIG_PARSE_MAP.put(yamlConfigParse.processType().toLowerCase(),
            yamlConfigParse);
      DEFAULT_CONFIG_PARSE_MAP.put(xmlConfigParse.processType().toLowerCase(),
            xmlConfigParse);

      // register customer ConfigParse
      ServiceLoader<ConfigParse> configParses = ServiceLoader.load(ConfigParse.class);
      StringBuilder sb = new StringBuilder();
      for (ConfigParse configParse : configParses) {
         String type = configParse.processType().toLowerCase();
         if (!CUSTOMER_CONFIG_PARSE_MAP.containsKey(type)) {
            CUSTOMER_CONFIG_PARSE_MAP.put(type, new HashMap<String, ConfigParse>(1));
         }
         sb.setLength(0);
         sb.append(configParse.dataId()).append(LINK_CHAR).append(configParse.group());
         if (LINK_CHAR.equals(sb.toString())) {
            // If the user does not set the data id and group processed by config
            // parse,
            // this type of config is resolved globally by default
            DEFAULT_CONFIG_PARSE_MAP.put(type, configParse);
         }
         else {
            CUSTOMER_CONFIG_PARSE_MAP.get(type).put(sb.toString(), configParse);
         }
      }

      DEFAULT_CONFIG_PARSE_MAP = Collections.unmodifiableMap(DEFAULT_CONFIG_PARSE_MAP);
      CUSTOMER_CONFIG_PARSE_MAP = Collections
            .unmodifiableMap(CUSTOMER_CONFIG_PARSE_MAP);
   }

   // 使用默认的解析器进行解析
   public static Map<String, Object> toProperties(final String context, String type) {

      if (context == null) {
         return new LinkedHashMap<String, Object>();
      }
      // Again the type lowercase, ensure the search
      type = type.toLowerCase();

      if (DEFAULT_CONFIG_PARSE_MAP.containsKey(type)) {
         ConfigParse configParse = DEFAULT_CONFIG_PARSE_MAP.get(type);
         return configParse.parse(context);
      }
      else {
         throw new UnsupportedOperationException(
               "Parsing is not yet supported for this type profile : " + type);
      }
   }


   public static Map<String, Object> toProperties(final String dataId,
         final String group, final String context, String type) {

      if (context == null) {
         return new LinkedHashMap<String, Object>();
      }
      // Again the type lowercase, ensure the search
      type = type.toLowerCase();

      String configParseKey = dataId + LINK_CHAR + group;
      // 如果自定义解析器存储的map不为空,读取到了解析器,那么直接走else 使用自定义解析器
      if (CUSTOMER_CONFIG_PARSE_MAP.isEmpty() || LINK_CHAR.equals(configParseKey)) {
         return toProperties(context, type);
      }
      if (CUSTOMER_CONFIG_PARSE_MAP.get(type) == null
            || CUSTOMER_CONFIG_PARSE_MAP.get(type).isEmpty()) {
         return toProperties(context, type);
      }
      if (CUSTOMER_CONFIG_PARSE_MAP.get(type).get(configParseKey) == null) {
         return toProperties(context, type);
      }
      else {
         if (CUSTOMER_CONFIG_PARSE_MAP.containsKey(type)) {
            ConfigParse configParse = CUSTOMER_CONFIG_PARSE_MAP.get(type)
                  .get(configParseKey);
            if (configParse == null) {
               throw new NoSuchElementException(
                     "This config can't find ConfigParse to parse");
            }
            return configParse.parse(context);
         }
         else {
            throw new UnsupportedOperationException(
                  "Parsing is not yet supported for this type profile : " + type);
         }
      }
   }

}
|
我们自定义一个解析器,这里直接把源码中的解析器的代码复制出来,到一个新的类文件中,最后debug运行,可以看到我们自定义的解析器被加载到了
如果使用自定义的解析器,需要注意的是 一定要重写com.imobpay.ifeeling.core.MyPropertiesConfigParse#dataId 和 com.imobpay.ifeeling.core.MyPropertiesConfigParse#group 否则,最后即使加载进入,但是最后还是使用默认的解析器,因为在 ConfigParseUtils 类中 CUSTOMER_CONFIG_PARSE_MAP.isEmpty() || LINK_CHAR.equals(configParseKey) 有个这样的判断,在83行。
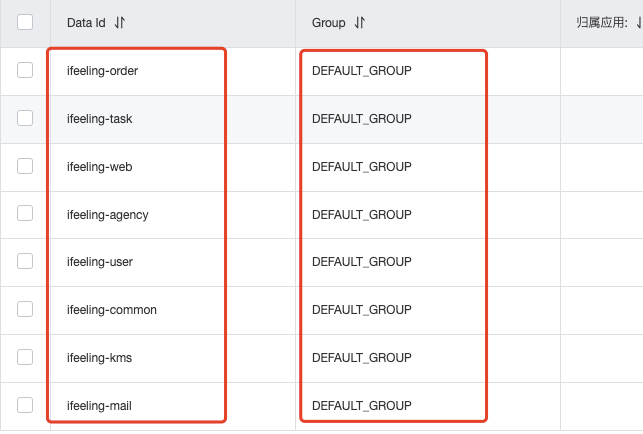
自定义的解析器 dataId 方法和group 方法返回值是什么呢,这个返回值其实是 nacos 配置中那两列的对应值,比如 ifeeling-order DEFAULT-GROUP 最后在源码中拼接成 ifeeling-order#@#DEFAULT-GROUP,在ConfigParseUtils类中最终需要以这个key 从自定义的解析器存储map中获取,如果没有找到,那么还是去使用默认定义好的解析器,在ConfigParseUtils 类 90 行代码
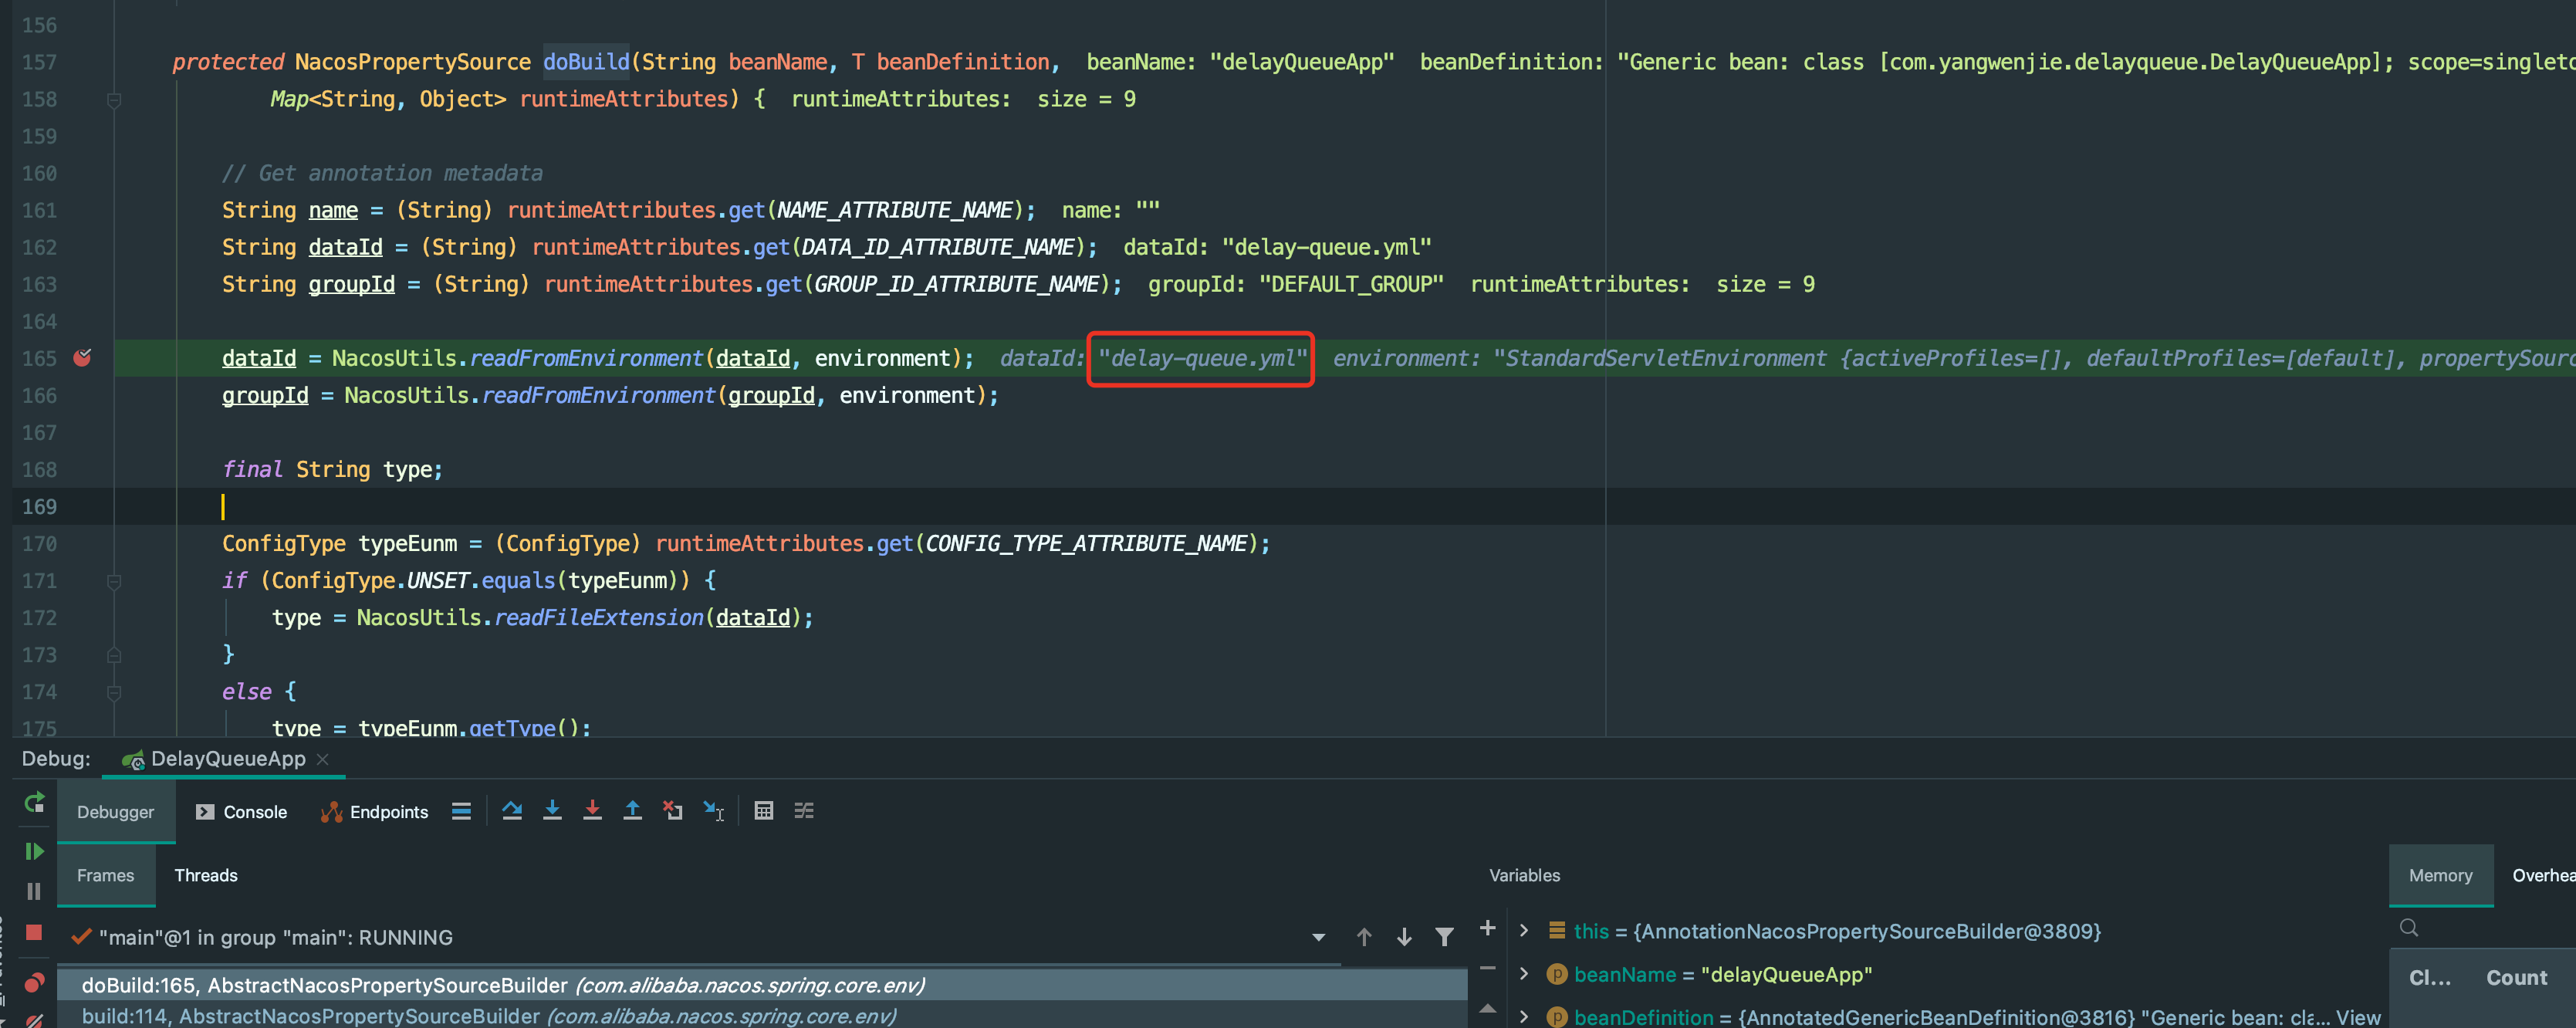
此外,nacos 和 spring boot 整合时, @NacosPropertySource(dataId = "delay-queue.yml", autoRefreshed = true) 这个注解中 dataId 参数的值,如果不加文件后缀.yml 那么即使你nacos服务端配置的是yaml 格式,那么最终在应用启动时nacos还是按.properties 格式进行读取配置,这个需要注意!!具体可以打断点在 com.alibaba.nacos.spring.core.env.AbstractNacosPropertySourceBuilder#doBuild 这个方法
并且 nacos 配置中心配置的值 dataId 也必须是和上面的dataId一致


本文来自博客园,作者:margo,转载请注明原文链接:https://www.cnblogs.com/ZMargo/articles/15007781.html

 浙公网安备 33010602011771号