SpringBoot初探(上传文件)
学了Spring,SpringMVC,Mybatis这一套再来看SpringBoot,心里只有一句握草,好方便
这里对今天做的东西做个总结,然后在这之间先安利一个热部署的工具,叫spring-DevTools,用这个的好处就是省去了我们以往改动代码
还要重启项目才能测试效果的麻烦,项目比较小的时候倒还不要紧,万一项目大了,编译要好一会,那么重启会占用我们大量时间
引入方式用maven即可
<!-- https://mvnrepository.com/artifact/org.springframework.boot/spring-boot-devtools -->
<dependency>
    <groupId>org.springframework.boot</groupId>
    <artifactId>spring-boot-devtools</artifactId>
    <version>2.1.1.RELEASE</version>
</dependency>
进入正题:这个随笔包括上传到自己服务器(以本机localhost做测试)和七牛云存储文件(没错,是跟着牛客叶神来做的)
上传文件其实非常简单,因为Spring里面就是MultiPartFile一个参数就行,然后后台在相应做一些命名处理和规定路径即可
第一种,
写好业务服务类:
package com.nowcoder.toutiao.service.Impl;

import com.nowcoder.toutiao.Utils.ToutiaoUtil;
import com.nowcoder.toutiao.service.NewsService;
import org.springframework.stereotype.Service;
import org.springframework.web.multipart.MultipartFile;

import java.io.File;
import java.io.IOException;
import java.nio.file.Files;
import java.nio.file.StandardCopyOption;
import java.util.UUID;

@Service
public class NewsServiceImpl implements NewsService {

    @Override
    public String saveLoadedFile(MultipartFile file) {
        int pos = file.getOriginalFilename().lastIndexOf(".");
        //判断点的位置
        if (pos<0)
            return null;
        //获得文件的扩展名,png,jpg等
        String fileExt = file.getOriginalFilename().substring(pos+1).toLowerCase();
        if (!ToutiaoUtil.isFileAllowed(fileExt)){//判断是否为规定格式
            return null;
        }
        String fileName = UUID.randomUUID().toString().replaceAll("-","")+"."+fileExt;
        try {
            //复制到路径下面
            Files.copy(file.getInputStream(),new File(ToutiaoUtil.saveDir+fileName).toPath(),StandardCopyOption.REPLACE_EXISTING);
        }catch (IOException e){
        }
        return ToutiaoUtil.TOUTIAO_DOMAIN+"image?name="+fileName;
    }
}
然后ToutiaoUtil是一个工具类
package com.nowcoder.toutiao.Utils;

import org.slf4j.Logger;
import org.slf4j.LoggerFactory;

public class ToutiaoUtil {
    //七牛云文件存储空间的域名,作为访问该图片用的url的前缀
    public static String PREFIX = "http://pji43w60m.bkt.clouddn.com/";
    //logger
    private static final Logger logger = LoggerFactory.getLogger(ToutiaoUtil.class);
    //文件扩展名
    private static String[] IMAGE_FILE_EXT = {"png","bmp","jpg","jpeg"};
    //本地存放文件的文件夹
    public static String saveDir = "D:/UpLoad/";
    //本地域名 localhost:8080
    public static String TOUTIAO_DOMAIN = "http://127.0.0.1:8080/";
    /**
     * 判断文件扩展名是否符合
     * */
    public static boolean isFileAllowed(String fileExt){
        for (String ext:IMAGE_FILE_EXT){
            if (ext.equals(fileExt))
                return true;
        }
        return false;
    }
}
之后到控制器里面写接口:
    @RequestMapping(path = "/uploadImage",method = {RequestMethod.POST})
    @ResponseBody
    public String upLoad(@RequestParam("file")MultipartFile file){
        try {
            String fileUrl = newsService.saveLoadedFile(file);
            if (fileUrl==null){
                JSONObject json= new JSONObject();
                json.put("result", JSONObject.toJSON("上传失败"));
                return json.toJSONString();
            }
            JSONObject json= new JSONObject();
            json.put("result", JSONObject.toJSON("上传图片成功"));
            return json.toJSONString();
        }catch (Exception e){
            JSONObject json= new JSONObject();
            json.put("result", JSONObject.toJSON("上传失败"));
            return json.toJSONString();
        }
    }
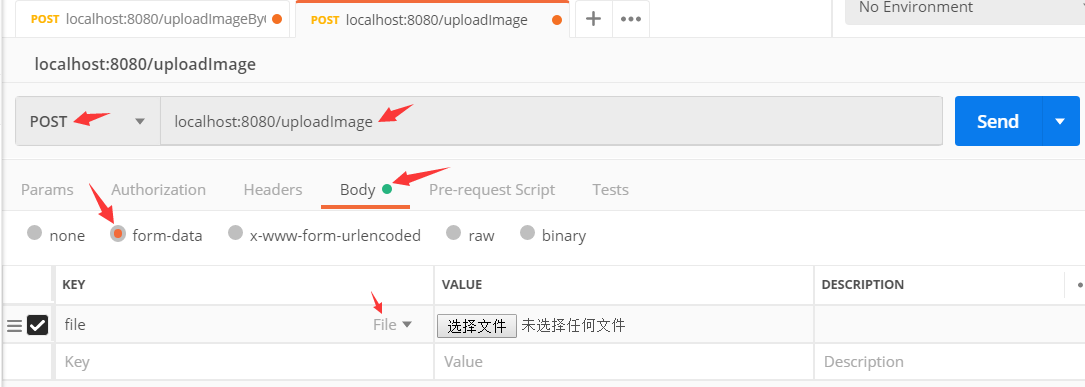
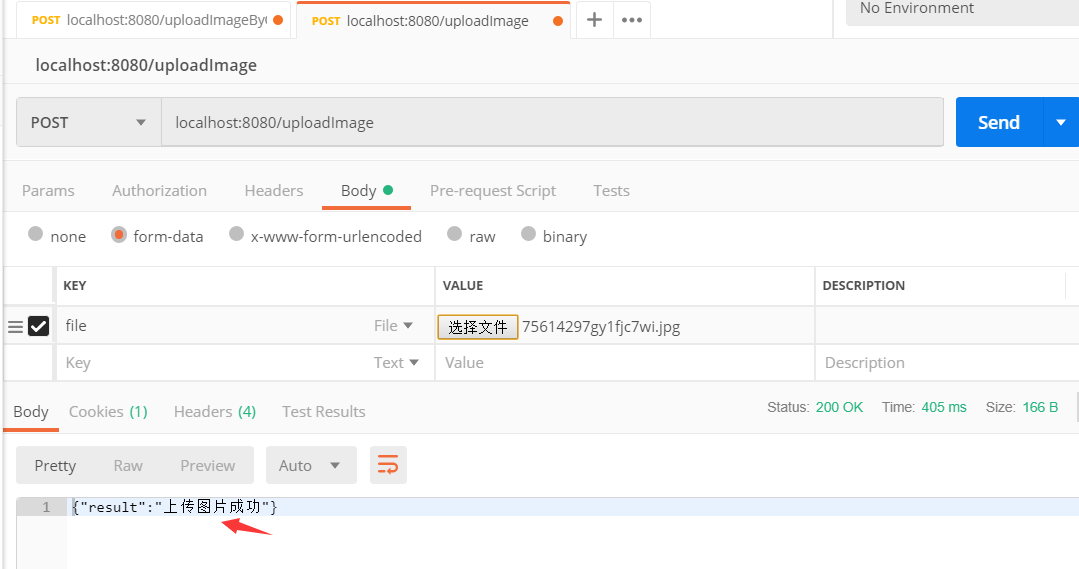
上传文件前端我也不大会写,所以用Postman来测试,记得Key一定要与接口中写的参数保持一致
然后看返回
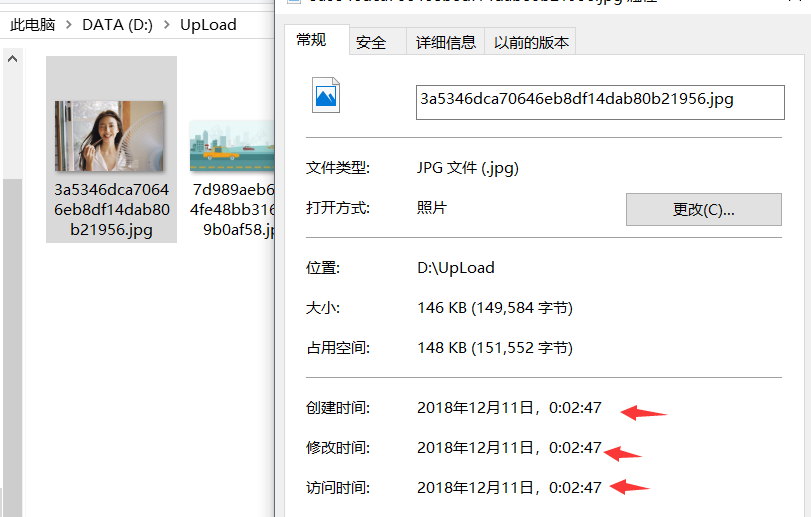
再去本地的路径下看一下,即ToutiaoUtil里面的D:/upload,可以看到上传成功
第二种是七牛云存储,这是我第一次接触这个
首先去七牛云注册一个账号,然后必须通过个人实名认证才能使用服务,这些完成后
在工程里引入七牛云的依赖,看官方文档https://developer.qiniu.com/kodo/sdk/1239/java,我就不把这一大段依赖贴出来了
在这之后,去控制台新建一个存储空间,记下密钥和空间名字,后面要用到
之后就是写代码了,为了方便,这里与上面不同的就是把存储的方式从存本地变成了上传七牛云,所以除了上传那部分,以及最后返回的部分,其余什么命名和判断格式都和第一种一样
我们把七牛云文档中的代码单独作为一个service
package com.nowcoder.toutiao.service.Impl;


import com.google.gson.Gson;
import com.nowcoder.toutiao.Utils.ToutiaoUtil;
import com.qiniu.common.QiniuException;
import com.qiniu.common.Zone;
import com.qiniu.http.Response;
import com.qiniu.storage.Configuration;
import com.qiniu.storage.UploadManager;
import com.qiniu.storage.model.DefaultPutRet;
import com.qiniu.util.Auth;
import org.springframework.stereotype.Service;
import org.springframework.web.multipart.MultipartFile;

import java.io.IOException;
import java.util.UUID;

@Service
public class QiniuService {

    //上传七牛云
    public String upload(MultipartFile file) throws IOException {
        int pos = file.getOriginalFilename().lastIndexOf(".");
        if (pos<0)
            return null;
        String fileExt = file.getOriginalFilename().substring(pos+1).toLowerCase();
        if (!ToutiaoUtil.isFileAllowed(fileExt)){
            return null;
        }
        String fileName = UUID.randomUUID().toString().replaceAll("-","")+"."+fileExt;
        //构造一个带指定Zone对象的配置类
        Configuration cfg = new Configuration(Zone.zone0());
        //...其他参数参考类注释
        UploadManager uploadManager = new UploadManager(cfg);
        //...生成上传凭证,然后准备上传
        String accessKey = "zk7UXbWxZKH2xdqN-lic119Pu3DMFMiFeZN5HRS2";
        String secretKey = "mnLG5YtRvGevec4j_0QMf8l47qmgqrj9dIL10yiL";
        String bucket = "yintianhaoupload";
        //如果是Windows情况下,格式是 D:\\qiniu\\test.png
        Auth auth = Auth.create(accessKey, secretKey);
        String upToken = auth.uploadToken(bucket);
        try {
            Response response = uploadManager.put(file.getBytes(), fileName, upToken);
            //解析上传成功的结果
            DefaultPutRet putRet = new Gson().fromJson(response.bodyString(), DefaultPutRet.class);
            System.out.println(putRet.key);
            System.out.println(putRet.hash);
            return ToutiaoUtil.PREFIX+putRet.key;

        } catch (QiniuException ex) {
            Response r = ex.response;
            System.err.println(r.toString());
            try {
                System.err.println(r.bodyString());
                } catch (QiniuException ex2) {
                //ignore
            }
            return null;
            }

    }
}
之后就是写接口,这里我想在上传之后直接显示出图片,所以我把service的返回值直接设成了图片的访问地址,之后在接口里确认上传无误就只要redirect一下就行了
 @RequestMapping(path = "/uploadImageByQiniu",method = {RequestMethod.POST})
    public String uploadFileByQiniu(@RequestParam("file")MultipartFile file) throws IOException {
        String res = qiniuService.upload(file);
        if (res!=null){
            System.out.println(res);
            return "redirect:"+res;
        }else {
            //不成功,返回库中已有的图片显示
            return "redirect:http://pji43w60m.bkt.clouddn.com/cc89ae4e48ba406eb4257c955e65c6b2.png";
        }
    }
ok,又到了测试的时候:跟前面一样,看看效果

之后你若还不信,控制台有打印信息,即文件名,然后去对比一下七牛云云空间的图片,就能验证了
这里我控制台打印出来

再看七牛云,可以看到是一样的


 浙公网安备 33010602011771号