angular 原理图(Schematic)的学习笔记
介绍
Schematics 是什么?
Schematics 是现代前端开发工作流的工具;它可以将变化应用到你的项目中。比如创建一个组件、添加配置项、将框架添加到现有项目,或者更新你的代码来修复更新依赖时带来的 break change。
Schematics — AnIntroduction
有道云链接
起步
首先需要安装全局依赖
$ npm i @angular-devkit/schematics-cli -g
执行schematics指令 看到如下信息则安装成功
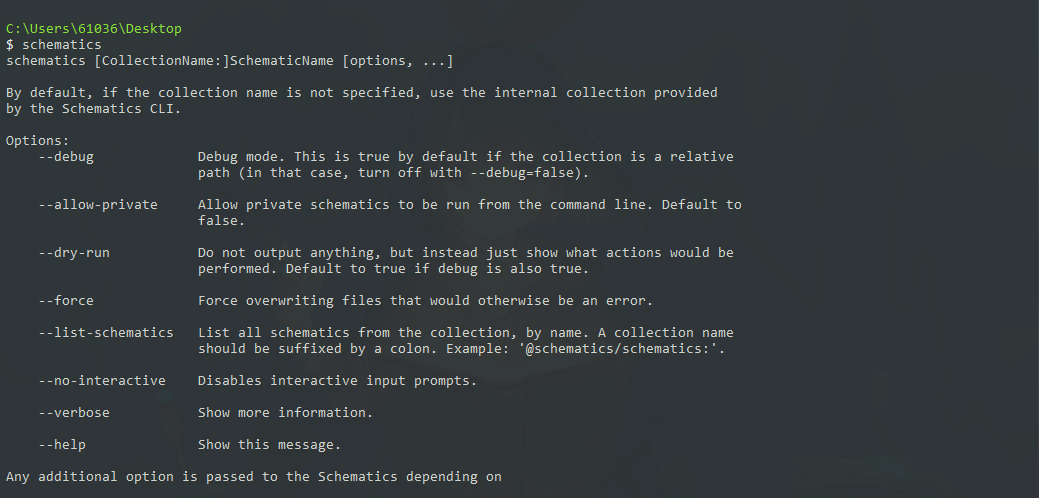
之后使用下面的命令新建一个 scheamtics 项目并用编辑器打开
$ schematics schematic --name my-schematics
$ cd my-schematics
$ code .
目录结构
├── node_modules/                 // 依赖包
├── src
│   ├── my-full-schematic        // 单个schematic文件夹
│   │   ├── files                // 要复制的可选组件/模板文件。
│   │   │   ├── test__INDEX__
│   │   │   └── test2
│   │   ├── index_spec.ts
│   │   ├── index.ts             //  定义命名原理图中转换逻辑的代码。
│   │   └── schema.json          //  原理图变量定义
│   ├── my-other-schematic
│   │   ├── index_spec.ts
│   │   └── index.ts
│   ├── my-schematic
│   │   ├── index_spec.ts
│   │   └── index.ts
│   └── collection.json         //   为每个schematic定义元数据
├── README.md
├── package.json
└── tsconfig.json
Schematics的一些基本概念
原理图的公共 API 定义了表达其基本概念的类。
-
虚拟文件系统用 Tree(树)表示。Tree 数据结构包含一个基础状态 base(一组已经存在的文件)和一个 暂存区 staging(需要应用到 base 的更改列表)。在进行修改的过程中,你并没有真正改变它的 base,而是把那些修改添加到了暂存区。
-
Rule(规则)对象定义了一个函数,它接受 Tree,进行转换,并返回一个新的 Tree。原理图的主文件 index.ts 定义了一组实现原理图逻辑的规则。
-
转换由 Action(动作)表示。有四种动作类型:Create、Rename、Overwrite 和 Delete。
-
每个原理图都在一个上下文中运行,上下文由一个 SchematicContext 对象表示。
传给规则的上下文对象可以访问该原理图可能会用到的工具函数和元数据,包括一个帮助调试的日志 API。上下文还定义了一个合并策略,用于确定如何将这些更改从暂存树合并到基础树中。可以接受或忽略某个更改,也可以抛出异常。
简单上手
创建一个blank的空模板
$ schematics blank --name my-schematics
成功之后看见如下目录结构
├── node_modules/                // 依赖包
├── src
│   ├── my-schematics            // 单个schematic文件夹
│   │   ├── index_spec.ts
│   │   ├── index.ts             //  定义命名原理图中转换逻辑的代码。
│   └── collection.json          //  为每个schematic定义元数据
├── README.md
├── package.json
└── tsconfig.json
打开index.ts并使用create创建文件
import { Rule, SchematicContext, Tree } from '@angular-devkit/schematics';


// You don't have to export the function as default. You can also have more than one rule factory
// per file.
export function mySchematics(_options: any): Rule {
  return (tree: Tree, _context: SchematicContext) => {
  // (method) Tree.create(path: string, content: string | Buffer): void
    tree.create("hello.ts","hello_world text")
    return tree;
  };
}
执行以下指令
$ npm run build   // 打包你的schematics
$ npm link        // 将你的schematics链接到全局
然后使用angular cli创建一个项目,并用编辑器打开
$ ng new project
$ cd project
$ code .
在angular项目中链接到你的schematics
$ npm link my-schematics
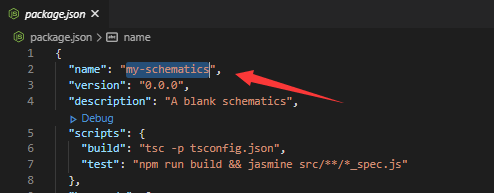
注意:你的schematics名在你创建的schematics文件的package.json中
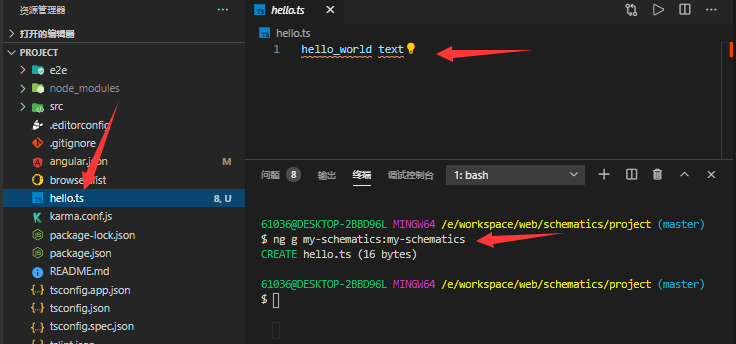
使用ng g执行你的第一个schematics
$ ng g my-schematics:my-schematics
或使用schematics执行你的第一个schematics
$ schematics my-schematics:my-schematics
如下代表成功
知识点:
$ npm link $PATH_TO_SCHEMATIC_PROJECT
$ ng generate my-component:my-component someName
补充:
为了方便,不用每次修改都运行 build,在此项目的 package.json 的 script 加入一行:
"build:watch": "tsc -p tsconfig.json --watch"
使得该项目一致在 watch 状态下,然后运行
npm run build:watch
集合(collection)
在 Angular 中,集合(collection)是指收录在同一个 npm 包 中的一组原理图(schematics)。
打开collection.json,并修改
{
  "$schema": "../node_modules/@angular-devkit/schematics/collection-schema.json",
  "schematics": {
    "my-schematics": {
      "aliases": ["mfs"],
      "description": "A blank schematic.",
      "factory": "./my-schematics/index#mySchematics",
      "schema": "./my-schematics/schema.json",
    }
    "my-extend-schematic": {
      "description": "A schematic that extends another schematic.",
      "extends": "my-schematics"
    }
  }
}
APi
| 属性 | 描述 |
|---|---|
| $schema | 定义该 collection 架构的 url 地址 |
| schematics | 它描述了此系列中包含的原理图 |
| my-schematics | 简单的描述一个工厂的字段 |
| 原理图可选参数 | 描述 |
|---|---|
description |
描述 |
| factory | 用字符串引用来指向代表RuleFactory的JavaScript函数 |
| schema | 用字符串引用来指向定义变量的schema.json |
| extends | 继承 |
| aliases | 属性是一个数组,我们能用来指定我们的schematic的一个或者多个别名。举个例子,在Angular CLI中"generate" schematic的别名是"g"。这允许我们通过$ ng g调用generate命令 |
交互(schema)
打开schema.json,并修改
{
    "$schema": "http://json-schema.org/schema",
    "id": "MyFullSchematicsSchema",
    "title": "My Full Schematics Schema",
    "type": "object",
    "properties": {
        "index": {
            "type": "number",
            "$default": {
                "$source": "argv",
                "index": 0
            },
        },
        "name": {
            "type": "string"
        }
    },
    "required": [
        "name"
    ]
}
| 属性说明 | 描述 |
|---|---|
| id | 这个模式定义在集合中的唯一 id。 |
| title | 一个人类可读的模式描述。 |
| type | 由这些属性提供的类型描述符。 |
| properties | 一个定义该原理图可用选项的对象。 |
| required | 必填的选项 |
properties 中定义变量的可选参数API
| 可选参数 | 描述 | 类型 |
|---|---|---|
| type | 传入类型 | |
| default | 默认参数 | |
| $default | 如果没有指定输入的选项,则自行指定 | |
| description | 描述 | string |
| minLength | 最小长度 | number |
| maxLength | 最大长度 | number |
| x-prompt | 添加一个提示 | |
| enum | 枚举成员成为列表中的选择项 |
$default
| 属性 | 描述 | 类型 |
|---|---|---|
| $source | 可指定 "argv" 参数 | |
| index | 选择获取参数的下标 | number |
x-prompt
| 属性 | 描述 |
| :----: | ---- | ---- |
|type| confirmation,input 或 list (以简短形式自动选择)|
|message| 字符串(必填) |number |
|items| 字符串和/或“标签/值”对象(仅对 list 类型有效) |
例:
"style": {
  "description": "The file extension or preprocessor to use for style files.",
  "type": "string",
  "default": "css",
  "enum": [
    "css",
    "scss",
    "sass",
    "less",
    "styl"
  ],
  "x-prompt": {
    "message": "Which stylesheet format would you like to use?",
    "type": "list",
    "items": [
      { "value": "css",  "label": "CSS" },
      { "value": "scss", "label": "SCSS   [ https://sass-lang.com/documentation/syntax#scss                ]" },
      { "value": "sass", "label": "Sass   [ https://sass-lang.com/documentation/syntax#the-indented-syntax ]" },
      { "value": "less", "label": "Less   [ http://lesscss.org                                             ]" },
      { "value": "styl", "label": "Stylus [ http://stylus-lang.com                                         ]" }
    ]
  },
},
使用文件模板
新建一个"blank"的schematics然后
打开index.ts 入口文件,并修改
import {
  Rule,
  apply,
  mergeWith,
  template,
  url,
} from '@angular-devkit/schematics';
import { strings } from '@angular-devkit/core';

// You don't have to export the function as default. You can also have more than one rule factory
// per file.
export function mySchematics(options: any): Rule {
  return  mergeWith(apply(url('./files'), [
    template({
      ...options,   // 拿到schema.json 中定义的变量
      ...strings,   // 添加模板方法
    }),
    move('src/')
  ]))
}
添加schema.json与files文件夹
schema.json 修改如下
{
  "$schema": "http://json-schema.org/schema",
  "id": "MyFullSchematicsSchema",
  "title": "My Full Schematics Schema",
  "type": "object",
  "properties": {
    "index": {
      "type": "number",
      "default": 1
    },
    "name": {
      "type": "string"
    }
  },
  "required": [
    "name"
  ]
}
files 文件修改如下 :
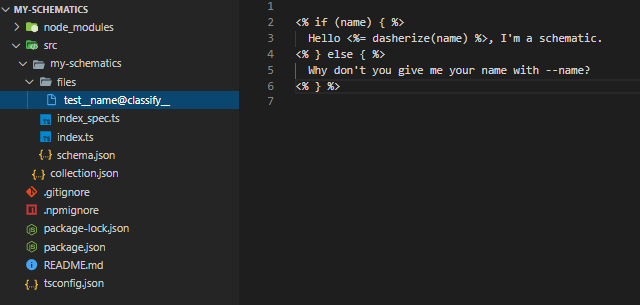
新建test__name@classify__ 文件,并填入以下内容
<% if (name) { %>
  Hello <%= dasherize(name) %>, I'm a schematic.
<% } else { %>
  Why don't you give me your name with --name?
<% } %>
执行代码看看效果吧!
知识点
| 属性 | 描述 |
|---|---|
mergeWith() |
则合并两个tree;一个来自source(没有base的tree),另一个作为rule的输入。您可以将其视为在当前更改的基础上重新设置source。 |
| apply() | 获取source,并对其应用rule |
| url() | 它接受一个url并返回一个包含该url中所有文件的tree |
| template() | 该rule获取一个tree并对其应用两个模板:路径模板:此模板用值替换路径中的\uux\uuu实例从传递给template()的选项中选择X。如果X的值是a函数,则将调用该函数。如果X未定义或返回null(不是空字符串),文件或路径将被删除。 |
| move() | 接收传入的路径字符串作为rule 返回给template(),用来指定文件生成路径 |
模板文件
简单说明两个函数
引用模板方法后使用:
 import { strings } from '@angular-devkit/core';
 template({
      ...strings,
    }),
| 属性 | 描述 |
|---|---|
classify() |
该方法接受一个值,并返回标题格式(title case)的值。比如,如果提供的名字是 my service,它就会返回 MyService。 |
dasherize() |
该方法接受一个值,并以中线分隔并小写的形式返回值。比如,如果提供的名字是 MyService,它就会返回 “my-service” 的形式。 |
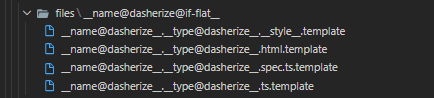
路径模板
variable@function
使用__variable__ 定义变量,使用@调用方法,例如:
内容模板
使用EJS模板语法,无需安装直接使用
<% if (name) { %>
  Hello <%= dasherize(name) %>, I'm a schematic.
<% } else { %>
  Why don't you give me your name with --name?
<% } %>
补充
可以利用 @schematics/angular 包提供的实用工具。寻求辅助函数来处理模块、依赖、TypeScript、AST、JSON、Angular CLI 工作空间和项目等等
npm i @schematics/angular
import {
  JsonAstObject,
  JsonObject,
  JsonValue,
  Path,
  normalize,
  parseJsonAst,
  strings,
} from '@angular-devkit/core';
到这里入门部分就讲解完成了!!!

 浙公网安备 33010602011771号