iOS之新浪微博的OAuth授权
新浪微博的OAuth授权
之前通过新浪微博开发平台写过微博的的项目,现在就开始总结下各个方面的知识点,一个是为了加深印象、巩固知识,另一个记录自己学习过程,希望自己在开发这条路上有所积累,为以后的道路打下坚实的基础。
首先创建一个UIWebView
- (void)viewDidLoad {
    [super viewDidLoad];
    //
    UIWebView *webView = [[UIWebView alloc]initWithFrame:self.view.bounds];
    [self.view addSubview:webView];
     //    一个完整的URL:基本的URL+参数
     //    https://api.weibo.com/oauth2/authorize
    NSString *baseUrl = YJYAuthorizeBaseUrl;
    NSString *client_id = YJYClient_id;
    NSString *redirect_uri = YJYRedirect_uri;
    //完整的URL字符串
    NSString *urlStr = [NSString stringWithFormat:@"%@?client_id=%@&redirect_uri=%@", baseUrl, client_id, redirect_uri];
    //URL字符串转换成NSURL
    NSURL *url = [NSURL URLWithString:urlStr];
    //
    NSURLRequest *request = [NSURLRequest requestWithURL:url];
    //其实创建好webview后,就可以写着一行代码,参数缺什么就补什么,一个一个往上不全就是了
    [webView loadRequest:request];

    //遵循协议
    webView.delegate = self;

 }
遵循UIWebViewDelegate
下面是实现代理方法:三个webView状态的方法和一个截取token_code的方法
#pragma mark --WebViewDelegate--
-(void)webViewDidStartLoad:(UIWebView *)webView{
    [MBProgressHUD showMessage:@"正在加载..."];
}

-(void)webViewDidFinishLoad:(UIWebView *)webView{
    [MBProgressHUD hideHUD];
}

-(void)webView:(UIWebView *)webView didFailLoadWithError:(NSError *)error{
    [MBProgressHUD hideHUD];
}

-(BOOL)webView:(UIWebView *)webView shouldStartLoadWithRequest:(NSURLRequest *)request navigationType:(UIWebViewNavigationType)navigationType{
    //包含有code的字符串,需要截取出来
    NSString *urlStr = request.URL.absoluteString;
    NSRange rang = [urlStr rangeOfString:@"code="];
    if (rang.length) {
        NSString *code = [urlStr substringFromIndex:rang.location+rang.length];
        NSLog(@"code::::%@", code);
        //截取好code之后,把code传出去
        [self accessTokenWithCode:code];
        //不通过回调网页,直接返回
        return NO;
    }
    //返回回调网页
    return YES;
}
接收code
上面截取了code之后,把code传出来,这里接收到code之后,就变写代码实现你想做的事情。
#pragma mark --Get accessToken--
-(void)accessTokenWithCode:(NSString *)code{
    /**
     client_id	true	string	申请应用时分配的AppKey。
     client_secret	true	string	申请应用时分配的AppSecret。
     grant_type	true	string	请求的类型,填写authorization_code

     grant_type为authorization_code时
     必选	类型及范围	说明
     code	true	string	调用authorize获得的code值。
     redirect_uri	true	string	回调地址,需需与注册应用里的回调地址一致。
*/
    NSMutableDictionary *param = [NSMutableDictionary dictionary];
    param[@"client_id"] = YJYClient_id;
    param[@"client_secret"] =YJYClient_secret;
    param[@"grant_type"] = @"authorization_code";
    param[@"code"] = code;
    param[@"redirect_uri"] =YJYRedirect_uri;

    AFHTTPRequestOperationManager *manager = [AFHTTPRequestOperationManager manager];
    [manager POST:@"https://api.weibo.com/oauth2/access_token" parameters:param success:^(AFHTTPRequestOperation *operation, id responseObject) {


        NSLog(@"%@", responseObject);
        //这里返回个人账号信息,并用一个YJYAccount工具类来接受
        YJYAccount *account = [YJYAccount accountWithDict:responseObject];
        //保存个人账号信息
        [YJYAccountTool saveAccount:account];
       //登录完成后,利用YJYRootToot工具类判断是进入新特征页面还是直接进入app
        [YJYRootTool chooseRootViewController:YJYKeyWindow];

   } failure:^(AFHTTPRequestOperation *operation, NSError *error) {
        NSLog(@"%@", error);
    }];

}
AppDelegate.m文件实现方法
    - (BOOL)application:(UIApplication *)application didFinishLaunchingWithOptions:(NSDictionary *)launchOptions {
    // Override point for customization after application launch.

    UIUserNotificationSettings *setting = [UIUserNotificationSettings settingsForTypes:UIUserNotificationTypeBadge categories:nil];
    [application registerUserNotificationSettings:setting];

    //创建窗口
    self.window = [[UIWindow alloc]initWithFrame:[UIScreen mainScreen].bounds];

    if ([YJYAccountTool account]) {

        [YJYRootTool chooseRootViewController:self.window];

    }else{
        YJYOAuthViewController *oauthVc = [[YJYOAuthViewController alloc]init];

        self.window.rootViewController = oauthVc;
    }

    [self.window makeKeyAndVisible];
    return YES;
}
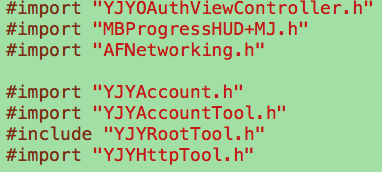
OAuth授权登录类所倒入类的头文件

介绍工具类
工具类的运用可以降低藕合度,也让代码看起来不会那么臃肿,所谓好处多多。
下面看看上面用的两个工具类:管理账号信息的YJYAccountTool 工具类和判断是否进入新特性界面的工具类。
1.YJYAccountTool:专门处理账号的业务(账号的存储和读取)
YJYAccountTool.h文件
#import <Foundation/Foundation.h>

@class YJYAccount;
@interface YJYAccountTool : NSObject
+(void)saveAccount:(YJYAccount *)account;
+(YJYAccount *)account;
+(void)accessWithCode:(NSString *)code success:(void(^)())success failure:(void(^)())failure;

@end
YJYAccountTool.m文件
//专门处理账号的业务(账号的存储和读取)
#import "YJYAccountTool.h"
#import "YJYAccount.h"
#import "AFNetworking.h"
#import "YJYHttpTool.h"
#import "YJYAccoountParam.h"

#define YJYAccountFileName [NSSearchPathForDirectoriesInDomains(NSDocumentDirectory, NSUserDomainMask, YES)[0] stringByAppendingString:@"accout.data"]
//类方法一般用静态变量代替成员属性
static YJYAccount *_account;

@implementation YJYAccountTool

+(void)saveAccount:(YJYAccount *)account{
    [NSKeyedArchiver archiveRootObject:account toFile:YJYAccountFileName];
}

+(YJYAccount *)account{
    if (!_account) {
        _account = [NSKeyedUnarchiver unarchiveObjectWithFile:YJYAccountFileName];
        if ([[NSDate date] compare:_account.expires_date] != NSOrderedAscending) {
        return nil;
        }
}
   //过期时间 = 当前时间+有效时间
    WBLog(@"%@", _account.expires_date);
    return _account;
}

+(void)accessWithCode:(NSString *)code success:(void (^)())success failure:(void (^)())failure{

    YJYAccoountParam *param = [[YJYAccoountParam alloc]init];
    param.client_id = YJYClient_id;
    param.client_secret = YJYClient_secret;
    param.code = code;
    param.grant_type = @"authorization_code";
    param.redirect_uri = YJYRedirect_uri;

    [YJYHttpTool POST:@"https://api.weibo.com/oauth2/access_token" parameters:param success:^(id responseObject) {

        YJYAccount *account = [YJYAccount accountWithDict:responseObject];
        //Save The Account Information
        [YJYAccountTool saveAccount:account];
        if (success) {
            success();
        }
    } failure:^(NSError *error) {
        if (failure) {
            NSLog(@"%@", error);
            failure(error);
        }
    }];
}
@end
2.YJYRootTool:
YJYRootTool.h文件
#import <Foundation/Foundation.h>

@interface YJYRootTool : NSObject
+(void)chooseRootViewController:(UIWindow *)window;
@end
YJYRootTool.m文件
#import "YJYRootTool.h"
#import "YJYTabBarController.h"
#import "YJYNewFeatureController.h"

#define WBVersionKey @"version"

@implementation YJYRootTool

+(void)chooseRootViewController:(UIWindow *)window{
    //获取当前版本好
    NSString *currentVersion =  [NSBundle mainBundle].infoDictionary[@"CFBundleVersion"];
    //获取上一个版本号
    NSString *lastVersion = [[NSUserDefaults standardUserDefaults] objectForKey:WBVersionKey];
    //判断当前是否有新的版本
    if ([currentVersion isEqualToString:lastVersion]) {
        UITabBarController *tabBarVc = [[YJYTabBarController alloc]init];
        window.rootViewController = tabBarVc;
    }else{
        //如果有新版,进入新特性界面
        YJYNewFeatureController *newF = [[YJYNewFeatureController alloc]init];
        window.rootViewController = newF;
    }
    //保存当前版本,用偏好设置
    [[NSUserDefaults standardUserDefaults] setObject:currentVersion forKey:WBVersionKey];
}
@end


 浙公网安备 33010602011771号