Myeclipse中使用maven快速搭建SpringBoot
前几天学习了SpringBoot,今天闲来无事,把在Myeclipse中使用maven快速搭建SpringBoot的步骤记录下来,以便后续复习!
一、环境:
Myeclipse10、JDK 1.7.0_80、Maven 3.5.4、SpringBoot 1.5.3
二、搭建步骤:
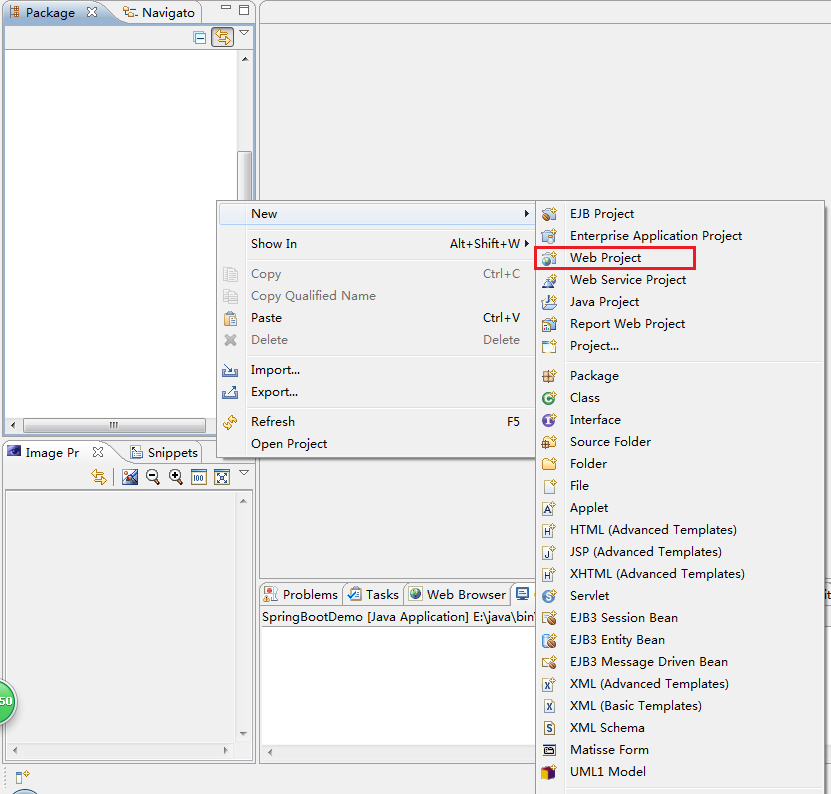
1、创建一个Web Project项目(直接创建Maven Project也可以,Artifact Id选择maven-archetype-webapp,我的不知道什么原因,这样创建出来的目录总是不对,所以我不用这种方式);
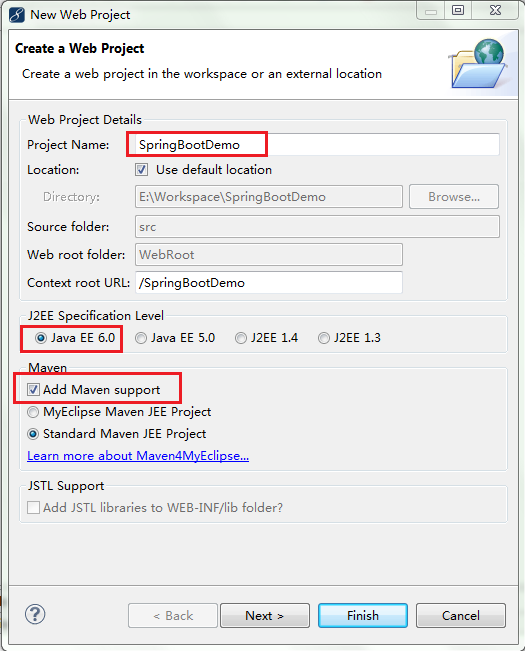
2、录入项目名称,选择Java EE 6.0,勾选Add Maven support,点击Next;
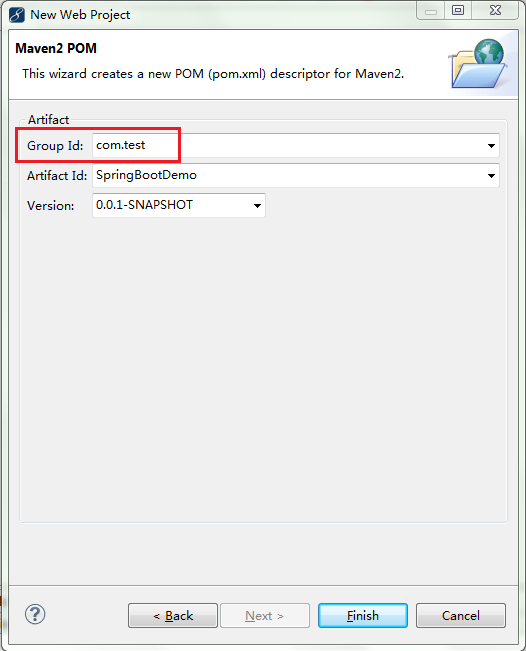
3、改修一下系统默认的Group Id(可以不改,为了让自己显得很专业,所以还是简单修改下),点击Finish;
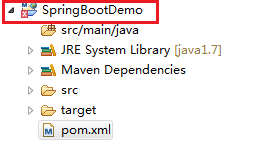
下面是创建好的工程目录

4、打开pom.xml,修改成以下内容:
<project xmlns="http://maven.apache.org/POM/4.0.0" xmlns:xsi="http://www.w3.org/2001/XMLSchema-instance"
    xsi:schemaLocation="http://maven.apache.org/POM/4.0.0 http://maven.apache.org/xsd/maven-4.0.0.xsd">

    <parent>
        <groupId>org.springframework.boot</groupId>
        <artifactId>spring-boot-starter-parent</artifactId>
        <version>1.5.3.RELEASE</version>
    </parent>

    <modelVersion>4.0.0</modelVersion>
    <groupId>com.test</groupId>
    <artifactId>SpringBootDemo</artifactId>
    <version>0.0.1-SNAPSHOT</version>
    <packaging>war</packaging>

    <properties>
        <java.version>1.7</java.version>
        <project.build.sourceEncoding>UTF-8</project.build.sourceEncoding>
        <maven.compiler.source>${java.version}</maven.compiler.source>
        <maven.compiler.target>${java.version}</maven.compiler.target>
        <tomcat.version>7.0.72</tomcat.version>
    </properties>

    <dependencies>
        <dependency>
            <groupId>org.springframework.boot</groupId>
            <artifactId>spring-boot-starter-web</artifactId>
        </dependency>
        <dependency>
            <groupId>org.apache.tomcat.embed</groupId>
            <artifactId>tomcat-embed-logging-juli</artifactId>
            <version>7.0.72</version>
        </dependency>
    </dependencies>

    <build>
        <plugins>
            <plugin>
                <artifactId>maven-war-plugin</artifactId>
            </plugin>
            <plugin>
                <artifactId>maven-compiler-plugin</artifactId>
                <configuration>
                    <source>1.7</source>
                    <target>1.7</target>
                </configuration>
            </plugin>
            <plugin>
                <groupId>org.springframework.boot</groupId>
                <artifactId>spring-boot-maven-plugin</artifactId>
            </plugin>
        </plugins>
    </build>

</project>
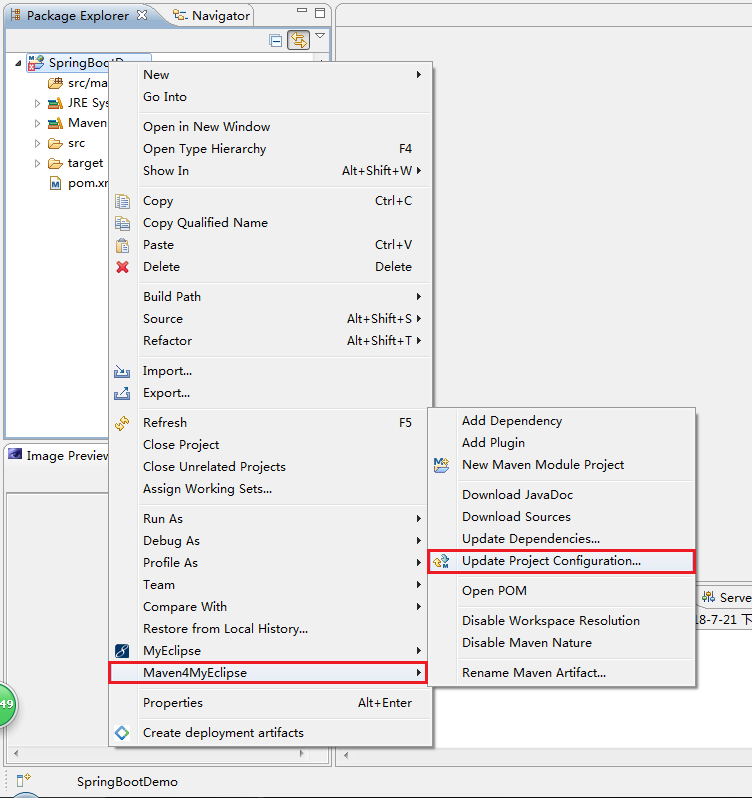
此时如果项目报错,如下图:
直接在项目上右键--Maven4MyEclipse--Update Project Configtration..,在弹出的窗口中点OK即可
5、在src/main/java下新建包com.guosp.test,并在该包下新建SpringBootDemo.java,代码内容具体如下:
package com.guosp.test;

import org.springframework.boot.SpringApplication;
import org.springframework.boot.autoconfigure.SpringBootApplication;
import org.springframework.web.bind.annotation.RequestMapping;
import org.springframework.web.bind.annotation.RestController;

@SpringBootApplication
@RestController
public class SpringBootDemo {

    public static void main(String[] args) {
        SpringApplication.run(SpringBootDemo.class, args);
    }

    @RequestMapping("/hello")
    public String say(){
        return "Hello World!";
    }

}
至此,一个最简单的SpringBoot环境就搭建好了
三、运行SpringBoot:
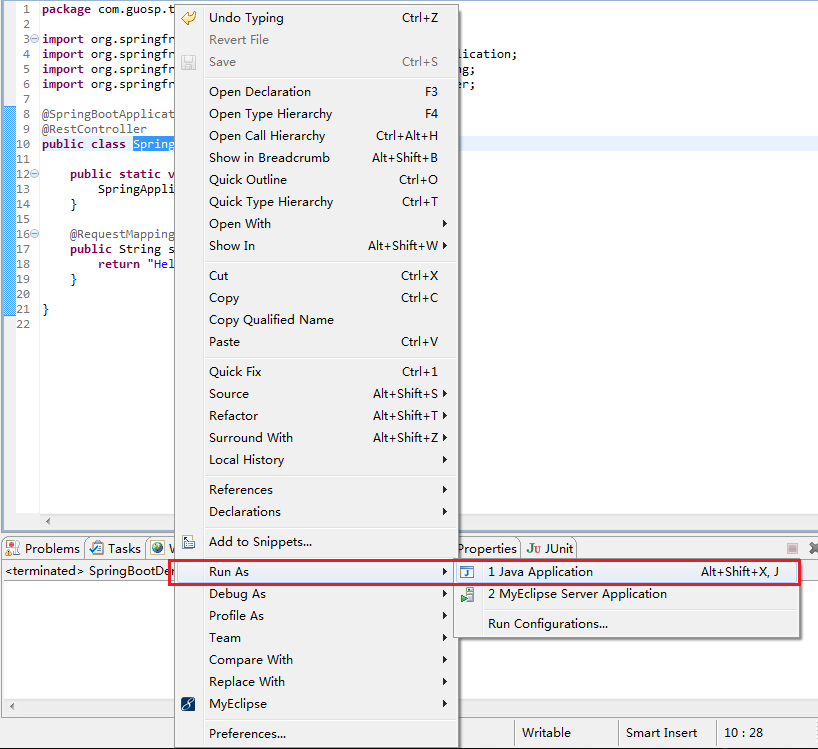
方式1:
在SpringBootDemo.java上右键--Run As--Java Application
看到下面的内容并且没有报错,说明应用已经启动成功,服务监听在8080端口(默认的,可以通过SpringBoot的配置文件进行修改,改起来非常方便,这篇文章就不做记录了)
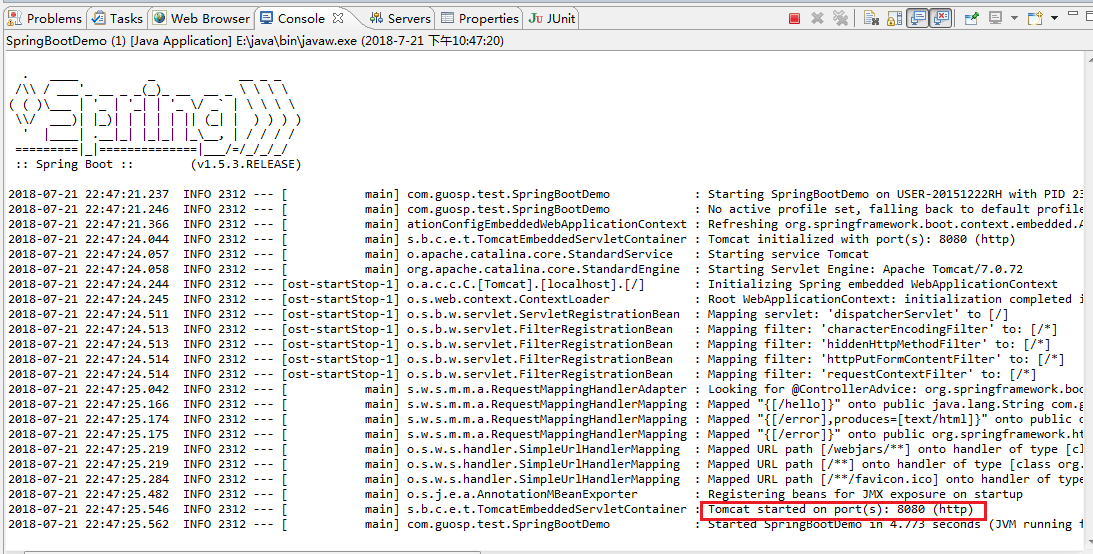
接下来打开浏览器,在地址栏中输入http://localhost:8080/hello

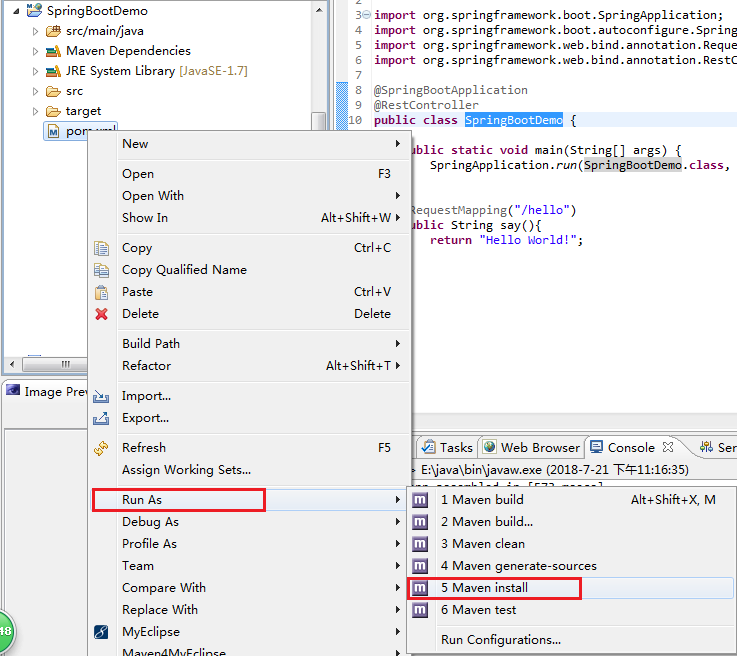
方式2:
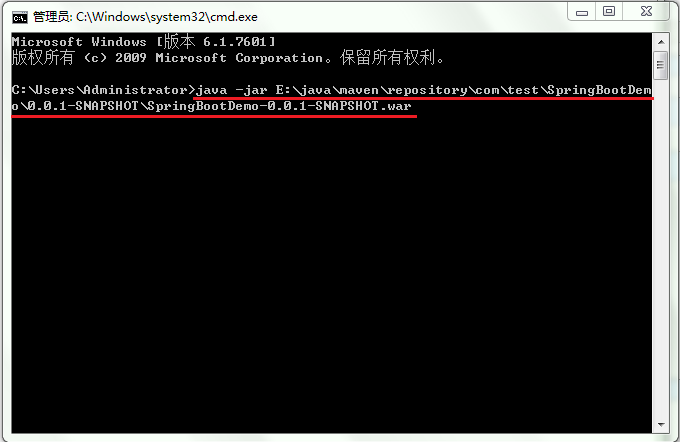
在pom.xml上右键--Run As--Maven install,将项目编译并打包到本地maven仓库中
打包完成后打开cmd窗口,在其中输入java -jar <SpringBoot项目在本地仓库中的位置>,回车
没有报错并看到如下信息时,说明发布成功
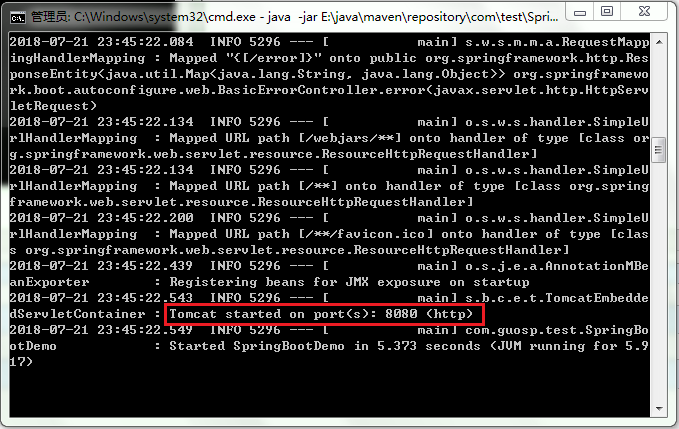
再次打开浏览器,在地址栏中输入http://localhost:8080/hello,同样会看到"Hello World!"信息。
到此结束,收工洗碗睡觉。

 浙公网安备 33010602011771号