SpringCloud统一配置中心
目录
springcloud-config server配置
pom
    <dependency>
            <groupId>org.springframework.cloud</groupId>
            <artifactId>spring-cloud-config-server</artifactId>
        </dependency>
        <dependency>
            <groupId>org.springframework.cloud</groupId>
            <artifactId>spring-cloud-starter-netflix-eureka-client</artifactId>
        </dependency>
启动类
@SpringBootApplication
@EnableDiscoveryClient
@EnableConfigServer
public class ConfigApplication {

    public static void main(String[] args) {
        SpringApplication.run(ConfigApplication.class, args);
    }

}
配置文件
# 端口
server.port=8091
# 应用名
spring.application.name=eureka-config
# 注册地址
eureka.client.service-url.defaultZone=http://localhost:8761/eureka/

# git地址
spring.cloud.config.server.git.uri=https://github.com/zhaimiya/config.git
# git用户名
spring.cloud.config.server.git.name=XX
# git密码
spring.cloud.config.server.git.password=XX
# 本地存储位置
spring.cloud.config.server.git.basedir=D:/coding/cloud/config/AAACONFIG/
git配置文件格式命名规则
-
{name}-{frofiles}.yml/properties/json
{服务名}-{环境}.yml
eg:order-dev.yml
或
order-dev.properties -
{lable}/{name}-{frofiles}.yml/properties/json
{分支}/{服务名}-{环境}.yml
eg:branch1/order-dev.yml
或
branch2/order-test.properties
config client原项目配置文件
- 原ORDER项目配置文件内容如下
![]()

环境要求
MQ安装好,可运行
I.实现启动项目,拉取配置
1.config client依赖添加
        <dependency>
            <groupId>org.springframework.cloud</groupId>
            <artifactId>spring-cloud-config-client</artifactId>
        </dependency>
2.config client配置文件修改
- 配置文件application.properties更改未bootstrap.properties
- 修改application为bootstarp的原因是想先执行此处配置,可将放到git上的配置文件拉取到本地
- 部分放入git上,配置文件命名规则参考上述
![]()
- git仓库配置文件名
![]()


II.实现手动post请求,刷新配置
1.pom依赖添加
- config server与configer client 都需要添加
        <dependency>
            <groupId>org.springframework.cloud</groupId>
            <artifactId>spring-cloud-starter-bus-amqp</artifactId>
        </dependency>
2.暴露config server的刷新端口
- bootstarp.properties(config server的配置文件)
# 官方说的是since Spring Boot 2.0, the Actuator endpoints are not exposed by default。
management.endpoints.web.exposure.include=*
3.MQ连接配置
- config server/client都需要配置
# 若默认配置如下,可以不写
spring.rabbitmq.host=localhost
spring.rabbitmq.port=5672
spring.rabbitmq.username=guest
spring.rabbitmq.password=guest
4.使用注解@RefreshScope
- 在需要实现自动刷新的地方加注解
@RestController
@RequestMapping("/env")
@RefreshScope
public class EnvController {

    @Value("${env}")
    private String env;

    @RequestMapping("/printenv")
    public String printEnv(){
        return  env;
    }
}
5.测试
- 1.修改git配置
- 2.手动调用接口(win10 cmd命令,端口为config server的端口)
curl -X POST 127.0.0.1:8901/actuator/bus-refresh
- 3.刷新完成,可查看结果
III.实现webhooks自动刷新
1.Spring Cloud Bus自动刷新图示(白piao的一张tu)
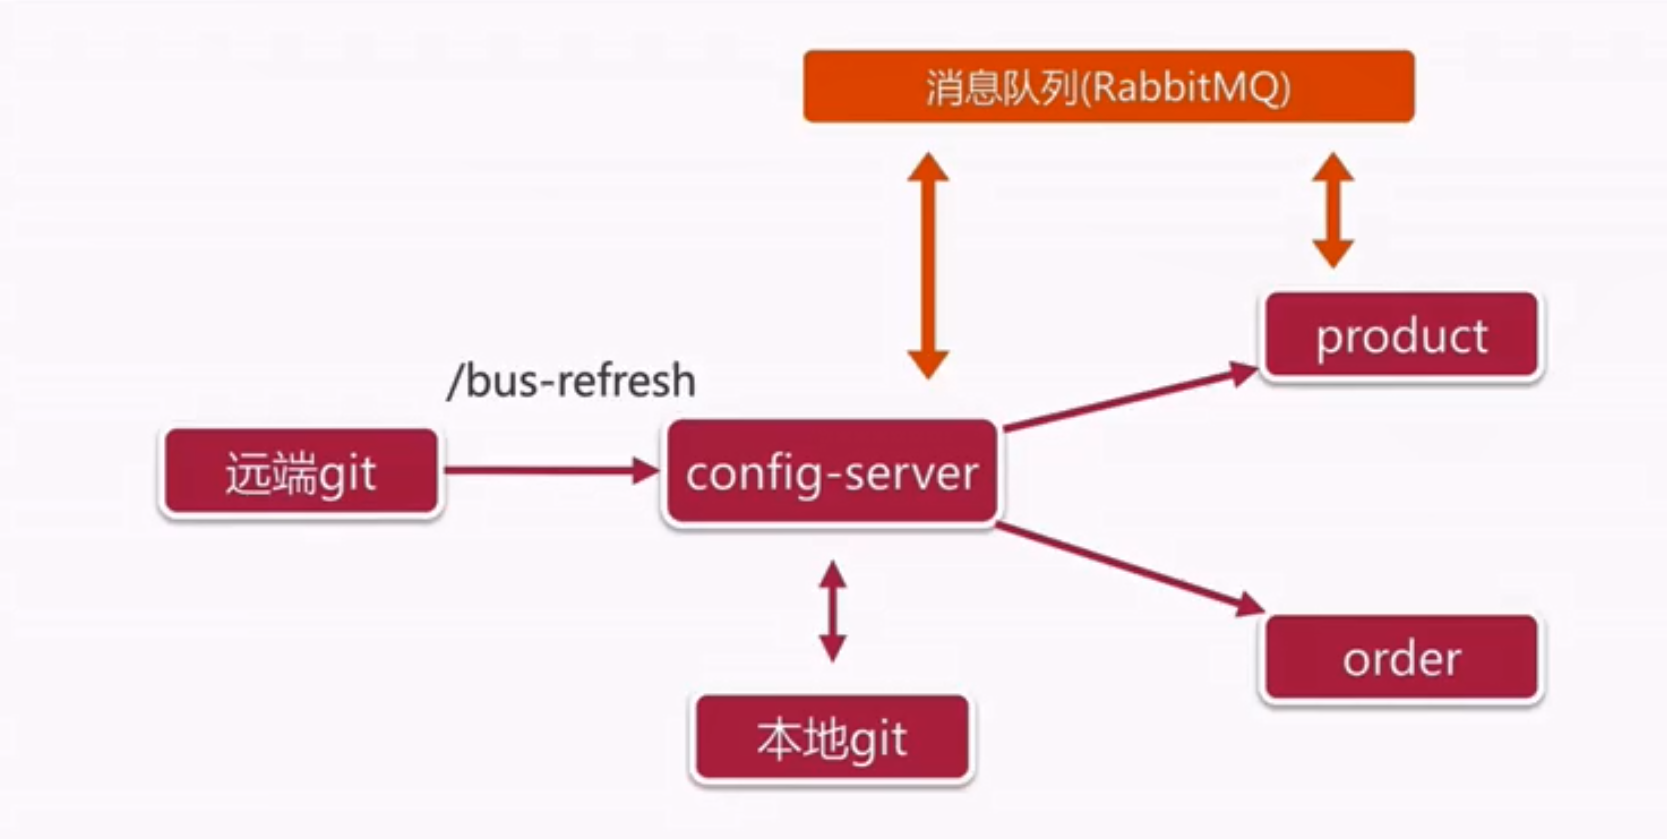
2.本地测试内网穿刺
- 使用内网穿刺(我用的是natapp上申请的免费隧道)将本地端口8901(config server启动的端口)映射出去
http://rijbh9.natappfree.cc -> 127.0.0.1:8901
3.配置文件添加 (config client端添加)
spring.cloud.bus.id=${spring.application.name}:${spring.cloud.config.profile}:${random.value}
4.配置webhooks,具体依据使用过的是什么工具,我用的是github,
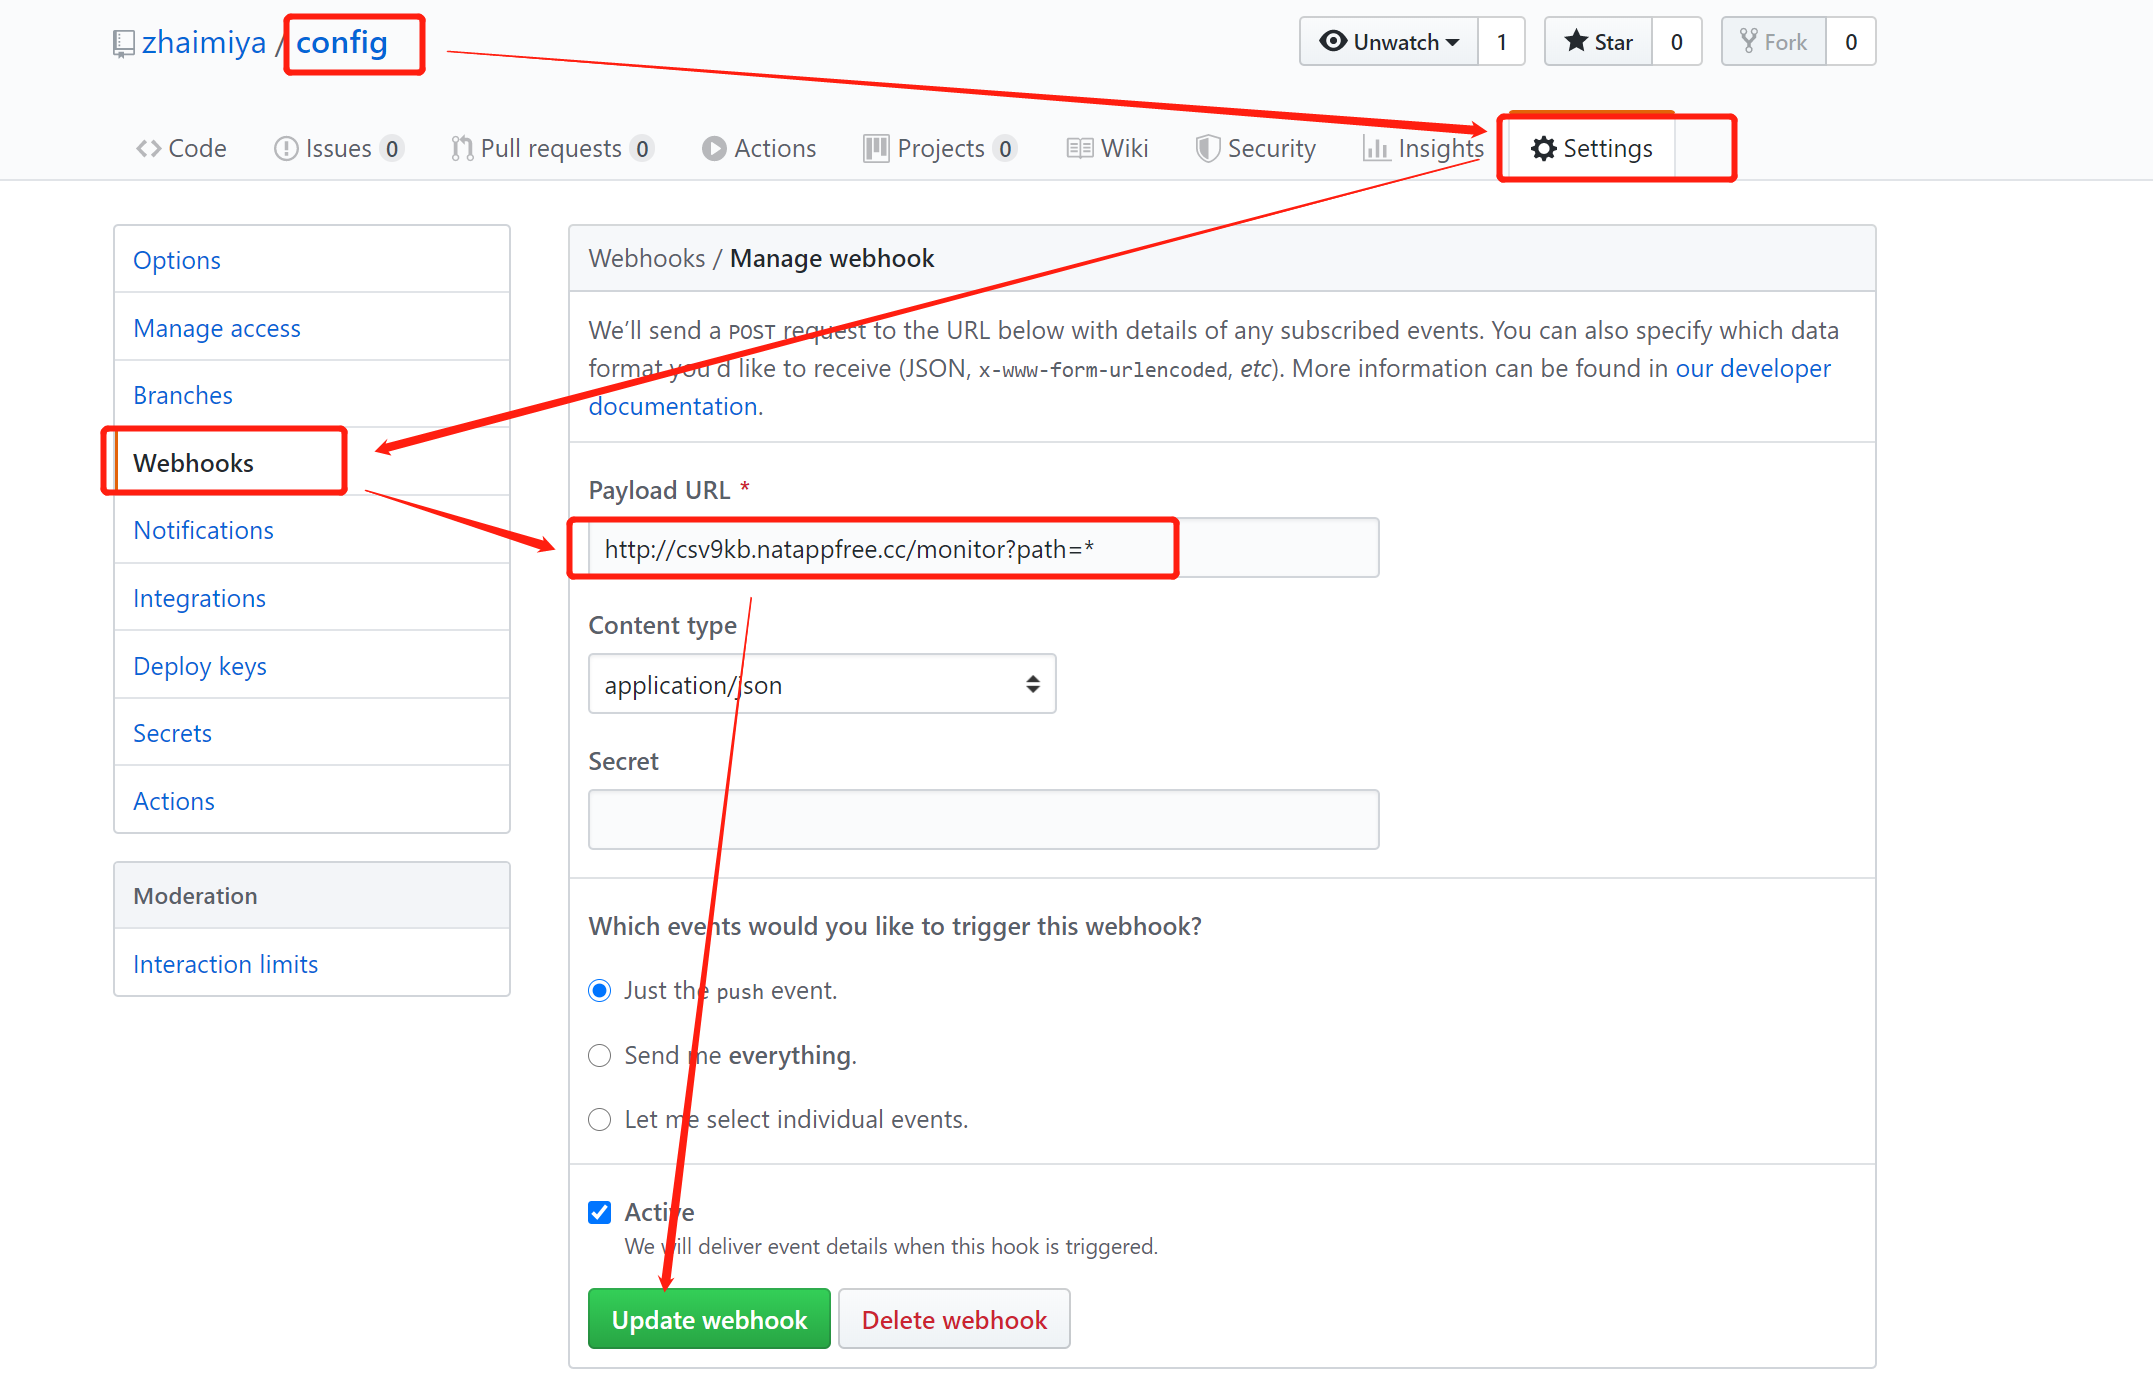
菜鸟一枚,欢迎指正批评
源码已上传至:https://github.com/zhaimiya/cloudlearn
❀❀ (ง •_•)ง little little 🦆🦆 ❀❀❀❀ ♕♕♕♕♕

 浙公网安备 33010602011771号