C#开发医学影像胶片打印系统(一):万能花式布局的实现思路
本篇文章将介绍开发医学影像胶片打印系统(printscu模式)遇到不规则排版时的一种思路,
一般来讲,医院打印胶片时都是整张胶片打印,但有时需要将多个病人或一个病人的多个检查打印在同一张胶片上,
这时候就需要不规则排版来满足打印需求,使胶片利用率最大化。
国际惯例,先看效果:

常规打印业务流程:
1、编辑布局模板
2、载入布局模板
3、选择标记模板
4、下载与选择影像
5、微调影像
6、超清预览、发送打印
编辑布局模板:
我们在一个Grid中,通过行数和列数循环创建带边框的Border来显示表格,并添加鼠标事件:
          for (int i = 0; i < row; i++)
                {
                    for (int j = 0; j < col; j++)
                    {
                        Border border = new Border
                        {
                            Width = w,
                            Height = h,
                            HorizontalAlignment = HorizontalAlignment.Left,
                            VerticalAlignment = VerticalAlignment.Top,
                            Margin = new Thickness(j * w, i * h, 0, 0),
                            BorderThickness = new Thickness(1),
                            BorderBrush = ColorHandler.GetColorBrush("#CCCCCC"),
                            Background = ColorHandler.GetColorBrush("#000000"),

                        };
                        border.MouseEnter += Border_MouseEnter;
                        border.MouseLeftButtonDown += Border_MouseLeftButtonDown;
                        GridTempl.Children.Add(border);
                    }
                }
点击单元格时将改变背景颜色,在鼠标按下时并移动鼠标,触发MouseEnter,选择多个单元格:
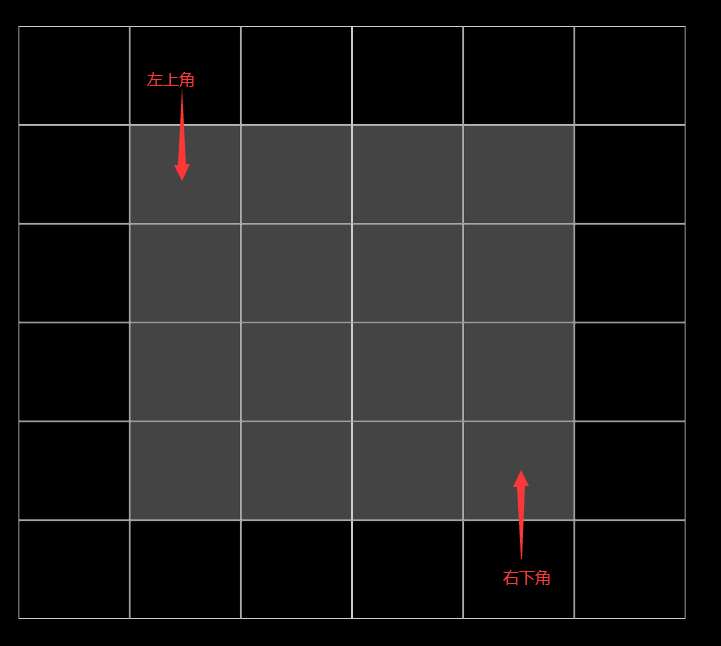
因为合并单元格是不能为不规则形状,所以多选的单元格整体必须为一个矩形,
因此多选时首先记录所有选中的单元格,然后通过坐标判断左上角和右下角的单元格位置,这样整体矩形的宽和高的范围就确定了,
在此矩形范围内的单元格将自动全部选中:
但也有特殊情况:如果矩形范围包含大小不一的单元格 这时候计算范围就会不准确:
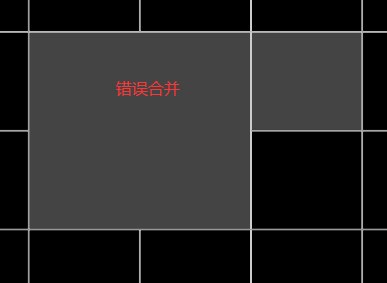
通过以下几种情况来判断大单元格与小单元格的包含关系:
       /// <summary>
        /// 筛选出已经合并的cell并计算最大选中范围
        /// </summary>
        private void CheckCell()
        {
            List<Border> bors = new List<Border>();
            for (int i = 0; i < GridTempl.Children.Count; i++)
            {
                Border border = (GridTempl.Children[i] as Border);
                if (((SolidColorBrush)border.Background).Color == Color.FromRgb(68, 68, 68))
                {
                    bors.Add(border);
                }
            }

            double cellMinLeft = bors[0].Margin.Left;
            double cellMaxLeft = 0;
            double cellMinTop = bors[0].Margin.Top;
            double cellMaxTop = 0;
            for (int i = 0; i < bors.Count; i++)
            {
                if (bors[i].Margin.Left < cellMinLeft)
                {
                    cellMinLeft = bors[i].Margin.Left;
                }
                if (bors[i].Margin.Top < cellMinTop)
                {
                    cellMinTop = bors[i].Margin.Top;
                }
                if (bors[i].Margin.Top + bors[i].Height > cellMaxTop)
                {
                    cellMaxTop = bors[i].Margin.Top + bors[i].Height;
                }
                if (bors[i].Margin.Left + bors[i].Width > cellMaxLeft)
                {
                    cellMaxLeft = bors[i].Margin.Left + bors[i].Width;
                }
            }

            for (int i = 0; i < GridTempl.Children.Count; i++)
            {
                Border otherBor = GridTempl.Children[i] as Border;
                if (bors.Contains(otherBor))
                {
                    continue;
                }

                //包含左上角
                if (otherBor.Margin.Left > cellMinLeft
                        && (otherBor.Margin.Left) < cellMaxLeft
                        && otherBor.Margin.Top > cellMinTop
                        && (otherBor.Margin.Top) < cellMaxTop)
                {
                    otherBor.Background = ColorHandler.GetColorBrush("#444444");
                    CheckCell();
                    return;
                }

                //包含右上角
                if (otherBor.Margin.Left + otherBor.Width > cellMinLeft
                         && (otherBor.Margin.Left + otherBor.Width) < cellMaxLeft
                         && otherBor.Margin.Top > cellMinTop
                         && (otherBor.Margin.Top) < cellMaxTop)
                {
                    otherBor.Background = ColorHandler.GetColorBrush("#444444");
                    CheckCell();
                    return;
                }

                //包含右下角
                if (otherBor.Margin.Left + otherBor.Width > cellMinLeft
                           && (otherBor.Margin.Left + otherBor.Width) < cellMaxLeft
                           && (otherBor.Margin.Top + otherBor.Height) > cellMinTop
                           && (otherBor.Margin.Top + otherBor.Height) < cellMaxTop)
                {
                    otherBor.Background = ColorHandler.GetColorBrush("#444444");
                    CheckCell();
                    return;
                }

                //包含左下角
                if (otherBor.Margin.Left > cellMinLeft
                          && (otherBor.Margin.Left) < cellMaxLeft
                          && (otherBor.Margin.Top + otherBor.Height) > cellMinTop
                          && (otherBor.Margin.Top + otherBor.Height) < cellMaxTop)
                {
                    otherBor.Background = ColorHandler.GetColorBrush("#444444");
                    CheckCell();
                    return;
                }

                //水平分割
                if (otherBor.Margin.Left > cellMinLeft
                          && (otherBor.Margin.Left) < cellMaxLeft
                          && (otherBor.Margin.Top) <= cellMinTop
                          && (otherBor.Margin.Top + otherBor.Height) >= cellMaxTop)
                {
                    otherBor.Background = ColorHandler.GetColorBrush("#444444");
                    CheckCell();
                    return;
                }

                //垂直分割
                if (otherBor.Margin.Left <= cellMinLeft
                          && (otherBor.Margin.Left + otherBor.Width) >= cellMaxLeft
                          && (otherBor.Margin.Top) > cellMinTop
                          && (otherBor.Margin.Top + otherBor.Height) < cellMaxTop)
                {
                    otherBor.Background = ColorHandler.GetColorBrush("#444444");
                    CheckCell();
                    return;
                }
            }
        }
通过递归填充单元格达到矩形范围的同行同列自动选择,接下来就可以合并所选择的单元格:
计算最大宽度和最大高度,并且使左上角的单元格等于最大宽高,以实现合并效果:
        //计算最大宽度
            double w = borderFirst.Width;
            for (int i = 0; i < bors.Count; i++)
            {
                if (bors[i] != borderFirst && borderFirst.Margin.Top == bors[i].Margin.Top)
                {
                    w += bors[i].Width;
                }
            }

            //计算最大高度
            double h = borderFirst.Height;
            for (int i = 0; i < bors.Count; i++)
            {
                if (bors[i] != borderFirst && borderFirst.Margin.Left == bors[i].Margin.Left)
                {
                    h += bors[i].Height;
                }
            }

            borderFirst.Tag = Math.Round(h / borderFirst.Height) + "#" + Math.Round(w / borderFirst.Width);
            borderFirst.Width = w;
            borderFirst.Height = h;
看效果:
将布局通过自定义格式保存到本地文件,就可以在排版界面载入布局模板。
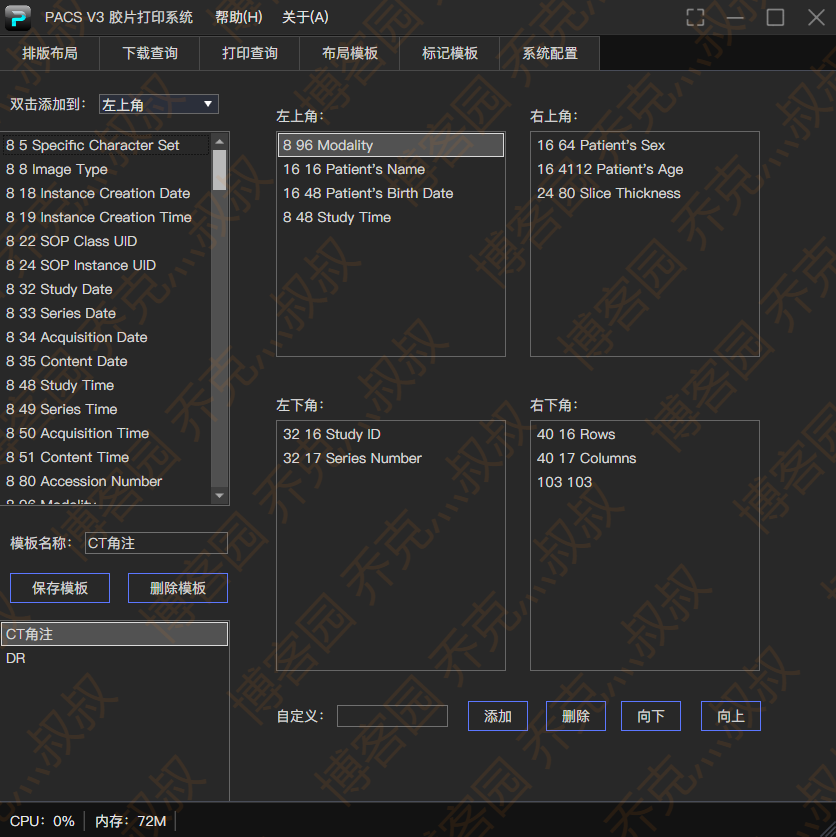
编辑标记模板:
选择常用Tag添加到胶片的四个角,以便在后面载入影像的时候读取标记信息:
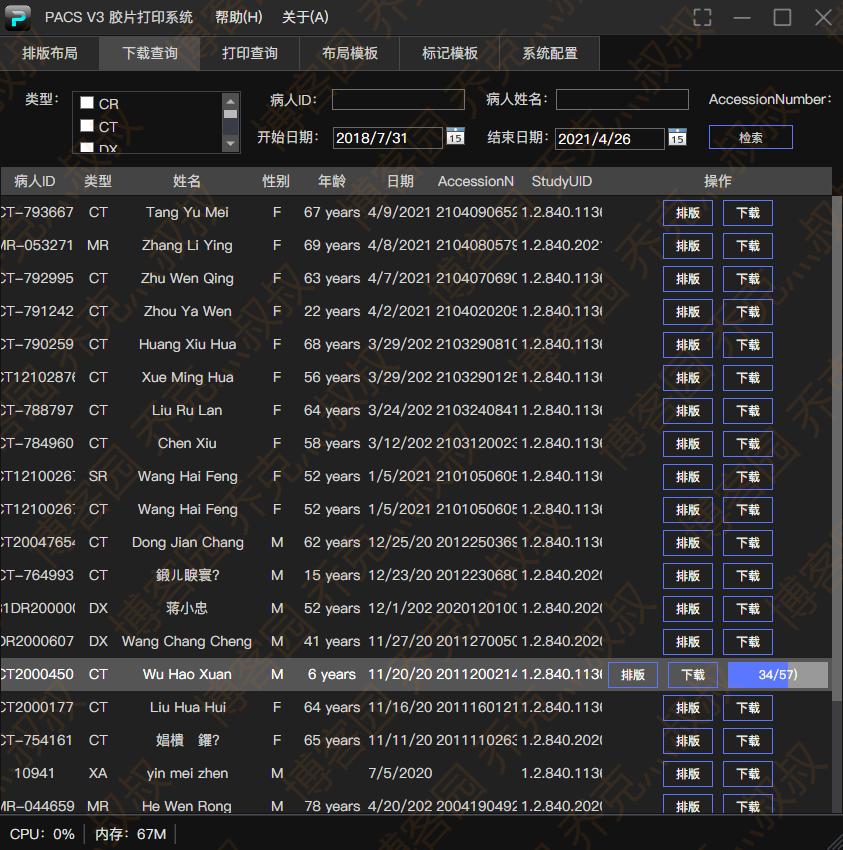
读取检查列表和下载影像:
可以参考本系列教程文章:
C#开发PACS医学影像处理系统(五):查询病人信息列表
载入影像并微调(平移,缩放,自由旋转等二维操作):
使用1:1像素超清预览查看打印细节:

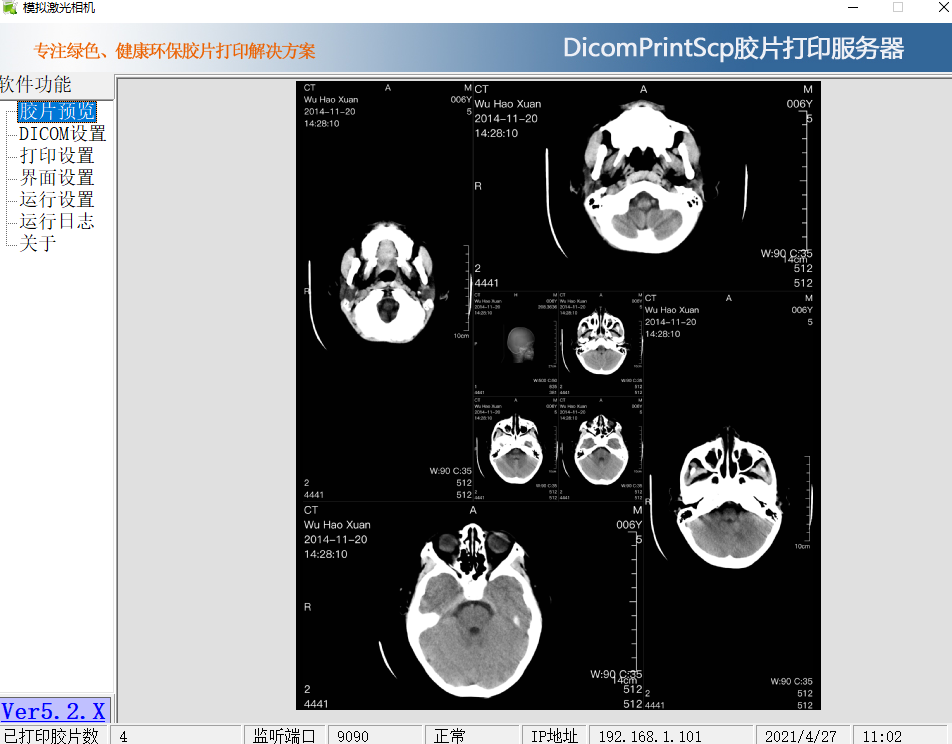
下载一个打印服务端模拟接受打印:
我这里使用的是模拟激光相机5.0版本,下载地址:https://www.fxxz.com/soft/47115.html
设置好端口并发送,查看握手状态和通讯包:
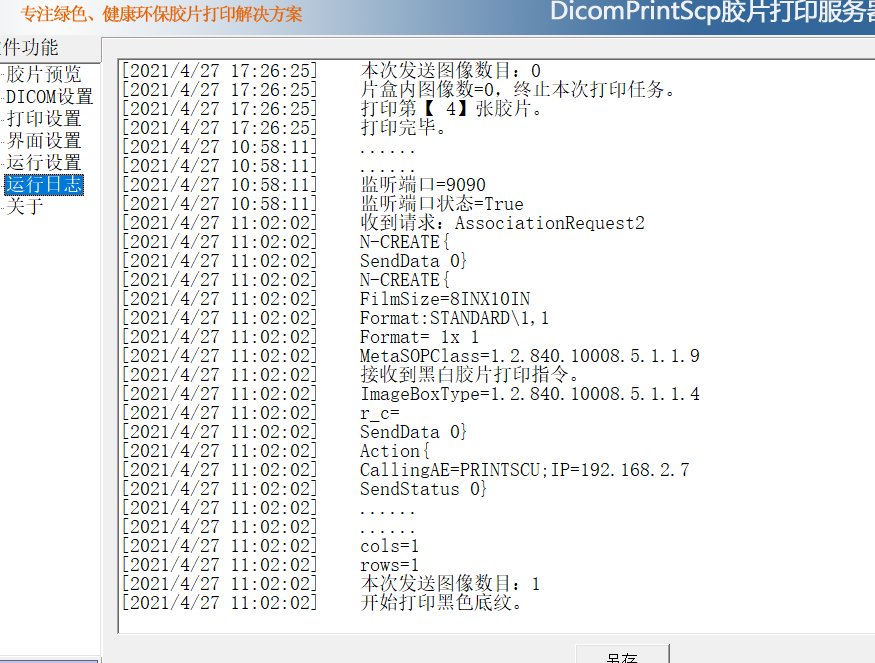
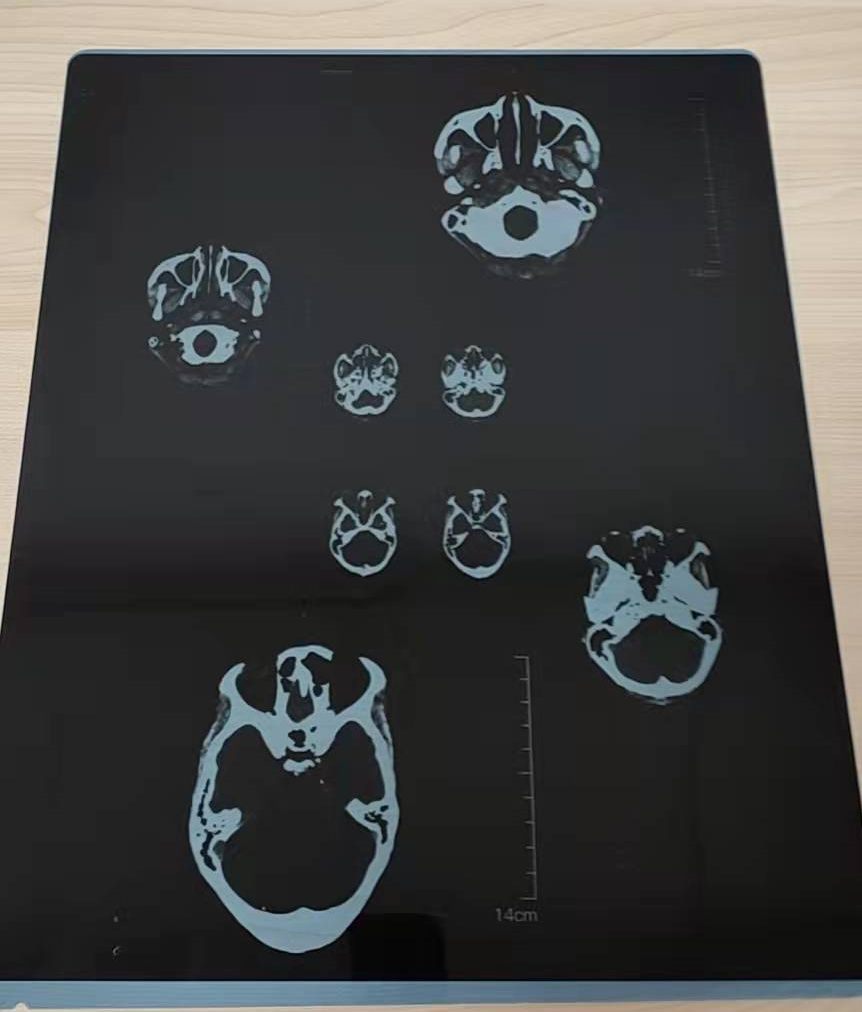
查看打印结果:

 浙公网安备 33010602011771号