SpringBoot
Spring Boot概述
什么是Spring Boot
SpringBoot 是 Spring 项目中的一个子工程
与我们所熟知的 Spring-framework 同属于 spring 的产品
设计目的是用来简化新 Spring 应用的初始搭建以及开发过程
最主要作用就是帮我们快速的构建庞大的 spring 项目,并且尽可能的减少一切 xml 配置
做到开箱即用,迅速上手,让我们关注与业务而非配置
为什么要学习Spring Boot
之前
- 复杂的配置
- 项目各种配置其实是开发时的损耗
- 写配置挤占了写应用程序逻辑的时间
- 混乱的依赖管理
- 项目当中添加很多库已经很麻烦了
- 还要知道这些库的哪个版本和其他库不会有冲突
- 一旦选错了依赖的版本
- 随之而来的不兼容问题就会造成项目的致命性伤害
现在
- Spring Boot 简化了基于 Spring 的应用开发
- 只需要
run就能创建一个独立的、生产级别的 Spring 应用 - Spring Boot为 Spring 平台及第三方库提供开箱即用的设置
Spring Boot特点
- 为所有 Spring 的开发者提供一个非常快速的、广泛接受的入门体验
- 开箱即用,通过简单的配置,简化了以前复杂配置操作
- 提供了一些大型项目中常见的非功能性特性,如内嵌服务器、安全、指标,健康检测、外部化配置等
- 无需 XML 配置
- http://spring.io/projects/spring-boot
Spring Boot功能
- 以
jar包方式独立运行(jar -jar xxx.jar) - 内嵌
Servlet容器(tomcat, jetty),无需以war包形式部署到独立的 servlet 容器中 - 提供
starter简化maven依赖包配置 - 自动装配
bean(大多数场景) - 提倡使用 java 配置和注解配置结合而无需 xml 配置
Spring Boot快速入门
从零使用Maven搭建
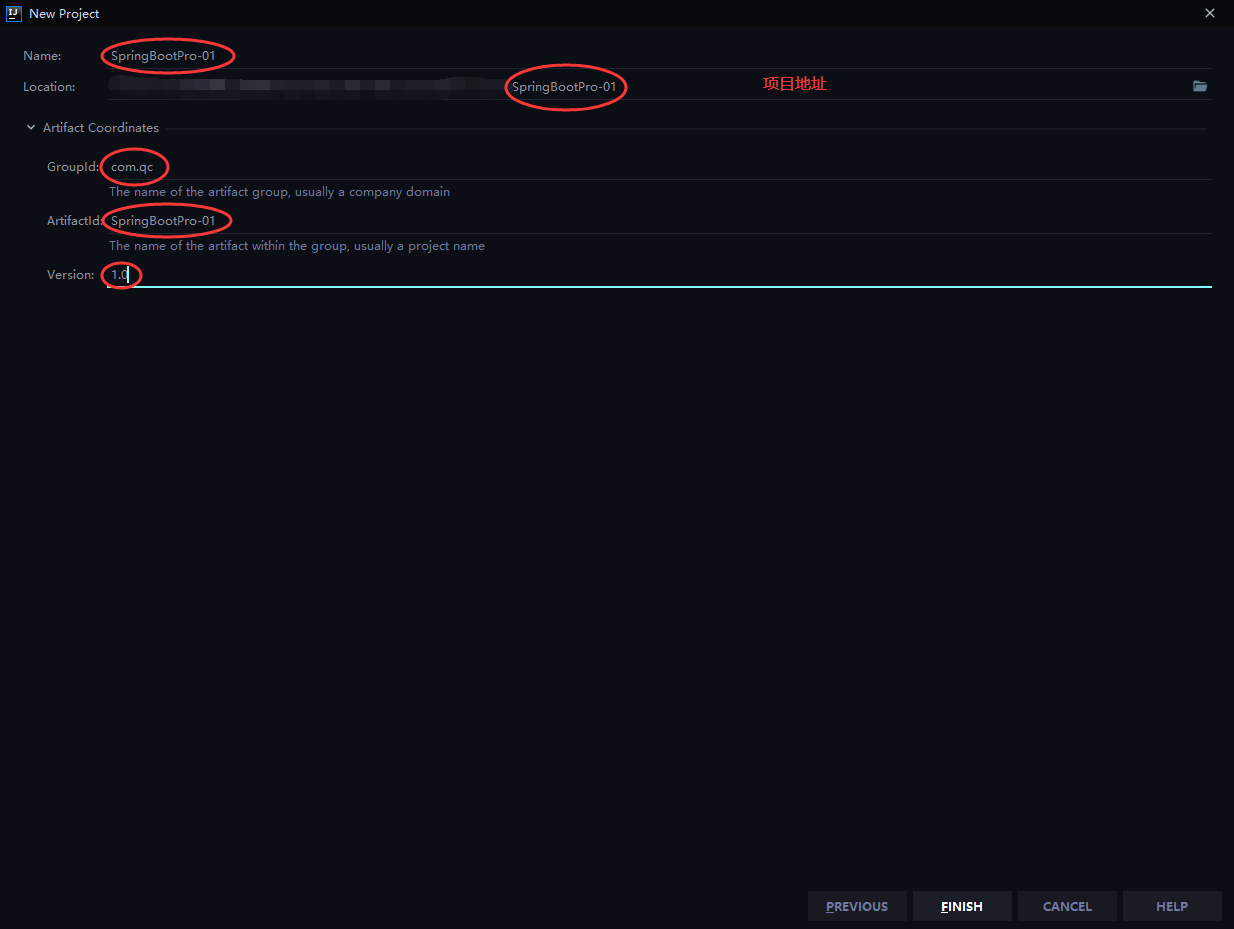
1.创建 Maven 工程

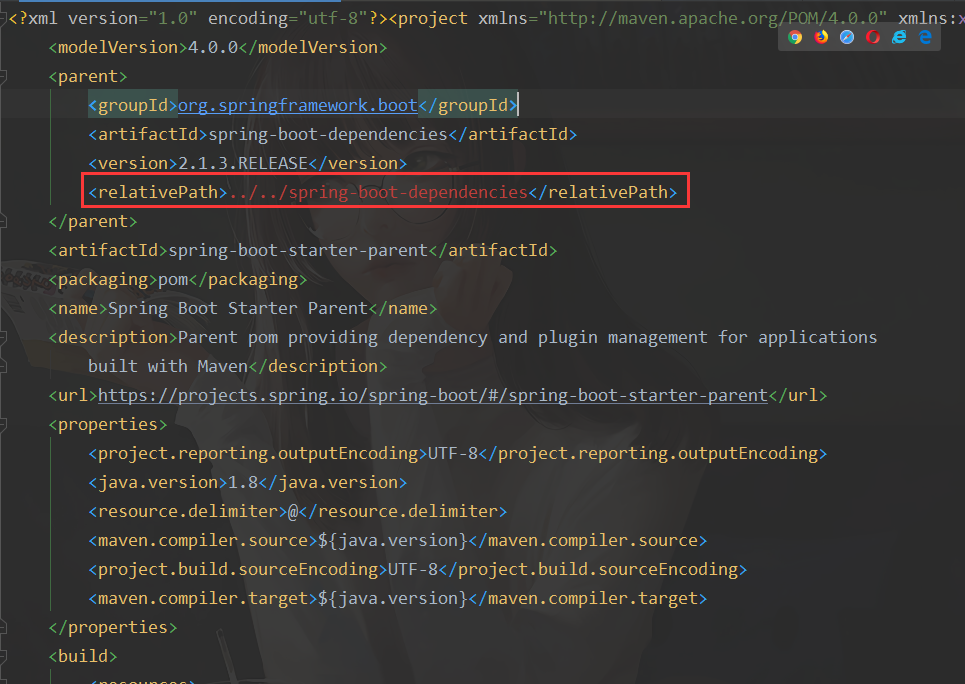
2.引入 Spring Boot 依赖
<parent>
    <groupId>org.springframework.boot</groupId>
    <artifactId>spring-boot-starter-parent</artifactId>
    <version>2.1.3.RELEASE</version>
</parent>
3.添加 Spring-Boot 启动器依赖
<dependencies>
    <dependency>
        <groupId>org.springframework.boot</groupId>
        <artifactId>spring-boot-starter-web</artifactId>
    </dependency>
</dependencies>
添加启动器后 web 工程常用的依赖会自动帮你引入。
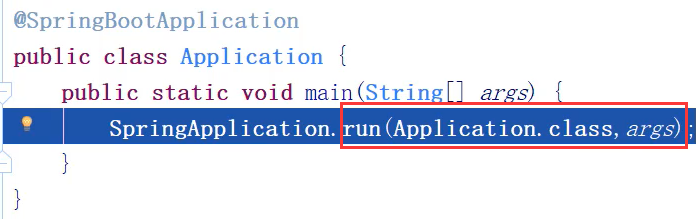
4.编写启动类

@SpringBootApplication
public class Application {

    public static void main(String[] args) {
        SpringApplication.run(Application.class,args);
    }

}
5.编写 Controller 直接访问
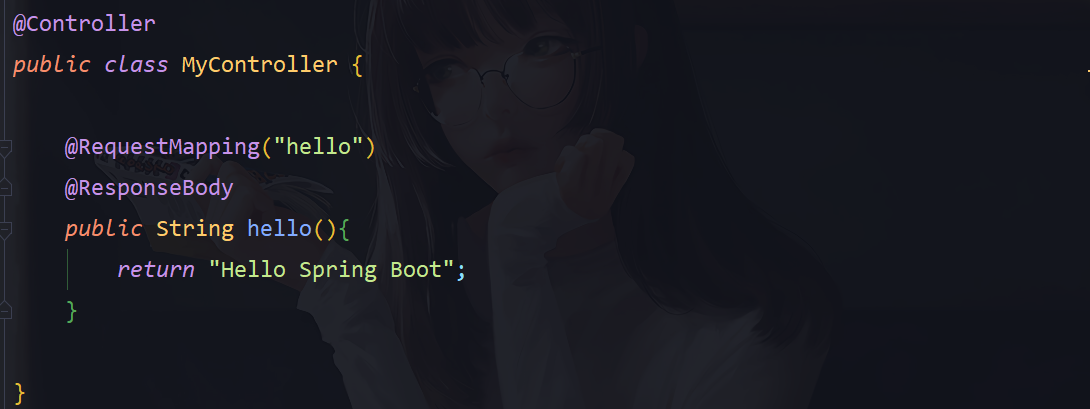
@Controller
public class MyController {

    @RequestMapping("hello")
    @ResponseBody
    public String hello(){
        return "Hello Spring Boot";
    }

}
Spring Boot 热部署
<!--热部署-->
<dependency>
    <groupId>org.springframework.boot</groupId>
    <artifactId>spring-boot-devtools</artifactId>
</dependency>
补充
- 如遇到 Spring Boot
run启动时非常缓慢使用以下方法- 1.在命令行中输入
hostname查询当前主机名称 - 2.到C盘
Windows\System32\drivers\etc中找到host文件 - 3.复制一份其它地方进行编辑,编辑时在
hostname之后添加.local - 4.注意事项:
127.0.0.1和local之间是两个tab不是空格
- 1.在命令行中输入


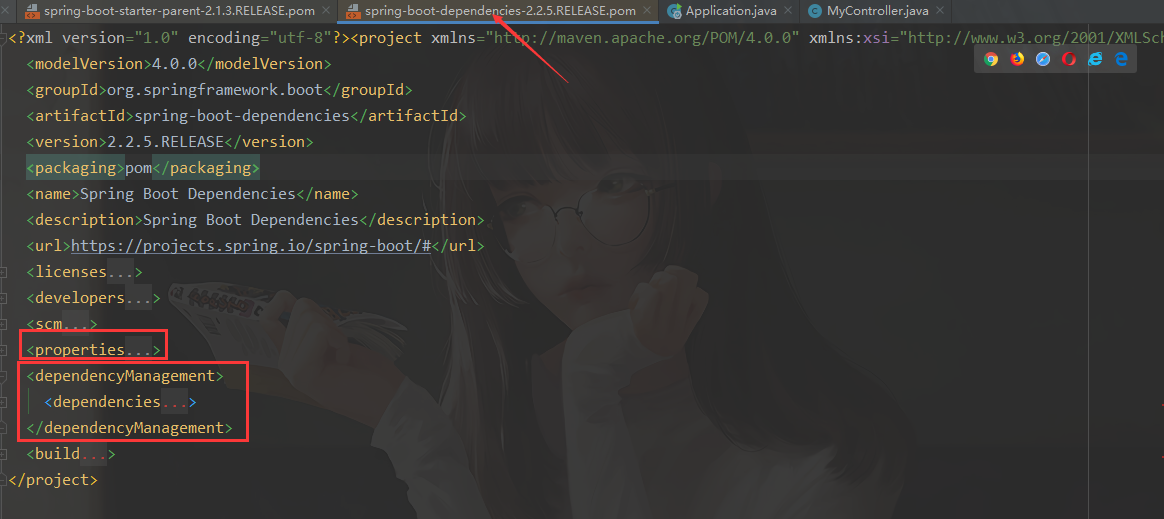
Spring Boot 父POM依赖管理
-
所有jar包的版本统一管理
-
所有jar的依赖管理,其中包含SpringBoot 给我们提供的很多的 starter 启动器
-
dependencyManage
- 定义了子项目中可能出现的各种依赖及其版本信息;使得子项目在需要的时候引入即可使用,且不再需要定义版本了

Spring Boot 进行Java配置
-
编写配置
-
SpringBoot 默认使用 servlet3.0 可以没有 web.xml
-
没有任何的 xml ,我们想要做一些自定义的配置,比如数据库相关的信息,该如何配置?
-
使用Java配置
-
Spring 1.0时代
- Spring 配置都是 xml格式
-
Spring 2.0时代
- 引入了 注解,并未 完全替代xml
-
Spring 3.0及以后
- 3.0以后 Spring的注解已经非常完善了
-
SpringBoot
- 使用 Java配置
-
-
SpringBoot 当中 java配置主要靠 java类 和一些 注解 代替xml
| 注解名称 | 作用 |
|---|---|
| @Configuration | 声明一个类作为 配置类,代替xml文件 |
| @Bean | 声明在 方法上,将方法的 返回值 加入 Bean容器,代替 |
| @value | 属性注入 |
| @PropertySource | 指定外部 属性文件 |
- 创建配置类,引入 jdbc.properties

package com.qc.config;

import com.alibaba.druid.pool.DruidDataSource;
import org.springframework.beans.factory.annotation.Value;
import org.springframework.context.annotation.Bean;
import org.springframework.context.annotation.Configuration;
import org.springframework.context.annotation.PropertySource;
import javax.sql.DataSource;

@Configuration
@PropertySource("classpath:jdbc.properties")
public class JdbcConfig {

    @Value("${jdbc.url}")
    String url;

    @Value("${jdbc.driverClassName}")
    String driverClassName;

    @Value("${jdbc.username}")
    String username;

    @Value("${jdbc.password}")
    String password;

    /*方法的返回值就是一个bean对象
      就可以使用@autoWare进行注入
    * */

    @Bean

    public DataSource dataSource() {
        DruidDataSource dataSource = new DruidDataSource();
        dataSource.setUrl(url);
        dataSource.setDriverClassName(driverClassName);
        dataSource.setUsername(username);
        dataSource.setPassword(password);
        return dataSource;
    }
}
- 控制器当中进行测试

@Controller
public class HelloController {

    @Autowired
    private DataSource dataSource;

    @RequestMapping("hello")
    @ResponseBody
    public String hello(){
        return "hello spring boot"+dataSource;
    }
}
Spring Boot属性注入
单独放到一个 类当中
- 0.把 jdbc.properties 名称改为 application.properties

jdbc.driverClassName=com.mysql.cj.jdbc.Driver
jdbc.url=jdbc:mysql://localhost:3306/dbname?useUnicode=true&characterEncoding=utf8&serverTimezone=GMT%2B8&useSSL=false
jdbc.username=root
jdbc.password=1234
- 1.创建一个类 名为 JDBCPropertis

-
2.把所有属性添加到类当中
-
3.在类上添加注解
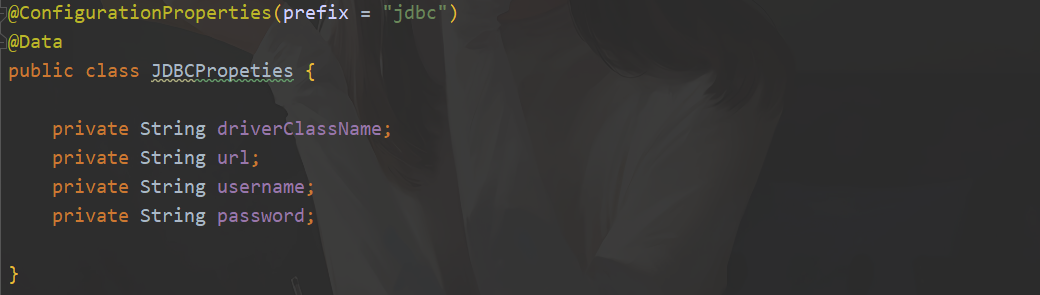
@ConfigurationProperties(prefix = "jdbc")
@Data
public class JDBCPropeties {

    private String driverClassName;
    private String url;
    private String username;
    private String password;

}
- 4.在 JdbcConfig 中直接使用

- 5.也可以使用 属性注入 方式,也可以使用 构造方法 的形式

直接注入
- 创建
application.properties属性文件

- 直接在 方法上 配置 注解形式

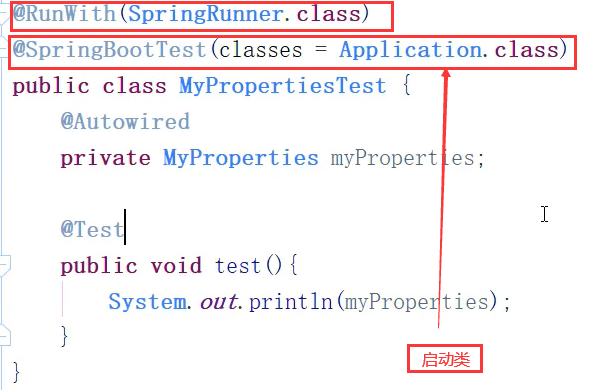
Spring Boot 单元测试
- 引入依赖
<dependency>
    <groupId>org.springframework.boot</groupId>
    <artifactId>spring-boot-starter-test</artifactId>
</dependency>
- 测试
属性文件使用 yaml文件方式
-
配置文件除了使用 application.properties 类型,还可以是后缀名为:
.yml或.yaml的类型 -
也会自动的加载
-
YAML是一种简洁的非标记语言,是以数据为中心, 使用空白缩进,分行组织数据
-
从而使得表示更加简洁易读
-
示例

-
注意事项
-
如果有两个配置文件一个 .properties 和一个 .yml
-
会取两个并集,如果有相同的名称,会以 properties` 为主
-
Spring Boot yaml自定义属性和值
- 示例


Spring Boot自动配置
Spring Boot 自动配置
-
使用 Spring Boot 之后,一个整合了 SpringMVC 的 WEB工程 开发 非常简单,那些 繁杂 的配置 都消失不见了,这是如何做到的?
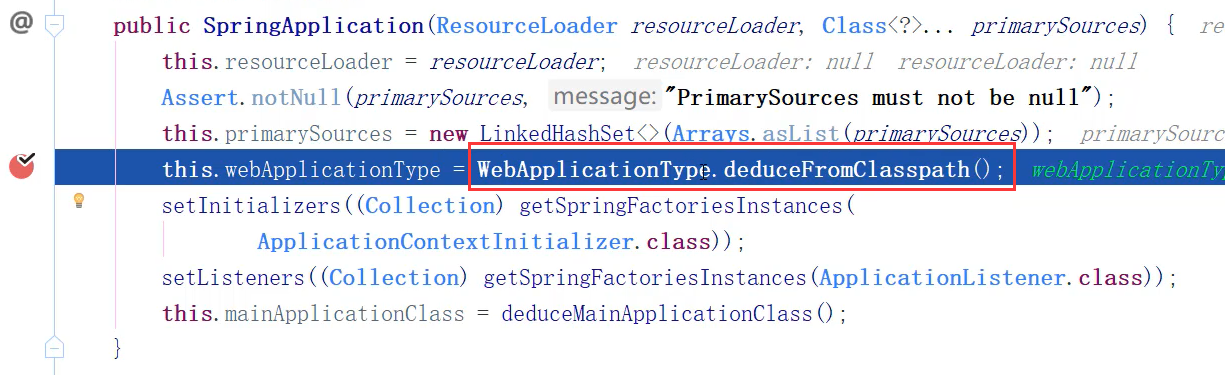
- 查看 main方法 的 启动类

-
注解:@SpringBootApplication
-
run方法:SpringApplication.run()
-
@SpringBootApplication
- 查看 @SpringBootApplication 源码

-
在源码 当中 有3个 比较重点 的注解
-
@SpringBootConfiguration 查看源码

-
在这个注解上面,又有一个
@Configuration注解-
这个注解 的 作用 就是 声明
当前类是一个配置类 -
然后 Spring 会自动扫描到添加了
@Configuration的类 -
读取其中的配置信息
-
而 @SpringBootConfiguration 是来 声明 当前类 是 SpringBoot 应用的配置类,项目中只能有一个。所以一般我们无需自己添加。
-
-
@EnableAutoConfiguration
-
开启自动配置 -
告诉 SpringBoot 基于所添加的依赖,去“猜测”你想要如何配置 Spring。
-
比如我们引入了 spring-boot-starter-web,而这个启动器中帮我们添加了 tomcat、SpringMVC的依赖
-
此时自动配置就知道你是要开发一个 web应用,所以就帮你完成了 web 及 SpringMVC 的默认配置了!
-
Spring Boot 内部对大量的第三方库 或 Spring 内部库 进行了默认配置
-
这些配置 是否生效,取决于我们是否 引入了对应库 所需的依赖
-
如果有 那么默认配置 就会生效
-
我们使用 Spring Boot 构建一个项目,只需要引入 所需框架的依赖,配置 就 可以交给 Spring Boot处理了
-
-
@ComponentScan
-
配置组件扫描的指令 -
提供了类似与
<context:component-scan>标签的作用 -
通过 basePackageClasses 或者 basePackages属性 来指定 要扫描的包。
-
如果没有指定这些属性,那么将从声明这个注解的类
所在的包开始,扫描包及子包 -
而我们的 @SpringBootApplication 注解声明的类就是 main 函数所在的 启动类,因此扫描的包 是该类 所在包 及 其子包。因此,一般启动类会放在一个 比较前的包 目录中。
-
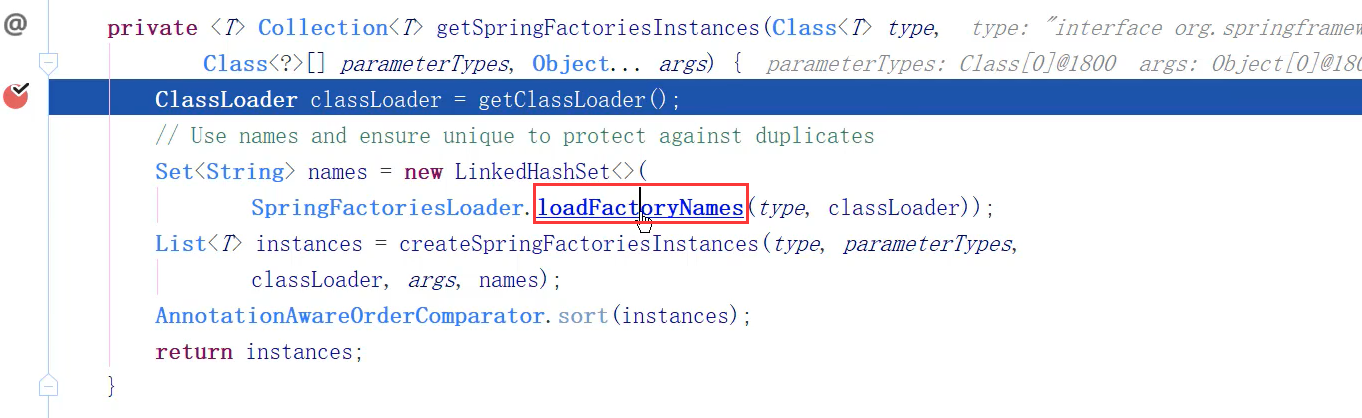
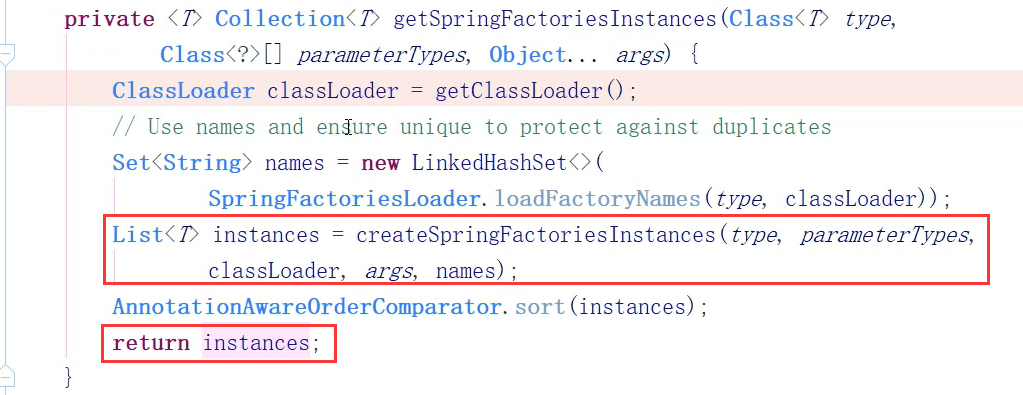
Spring Boot 自动配置原理
-
@EnableAutoConfiguration 会开启 Spring Boot 的自动配置,并且 根据你引入的依赖 来生效对应的默认配置
-
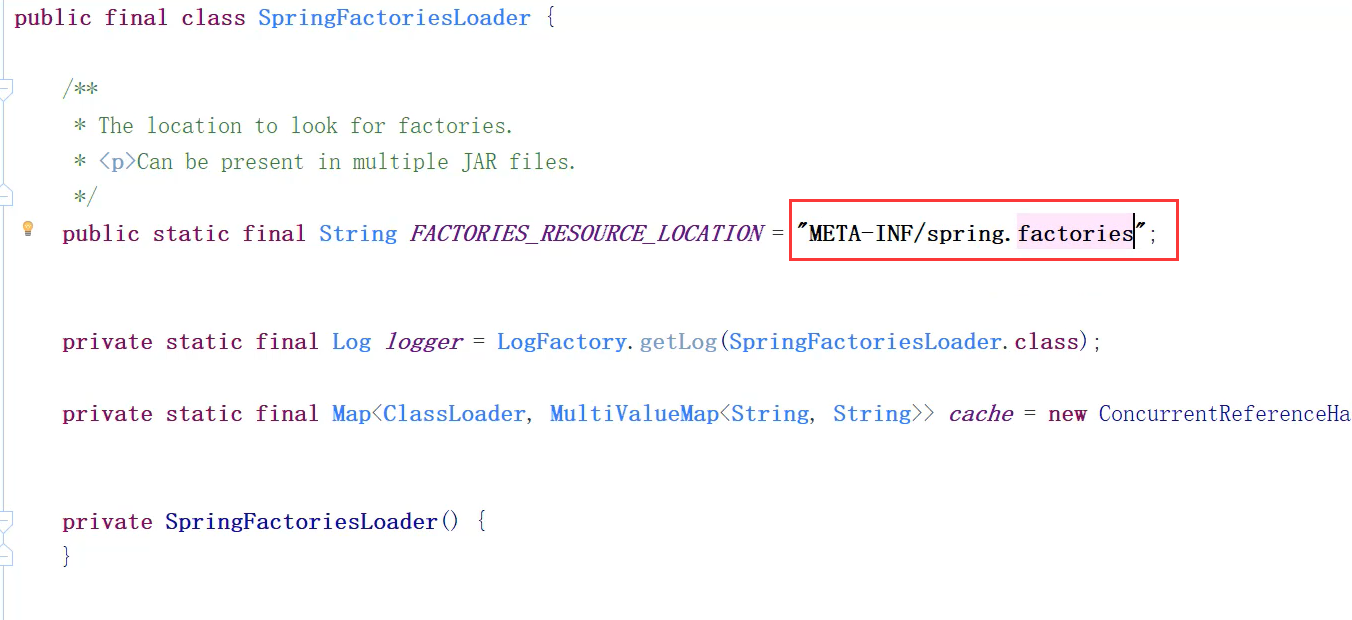
这些默认配置是在哪里定义的?

- 为何依赖引入就会触发配置?


Spring Boot搭建SSM
准备工作
- 创建表
DROP TABLE IF EXISTS `tb_hero`;
CREATE TABLE `tb_hero` (
  `id` int(11) NOT NULL AUTO_INCREMENT,
  `username` varchar(255) DEFAULT NULL,
  `profession` varchar(255) DEFAULT NULL,
  `phone` varchar(255) DEFAULT NULL,
  `email` varchar(255) DEFAULT NULL,
  `onlinetime` datetime DEFAULT NULL,
  PRIMARY KEY (`id`)
) ENGINE=InnoDB AUTO_INCREMENT=11 DEFAULT CHARSET=utf8;
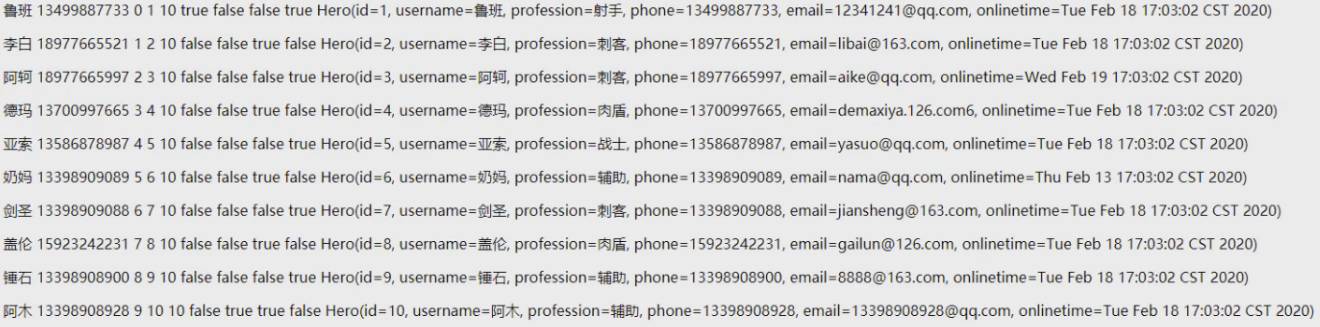
INSERT INTO `tb_hero` VALUES ('1', '鲁班', '射手', '13499887733', '12341241@qq.com', '2020-03-11 17:28:23');
INSERT INTO `tb_hero` VALUES ('2', '李白', '刺客', '18977665521', 'libai@163.com', '2020-03-11 17:28:29');
INSERT INTO `tb_hero` VALUES ('3', '阿轲', '刺客', '18977665997', 'aike@qq.com', '2020-03-11 17:28:32');
INSERT INTO `tb_hero` VALUES ('4', '德玛', '肉盾', '13700997665', 'demaxiya.126.com6', '2020-03-11 17:28:35');
INSERT INTO `tb_hero` VALUES ('5', '亚索', '战士', '13586878987', 'yasuo@qq.com', '2020-03-11 17:28:38');
INSERT INTO `tb_hero` VALUES ('6', '奶妈', '辅助', '13398909089', 'nama@qq.com', '2020-03-11 17:28:41');
INSERT INTO `tb_hero` VALUES ('7', '剑圣', '刺客', '13398909088', 'jiansheng@163.com', '2020-03-20 17:28:43');
INSERT INTO `tb_hero` VALUES ('8', '盖伦', '肉盾', '15923242231', 'gailun@126.com', '2020-03-20 17:28:46');
INSERT INTO `tb_hero` VALUES ('9', '锤石', '辅助', '13398908900', '8888@163.com', '2020-03-09 17:28:49');
INSERT INTO `tb_hero` VALUES ('10', '阿木', '辅助', '13398908928', '13398908928@qq.com', '2020-02-01 17:28:54');
- 表对应的 pojo
public class TbHero {
    private Integer id;
    private String username;
    private String profession;
    private String phone;
    private String email;
    private Date onlinetime;
}
配置 spring-mvc
- 端口配置
server:    #端口
  port: 80
-
静态资源访问
-
由于没有了 web-inf 目录,如果直接把静态资源 类似图片等信息放到 resource 是无法访问到的
-
默认情况下,它是在以下目录当中进行查找静态资源文件
-

- 所以要自己手动 在 resource 文件 当中 创建静态资源目录

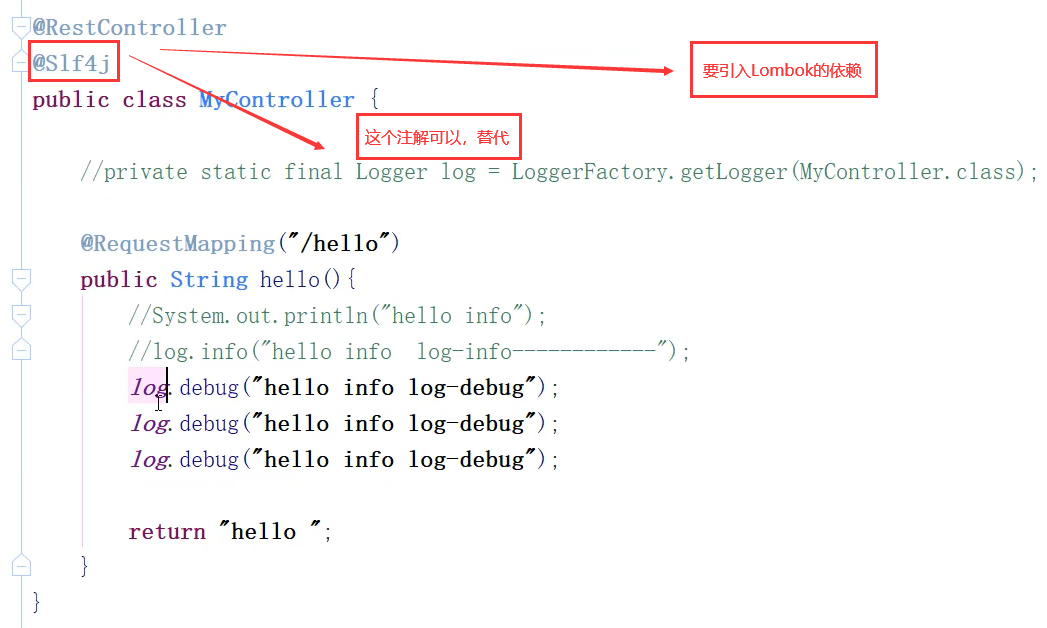
- 日志级别
private static final Logger log = LoggerFactory.getLogger(MyInterceptor.class);
- Slf4j
- 日志级别配置
logging:
  level:
    com.qc: info
  path: "D:/test/test.log"
-
拦截器
-
自定义拦截器

@Slf4j
/**
 * @author 30315
 * @title: MyInterceptor
 * @projectName SpringBootPro-01
 * @description: TODO
 * @date 2020-03-1116:59
 */
public class MyInterceptor implements HandlerInterceptor {

    @Override
    public boolean preHandle(HttpServletRequest request, HttpServletResponse response, Object handler) throws Exception {
        log.debug("MyInterceptor---preHandle");
        return false;
    }

    @Override
    public void postHandle(HttpServletRequest request, HttpServletResponse response, Object handler, ModelAndView modelAndView) throws Exception {

    }

    @Override
    public void afterCompletion(HttpServletRequest request, HttpServletResponse response, Object handler, Exception ex) throws Exception {

    }
}
- 配置拦截器

@Configuration
public class MvcConfig implements WebMvcConfigurer {

    /**
     *@描述 添加拦截器,拦截所有请求
     *@参数
     *@返回值
     *@创建人 XiaoHuiHui丶Tang
     *@创建时间 2020-03-11
     *@修改人和其它信息
     */
    @Override
    public void addInterceptors(InterceptorRegistry registry) {
        registry.addInterceptor(new MyInterceptor()).addPathPatterns("/**");
    }
}
-
注解扫描-自动配置完成
-
包扫描-内部自带了包扫描
-
视图解析器 Spring Boot 当中 不支持 jsp,无需配置
Spring Boot集成Mybatis
- 添加 jdbc启动器
<dependency>
    <groupId>org.springframework.boot</groupId>
    <artifactId>spring-boot-starter-jdbc</artifactId>
</dependency>
- 添加 Mysql数据库驱动
<dependency>
    <groupId>mysql</groupId>
    <artifactId>mysql-connector-java</artifactId>
</dependency>
- 配置 连接参数
spring:
  datasource:
    driver-class-name: com.mysql.cj.jdbc.Driver
    url: jdbc:mysql://localhost:3306/dbname?useUnicode=true&characterEncoding=utf8&serverTimezone=GMT%2B8&useSSL=false
    username: root
    password: 1234
-
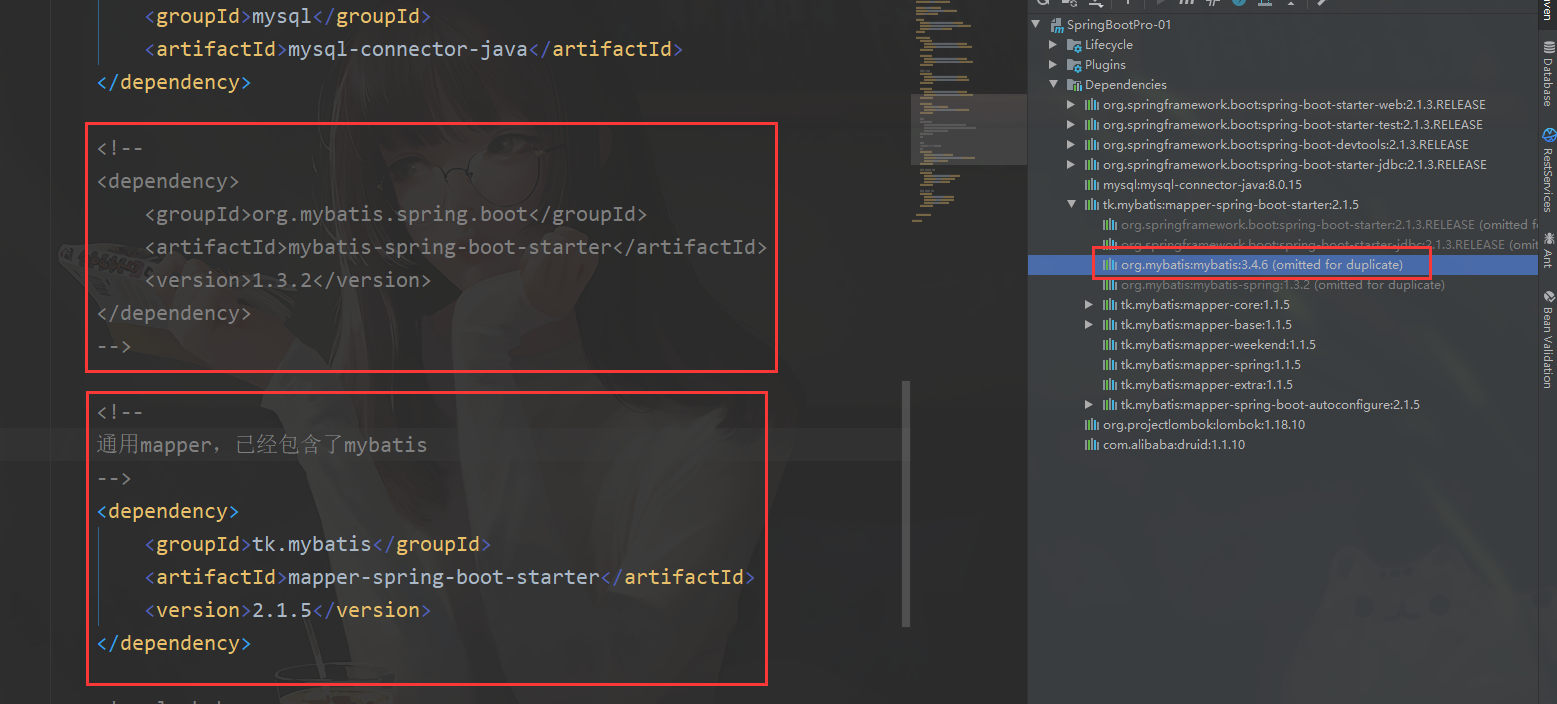
添加 Mybatis启动器
-
Spring Boot 没有给 Mybatis 写启动器,Mybaits 自己写了启动器
-
添加 Mybatis启动器
-
<dependency>
    <groupId>org.mybatis.spring.boot</groupId>
    <artifactId>mybatis-spring-boot-starter</artifactId>
    <version>1.3.2</version>
</dependency>
- 配置 别名 xml地址
mybatis:
  type-aliases-package: com.qc.pojo
  mapper-locations: mapper/*.xml
-
mapper 接口扫描
- 在 main方法 上添加
@MapperScan("包名")注解
- 在 main方法 上添加
-
创建 mapper.xml
<?xml version="1.0" encoding="UTF-8" ?>
<!DOCTYPE mapper
        PUBLIC "-//mybatis.org//DTD Mapper 3.0//EN"
        "http://mybatis.org/dtd/mybatis-3-mapper.dtd">
<mapper namespace="namespace">

</mapper>
Spring Boot集成通用mapper
-
介绍
-
通用Mapper 可以极大的方便 开发人员。可以随意的 按照自己的 需要选择 通用方法,还可以 很方便的 开发自己的 通用方法。极其方便的 使用 MyBatis
单表的增删改查。 -
支持
单表操作,不支持通用的多表联合查询。
-
-
引入 启动器
<!--
通用mapper,已经包含了mybatis
-->
<dependency>
    <groupId>tk.mybatis</groupId>
    <artifactId>mapper-spring-boot-starter</artifactId>
    <version>2.1.5</version>
</dependency>
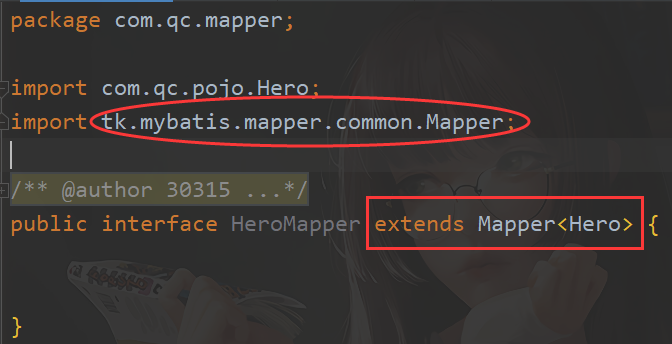
- 在接口上 继承
Mapper<实体类>
-
以前 需要自己写方法, 现在 不用自己写,直接继承
-
也不需要在 Mapper文件当中 写sql了 底层会利用 Mybatis的 可拦截原理,帮你把方法的sql动态生成了
-
通用mapper 已经引入了 springboot jdbc Mybatis,就不需要再 单独引入了
-
也可开启驼峰
-
启动类也可改成通用mapper 的启动类,通过mapper在扫描时, 去自动生成sql

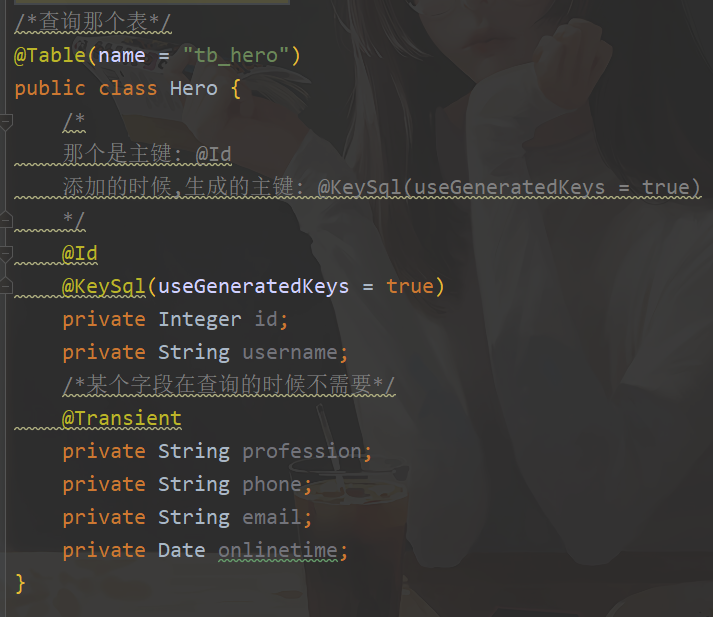
- 在Pojo中 指定表名 与相关 主键属性
Spring Boot集成Servlet
- 通过 注解扫描 方式完成 Servlet组件的注册
Servlet代码部分
@WebServlet(name = "firstServlet",urlPatterns = "/first")
public class FirstServlet extends HttpServlet{
	protected void doGet(HttpServletRequest req, HttpServletResponse resp) throws  ServletException, IOException {
		doPost(req, resp);
	}
        protected void doPost(HttpServletRequest req, HttpServletResponse resp) throws ServletException, IOException {
	    System.out.println("------------FirstServlet------------");
	}
}
启动类
@SpringBootApplication
// 在spring boot启动时会扫描@WebServlet @WebFilter @WebListener注解,并创建该类的实例
@ServletComponentScan
public class App {
	public static void main(String[] args) {
		SpringApplication.run(App.class, args);
	}
}
- 通过方法 完成Servlet组件的注册
Servlet部分
public class SecondServlet extends HttpServlet{
	@Override
	protected void doGet(HttpServletRequest req, HttpServletResponse resp) throws ServletException, IOException {
		doPost(req, resp);
	}
	@Override
	protected void doPost(HttpServletRequest req, HttpServletResponse resp) throws ServletException, IOException {
	    System.out.println("------------SecondServlet------------");
	}
}
启动类
@SpringBootApplication
public class App2 {
	public static void main(String[] args) {
		SpringApplication.run(App2.class, args);
	}

	//添加一个方法,方法名无要求,必须返回ServletRegistrationBean。注册Servlet对象
	@Bean     //主键等价于<bean>标签
	public ServletRegistrationBean<SecondServlet> getServletRegistrationBean(){
		ServletRegistrationBean<SecondServlet> bean=
			new ServletRegistrationBean<SecondServlet>(new SecondServlet(),"/second");
		return bean;
	}
}
Spring Boot集成Filter
- 通过注解扫描方式 完成Fliter组件的注册
Filter代码
@WebFilter(filterName = "FirstFilter",urlPatterns = "/first")
public class FirstFilter implements Filter{
	@Override
	public void doFilter(ServletRequest request, ServletResponse response, FilterChain chain)
			throws IOException, ServletException {
		System.out.println("----进入FirstFilter-----");
		chain.doFilter(request, response);//放行
		System.out.println("----离开FirstFilter-----");
	}
}
启动类
@SpringBootApplication
@ServletComponentScan
public class App {
	public static void main(String[] args) {
		SpringApplication.run(App.class, args);
	}
}
- 通过方法方式 完成Filter组件的注册
Filter代码
public class SecondFilter implements Filter{
	@Override
	public void doFilter(ServletRequest request, ServletResponse response, FilterChain chain)
			throws IOException, ServletException {
		System.out.println("----进入SecondFilter-----");
		chain.doFilter(request, response);//放行
		System.out.println("----离开SecondFilter-----");
	}
}
启动类
@SpringBootApplication
public class App2 {
	public static void main(String[] args) {
		SpringApplication.run(App2.class, args);
	}
	//添加一个方法,方法名无要求,必须返回ServletRegistrationBean。注册Servlet对象
	@Bean     //主键等价于<bean>标签
	public ServletRegistrationBean<SecondServlet> getServletRegistrationBean(){
		ServletRegistrationBean<SecondServlet> bean=
			new ServletRegistrationBean<SecondServlet>(new SecondServlet(),"/second");
		return bean;
	}
	//添加一个方法
	@Bean
	public FilterRegistrationBean<SecondFilter> getFilterRegistrationBean(){
		FilterRegistrationBean<SecondFilter> bean=
				new FilterRegistrationBean<SecondFilter>(new SecondFilter());
		bean.addUrlPatterns("*.do","*.jsp","/second");
		return bean;
	}
}
Spring Boot集成Listener
- 通过注解扫描 完成Listener组件注册
Listener代码部分
@WebListener()
public class FirstListener implements ServletContextListener{
	//监听application对象的创建
	@Override
	public void contextInitialized(ServletContextEvent sce) {
		System.out.println("-----------application对象创建-----------------");
	}
}
启动类
@SpringBootApplication
@ServletComponentScan
public class App {
	public static void main(String[] args) {
		SpringApplication.run(App.class, args);
	}
}
- 通过方法 完成Listener组件注册
Listener部分
public class SecondListener implements ServletContextListener{
	//监听application对象的创建
	@Override
	public void contextInitialized(ServletContextEvent sce) {
		System.out.println("-----SecondListener------application对象创建-----------------");
	}
}
启动类
@SpringBootApplication
public class App2 {
	public static void main(String[] args) {
		SpringApplication.run(App2.class, args);
	}
	@Bean
	public ServletListenerRegistrationBean<SecondListener> getServletListenerRegistrationBean(){
		ServletListenerRegistrationBean<SecondListener> bean=
				new ServletListenerRegistrationBean<SecondListener>(new SecondListener());
		return bean;
	}
}
Spring Boot集成jsp
引入依赖
<!-- jstl -->
<dependency>
    <groupId>javax.servlet</groupId>
    <artifactId>jstl</artifactId>
</dependency>
<!-- jasper:jsp引擎 -->
<dependency>
    <groupId>org.apache.tomcat.embed</groupId>
    <artifactId>tomcat-embed-jasper</artifactId>
</dependency>
- 编写控制器 Controller
@Controller
public class UserController {
	/**
	 * 获取用户信息,到jsp页面进行展示
	*/
	@RequestMapping("/userList")
	public String getUsersAll(Model model) {
		//访问业务层-->数据访问层mapper-->mybatis数据库获取所有用户信息
		//模拟,定义固定的用户信息
		List<User> list=new ArrayList<User>();
		list.add(new User("007", "小美", 22));
		list.add(new User("009","小灰",32));
		list.add(new User("012","小Blog",18));
		model.addAttribute("list", list);
		//配置springmvc的视图解析器,前缀:/WEB-INF/   后缀: .jsp
		return "index";
	}
}
创建Spring Boot的全局配置文件 application.properties
#配置jsp的访问的前缀和后缀 (视图解析器)
spring.mvc.view.prefix=/WEB-INF/
spring.mvc.view.suffix=.jsp

#服务tomcat端口号
server.port=80
视图层 jsp
<%@ page language="java" contentType="text/html; charset=UTF-8"
    pageEncoding="UTF-8"%>
<%@taglib  uri="http://java.sun.com/jsp/jstl/core" prefix="c" %>
<!DOCTYPE html>
<html>
<head>
<meta charset="UTF-8">
<title>用户显示页面</title>
</head>
<body>
   <table border="1" width="60%" align="center">
       <tr>
       	  <td>用户编号</td>
       	  <td>用户名称</td>
       	  <td>年龄</td>
       </tr>
       <c:forEach items="${list}" var="user">
	       <tr>
	       	  <td>${user.id}</td>
	       	  <td>${user.username}</td>
	       	  <td>${user.age}</td>
	       </tr>
       </c:forEach>
   </table>
</body>
</html>
Spring Boot集成freemarker
引入依赖
<!-- freemarker 启动器坐标 -->
<dependency>
    <groupId>org.springframework.boot</groupId>
    <artifactId>spring-boot-starter-freemarker</artifactId>
</dependency>
视图层 freemarker
-
freemarker 页面必须放入 src/main/resources 下的
templates目录下,并且页面的扩展名为:ftl -
index.ftl 页面代码
<!DOCTYPE html>
<html>
<head>
<meta charset="UTF-8">
<title>用户显示页面</title>
</head>
<body>
   <table border="1" width="60%" align="center">
       <tr>
       	  <td>用户编号</td>
       	  <td>用户名称</td>
       	  <td>年龄</td>
       </tr>
	   <!--freemarker获取request传过来的数据  <#数据类型  key类型 as 遍历元素名称>-->
	   <#list list as user>
	       <tr>
	       	  <td>${user.id}</td>
	       	  <td>${user.username}</td>
	       	  <td>${user.age}</td>
	       </tr>
	   </#list>
   </table>
</body>
<html>
创建Spring Boot的全局配置文件 application.properties
# 模板编码。
spring.freemarker.charset= UTF-8
# 后缀,在构建URL时附加到查看名称。
spring.freemarker.suffix=.ftl
# 逗号分隔的模板路径列表。src/main/resources==classpath
spring.freemarker.template-loader-path=classpath:/templates/
Spring Boot集成Thymeleaf
Thymeleaf 介绍
-
Spring Boot 并不推荐使用 jsp
-
Thymeleaf 是一个跟 Velocity、FreeMarker 类似的模板引擎,它可以完全替代 JSP
Thymeleaf 特点
-
动静结合
-
Thymeleaf 在有网络 和无网络 的环境下 皆可运行
-
它可以让美工 在浏览器查看页面的静态效果,也可以让程序员在服务器 查看带数据的动态页面效果
-
这是由于它支持 html 原型,然后在 html 标签里增加额外的属性来达到模板+数据的展示方式
-
浏览器解释 html 时 会忽略 未定义的标签属性,所以 thymeleaf 的模板可以静态地运行 -
当有数据返回到页面时,
Thymeleaf 标签会动态地替换掉静态内容,使页面动态显示
-
-
开箱即用
-
它提供标准和 spring 标准两种方言,可以直接套用模板实现JSTL、 OGNL表达式效果
-
避免每天套模板、该jstl、改标签的困扰。同时开发人员也可以扩展和创建自定义的方言。
-
-
多方言支持
-
Thymeleaf 提供 spring 标准方言和一个与 SpringMVC 完美集成的可选模块
-
可以快速的实现 表单绑定、属性编辑器、国际化等功能。
-
-
Spring Boot完美集成
-
与SpringBoot完美集成,SpringBoot 提供了Thymeleaf的默认配置
-
并且为 Thymeleaf设置了视图解析器,我们可以像以前操作jsp一样来操作Thymeleaf。
-
Thymeleaf 配置
- 添加启动器
<dependency>
    <groupId>org.springframework.boot</groupId>
    <artifactId>spring-boot-starter-thymeleaf</artifactId>
</dependency>
-
创建模板文件夹
-
Spring Boot 会自动为 Thymeleaf注册一个视图解析器
ThymeleafViewResolver -
还配置了模板文件(html)的位置,与jsp类似的前缀+ 视图名 + 后缀风格
-
与解析JSP的 InternalViewResolver 类似,Thymeleaf也会根据前缀 和后缀 来确定模板文件的位置
-
-
ThymeleafProperties

- 在配置文件中 配置缓存,编码
Spring Boot集成Thymeleaf基本使用
Thymeleaf 名称空间
<html lang="en" xmlns:th="http://www.thymeleaf.org">
Thymeleaf 表达式
${}: 变量 表达式
*{}: 选择变量 表达式
#{...}: Message 表达式,属性文件里面取值,国际化

Thymeleaf URL
-
绝对网址
- 绝对 URL 用于创建到 其他服务器 的链接,它们需要指定一个协议名称(http://或https😕/)开头
<a th:href="@{http://www.baidu.com}">链接</a>
-
上下文 相关URL
- 与Web应用程序
根相关联URL
- 与Web应用程序
<a th:href="@{/hello}">跳转</a>
-
与服务器 相关URL
- 服务器相关的URL 与 上下文相关的URL 非常相似
<a th:href="@{~/hello}">跳转</a>
- 携带 参数
<a th:href="@{/hero(id=3,action='show_all')}">跳转</a>
Thymeleaf 字面值
-
有的时候,我们需要在指令中 填写 基本类型如:字符串、数值、布尔等,并不希望被 Thymeleaf解析为变量,这个时候称为字面值。
- 字符串字面值

- 数字字面值

-
布尔字面值
- 布尔类型的字面值是true或false
Thymeleaf 拼接
- 普通字符串 与 表达式拼接的情况

- 字符串 字面值 需要用'',拼接起来非常麻烦,Thymeleaf对此进行了简化,使用一对
|即可

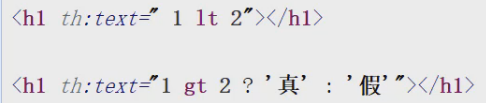
Thymeleaf 运算符
-
算术操作符
- + - * / %

-
比较运算
-
> < >= and <=
-
但是 >, < 不能直接使用,因为 xml会解析为标签
-
> gt
-
< lt
-
>= ge
-
<= le
-
-
三元运算
- conditon ? then : else

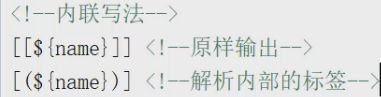
Thymeleaf 内联写法
Thymeleaf 局部变量

Thymeleaf 判断
- th:if

- th:unless

- th:switch

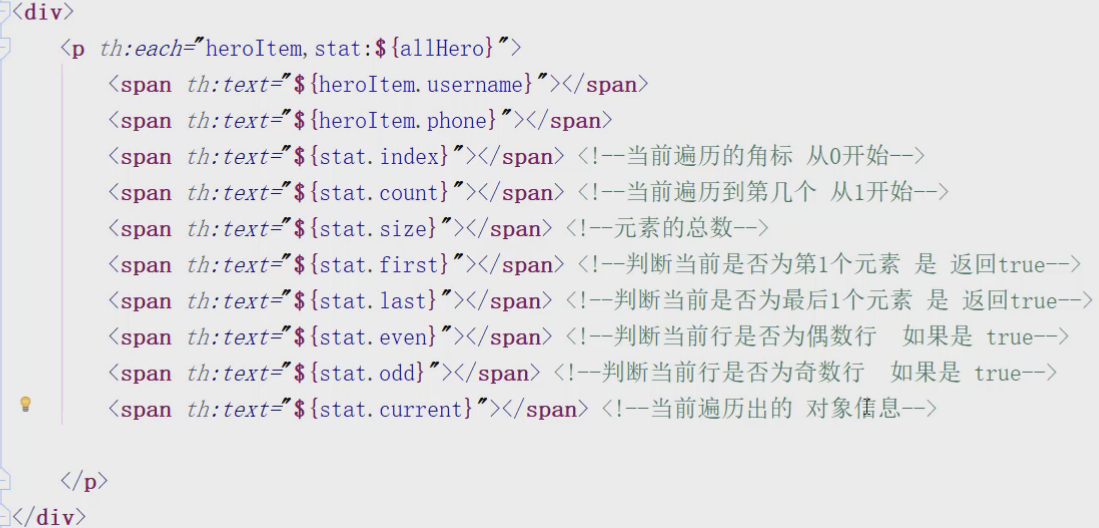
Thymeleaf 迭代

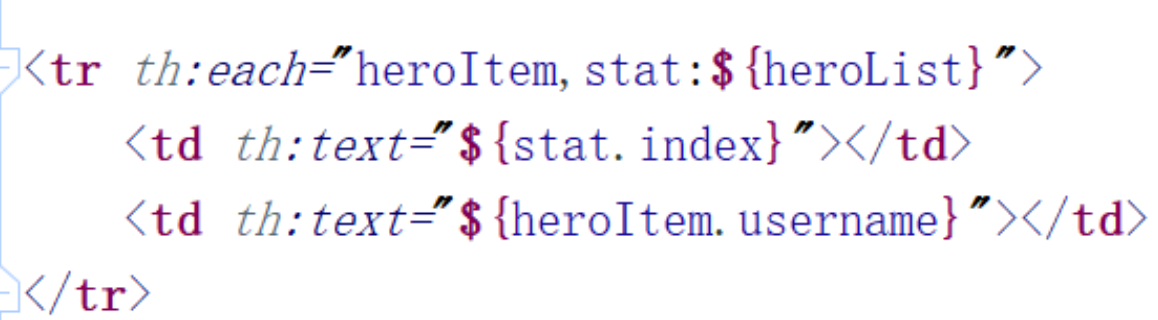
stat对象属性说明
| 属性名 | 作用 |
|---|---|
| index | 从0开始的角标 |
| count | 元素的个数,从1开始 |
| size | 总元素个数 |
| current | 当前遍历到的元素 |
| even/odd | 返回是否为奇偶,boolean值 |
| first/last | 返回是否为第一或最后,boolean值 |
Thymeleaf 内置对象
环境相关 对象
${#ctx} 上下文对象,可用于获取其它内置对象。
${#vars}:    上下文变量。
${#locale}:上下文区域设置。
${#request}: HttpServletRequest对象。
${#response}: HttpServletResponse对象。
${#session}: HttpSession对象。
${#servletContext}:  ServletContext对象。
全局对象 功能
#strings:字符串工具类
#lists:List 工具类
#arrays:数组工具类
#sets:Set 工具类
#maps:常用Map方法。
#objects:一般对象类,通常用来判断非空
#bools:常用的布尔方法。
#execInfo:获取页面模板的处理信息。
#messages:在变量表达式中获取外部消息的方法,与使用#{...}语法获取的方法相同。
#uris:转义部分URL / URI的方法。
#conversions:用于执行已配置的转换服务的方法。
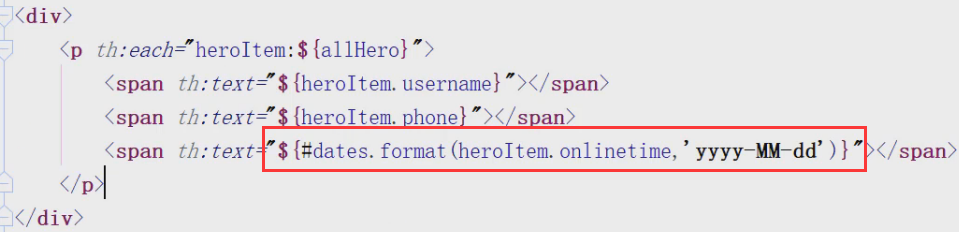
#dates:时间操作和时间格式化等。
#calendars:用于更复杂时间的格式化。
#numbers:格式化数字对象的方法。
#aggregates:在数组或集合上创建聚合的方法。
#ids:处理可能重复的id属性的方法。
示例
${#strings.abbreviate(str,10)}  str截取0-10位,后面的全部用…这个点代替,注意,最小是3位
${#strings.toUpperCase(name)}
判断是不是为空:null:

<span th:if="${name} != null">不为空</span>

<span th:if="${name1} == null">为空</span>

判断是不是为空字符串: “”

<span th:if="${#strings.isEmpty(name1)}">空的</span>


判断是否相同:

<span th:if="${name} eq 'jack'">相同于jack,</span>

<span th:if="${name} eq 'ywj'">相同于ywj,</span>

<span th:if="${name} ne 'jack'">不相同于jack,</span>


不存在设置默认值:

<span th:text="${name2} ?: '默认值'"></span>

是否包含(分大小写):

<span th:if="${#strings.contains(name,'ez')}">包ez</span>

<span th:if="${#strings.contains(name,'y')}">包j</span>

是否包含(不分大小写)

<spanth:if="${#strings.containsIgnoreCase(name,'y')}">包</span>

${#strings.startsWith(name,'o')}

${#strings.endsWith(name, 'o')}

${#strings.indexOf(name,frag)}// 下标

${#strings.substring(name,3,5)}// 截取

${#strings.substringAfter(name,prefix)}// 从 prefix之后的一位开始截取到最后,比如 (ywj,y) = wj, 如果是(abccdefg,c) = cdefg//里面有2个c,取的是第一个c

${#strings.substringBefore(name,suffix)}// 同上,不过是往前截取

${#strings.replace(name,'las','ler')}// 替换

${#strings.prepend(str,prefix)}// 拼字字符串在str前面

${#strings.append(str,suffix)}// 和上面相反,接在后面

${#strings.toUpperCase(name)}

${#strings.toLowerCase(name)}

${#strings.trim(str)}

${#strings.length(str)}

${#strings.abbreviate(str,10)}//  str截取0-10位,后面的全部用…这个点代替,注意,最小是3位
Thymeleaf 布局
- 方式 1

- 方式 2

-
引入方式
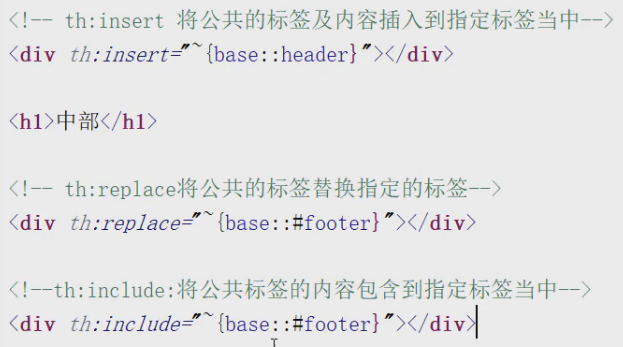
-
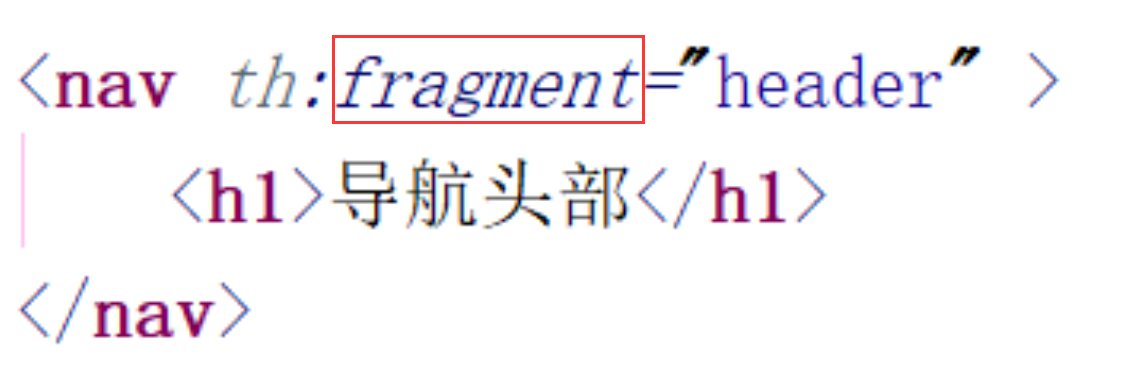
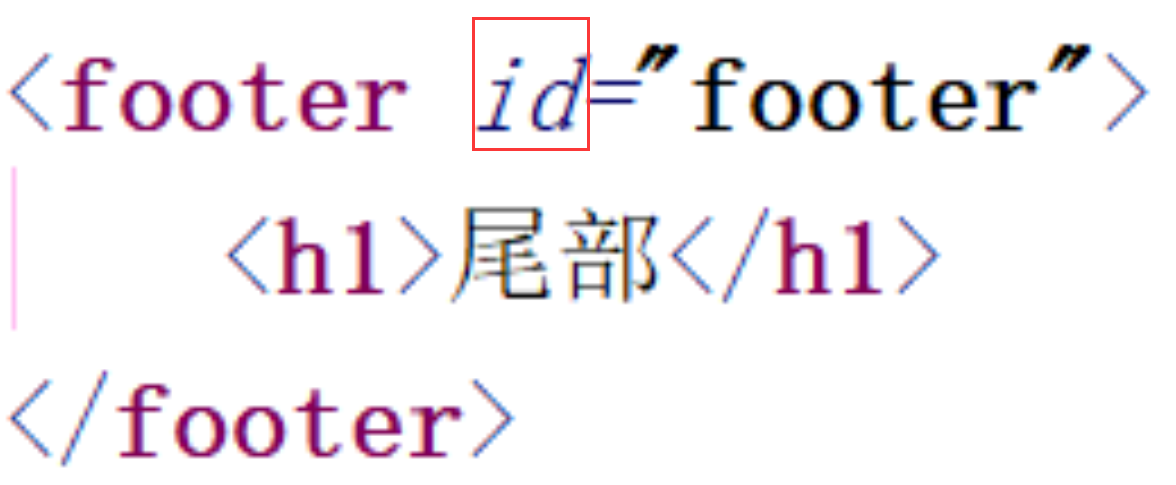
th:insert 将 公共的标签 及 内容 插入到指定标签当中
-
th:replace 将 公共的标签 替换 指定的标签
-
th:include 将 公共标签 的 内容 包含 到指定标签当中
-
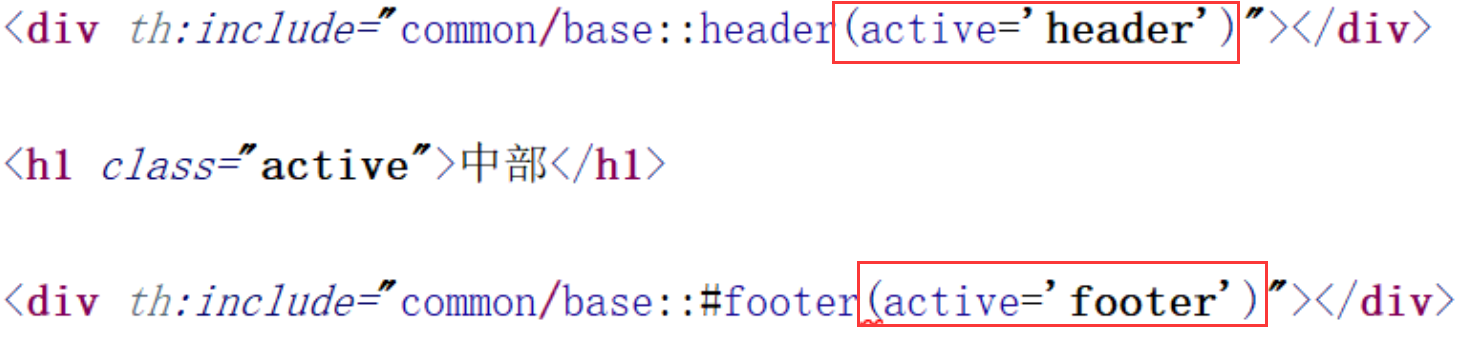
- 传值

Thymeleaf JS模板处理
-
模板引擎不仅可以渲染html,也可以对JS中的进行预处理。而且为了在纯静态环境下可以运行
-
在script标签中通过
th:inline="javascript"来声明这是要特殊处理的js脚本

Spring Boot-Thymeleaf综合使用
环境搭建
引入依赖
<parent>
    <groupId>org.springframework.boot</groupId>
    <artifactId>spring-boot-starter-parent</artifactId>
    <version>2.1.3.RELEASE</version>
</parent>

<dependencies>

    <!--Spring-Boot 启动器依赖-->
    <dependency>
        <groupId>org.springframework.boot</groupId>
        <artifactId>spring-boot-starter-web</artifactId>
    </dependency>

    <!--添加 jdbc启动器-->
    <dependency>
        <groupId>org.springframework.boot</groupId>
        <artifactId>spring-boot-starter-jdbc</artifactId>
    </dependency>

    <!--热部署-->
    <dependency>
        <groupId>org.springframework.boot</groupId>
        <artifactId>spring-boot-devtools</artifactId>
    </dependency>

    <!--Mysql数据库驱动-->
    <dependency>
        <groupId>mysql</groupId>
        <artifactId>mysql-connector-java</artifactId>
    </dependency>

    <!--
    通用mapper,已经包含了mybatis
    -->
    <dependency>
        <groupId>tk.mybatis</groupId>
        <artifactId>mapper-spring-boot-starter</artifactId>
        <version>2.1.5</version>
    </dependency>

    <!--thymeleaf启动器-->
    <dependency>
        <groupId>org.springframework.boot</groupId>
        <artifactId>spring-boot-starter-thymeleaf</artifactId>
    </dependency>

    <!--连接池-->
    <dependency>
        <groupId>com.alibaba</groupId>
        <artifactId>druid</artifactId>
        <version>1.1.6</version>
    </dependency>

    <dependency>
        <groupId>org.projectlombok</groupId>
        <artifactId>lombok</artifactId>
    </dependency>
    <dependency>
        <groupId>org.webjars</groupId>
        <artifactId>bootstrap</artifactId>
        <version>4.0.0</version>
    </dependency>
</dependencies>
创建 全局配置文件
application.yml
server:
  port: 80

spring:
  mvc:
    servlet:
      load-on-startup: 1
  datasource:
    driver-class-name: com.mysql.cj.jdbc.Driver
    url: jdbc:mysql://localhost:3306/dbname?useUnicode=true&characterEncoding=utf8&serverTimezone=GMT%2B8&useSSL=false
    username: root
    password: 1234
  thymeleaf:
    # 是否开启缓存
    cache: false
    mode: HTML5
    # 编码格式
    encoding: UTF-8
logging:
  level:
    # 那个包下  日志级别
    com.qc: debug
    # 日志存放地址
  # path:

mybatis:
  # 别名
  type-aliases-package: com.qc.pojo
  # mapper.xml的地址
  mapper-locations: mapper/*.xml
启动类
package com.qc;

import org.springframework.boot.SpringApplication;
import org.springframework.boot.autoconfigure.SpringBootApplication;

@SpringBootApplication
public class Application {

    public static void main(String[] args) {
        SpringApplication.run(Application.class,args);
    }

}
https://files.cnblogs.com/files/TangXiaoHuiHui/manager.zip
引入 命名空间
<html lang="en" xmlns:th="http://www.thymeleaf.org">
路径修改
<link rel="shortcut icon" th:href="@{~/images/favicon.ico}" type="image/x-icon">
<link rel="stylesheet" th:href="@{~/js/bootstrap/dist/css/bootstrap.css}">
<link rel="stylesheet" th:href="@{~/css/font-awesome/css/font-awesome.css}">
<link rel="stylesheet" th:href="@{~/css/index.css}">
<script th:src="@{~/js/jquery/dist/jquery.js}"></script>
<script  th:href="@{/webjars/bootstrap/4.0.0/js/bootstrap.js}"></script>
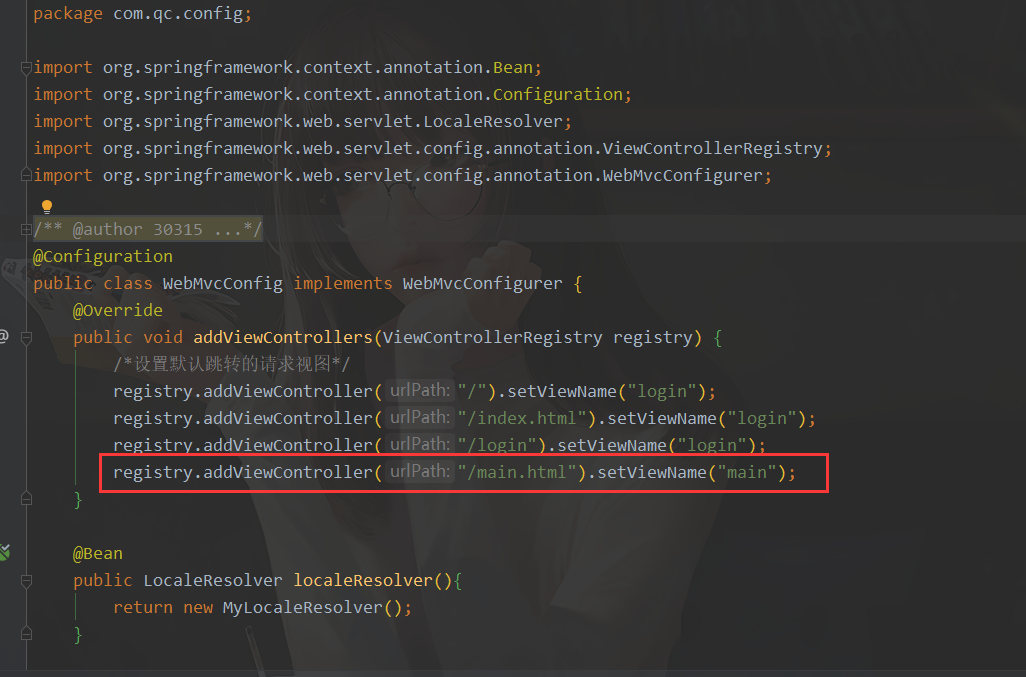
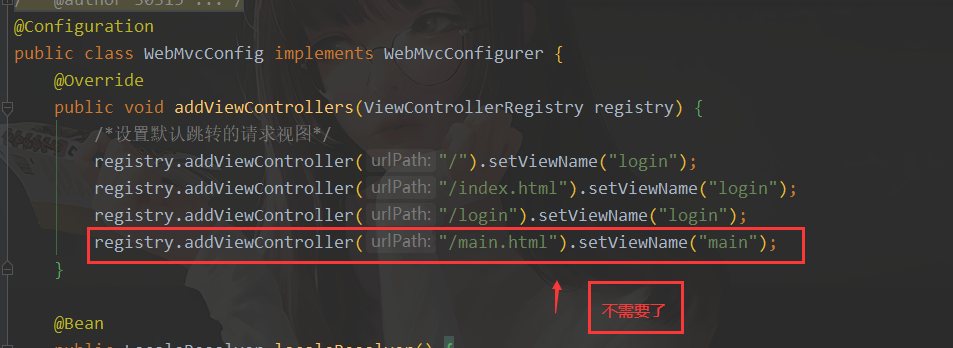
设置 默认主页
@Configuration
public class WebMvcConfig implements WebMvcConfigurer {
    @Override
    public void addViewControllers(ViewControllerRegistry registry) {
        /*设置默认跳转的请求视图*/
        registry.addViewController("/").setViewName("login");
        registry.addViewController("/index.html").setViewName("login");
        registry.addViewController("/login").setViewName("login");
    }
}
国际化
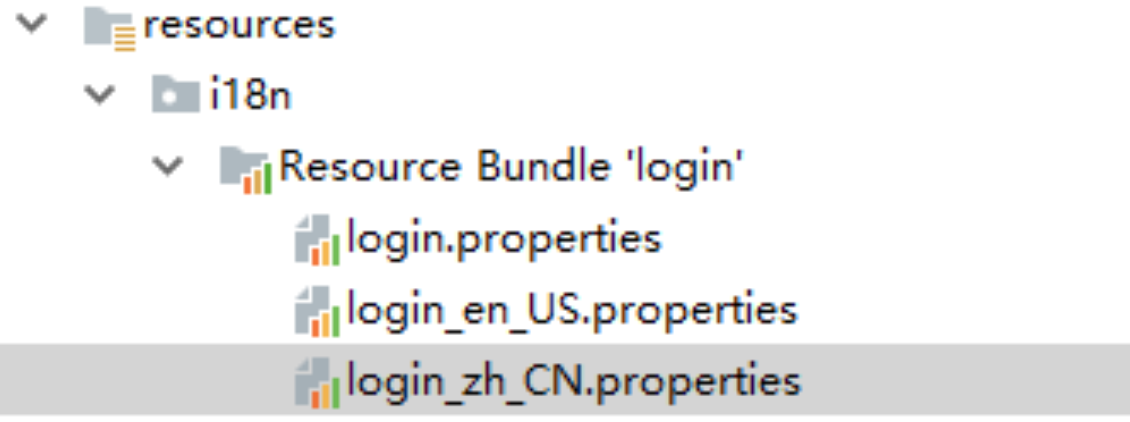
1.编写 国际化 配置文件
创建一个 文件夹 i18n
在该文件夹中 创建一个 login.properties 文件
创建中文/英文国际化文件
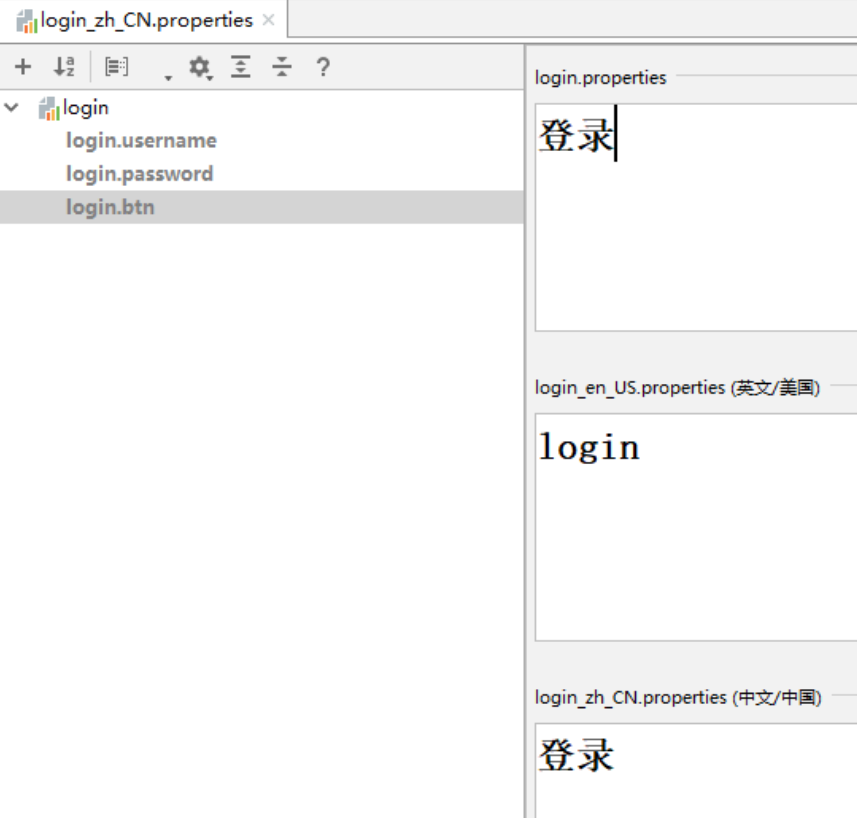
注意
要更改 文件编码

2.在springboot中有一个 messageSourceAutoConfiguration
会自动 管理 国际化 资源文件
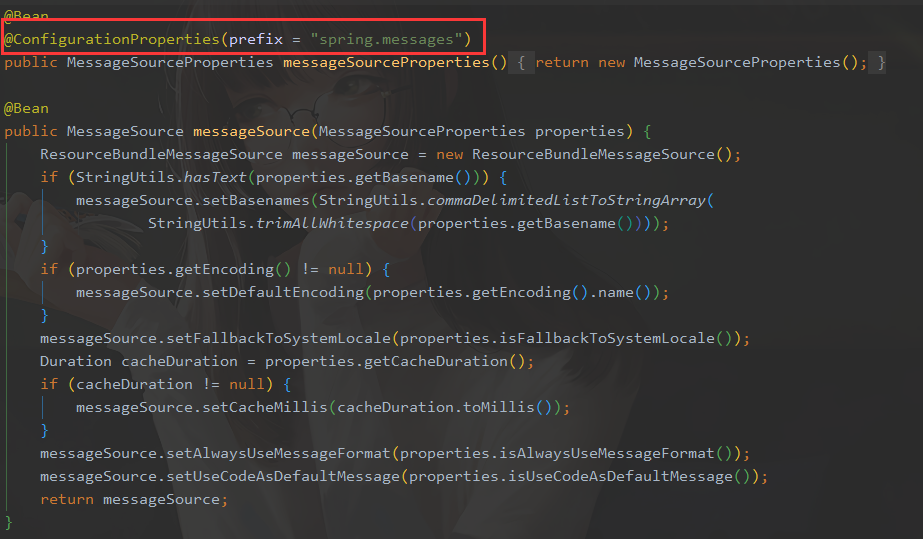
在全局配置文件中 设置 基础名
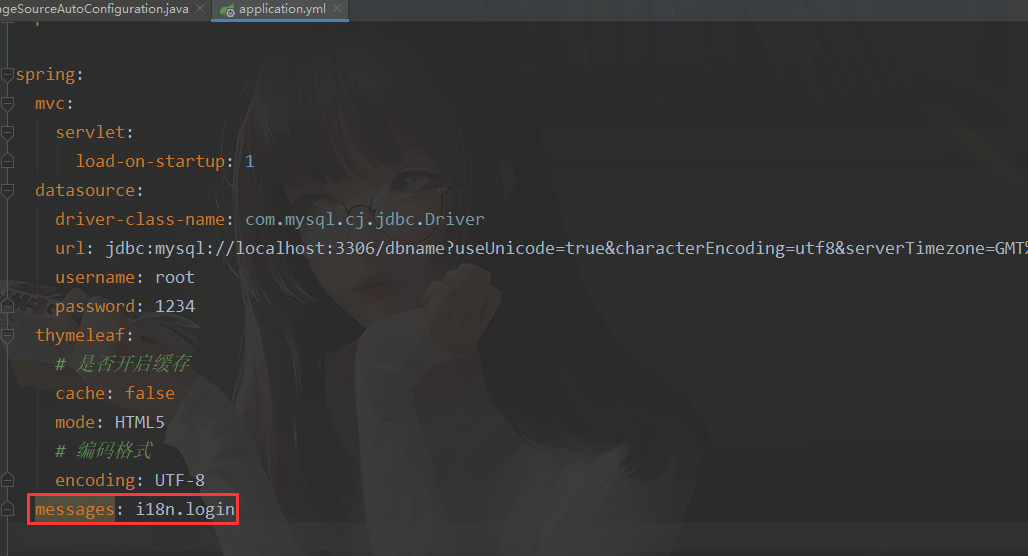
3.在页面中 获取 国际化 的值

4.切换中英文
默认
自定义
<a class="language" th:href="@{/login(lan='zh_CN')}">中文</a>
|
<a class="language" th:href="@{/login(lan='en_US')}">English</a>
public class MyLocaleResolver implements LocaleResolver {
    @Override
    public Locale resolveLocale(HttpServletRequest request) {
        // 接收语音的参数
        String lan = request.getParameter("lan");
        Locale locale = Locale.getDefault();
        if(!StringUtils.isEmpty(lan)){
            String[] split = lan.split("_");
            locale = new Locale(split[0], split[1]);
        }
        return locale;
    }

    @Override
    public void setLocale(HttpServletRequest request, HttpServletResponse response, Locale locale) {

    }
}
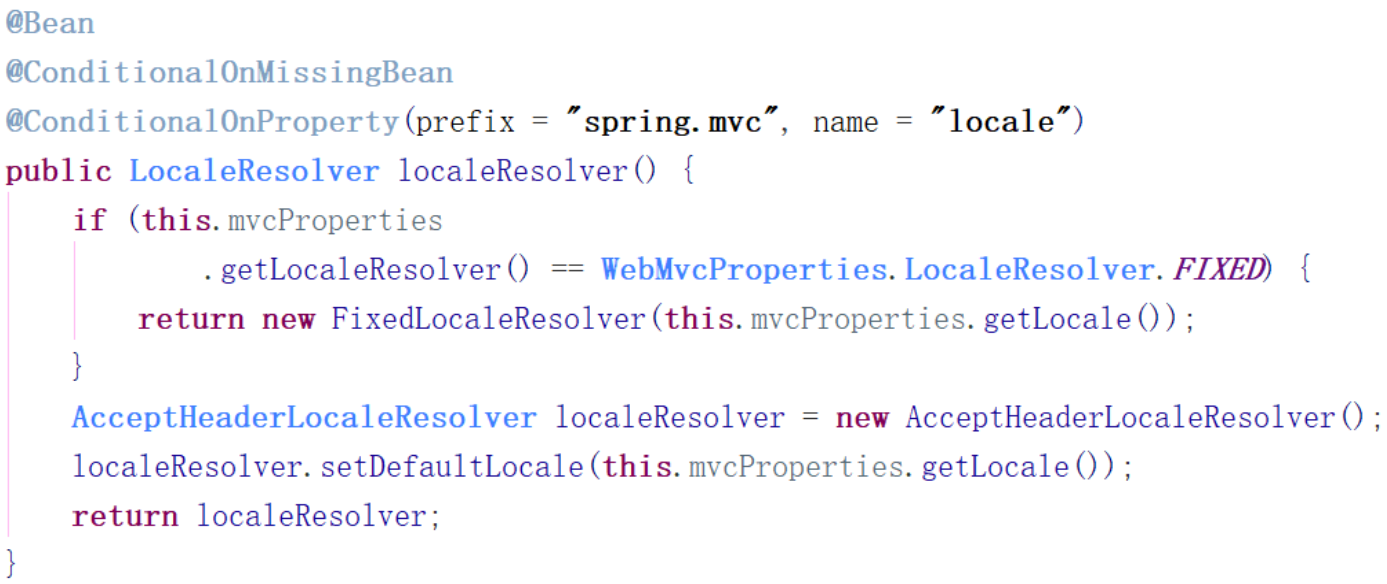
@Bean
public LocaleResolver localeResolver(){
    return new MyLocaleResolver();
}
登录
- 界面处理

<!DOCTYPE html>
<html lang="en" xmlns:th="http://www.thymeleaf.org">
<head>
    <meta charset="UTF-8">
    <title>后台管理系统</title>
<link rel="shortcut icon" th:href="@{~/images/favicon.ico}" type="image/x-icon">
<link rel="stylesheet" th:href="@{~/js/bootstrap/dist/css/bootstrap.css}">
<link rel="stylesheet" th:href="@{~/css/font-awesome/css/font-awesome.css}">
<link rel="stylesheet" th:href="@{~/css/index.css}">
<script th:src="@{~/js/jquery/dist/jquery.js}"></script>
<script  th:href="@{/webjars/bootstrap/4.0.0/js/bootstrap.js}"></script>

</head>
<body>
    <!-- 登录 -->
    <div class="login">
        <div class="login-wrap">
            <div class="avatar">
                <img src="./images/logo.png" class="img-circle" alt="">
            </div>
            <p th:text="${msg}" th:if="${not #strings.isEmpty(msg)}" style="color: red"></p>
            <form th:action="@{/userLogin}" method="post" class="col-md-offset-1 col-md-10">
                <div class="input-group input-group-lg">
                    <span class="input-group-addon">
                        <i class="fa fa-id-card-o"></i>
                    </span>
                    <input type="text" name="username" class="form-control" th:placeholder="#{login.username}">
                </div>
                <div class="input-group input-group-lg">
                    <span class="input-group-addon">
                        <i class="fa fa-key"></i>
                    </span>
                    <input type="password" name="password" class="form-control" th:placeholder="#{login.password}">
                </div>

                <button type="submit" class="btn btn-lg btn-danger btn-block" th:text="#{login.btn}"></button>
                <a class="language" th:href="@{/login(lan='zh_CN')}">中文</a>
                |
                <a class="language" th:href="@{/login(lan='en_US')}">English</a>
            </form>
        </div>
    </div>


</body>
</html>
- 接收请求
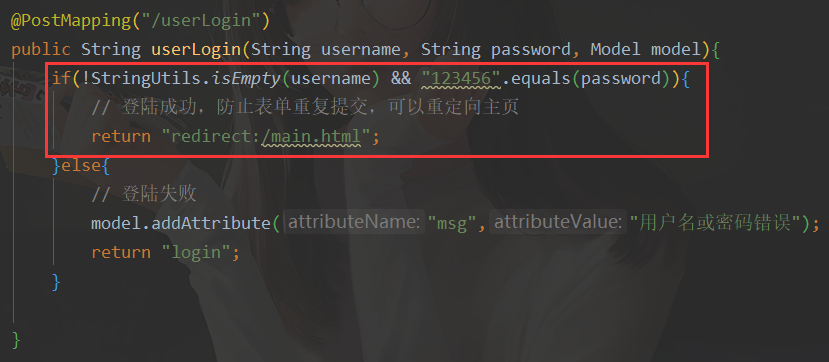
@PostMapping("/userLogin")
public String userLogin(String username, String password, Model model){
    if(!StringUtils.isEmpty(username) && "123456".equals(password)){
        // 登陆成功,防止表单重复提交,可以重定向主页
        return "redirect:/main.html";
    }else{
        // 登陆失败
        model.addAttribute("msg","用户名或密码错误");
        return "login";
    }

}
- 权限校验


public class LoginInterceptor implements HandlerInterceptor {

    @Override
    public boolean preHandle(HttpServletRequest request, HttpServletResponse response, Object handler) throws Exception {
        Object user = request.getSession().getAttribute("user");
        if(user == null){
            request.setAttribute("msg", "当前没有权限请先登陆");
            request.getRequestDispatcher("/login").forward(request, response);
            return false;
        }
        return true;
    }
}

// 让拦截器生效
@Override
public void addInterceptors(InterceptorRegistry registry) {
    registry.addInterceptor(new LoginInterceptor()).addPathPatterns("/**")
            .excludePathPatterns("/", "/index.html", "/login", "/userLogin","/static/**");
}

// 静态资源的处理
@Override
public void addResourceHandlers(ResourceHandlerRegistry registry) {
    registry.addResourceHandler("/static/**").addResourceLocations("classpath:/static/");
    WebMvcConfigurer.super.addResourceHandlers(registry);
}
列表 查询

- 列表数据获取
pojo
@Data
@AllArgsConstructor
@NoArgsConstructor
@ToString
@Table(name = "tb_hero")
public class TbHero {

    @Id
    @KeySql(useGeneratedKeys = true)
    private Integer id;
    private String username;
    private String profession;
    private String phone;
    private String email;
    private Date onlinetime;
}
mapper
public interface HeroMapper extends Mapper<TbHero> {
}
service interface
public interface HeroService {

    public List<TbHero> queryAllHero();

}
HeroServiceImpl
@Service
public class HeroServiceImpl implements HeroService {

    @Autowired
    private HeroMapper heroMapper;

    @Override
    public List<TbHero> queryAllHero() {
        return heroMapper.selectAll();
    }
}
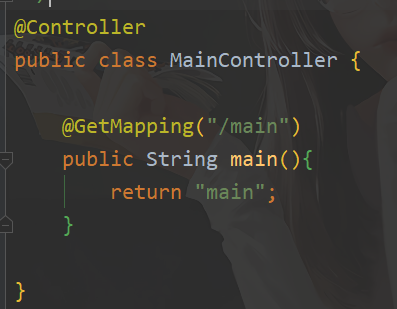
MainController
@Controller
public class MainController {

    @Autowired
    private HeroService heroService;

    @GetMapping("/main")
    public String main(){
        // 获取列表数据
        List<TbHero> heroList = heroService.queryAllHero();
        System.out.println(heroList);
        return "main";
    }

}
启动类开启 通用mapper接口扫描
@SpringBootApplication
@MapperScan("com.qc.mapper")
public class Application {

    public static void main(String[] args) {
        SpringApplication.run(Application.class,args);
    }

}
列表展示


<tr th:each="hero:${heroList}">
    <td th:text="${hero.username}">1</td>
    <td th:text="${hero.profession}">1</td>
    <td th:text="${hero.phone}">1</td>
    <td th:text="${hero.email}">1</td>
    <td th:text="${#dates.format(hero.onlinetime,'yyyy-MM-dd HH:mm:ss')}">1</td>
    <td>
        <a src="javascript:;" data-toggle="modal" data-target="#lesson"
           class="btn btn-danger btn-sm">
            编辑
        </a>
        <a href="javascript:;" class="btn btn-warning btn-sm">删除</a>
    </td>
</tr>
跳转到添加页面

添加
按钮点击
<form th:action="@{/addHero}" class="form-horizontal" method="post">

    <input type="hidden" name="_method" value="put" th:if="${hero!=null}"/>
    <input type="hidden" name="id" th:if="${hero!=null}" th:value="${hero.id}">

    <div class="form-group">
        <label  class="col-md-2 control-label">名称</label>
        <div class="col-md-6">
            <input type="text" name="username" th:value="${hero!=null}?${hero.username}" class="form-control">
        </div>
    </div>
    <div class="form-group">
        <label  class="col-md-2 control-label">职业</label>
        <div class="col-md-6">
            <input type="text" name="profession" th:value="${hero!=null}?${hero.profession}" class="form-control">
        </div>
    </div>
    <div class="form-group">
        <label  class="col-md-2 control-label">电话</label>
        <div class="col-md-6">
            <input type="text" name="phone" th:value="${hero!=null}?${hero.phone}"  class="form-control">
        </div>
    </div>
    <div class="form-group">
        <label  class="col-md-2 control-label">邮箱</label>
        <div class="col-md-6">
            <input type="text" name="email" th:value="${hero!=null}?${hero.email}"  class="form-control">
        </div>
    </div>
    <div class="form-group">
        <label  class="col-md-2 control-label">上线日期</label>
        <div class="col-md-6">
            <input type="text" name="onlinetime" th:value="${hero!=null}?${#dates.format(hero.onlinetime,'yyyy-MM-dd')}"  class="form-control">
        </div>
    </div>
    <div class="modal-footer">
        <input type="submit" class="btn btn-danger"   th:value="${hero!=null}?'修改':'添加'">
    </div>
</form>
MainController
@PostMapping("/addHero")
public String addHero(TbHero tbHero) {
    heroService.insertHero(tbHero);
    return "redirect:/main";
}
HeroService
public void insertHero(TbHero tbHero);
HeroServiceImpl
@Override
public void insertHero(TbHero tbHero) {
    heroMapper.insert(tbHero);
}
- 日期处理
MainController
@InitBinder
public void InitBinder(WebDataBinder dataBinder){
    dataBinder.registerCustomEditor(Date.class, new PropertyEditorSupport(){
        @Override
        public void setAsText(String value){
            try {
                setValue(new SimpleDateFormat("yyyy-MM-dd").parse(value));
            } catch (ParseException e) {
                setValue(null);
            }
        }
        @Override
        public String getAsText(){
            return new SimpleDateFormat("yyyy-MM-dd").format((Date)getValue());
        }
    });
}
编辑
数据回显
- 监听编辑按钮的点击,发送请求
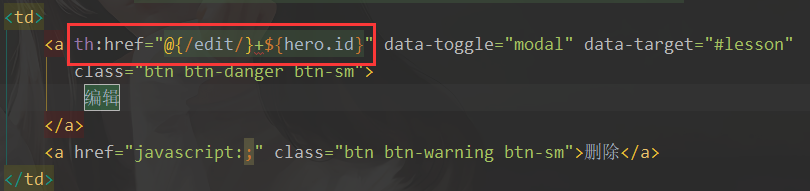
- 控制器,接收请求,查询回显数据,放入request域当中
@GetMapping("/edit/{id}")
public String updateHero(@PathVariable("id") Integer id,Model model){
    // 根据id去数据库查询
    TbHero hero = heroService.queryWithHero(id);

    model.addAttribute("hero",hero);
    return "add";
}
- 服务层调用通用mapper,去查询
@Override
public TbHero queryWithHero(Integer id) {
    return heroMapper.selectByPrimaryKey(id);
}
- 编辑页面的处理

编辑提交
-
put请求步骤
- SpringMVC 中配置 HiddenHttpMethodFilter;(SpringBoot在WebMvcAutoConfigration自动配置好的)

-
页面创建一个 post 表单
-
input中 name="_method",value就是我们指定的请求方式

- 编写Controller,接收put请求,进行编辑
@PutMapping("addHero")
public String updateHero(TbHero hero){
    heroService.updateHero(hero);
    // 修改成功,重定向main,查询数据更新页面数据
    return "redirect:/main";
}
- 服务层,调用通用mapper,进行修改
@Override
public void updateHero(TbHero hero) {
    heroMapper.updateByPrimaryKey(hero);
}
删除
页面处理
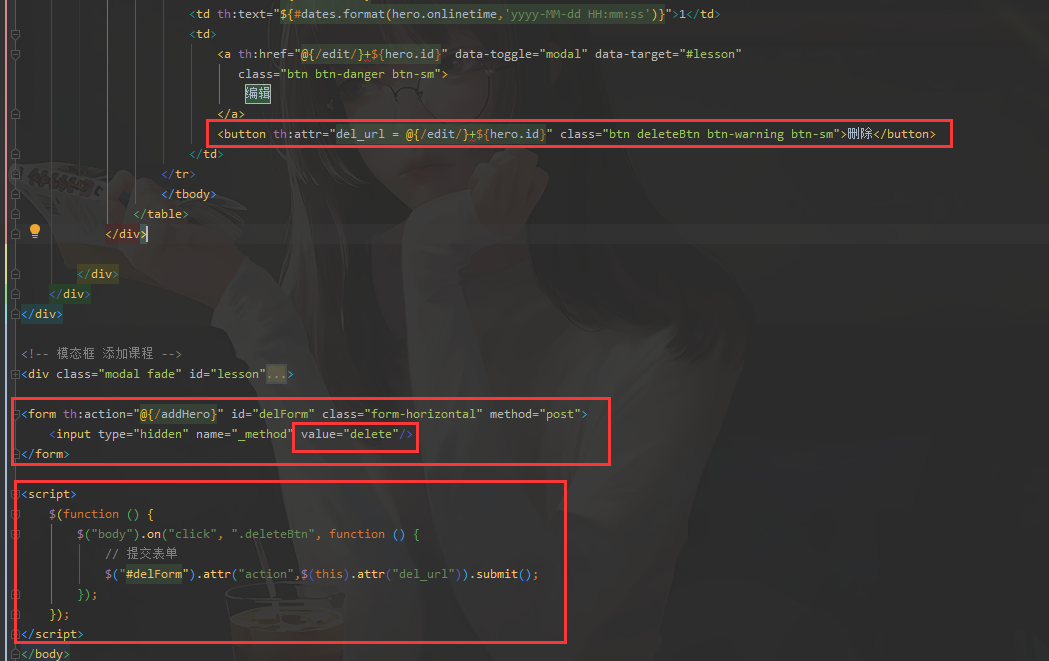
<button th:attr="del_url = @{/edit/}+${hero.id}" class="btn deleteBtn btn-warning btn-sm">删除</button>

<form th:action="@{/addHero}" id="delForm" class="form-horizontal" method="post">
    <input type="hidden" name="_method" value="delete"/>
</form>

<script>
    $(function () {
        $("body").on("click", ".deleteBtn", function () {
            // 提交表单
            $("#delForm").attr("action",$(this).attr("del_url")).submit();
        });
    });
</script>
- Controller接收删除请求,调用服务层,服务层调用通用mapper进行删除
@DeleteMapping("/edit/{id}")
public String delete(@PathVariable("id") Integer id, Model model) {
    // 根据id去数据库删除
    heroService.deleteHeroById(id);

    return "redirect:/main";
}
- HeroServiceImpl
@Override
public void deleteHeroById(Integer id) {
    heroMapper.deleteByPrimaryKey(id);
}
Spring BootDruid连接池
引入 相关依赖
<!-- druid -->
<dependency>
    <groupId>com.alibaba</groupId>
    <artifactId>druid</artifactId>
    <version>1.1.21</version>
</dependency>

<dependency>
    <groupId>log4j</groupId>
    <artifactId>log4j</artifactId>
    <version>1.2.17</version>
</dependency>
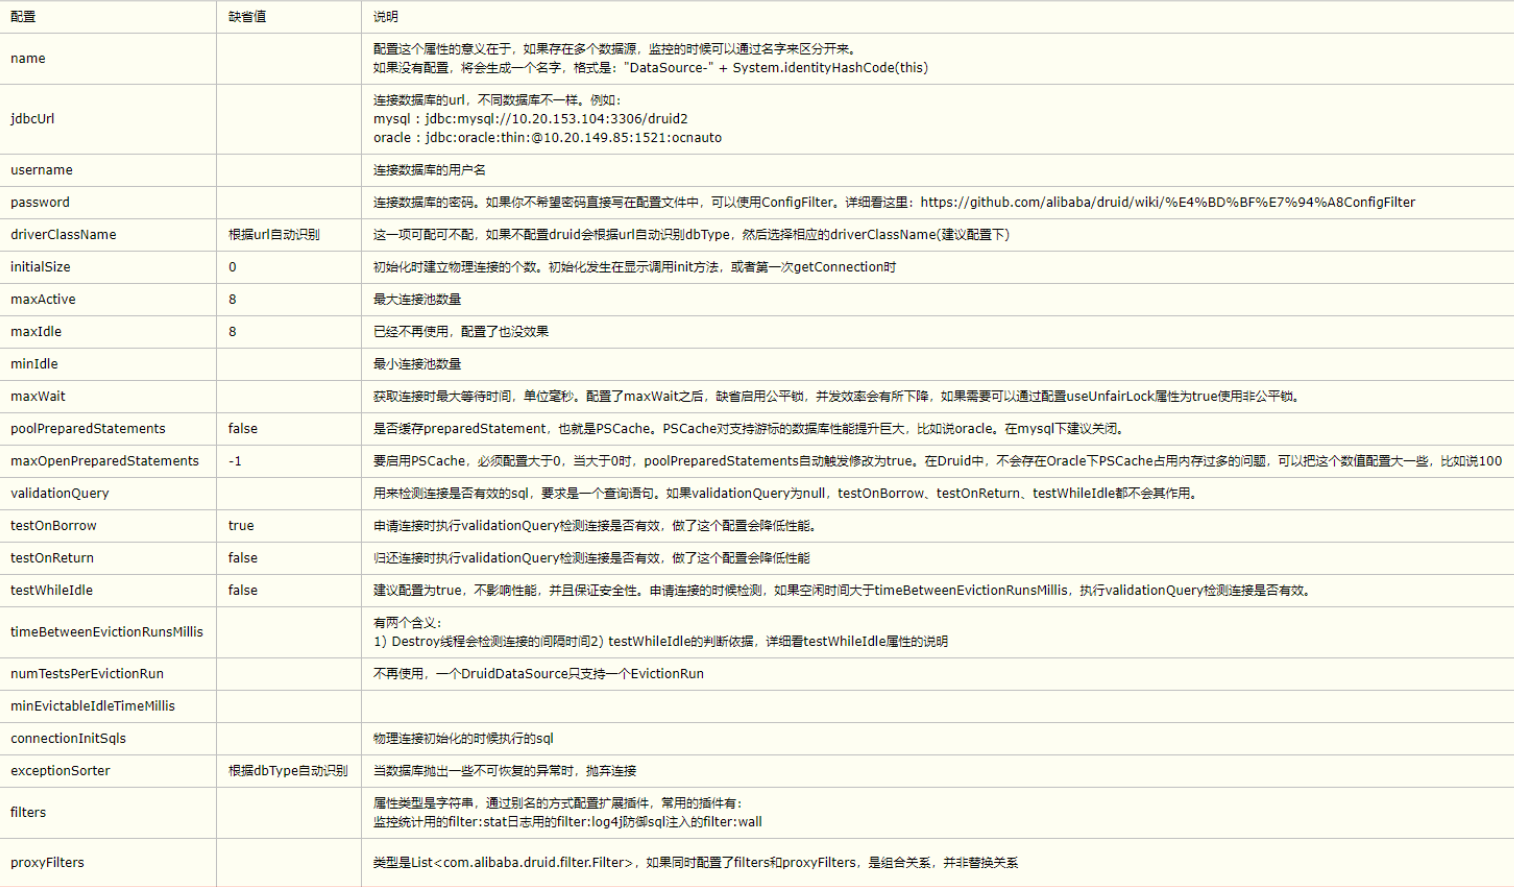
配置 配置文件
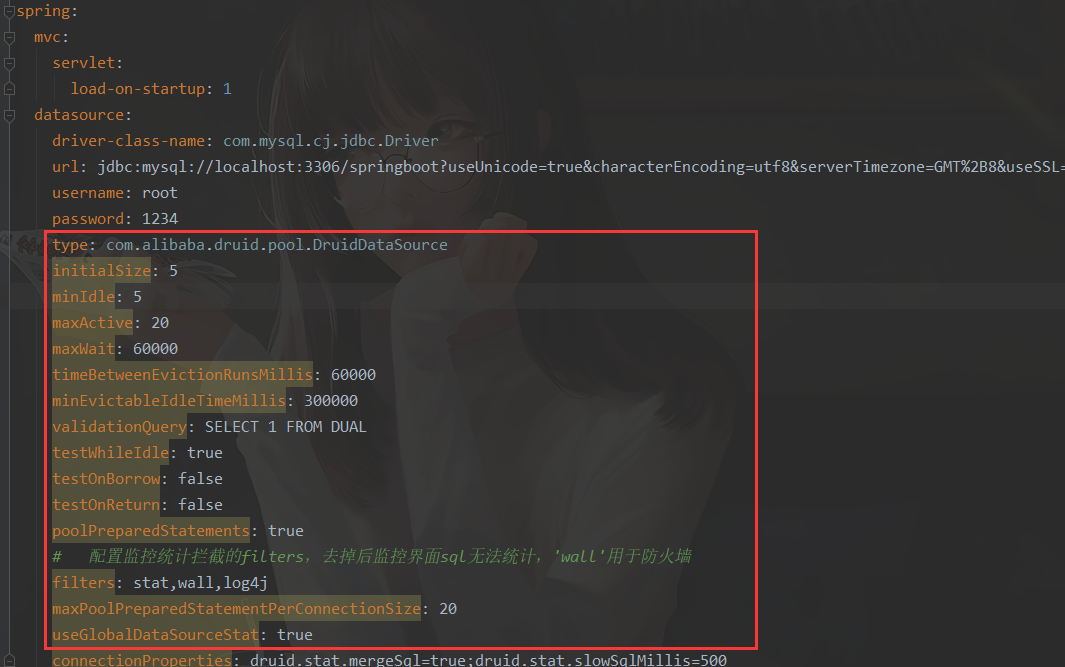
spring:
  mvc:
    servlet:
      load-on-startup: 1
  datasource:
    driver-class-name: com.mysql.cj.jdbc.Driver
    url: jdbc:mysql://localhost:3306/springboot?useUnicode=true&characterEncoding=utf8&serverTimezone=GMT%2B8&useSSL=false
    username: root
    password: 1234
    type: com.alibaba.druid.pool.DruidDataSource
    initialSize: 5
    minIdle: 5
    maxActive: 20
    maxWait: 60000
    timeBetweenEvictionRunsMillis: 60000
    minEvictableIdleTimeMillis: 300000
    validationQuery: SELECT 1 FROM DUAL
    testWhileIdle: true
    testOnBorrow: false
    testOnReturn: false
    poolPreparedStatements: true
    #   配置监控统计拦截的filters,去掉后监控界面sql无法统计,'wall'用于防火墙
    filters: stat,wall,log4j
    maxPoolPreparedStatementPerConnectionSize: 20
    useGlobalDataSourceStat: true
    connectionProperties: druid.stat.mergeSql=true;druid.stat.slowSqlMillis=500
使用java配置方式配置Druid
- 创建配置类
DruidConfig
@Configuration
public class DruidConfig {

    @Bean
    // 属性注入
    @ConfigurationProperties(prefix = "spring.datasource")
    public DataSource druid() {
        return new DruidDataSource();
    }

    // 配置Druid监控
    // 配置一个管理后台的Servlet
    @Bean
    public ServletRegistrationBean statViewServlet() {
        ServletRegistrationBean bean = new ServletRegistrationBean(new StatViewServlet(), "/druid/*");

        // 配置初始化参数
        HashMap<Object, Object> initParams = new HashMap<>();
        initParams.put("loginUsername", "admin");
        initParams.put("loginPassword", "1234");
        // 默认就是允许所有访问
        initParams.put("allow", "");

        bean.setInitParameters(initParams);
        return bean;
    }

    // 配置一个web监控的filter 过滤器
    @Bean
    public FilterRegistrationBean webStatFilter() {
        FilterRegistrationBean bean = new FilterRegistrationBean(new WebStatFilter());

        HashMap<Object, Object> initParams = new HashMap<>();
        // 除了这些之外的
        initParams.put("exclusions", "*.js,*.css,/druid/*");
        bean.setInitParameters(initParams);

        // 过滤所有
        bean.setUrlPatterns(Arrays.asList("/*"));
        return bean;
    }

}
- 在地址栏中输入
http://localhost/druid/进入监控页面
Spring Boot集成Swagger2
Swagger2 简介
-
随 项目 自动生成 强大
RESTful API文档,减少工作量 -
API文档 与 代码 整合在一起,便于 同步更新 API说明
-
页面测试 功能 来调试 每个 RESTful API
Swagger2 使用
1.添加依赖
<dependency>
    <groupId>io.springfox</groupId>
    <artifactId>springfox-swagger2</artifactId>
    <version>2.2.2</version>
</dependency>
<dependency>
    <groupId>io.springfox</groupId>
    <artifactId>springfox-swagger-ui</artifactId>
    <version>2.2.2</version>
</dependency>
2.创建Swagger2配置类
package com.qc.config;

import org.springframework.context.annotation.Bean;
import org.springframework.context.annotation.Configuration;
import springfox.documentation.builders.ApiInfoBuilder;
import springfox.documentation.builders.PathSelectors;
import springfox.documentation.builders.RequestHandlerSelectors;
import springfox.documentation.service.ApiInfo;
import springfox.documentation.spi.DocumentationType;
import springfox.documentation.spring.web.plugins.Docket;
import springfox.documentation.swagger2.annotations.EnableSwagger2;

@Configuration
@EnableSwagger2
public class SwaggerConfig {
    @Bean
    public Docket createRestApi() {
        return new Docket(DocumentationType.SWAGGER_2)
                .apiInfo(apiInfo())
                .select()
                .apis(RequestHandlerSelectors.basePackage("com.qc"))// 指定扫描包下面的注解
                .paths(PathSelectors.any())
                .build();

    }

    // 创建api的基本信息
    private ApiInfo apiInfo() {
        return new ApiInfoBuilder()
                .title("集成Swagger2构建RESTful APIs")
                .description("集成Swagger2构建RESTful APIs")
                .termsOfServiceUrl("https://www.baidu.com")
                .contact("xhhBlog")
                .version("1.0.0")
                .build();
    }
}
3.启动Spring boot,访问Swagger UI界面
http://localhost/swagger-ui.html#/

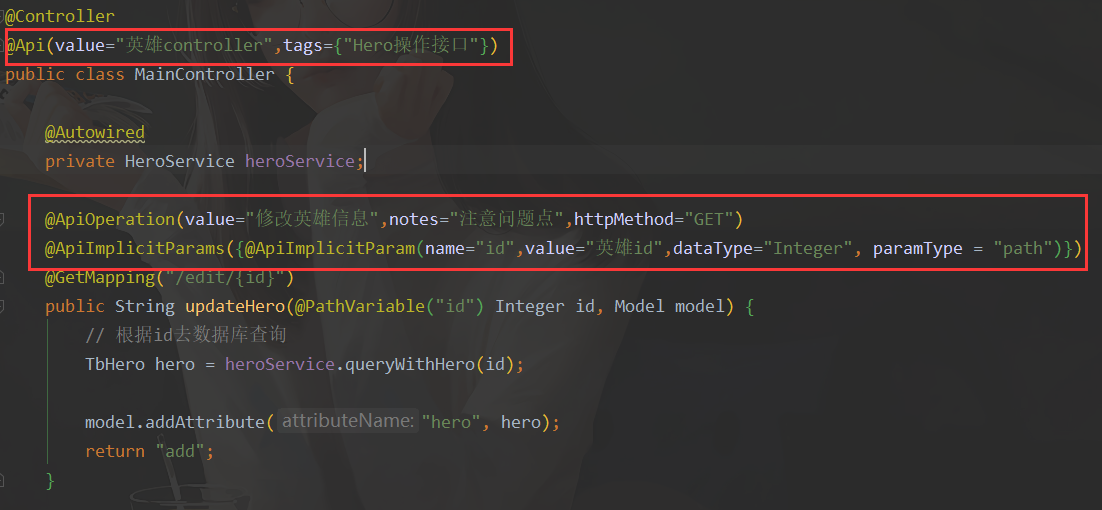
Swagger2 常见Api
| Api名称 | 作用 |
|---|---|
| @Api(value="用户controller",tags={"用户操作接口"}) | Api 用在类上,说明该类的作用。可以标记一个Controller类做为swagger 文档资源 |
| @ApiOperation(value="获取用户信息",notes="注意问题点",httpMethod="GET") | 用在方法上,说明方法的作用,每一个url资源的定义,使用方式 |
| @ApiImplicitParams({@ApiImplicitParam(name="id",value="用户id",dataType="Long", paramType = "path")}) | 参数说明 |
| @ApiIgnore() | 忽略方法 |
在控制器 方法上 添加 对应api信息

 浙公网安备 33010602011771号