Swagger
Swagger
简介
前后端分离
- 前端:前端控制层、视图层
- 伪造后端数据,json,数据已经存在,不需要后端,前端工程依旧能跑起来
- 后端:后端控制层、服务层、数据访问层
- 前后端通过 API 进行交互
- 前后端相对独立且松耦合
- 前后端甚至可以部署在不同的服务器上
产生的问题
- 前后端集成,前端和后端无法做到“及时协商,尽早解决”,最终导致问题集中爆发
解决方案
- 首先指定 schema [ 计划的提纲 ],并实时更新最新的API,降低集成风险
- 早些年:制定 word 计划文档
- 前后端分离:
- 前端测试后端接口:postman
- 后端提供接口,需要实时更新最新的消息及改动
Swagger
- 号称世界上最流行的 API 框架
- RestFul Api 文档在线自动生成器 => API 文档 与API 定义同步更新
- 直接运行,可以在线测试 API
- 支持多种语言 (如:Java,PHP等)
在项目中使用 Swagger 需要 springfox:swagger2、ui
SpringBoot 集成 Swagger
-
新建 SpringBoot 项目(web)
-
导入相关依赖
<!-- https://mvnrepository.com/artifact/io.springfox/springfox-swagger2 --> <dependency> <groupId>io.springfox</groupId> <artifactId>springfox-swagger2</artifactId> <version>2.9.2</version> </dependency> <!-- https://mvnrepository.com/artifact/io.springfox/springfox-swagger-ui --> <dependency> <groupId>io.springfox</groupId> <artifactId>springfox-swagger-ui</artifactId> <version>2.9.2</version> </dependency> -
编写一个 HelloWorld
@RestController public class HelloController { @GetMapping("/hello") public String hello(){ return "hello swagger"; } } -
配置 swagger ==> config
@Configuration @EnableSwagger2 // 开启 Swagger2 public class SwaggerConfig { } -
测试运行,访问 http://localhost:8080/swagger-ui.html ,可以看到 swagger 的界面
![]()

配置 Swagger
1、配置文档信息
-
Swagger 实例 Bean 是 Docket,所以通过配置 Docket 实例来配置 Swaggger
-
可以通过
apiInfo()属性配置文档信息 -
Docket 实例关联上 apiInfo()
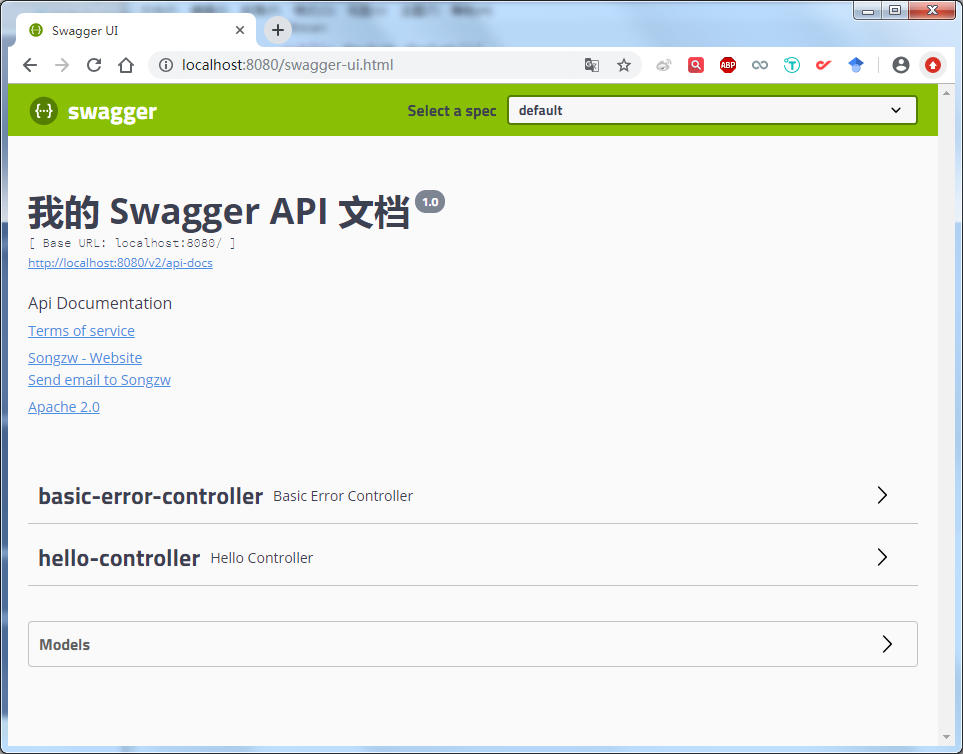
@Configuration @EnableSwagger2 // 开启 Swagger2 public class SwaggerConfig { // 配置了swagger的Docket的bean实例 @Bean public Docket docket(){ return new Docket(DocumentationType.SWAGGER_2).apiInfo(apiInfo()); } // 配置swagger信息 apiInfo,修改了默认的配置 public ApiInfo apiInfo(){ // 作者信息 Contact contact = new Contact("Songzw", "https://www.cnblogs.com/Songzw/", "10xxxxx@qq.com"); //没有 set方法,只能构造器修改参数 return new ApiInfo( "我的 Swagger API 文档", "Api Documentation", "1.0", "https://www.cnblogs.com/Songzw/", contact, "Apache 2.0", "http://www.apache.org/licenses/LICENSE-2.0", new ArrayList()); } } -
重启项目,访问测试 http://localhost:8080/swagger-ui.html
![]()
2、Swagger 配置扫描接口
-
构建 Docket 时通过
select()方法配置怎么扫描接口@Bean public Docket docket(){ return new Docket(DocumentationType.SWAGGER_2) .apiInfo(apiInfo()) .select() // RequestHandlerSelectors 配置要扫描接口的方式 // basePackage():指定要扫描的包 .apis(RequestHandlerSelectors.basePackage("com.song.controller")) // paths 过滤路径,只扫描以指定的/song开头的请求路径 .paths(PathSelectors.ant("/song/**")) .build(); }RequestHandlerSelectors的其他方法:// RequestHandlerSelectors 配置要扫描接口的方式 // basePackage():指定要扫描的包 // any():扫描全部 // none():都不扫描 // withClassAnnotation():扫描类上的注解,参数是一个注解的反射对象 //如withMethodAnnotation(GetMapping.class)只扫描get请求 // withMethodAnnotation():扫描方法上的注解 //如.withClassAnnotation(Controller.class)只扫描有controller注解的类中的接口 -
配置接口扫描过滤
// paths 过滤路径,只扫描以指定的/song开头的请求路径 .paths(PathSelectors.ant("/song/**"))PathSelectors的可选值还有:any() // 任何请求都扫描 none() // 任何请求都不扫描 regex(final String pathRegex) // 通过正则表达式控制 ant(final String antPattern) // 通过ant()控制
3、配置是否启动 swagger
-
通过 enable() 方法配置是否启用 swagger,默认为 true,如果是 false,swagger 将不能在浏览器中访问了
@Bean public Docket docket(){ return new Docket(DocumentationType.SWAGGER_2) .apiInfo(apiInfo()) // 是否启用swagger,如果是 false,swagger 将不能在浏览器中访问 .enable(false) .select() .apis(RequestHandlerSelectors.basePackage("com.song.controller")) //.paths(PathSelectors.ant("/song/**")) .build(); } -
如何动态配置当项目处于 dev 环境时显示 swagger,处于 prod 时不显示?
-
判断是不是生产环境 flag=false
-
注入 enable(flag)
@Bean
public Docket docket(Environment environment){

    // 设置要显示的 swagger环境
    Profiles profiles = Profiles.of("dev","test");
    // 通过environment.acceptsProfiles判断是否处在自己设定的环境当中
    // 最后通过 enable() 接收此参数 flag 判断是否要显示
    boolean flag = environment.acceptsProfiles(profiles);

    return new Docket(DocumentationType.SWAGGER_2)
            .apiInfo(apiInfo())

            // 是否启用swagger,如果是 false,swagger 将不能在浏览器中访问
            .enable(flag)

            .select()
            .apis(RequestHandlerSelectors.basePackage("com.song.controller"))
            .build();
}
增加配置文件 application-dev.properties、application-prod.properties
# dev
server.port=8081
# prod server.port=8082在配置文件 application-dev.properties 中激活指定的环境
spring.profiles.active=dev测试结果:输入 http://localhost:8081/swagger-ui.html (dev 环境)可以显示 swagger,而输入 http://localhost:8082/swagger-ui.html (prod 环境)不显示。
-
4、配置 API 分组
-
如果没有配置分组,默认是default。通过
groupName()方法即可配置分组@Bean public Docket docket(Environment environment){ return new Docket(DocumentationType.SWAGGER_2).apiInfo(apiInfo()) .groupName("song") // 配置分组 ... } -
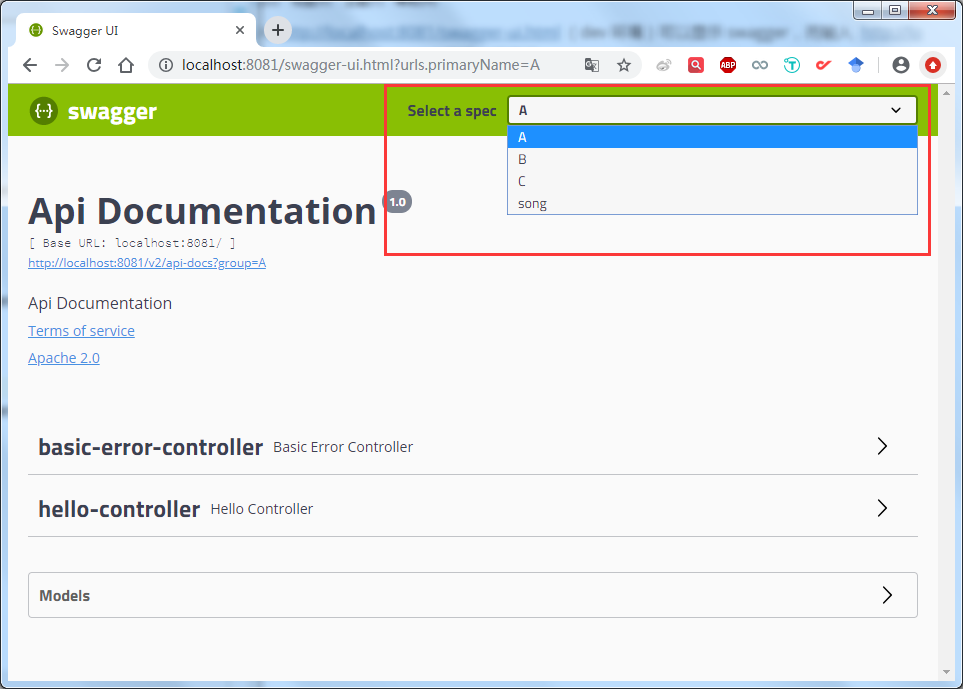
配置多个分组,需要配置多个 docket 实例(就是多个人开发的多个 bean)
@Bean public Docket docket1(Environment environment){ return new Docket(DocumentationType.SWAGGER_2).groupName("A"); } @Bean public Docket docket2(Environment environment){ return new Docket(DocumentationType.SWAGGER_2).groupName("B"); } @Bean public Docket docket3(Environment environment){ return new Docket(DocumentationType.SWAGGER_2).groupName("C"); }![]()
5、实体配置
-
新建一个实体类
//@Api("注释") @ApiModel("用户实体类") public class User { @ApiModelProperty("用户名") public String name; @ApiModelProperty("密码") public String password; } -
只要这个实体在请求接口的返回值上(即使是泛型),都能映射到实体项中
// 只要接口中的返回值中存在实体类,他就会被扫描到swagger中 @PostMapping("/user") public User user(){ return new User(); } -
测试查看
![]()
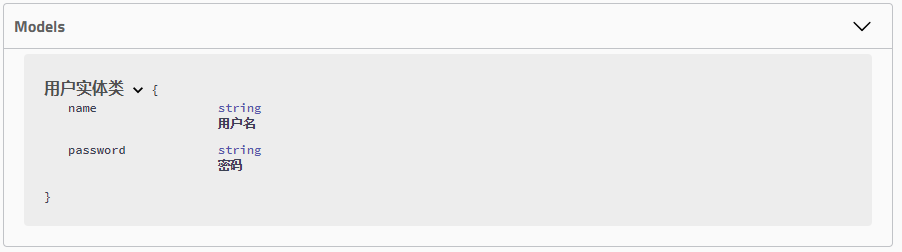
注:并不是因为 @ApiModel 这个注解让实体显示在这里了,而是只要出现在接口方法的返回值上的实体都会显示在这里,而 @ApiModel 和 @ApiModelProperty 这两个注解只是为实体添加注释的。
@ApiModel 为类添加注释
@ApiModelProperty 为类属性添加注释
6、常用注解
| Swagger注解 | 简单说明 |
|---|---|
| @Api(tags = "xxx模块说明") | 作用在模块类上 |
| @ApiOperation("xxx接口说明") | 作用在接口方法上 |
| @ApiModel("xxxPOJO说明") | 作用在模型类上:如 VO、BO |
| @ApiModelProperty(value = "xxx属性说明",hidden = true) | 作用在类方法和属性上,hidden 设置为 true 可以隐藏该属性 |
| @ApiParam("xxx参数说明") | 作用在参数、方法和字段上,类似@ApiModelProperty |
例:给请求的接口配置一些注释
@ApiOperation("Hello方法")
@GetMapping("/hello2")
public String hello2(@ApiParam("用户名") String username){
    return "hello"+username;
}
7、总结
-
可以给一些比较难理解的属性或者接口,增加注释信息,方便阅读
-
接口文档实时更新
-
可以在线测试
注意点:出于安全考虑和节省运行内存,正式发布时,关闭 swagger。
8、拓展:其他皮肤
可以导入不同的包实现不同的皮肤定义:
-
默认的,访问 http://localhost:8080/swagger-ui.html
<dependency> <groupId>io.springfox</groupId> <artifactId>springfox-swagger-ui</artifactId> <version>2.9.2</version> </dependency> -
bootstrap-ui,访问 http://localhost:8080/doc.html
<!-- 引入swagger-bootstrap-ui包 /doc.html--> <dependency> <groupId>com.github.xiaoymin</groupId> <artifactId>swagger-bootstrap-ui</artifactId> <version>1.9.1</version> </dependency> -
Layui-ui,访问 http://localhost:8080/docs.html
<!-- 引入swagger-ui-layer包 /docs.html--> <dependency> <groupId>com.github.caspar-chen</groupId> <artifactId>swagger-ui-layer</artifactId> <version>1.1.3</version> </dependency> -
mg-ui 访问 http://localhost:8080/document.html
<!-- 引入swagger-ui-layer包 /document.html-->
<dependency>
   <groupId>com.zyplayer</groupId>
   <artifactId>swagger-mg-ui</artifactId>
   <version>1.0.6</version>
</dependency>

 浙公网安备 33010602011771号