
13-前端核心技术-JavaScript-Dom和Bom对象
第13章-前端核心技术-JavaScript-DOM和BOM对象
学习目标
-
掌握JavaScript DOM对象
重点 -
掌握JavaScript BOM对象
重点 -
掌握JavaScript操作文档元素的方法
-
掌握JavaScript事件的原理
-
掌握JavaScript常用事件的运用方法
重点
JavaScript BOM对象
BOM(Browser Object Model) 是指浏览器对象模型
| document | 对 Document 对象的只读引用。 |
|---|---|
| history | 对 History 对象的只读引用。 |
| navigator | 对 Navigator 对象的只读引用。 |
| screen | 对 Screen 对象的只读引用。 |
| location | 用于窗口或框架的 Location 对象。 |
| name | 设置或返回窗口的名称。 |
| innerHeight | 返回窗口的文档显示区的高度。 |
| innerWidth | 返回窗口的文档显示区的宽度。 |
| outerHeight | 返回窗口的外部高度,包含工具条与滚动条。 |
| outerWidth | 返回窗口的外部宽度,包含工具条与滚动条。 |
Window 对象
所有 JavaScript 全局对象、函数以及变量均自动成为 window 对象的成员。全局变量是 window 对象的属性。全局函数是 window 对象的方法。甚至 HTML DOM 的 document 也是 window 对象的属性之一:
1
2
3
4
js
window.document.getElementById("header");
// 与此相同:
document.getElementById("header");
setInterval()
window.setInterval() 按照指定的周期(以毫秒计)来调用函数或计算表达式。
var label = setInterval(function, milliseconds, param1, param2, ...)
clearInterval()
window.clearInterval() 取消由 setInterval() 设置的 timeout。
1
2
js
clearInterval(label)
setTimeout()
window.setTimeout() 在指定的毫秒数后调用函数或计算表达式。
var label = setTimeout(function, milliseconds, param1, param2, ...)
clearTimeout()
window.clearTimeout() 取消由 setTimeout() 方法设置的 timeout。
clearTimeout(label)
浏览器窗口的尺寸
有三种方法能够确定浏览器窗口的尺寸。
1.对于Internet Explorer、Chrome、Firefox、Opera 以及 Safari:
1
2
window.innerHeight - 浏览器窗口的内部高度(不包括滚动条)
window.innerWidth - 浏览器窗口的内部宽度(不包括滚动条)
2.对于 Internet Explorer 8、7、6、5:
1
2
3
js
document.documentElement.clientHeight
document.documentElement.clientWidth
3.常规
1
2
document.body.clientHeight
document.body.clientWidth
案例01:获取浏览器宽高
1
2
3
4
5
6
7
8
9
10
11
12
13
14
15
16
17
18
19
20
<!DOCTYPE html>
<html>
<head>
<meta charset="utf-8">
<title></title>
</head>
<body>
</body>
<script>
var w = window.innerWidth ||
document.documentElement.clientWidth ||
document.body.clientWidth;
<span class="hljs-keyword">var</span> h = <span class="hljs-built_in">window</span>.innerHeight ||
<span class="hljs-built_in">document</span>.documentElement.clientHeight ||
<span class="hljs-built_in">document</span>.body.clientHeight;
<span class="hljs-built_in">document</span>.write(<span class="hljs-string">"浏览器window宽度: "</span> + w + <span class="hljs-string">", 高度: "</span> + h + <span class="hljs-string">"。"</span>);
</span><span class="hljs-tag"></<span class="hljs-title">script</span>></span>
</html>
效果展示

显示器尺寸
window.scren对象用户获取显示器的各种参数:
- scren.width - 返回屏幕的总宽度,(包括Windows底部任务栏)
- screen.height - 返回屏幕的总高度,(包括Windows底部任务栏)
- screen.availWidth - 返回屏幕的高度(不包括Windows底部任务栏)
- screen.availHeight - 返回屏幕的宽度(不包括Windows底部任务栏)
- screen.colorDepth - 色彩深度
- screen.pixelDepth - 色彩分辨率
案例02:获取屏幕参数
1
2
3
4
5
6
7
8
9
10
11
12
13
14
15
16
17
18
<!DOCTYPE html>
<html>
	<head>
		<meta charset="utf-8">
		<title></title>
	</head>
	<body>
	</body>
	<script>
		document.write("总宽度/高度: "+screen.width + "*" + screen.height);
		document.write("<br>");
		document.write("可用宽度/高度: "+screen.availWidth + "*" + screen.availHeight);
		document.write("<br>");
		document.write("色彩深度: "+screen.colorDepth);
		document.write("<br>");
		document.write("色彩分辨率: "+screen.pixelDepth);
	</script>
</html>
效果展示

Location对象
window.location 对象可以获取url的各部分参数、跳转、重定向等
-
location.hostname 返回 web 主机的域名
-
location.pathname 返回当前页面的路径和文件名
-
location.port 返回 web 主机的端口 (80 或 443)
-
location.protocol 返回所使用的 web 协议(http:// 或 https://)
-
location.href返回完整的 URL(http://127.0.0.1:8020 /demo02/index.html)
-
location.hash 返回一个URL的锚部分
-
location.assign(url) 跳转到新文档【location.assign("http://www.baidu.com")】,可返回
-
location.replace(url) 用新文档取代当前文【location.replace("http://www.baidu.com")】
-
location.reload() 刷新(重新加载)当前文档【location.reload()】
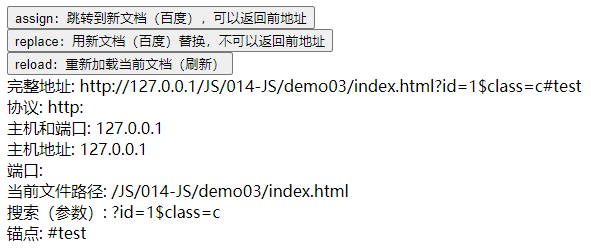
案例03:链接属性
1
2
3
4
5
6
7
8
9
10
11
12
13
14
15
16
17
18
19
20
21
22
23
24
25
26
27
28
29
30
31
32
33
34
35
36
37
38
39
40
<!DOCTYPE html>
<html>
	<head>
		<meta charset="utf-8">
		<title></title>
	</head>
	<body>
		<button onclick="location.assign('http://www.baidu.com')">
			assign:跳转到新文档(百度),可以返回前地址
		</button>
		<br/>
		<button onclick="location.replace('http://www.baidu.com')">
			replace:用新文档(百度)替换,不可以返回前地址
		</button>
		<br/>
		<button onclick="location.reload()">
			reload:重新加载当前文档(刷新)
		</button>
		<br/>
	</body>
	<script>
		location.href = 'http://127.0.0.1/JS/014-JS/demo03/index.html?id=1$class=c#test'
		document.write("完整地址: "+location.href);
		document.write("<br>");
		document.write("协议: "+location.protocol);
		document.write("<br>");
		document.write("主机和端口: "+ location.host);
		document.write("<br>");
		document.write("主机地址: "+ location.hostname);
		document.write("<br>");
		document.write("端口: "+location.port);
		document.write("<br>");
		document.write("当前文件路径: "+location.pathname);
		document.write("<br>");
		document.write("搜索(参数): "+location.search);
		document.write("<br>");
		document.write("锚点: "+location.hash);
		document.write("<br>");
	</script>
</html>
效果展示
历史记录对象
window.history对象可以操作历史记录,前进后退等
- history.back() - 与在浏览器点击后退按钮相同
- history.forward() - 与在浏览器中点击向前按钮相同
- history.go(number|URL) - 加载某个具体页面(正数:向前;负数:向后)
案例04:回到历史记录
文件一
1
2
3
4
5
6
7
8
9
10
11
12
13
14
<!DOCTYPE html>
<html>
	<head>
		<meta charset="utf-8">
		<title></title>
	</head>
	<body>
		<div>
			页面1
		</div>
		<a href="new_file1.html">跳转到页面1</a>
		<button onclick="history.forward();">下一页面</button>
	</body>
</html>
文件二
1
2
3
4
5
6
7
8
9
10
11
12
13
14
15
<!DOCTYPE html>
<html>
	<head>
		<meta charset="UTF-8">
		<title></title>
	</head>
	<body>
		<div>
			页面2
		</div>
		<a href="new_file2.html">跳转到页面3</a>
		<button onclick="history.back();">上一页面</button>
		<button onclick="history.forward();">下一页面</button>
	</body>
</html>
文件三
1
2
3
4
5
6
7
8
9
10
11
12
13
14
<!DOCTYPE html>
<html>
	<head>
		<meta charset="UTF-8">
		<title></title>
	</head>
	<body>
		<div>
			页面3
		</div>
		<button onclick="history.back();">返回上一页面</button>
		<button onclick="history.go(-2);">返回第一页</button>
	</body>
</html>
浏览器对象
Window.navigator对象用户获取当前浏览器的各种参数
- navigator.appCodeName - 返回浏览器的代码名
- navigator.appName - 返回浏览器的名称
- navigator.appVersion - 返回浏览器的平台和版本信息
- navigator.cookieEnabled - 返回指明浏览器中是否启用 cookie 的布尔值
- navigator.platform - 返回运行浏览器的操作系统平台
- navigator.userAgent - 返回由客户机发送服务器的user-agent 头部的值
- navigator.javaEnabled() - 指定是否在浏览器中启用Java
- navigator.taintEnabled() - 规定浏览器是否启用数据污点(data tainting)
案例05:获取浏览器参数
1
2
3
4
5
6
7
8
9
10
11
12
13
14
15
16
<!DOCTYPE html>
<html>
	<head>
		<meta charset="UTF-8">
		<title></title>
	</head>
	<body>
	</body>
	<script type="text/javascript">
		document.write("浏览器代号: " + navigator.appCodeName + "<br/><br/>");
		document.write("浏览器名称: " + navigator.appName + "<br/><br/>");
		document.write("浏览器的平台和版本信息: " + navigator.appVersion + "<br/><br/>");
		document.write("浏览器启用cookie: " + navigator.cookieEnabled + "<br/><br/>");
		document.write("HTTP 请求的用户代理头: " + navigator.userAgent + "<br/><br/>");
	</script>
</html>
效果展示

JavaScript DOM对象
文档对象模型 (DOM),将 web 页面与到脚本或编程语言连接起来
Document 对象
| 属性 / 方法 | 描述 |
|---|---|
| document.addEventListener() | 向文档添加事件句柄 |
| document.removeEventListener() | 移除文档中的事件句柄(由 addEventListener() 方法添加) |
| document.body | 返回文档的body元素 |
| document.cookie | 设置或返回与当前文档有关的所有 cookie。 |
| document.createAttribute() | 创建一个属性节点 |
| document.createComment() | createComment() 方法可创建注释节点。 |
| document.createElement() | 创建元素节点。 |
| document.createTextNode(xxxx) | 创建文本节点。 |
| document.getElementsByClassName() | 返回文档中所有指定类名的元素集合,作为 NodeList 对象。 |
| document.getElementById() | 返回对拥有指定 id 的第一个对象的引用。 |
| document.getElementsByName() | 返回带有指定名称的对象集合。 |
| document.getElementsByTagName() | 返回带有指定标签名的对象集合。 |
| document.querySelector() | 返回文档中匹配指定的CSS选择器的第一元素 |
| document.querySelectorAll() | document.querySelectorAll() 是 HTML5中引入的新方法,返回文档中匹配的CSS选择器的所有元素节点列表 |
| document.write() | 向文档写 HTML 表达式 或 JavaScript 代码。 |
| document.writeln() | 等同于 write() 方法,不同的是在每个表达式之后写一个换行符。 |
Element对象
| 属性 / 方法 | 描述 |
|---|---|
| element.addEventListener() | 向指定元素添加事件句柄 |
| element.removeEventListener() | 移除由 addEventListener() 方法添加的事件句柄 |
| element.appendChild(node) | 为元素添加一个新的子元素 |
| element.removeChild(node) | 删除一个子元素 |
| element.insertBefore(node,newnode) | 现有的子元素之前插入一个新的子元素 |
| element.classList | 返回元素的类数组,可用add(class1, class2, …)、contains(class)、item(index)、remove(class1, class2, …)、toggle(class) |
| element.className | 设置或返回元素的class属性值 |
| element.id | 设置或者返回元素的 id。 |
| element.attributes | 返回一个元素的属性数组 |
| element.innerHTML | 设置或者返回元素的内容。 |
| element.getAttribute(name) | 返回指定元素的属性值 |
| element.getAttributeNode(name) | 返回指定属性节点对象,name:属性名;value:属性值 |
| element.hasAttribute(name) | 判断元素中是否存在指定的属性返回 true,否则返回false。 |
| element.hasAttributes() | 判断元素是否有任何属性返回true,否则返回false。 |
| element.hasChildNodes() | 判断元素是否具有任何子元素 |
| element.removeAttribute() | 从元素中删除指定的属性 |
| element.removeAttributeNode() | 删除指定属性节点并返回移除后的节点。 |
| element.setAttribute() | 设置或者改变指定属性并指定值。 |
| element.setAttributeNode() | 设置或者改变指定属性节点。 |
| element.clientHeight | 在页面上返回内容的可视高度(不包括边框,边距或滚动条) |
| element.clientWidth | 在页面上返回内容的可视宽度(不包括边框,边距或滚动条) |
| element.offsetHeight | 返回,任何一个元素的高度包括边框和填充,但不是边距 |
| element.offsetWidth | 返回元素的宽度,包括边框和填充,但不是边距 |
| element.scrollHeight | 返回整个元素的高度(包括带滚动条的隐蔽的地方) |
| element.offsetTop | 返回元素距离顶部的高度 |
| element.offsetLeft | 返回元素距离左边的宽度 |
| element.scrollLeft | 返回当前视图中的实际元素的左边缘和左边缘之间的距离 |
| element.scrollTop | 返回当前视图中的实际元素的顶部边缘和顶部边缘之间的距离 |
| element.scrollWidth | 返回元素的整个宽度(包括带滚动条的隐蔽的地方) |
| element.cloneNode(boolean) | 克隆某个元素,true:克隆子元素;false:不包括子元素 |
| element.childNodes | 返回元素的一个子节点的数组,包括空文字节点 |
| element.children | 返回元素的一个子节点的数组,不包括空文字节点 |
| element.firstChild | 返回元素的第一个子节点 |
| element.lastChild | 返回的最后一个子元素 |
| element.nextSibling | 返回该元素紧跟的一个节点 |
| element.parentNode | 返回元素的父节点element.parentElement |
| element.previousSibling | 返回某个元素紧接之前元素 |
| element.querySelector() | 返回匹配指定 CSS 选择器元素的第一个子元素 |
经典案例:显示隐藏
1
2
3
4
5
6
7
8
9
10
11
12
13
14
15
16
17
18
19
20
21
22
23
24
25
26
27
28
29
30
31
32
33
34
35
36
37
38
39
<!DOCTYPE html>
<html>
	<head>
		<meta charset="utf-8">
		<title></title>
		<style type="text/css">
			.hide{display: none;}
		</style>
	</head>
	<body>
		<input type="text" id="a" class="hide"/>
		<button onclick="change(this)">切换</button>
	</body>
	<script type="text/javascript">
		// 方法1 : 计数求模
		count = 0
		function change(that){
			if (count++ % 2 == 0) {
				a.classList.add("b1")
			} else{
				a.classList.remove("b1")
			}
		}
		// 方法2 : 属性记录状态
		function change(that){
			if (that.getAttribute("isShow") == "true") {
				a.classList.add("b1")
				that.setAttribute("isShow","false")
			} else{
				a.classList.remove("b1")
				that.setAttribute("isShow","true")
			}
		}
		// 方法3 : 类列表切换 class 属性
		function change(that){
			a.classList.toggle("b1")
		}
	</script>
</html>
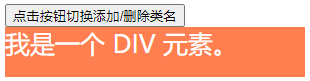
案例06:切换class
1
2
3
4
5
6
7
8
9
10
11
12
13
14
15
16
17
18
19
20
21
22
23
24
25
26
27
28
29
30
31
32
33
34
35
36
37
38
<!DOCTYPE html>
<html>
<head>
<meta charset="utf-8">
<title> </title>
<style>
.mystyle {
width: 300px;
height: 50px;
background-color: coral;
color: white;
font-size: 25px;
}
<span class="hljs-class">.newClassName</span> <span class="hljs-rules">{
<span class="hljs-rule"><span class="hljs-attribute">width</span>:<span class="hljs-value"> <span class="hljs-number">400px</span></span></span>;
<span class="hljs-rule"><span class="hljs-attribute">height</span>:<span class="hljs-value"> <span class="hljs-number">100px</span></span></span>;
<span class="hljs-rule"><span class="hljs-attribute">background-color</span>:<span class="hljs-value"> lightblue</span></span>;
<span class="hljs-rule"><span class="hljs-attribute">text-align</span>:<span class="hljs-value"> center</span></span>;
<span class="hljs-rule"><span class="hljs-attribute">font-size</span>:<span class="hljs-value"> <span class="hljs-number">25px</span></span></span>;
<span class="hljs-rule"><span class="hljs-attribute">color</span>:<span class="hljs-value"> navy</span></span>;
<span class="hljs-rule"><span class="hljs-attribute">margin-bottom</span>:<span class="hljs-value"> <span class="hljs-number">10px</span></span></span>;
<span class="hljs-rule">}</span></span>
</span><span class="hljs-tag"></<span class="hljs-title">style</span>></span>
<span class="hljs-tag"></<span class="hljs-title">head</span>></span>
<span class="hljs-tag"><<span class="hljs-title">body</span>></span>
<span class="hljs-tag"><<span class="hljs-title">button</span> <span class="hljs-attribute">onclick</span>=<span class="hljs-value">"myFunction()"</span>></span>点击按钮切换添加/删除类名<span class="hljs-tag"></<span class="hljs-title">button</span>></span>
<span class="hljs-tag"><<span class="hljs-title">div</span> <span class="hljs-attribute">id</span>=<span class="hljs-value">"myDIV"</span> <span class="hljs-attribute">class</span>=<span class="hljs-value">"mystyle"</span>></span>
我是一个 DIV 元素。
<span class="hljs-tag"></<span class="hljs-title">div</span>></span>
<span class="hljs-tag"><<span class="hljs-title">script</span>></span><span class="javascript">
<span class="hljs-function"><span class="hljs-keyword">function</span> <span class="hljs-title">myFunction</span><span class="hljs-params">()</span> </span>{
<span class="hljs-built_in">document</span>.getElementById(<span class="hljs-string">"myDIV"</span>).classList.toggle(<span class="hljs-string">"newClassName"</span>);
}
</span><span class="hljs-tag"></<span class="hljs-title">script</span>></span>
<span class="hljs-tag"></<span class="hljs-title">body</span>></span>
</html>
效果展示
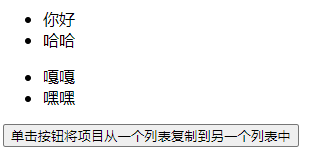
案例07:动态添加元素
1
2
3
4
5
6
7
8
9
10
11
12
13
14
15
16
17
18
19
20
21
22
23
24
25
26
27
28
29
30
31
<!DOCTYPE html>
<html>
<span class="hljs-tag"><<span class="hljs-title">head</span>></span>
<span class="hljs-tag"><<span class="hljs-title">meta</span> <span class="hljs-attribute">charset</span>=<span class="hljs-value">"utf-8"</span>></span>
<span class="hljs-tag"><<span class="hljs-title">title</span>></span><span class="hljs-tag"></<span class="hljs-title">title</span>></span>
<span class="hljs-tag"></<span class="hljs-title">head</span>></span>
<span class="hljs-tag"><<span class="hljs-title">body</span>></span>
<span class="hljs-tag"><<span class="hljs-title">ul</span> <span class="hljs-attribute">id</span>=<span class="hljs-value">"myList1"</span>></span>
<span class="hljs-tag"><<span class="hljs-title">li</span>></span>你好<span class="hljs-tag"></<span class="hljs-title">li</span>></span>
<span class="hljs-tag"><<span class="hljs-title">li</span>></span>哈哈<span class="hljs-tag"></<span class="hljs-title">li</span>></span>
<span class="hljs-tag"></<span class="hljs-title">ul</span>></span>
<span class="hljs-tag"><<span class="hljs-title">ul</span> <span class="hljs-attribute">id</span>=<span class="hljs-value">"myList2"</span>></span>
<span class="hljs-tag"><<span class="hljs-title">li</span>></span>嘎嘎<span class="hljs-tag"></<span class="hljs-title">li</span>></span>
<span class="hljs-tag"><<span class="hljs-title">li</span>></span>嘿嘿<span class="hljs-tag"></<span class="hljs-title">li</span>></span>
<span class="hljs-tag"></<span class="hljs-title">ul</span>></span>
<span class="hljs-tag"><<span class="hljs-title">button</span> <span class="hljs-attribute">onclick</span>=<span class="hljs-value">"myFunction()"</span>></span>单击按钮将项目从一个列表复制到另一个列表中<span class="hljs-tag"></<span class="hljs-title">button</span>></span>
<span class="hljs-tag"><<span class="hljs-title">script</span>></span><span class="javascript">
<span class="hljs-function"><span class="hljs-keyword">function</span> <span class="hljs-title">myFunction</span><span class="hljs-params">()</span> </span>{
<span class="hljs-keyword">var</span> itm = <span class="hljs-built_in">document</span>.getElementById(<span class="hljs-string">"myList2"</span>).children;
<span class="hljs-keyword">var</span> cln = itm[itm.length-<span class="hljs-number">1</span>].cloneNode(<span class="hljs-literal">true</span>);
<span class="hljs-built_in">document</span>.getElementById(<span class="hljs-string">"myList1"</span>).appendChild(cln);
}
</span><span class="hljs-tag"></<span class="hljs-title">script</span>></span>
<span class="hljs-tag"></<span class="hljs-title">body</span>></span>
</html>
效果展示
Event对象
| 属性 | 此事件发生在何时… |
|---|---|
| onblur | 元素失去焦点。 |
| onchange | 域的内容被改变。 |
| onclick | 当用户点击某个对象时调用的事件句柄。 |
| ondblclick | 当用户双击某个对象时调用的事件句柄。 |
| onfocus | 元素获得焦点。 |
| onkeydown | 某个键盘按键被按下。 |
| onkeypress | 某个键盘按键被按下并松开。 |
| onkeyup | 某个键盘按键被松开。 |
| onload | 一张页面或一幅图像完成加载。 |
| onmousedown | 鼠标按钮被按下。 |
| onmousemove | 鼠标被移动。 |
| onmouseout | 鼠标从某元素移开。 |
| onmouseover | 鼠标移到某元素之上。 |
| onmouseup | 鼠标按键被松开。 |
| onresize | 窗口或框架被重新调整大小。 |
| onunload | 用户退出页面。 |
| onscroll | 页面滚动 |
鼠标 / 键盘属性
| 属性 | 描述 |
|---|---|
| clientX | 返回当事件被触发时,鼠标指针的水平坐标。 |
| clientY | 返回当事件被触发时,鼠标指针的垂直坐标。 |
| screenX | 返回当某个事件被触发时,鼠标指针的水平坐标。 |
| screenY | 返回当某个事件被触发时,鼠标指针的垂直坐标。 |
标准 Event 方法
| 方法 | 描述 |
|---|---|
| preventDefault() | 不执行与事件关联的默认事件。 |
| stopPropagation() | 不再向上(子元素)传递事件 |
案例08:鼠标坐标
1
2
3
4
5
6
7
8
9
10
11
12
13
14
15
16
17
18
19
20
21
<!DOCTYPE html>
<html>
	<head>
		<meta charset="UTF-8">
		<title></title>
		<style type="text/css">
			html,body{
				height: 100%;
			}
		</style>
	</head>
	<body onmousemove="show_coords(event)">
	</body>
	<script type="text/javascript">
		function show_coords(event) {
			x = event.clientX;
			y = event.clientY;
			document.body.innerHTML= "X 坐标: " + x + ", Y 坐标: " + y;
		}
	</script>
</html>
效果图

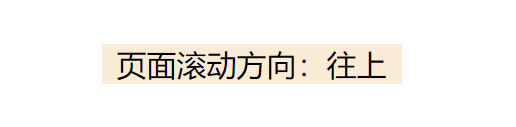
作业
使用JS实现如下效果对话框效果
要求整体居中显示

判断页面滚动放向
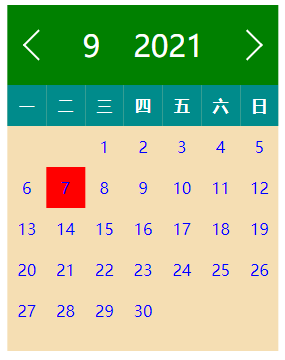
实现如下日历效果
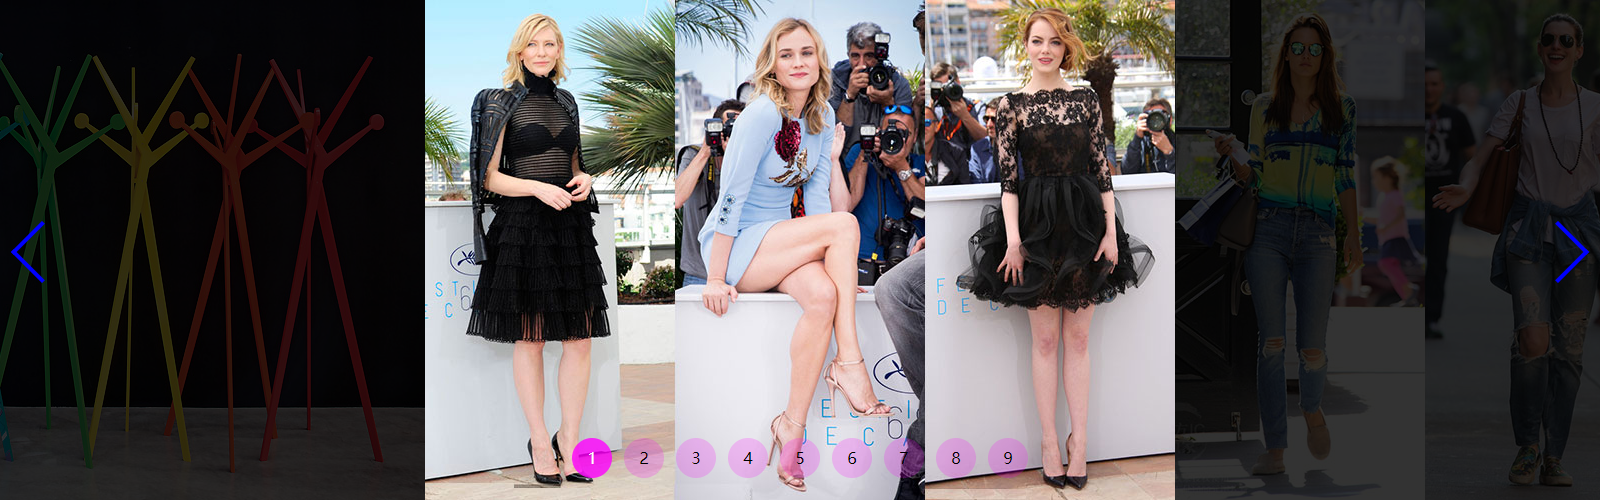
实现简单轮播图

实现无缝轮播图
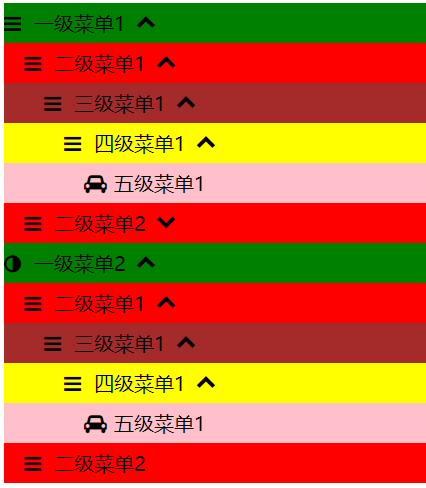
实现无限极菜单
</article>

 浙公网安备 33010602011771号