

4.4. @ControllerAdvice
@ControllerAdvice 就是@Controller 的增强版。@ControllerAdvice 主要用来处理全局数据, 一般搭配
@ExceptionHandler、@ModelAttribute 以及@InitBinder 使用。
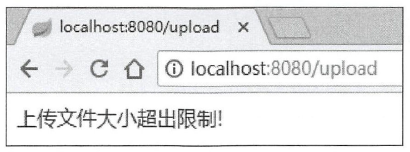
@ControllerAdvice 最常见的使用场景就是全局异常处理。在4.3 节向读者介绍过文件上传大小限制的配置,如果用户上传的文件超过了限制大小,就会抛出异常,此时可以通过@Controller Advice 结合@ExceptionHandler 定义全局异常捕获机制,代码如下:
@ControllerAdvice
public class CustomExceptionHandler {
  // 表明该方法用来处理MaxUploadSizeExceededException类型的异常
  // 如果想让该方法处理所有类型的异常, 只需将 MaxUploadSizeExceededException 改为Exception 即可
  @ExceptionHandler(MaxUploadSizeExceededException.class)
  // 方法的参数可以有异常实例、HttpServletResponse 以及HttpServletRequest 、Model 等
  public void uploadException(MaxUploadSizeExceededException e, HttpServletResponse resp) throws IOException {
    resp.setContentType("text/html;charset=utf-8");
    PrintWriter out = resp.getWriter();
    out.write("上传文件大小超出限制!");
    out.flush();
    out.close();
    // 返回值可以是一段JSON 、一个ModelAndView 、一个逻辑视图名等
  }
}
PrintWriter 是一个输出流。返回的会是一个字符串而不是Json
如果返回参数是一个ModelAndView ,假设使用的页面模板为Thymeleaf (注意添加Thymeleaf相关依赖〉,此时异常处理方法定义如下:
@ControllerAdvice
public class CustomExceptionHandler {
  @ExceptionHandler(MaxUploadSizeExceededException.class)
  public ModelAndView uploadException(MaxUploadSizeExceededException e) throws IOException {
    ModelAndView mv = new ModelAndView();
    mv.addObject("msg","上传文件大小超出限制!");
    // 指error.html
    mv.setViewName("error");
    return mv;
  }
}
然后在resources/templates 目录下创建 error.html 文件,内容如下:效果和上面的相同
<!DOCTYPE html>
<html lang=@en" xmlns:th= "http://www.thymeleaf.org">
<head>
<meta charset="UTF-8">
<title>Title</title>
</head>
<body>
<div th:text="${msg}"></div>
</body>
</html>
、、、、、、、、、、、、、、、、、、、、、、、、、、、、、、、、、、、、、、、、、、、、、、、、、、、、、、、、、、
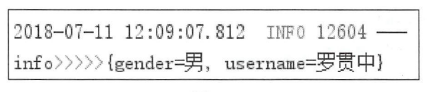
也可以在@ControllerAdvice 中配置全局数据,使用@ModelAttribute 注解进行配置,代码如下:@ControllerAdvice public class GlobalConfig {
// value£性表示这条返回数据的key @ModelAttribute(value = "info") public Map<String, String> userInfo () { HashMap<String , String> map = new HashMap<>(); map.put("username","罗贯中"); map.put("gender","男"); return map ;
} }
此时在任意请求的Controller 中,通过方法参数中的Model 都可以获取info 的数据。
@GetMapping ("/hello")
@ResponseBody
public void hello(Model model) {
  Map<String, Object> map = model.asMap();
  Set<String> keySet = map.keySet();
  Iterator<String> iterator = keySet.iterator();
  while(iterator.hasNext()) {
    String key = iterator.next();
    Object value = map.get(key);
    System.out.println(key + ”>>>” + value );
  }
}
结果
................................................................................................................................................................
@Controller Ad vice 结合@InitBinder 还能实现请求参数预处理,即将表单中的数据绑定到实体
类上时进行一些额外处理。
public class Book {
    private String name ;
    private String author ;
    // 省略getter/setter
}

public class Author {
  private String name;
  private int age ;
  // 省略getter/setter
}
在Controller 上需要接收两个实体类的数据,
@GetMapping ("/book" )
@ResponseBody
public String book(Book book, Author author) {
    return book.toString() + ”>>” + author.toString () ;
}
此时在参数传递时,两个实体类中的name 属性会混淆,@ControllerAdvice 结合@InitBinder可以顺利解决该问题。首先给Controller 中方法的参数添加@ModelAttribute注解
@GetMapping("/book")
@ResponseBody
public String book(@ModelAttribute("b") Book book,@ModelAttribute("a") Author author) {
  return book.toString() + ”>>” + author.toString();
}
然后配置@ControllerAdvice
@ControllerAdvice
public class GlobalConfig {
  @InitBinder("b")
  public void init(WebDataBinder binder) {
    binder.setFieldDefaultprefix("b.");
  }

  @InitBinder("a")
  public void init2(WebDataBinder binder) {
    binder.setFieldDefaultprefix("a.");
  }
}
在每个方法中给相应的Field 设直一个前缀,然后在浏览器中请求
http://localhost:8080/book?b.name=三国演义&b.author= 罗贯中&a.name=曹雪芹&a.age=48 ,即可成功地区分出name 属性。
不然的话都是 http://localhost:8080/book?name=三国演义&author= 罗贯中&name=曹雪芹&age=48 会无法区分是谁的name。

 浙公网安备 33010602011771号