
【音视频】如何部署属于自己的直播源站
背景

疫情3年过后,国内的视频直播火热不减,仍然是国内流量的主入口。本文将尝试在自己服务器配置nginx的直播服务器,并进行推流和拉流测试。
一、部署准备
1、一台centos7服务器
2、下载 nginx-rtmp-module 源码 (link)
3、下载 nginx 源码 (link)
二、开始部署
nginx的环境依赖需提前安装
yum -y install gcc gcc-c++
yum -y install pcre-devel
yum install -y zlib-devel
yum -y install openssl openssl-devel
参考github官网说明进行操作即可
# 编译和安装
cd /opt/nginx-1.20.2 && ./configure --add-module=/opt/nginx-rtmp-module
make
make install
替换conf的内容
vi conf/nginx.conf
events {
    worker_connections  1024;
}


rtmp {

    server {

        listen 1935;

        chunk_size 4000;

        # TV mode: one publisher, many subscribers
        application mytv {

            # enable live streaming
            live on;

            # record first 1K of stream
            record all;
            record_path /tmp/av;
            record_max_size 1K;

            # append current timestamp to each flv
            record_unique on;

            # publish only from localhost
            allow publish 127.0.0.1;
            deny publish all;

            #allow play all;
        }

        # Transcoding (ffmpeg needed)
        application big {
            live on;

            # On every pusblished stream run this command (ffmpeg)
            # with substitutions: $app/${app}, $name/${name} for application & stream name.
            #
            # This ffmpeg call receives stream from this application &
            # reduces the resolution down to 32x32. The stream is the published to
            # 'small' application (see below) under the same name.
            #
            # ffmpeg can do anything with the stream like video/audio
            # transcoding, resizing, altering container/codec params etc
            #
            # Multiple exec lines can be specified.

            exec ffmpeg -re -i rtmp://localhost:1935/$app/$name -vcodec flv -acodec copy -s 32x32
                        -f flv rtmp://localhost:1935/small/${name};
        }

        application small {
            live on;
            # Video with reduced resolution comes here from ffmpeg
        }

        application webcam {
            live on;

            # Stream from local webcam
            exec_static ffmpeg -f video4linux2 -i /dev/video0 -c:v libx264 -an
                               -f flv rtmp://localhost:1935/webcam/mystream;
        }

        application mypush {
            live on;

            # Every stream published here
            # is automatically pushed to
            # these two machines
            push rtmp1.example.com;
            push rtmp2.example.com:1934;
        }

        application mypull {
            live on;

            # Pull all streams from remote machine
            # and play locally
            pull rtmp://localhost pageUrl=www.example.com/index.html;
        }

        application mystaticpull {
            live on;

            # Static pull is started at nginx start
            pull rtmp://localhost pageUrl=www.example.com/index.html name=mystream static;
        }

        # video on demand
        application vod {
            play /var/flvs;
        }

        application vod2 {
            play /var/mp4s;
        }

        # Many publishers, many subscribers
        # no checks, no recording
        application videochat {

            live on;

            # The following notifications receive all
            # the session variables as well as
            # particular call arguments in HTTP POST
            # request

            # Make HTTP request & use HTTP retcode
            # to decide whether to allow publishing
            # from this connection or not
            on_publish http://localhost:8080/publish;

            # Same with playing
            on_play http://localhost:8080/play;

            # Publish/play end (repeats on disconnect)
            on_done http://localhost:8080/done;

            # All above mentioned notifications receive
            # standard connect() arguments as well as
            # play/publish ones. If any arguments are sent
            # with GET-style syntax to play & publish
            # these are also included.
            # Example URL:
            #   rtmp://localhost/myapp/mystream?a=b&c=d

            # record 10 video keyframes (no audio) every 2 minutes
            record keyframes;
            record_path /tmp/vc;
            record_max_frames 10;
            record_interval 2m;

            # Async notify about an flv recorded
            on_record_done http://localhost:8080/record_done;

        }


        # HLS

        # For HLS to work please create a directory in tmpfs (/tmp/hls here)
        # for the fragments. The directory contents is served via HTTP (see
        # http{} section in config)
        #
        # Incoming stream must be in H264/AAC. For iPhones use baseline H264
        # profile (see ffmpeg example).
        # This example creates RTMP stream from movie ready for HLS:
        #
        # ffmpeg -loglevel verbose -re -i movie.avi  -vcodec libx264
        #    -vprofile baseline -acodec libmp3lame -ar 44100 -ac 1
        #    -f flv rtmp://localhost:1935/hls/movie
        #
        # If you need to transcode live stream use 'exec' feature.
        #
        application hls {
            live on;
            hls on;
            hls_path /tmp/hls;
        }

        # MPEG-DASH is similar to HLS

        application dash {
            live on;
            dash on;
            dash_path /tmp/dash;
        }
    }
}

# HTTP can be used for accessing RTMP stats
http {

    server {

        listen      8080;

        # This URL provides RTMP statistics in XML
        location /stat {
            rtmp_stat all;

            # Use this stylesheet to view XML as web page
            # in browser
            rtmp_stat_stylesheet stat.xsl;
        }

        location /stat.xsl {
            # XML stylesheet to view RTMP stats.
            # Copy stat.xsl wherever you want
            # and put the full directory path here
            root /path/to/stat.xsl/;
        }

        location /hls {
            # Serve HLS fragments
            types {
                application/vnd.apple.mpegurl m3u8;
                video/mp2t ts;
            }
            root /tmp;
            add_header Cache-Control no-cache;
        }

        location /dash {
            # Serve DASH fragments
            root /tmp;
            add_header Cache-Control no-cache;
        }
    }
}
启动nginx
# 初次启动
$ ./sbin/nginx
# 重新加载后启动
$ ./sbin/nginx -s reload

三、功能测试与验证
rtmp测试
ffmpeg -re -stream_loop -1 -i test.mp4 -vcodec copy -acodec copy -f flv -y 'rtmp://ip:port/mytv/xxx'
ffplay播放效果
ffplay rtmp://ip:port/mytv/xxx

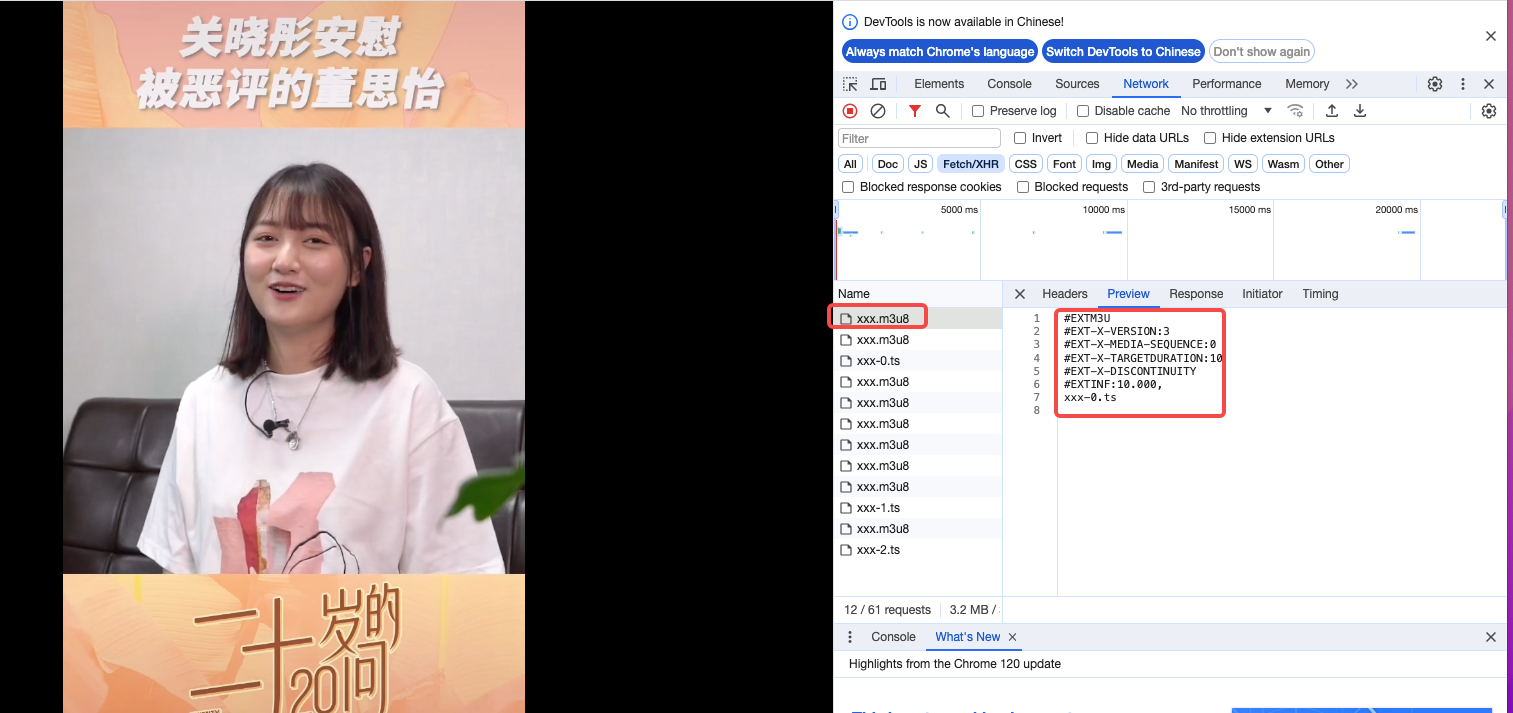
hls测试
ffmpeg -re -stream_loop -1 -i test.mp4 -vcodec copy -acodec copy -f flv -y 'rtmp://ip:port/hls/xxx'
直接使用浏览器播放
dash测试
ffmpeg -re -stream_loop -1 -i test.mp4 -vcodec copy -acodec copy -f flv -y 'rtmp://ip:port/dash/xxx'
ffplay播放效果
ffplay rtmp://ip:port/dash/xxx
四、总结
本文通过配置nginx-rtmp流媒体服务器,整体的推流和拉流功能测试通过。
可能出现的问题:
1、提示缺少依赖包

请执行
yum -y install gcc-c++
2、提示没有权限 no permission
建议全程使用root权限操作, 避免权限的问题。
-------- 以上内容纯属个人学习总结,不代表任何团体或单位。若有理解不到之处请见谅!---------

 浙公网安备 33010602011771号