

P18_神经网络-最大池化的使用
18.1打开pytorch官网:Docs-PyTorch-torch.nn-Pooling Layers-MaxPool2d
1.MaxPool2d参数的Parameters
class torch.nn.MaxPool2d
(kernel_size, stride=None, padding=0, dilation=1, return_indices=False, ceil_mode=False)
其参数具体用法如下:
点击查看代码
kernel_size (Union[int, tuple[int, int]]) – the size of the window to take a max over
stride (Union[int, tuple[int, int]]) – the stride of the window. Default value is kernel_size
padding (Union[int, tuple[int, int]]) – Implicit negative infinity padding to be added on both sides
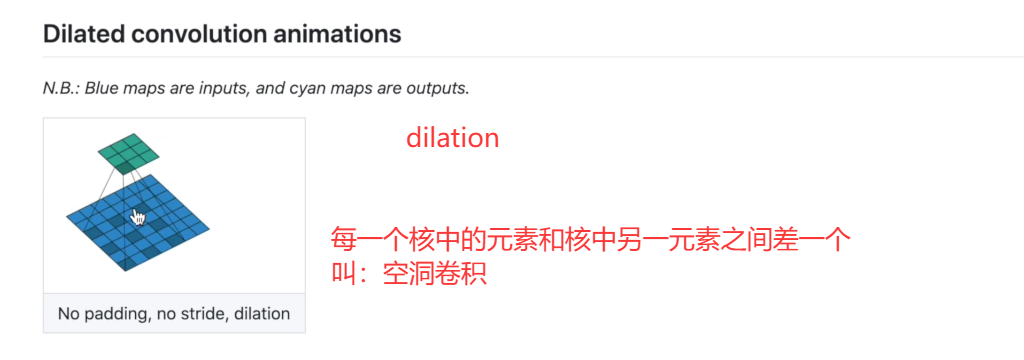
dilation (Union[int, tuple[int, int]]) – a parameter that controls the stride of elements in the window
return_indices (bool) – if True, will return the max indices along with the outputs. Useful for torch.nn.MaxUnpool2d later
ceil_mode (bool) – when True, will use ceil instead of floor to compute the output shape
(1)stride的含义
stride步长默认就是池化核的大小;
eg.池化核(3×3)则kernel_size = 3,即stride=3
(2)dilation的含义
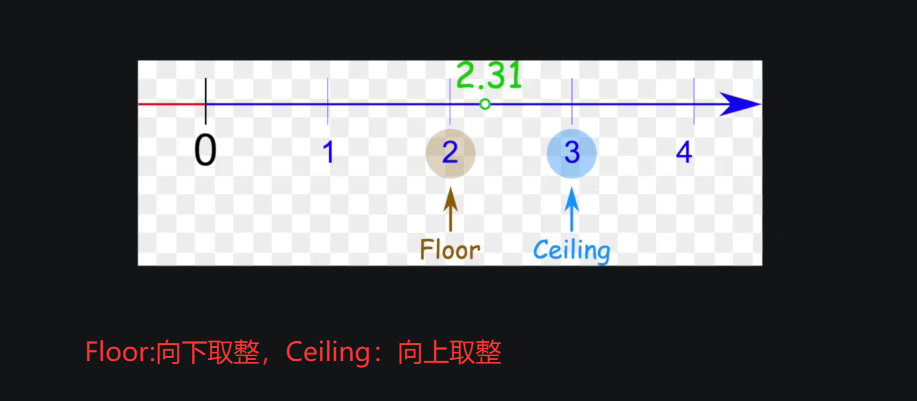
(3)ceil_mode含义
ceil_mode=True时,表示采用ceil
ceil_mode=False时,表示采用flood
(4)应用ceil_mode
默认ceil_mode设置为false,表示stride过程中不取(所谓)“无值区域”的最大值

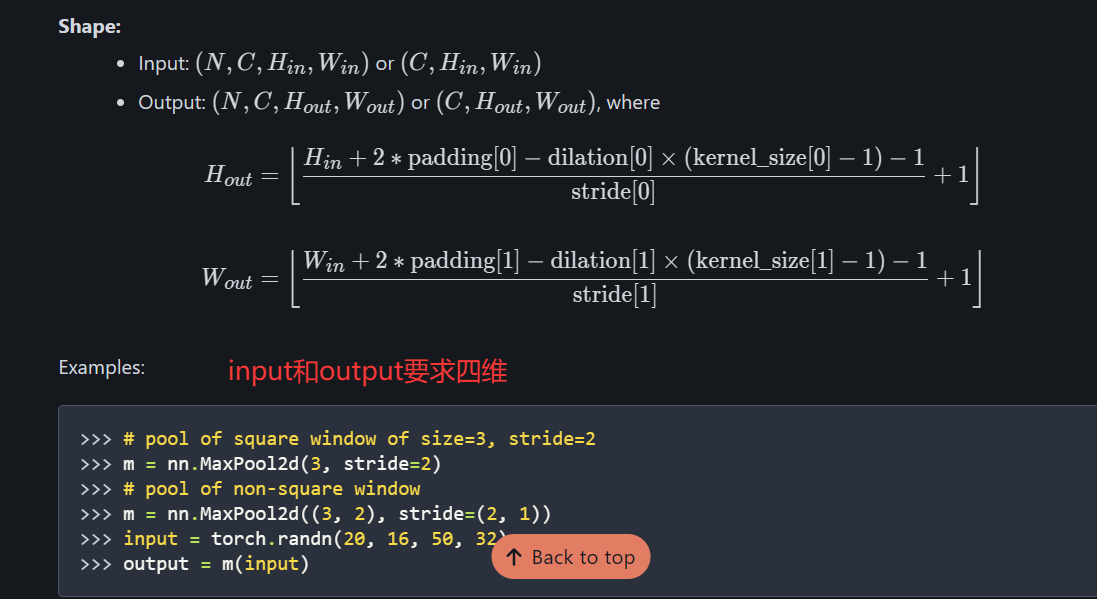
(5)input和output的shape要求
Input:N(即batch_size),C(即Channel),H(高),W(宽)
18.2打开pycharm
1.对上图的矩阵进行最大池化,使用ceil_mode=True:
点击查看代码
import torch
from torch import nn
from torch.nn import MaxPool2d
input = torch.tensor([[1,2,0,3,1],
                      [0,1,2,3,1],
                      [1,2,1,0,0],
                      [5,2,3,1,1],
                      [2,1,0,1,1]],dtype=torch.float32)
#加一个dtype=float就可以把整数类型如1,2等转换成float数据类型1.0,2.0等

#但是要求MaxPool的input是四维的,所以进行reshape一下
input = torch.reshape(input,(-1,1,5,5))
#其中,batch_size设置为-1表示让他自己去计算batch_size,只有一层所以channel=1,5×5即宽和高设置为5,5
print(input.shape)

#定义神经网络的模板
class Dyl(nn.Module):
    def __init__(self):
        super(Dyl, self).__init__()
        self.maxpool1 = MaxPool2d(kernel_size=3,ceil_mode=True)
    def forward(self,input):
        output = self.maxpool1(input)  #input经过最大池化就会得到output
        return output

#先创建名为dyl的神经网路
dyl = Dyl()
#再给神经网络一个输入input,就会得到一个输出
output = dyl(input)
print(output)
点击查看代码
输出为D:\anaconda3\envs\pytorch\python.exe D:/DeepLearning/Learn_torch/P18_nnMaxPool.py
torch.Size([1, 1, 5, 5])
tensor([[[[2., 3.],
          [5., 1.]]]])

进程已结束,退出代码0
2.再将ceil_mode设置为False时:
self.maxpool1 = MaxPool2d(kernel_size=3, ceil_mode=False)
结果如下:
点击查看代码
D:\anaconda3\envs\pytorch\python.exe D:/DeepLearning/Learn_torch/P18_nnMaxPool.py
torch.Size([1, 1, 5, 5])
tensor([[[[2.]]]])

进程已结束,退出代码0
18.3最大池化的使用
1.为什么要进行最大池化
最大池化目的是保留输入特征,同时减少数据量,训练会更快
2.对CIFAR10的数据集进行最大池化
点击查看代码
import torch
import torchvision.datasets
from torch import nn
from torch.nn import MaxPool2d
from torch.utils.data import DataLoader
from torch.utils.tensorboard import SummaryWriter

dataset = torchvision.datasets.CIFAR10(root="./dataset",train=False,download=True,transform=torchvision.transforms.ToTensor())
dataloader = DataLoader(dataset,batch_size=64)


#定义神经网络的模板
class Dyl(nn.Module):
    def __init__(self):
        super(Dyl, self).__init__()
        #self.maxpool1 = MaxPool2d(kernel_size=3,ceil_mode=True)
        self.maxpool1 = MaxPool2d(kernel_size=3, ceil_mode=False)
    def forward(self,input):
        output = self.maxpool1(input)  #input经过最大池化就会得到output
        return output

#先创建名为dyl的神经网路
dyl = Dyl()

step = 0
writer = SummaryWriter("logs_maxpool")
for data in dataloader:
    imgs,targets = data
    writer.add_images("input",imgs,step)
    output = dyl(imgs)   #input即imgs放进去卷积得到output
    writer.add_images("output",output,step)
    step = step + 1
writer.close()
输出成果:
点击查看代码
xxxxxxxxxx Files already downloaded and verified进程已结束,退出代码0
点击查看代码
tensorboard --logdir=logs_maxpool
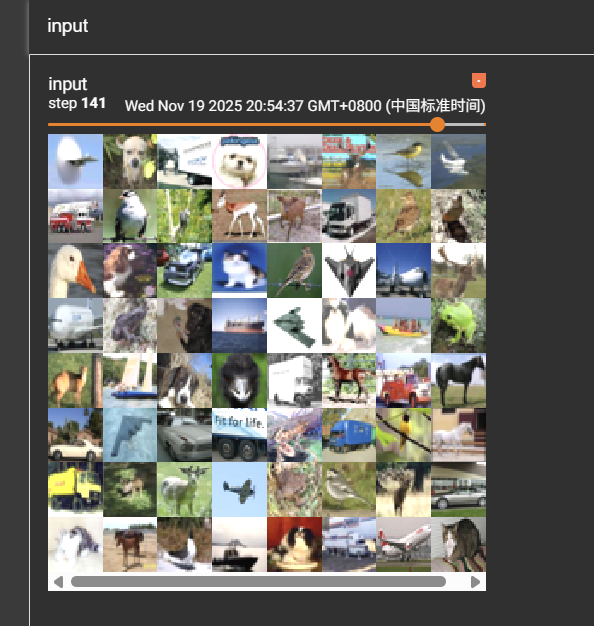
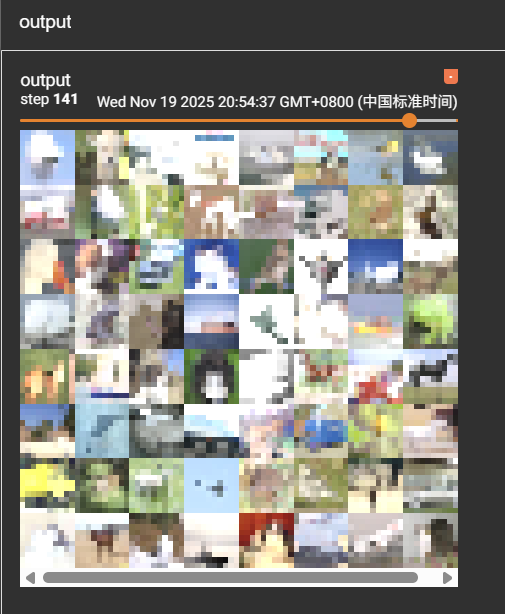
4.tensorboard打开后:
(1)input和output的tensorboard:对比

(2)input的tensorboard:池化前
(3)output的tensorboard:池化后(像打了马赛克)

 浙公网安备 33010602011771号