搭建一个node+vue的项目
一.使用express搭建一个服务
//1.导入express
const express = require('express')
//2.调用express函数,它的返回值就是服务器的实例
const app = express()//TODO_01配置session中间件
const bodyParser = require('body-parser')
//引入第三方中间件,要在router之前引入才能通过req.body获取到请求的数据
app.use(bodyParser.json());
app.use(bodyParser.urlencoded({extended:false}))

const session = require('express-session')
app.use(session({
  secret: 'itheima',
  resave: false,
  saveUninitialized: true
}))
//TODO_02请将登录成功后的用户信息保存到session当中
app.post('/api/login', (req, res) => {
  console.log(req.body,req.session)
  if (req.body.username !== 'admin' || req.body.password !== '000000') {
    return res.send({ status: 1, mesg: '登录失败' })
  }
  console.log(req.body)
  //注意只有成功配置了express-session中间件之后才能通过req 点出来session这个属性
  req.session.user = req.body//用户信息
  req.session.isLogin = true//用户登录状态
  res.send({ status: 0, mesg: '登录成功' })
})
//TODO_03从session中获取用户的名称,响应给客户端
//1.判断是否登录


//退出登录接口
app.post('/api/logout', (req, res) => {
  //TODO_04清空session
  req, session.destroy()
  res.send({
    status: 0,
    msg: '退出登录成功'
  })
})

app.listen(80, () => {
  console.log('express server running at http://127.0.0.1')
})
注意:
const bodyParser = require('body-parser')
//引入第三方中间件,要在router之前引入才能通过req.body获取到请求的数据
app.use(bodyParser.json());
app.use(bodyParser.urlencoded({extended:false}))

二.使用vue搭建一个前端项目,并引入axios,封装接口,配置跨域
npm install aixos -g
npm install vue-axios -g
然后在main.js中使用
// The Vue build version to load with the `import` command
// (runtime-only or standalone) has been set in webpack.base.conf with an alias.
import Vue from 'vue'
import App from './App'
import router from './router'
import axios from 'axios'
import VueAxios from 'vue-axios'
Vue.config.productionTip = false
Vue.prototype.$axios =axios
Vue.use(VueAxios, axios)

/* eslint-disable no-new */
new Vue({
  el: '#app',
  router,
  components: { App },
  template: '<App/>'
})
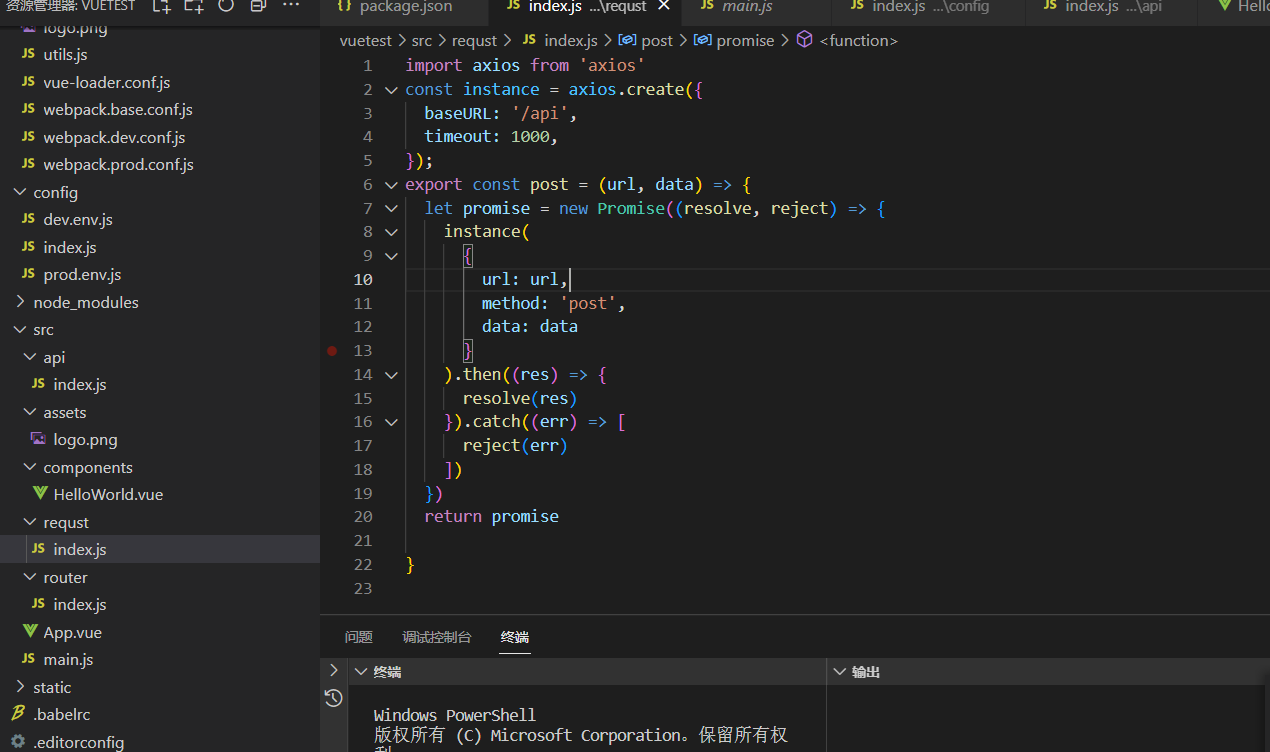
封装axios方法
import axios from 'axios'
const instance = axios.create({
  baseURL: '/api',
  timeout: 1000,
});
export const post = (url, data) => {
  let promise = new Promise((resolve, reject) => {
    instance(
      {
        url: url,
        method: 'post',
        data: data
      }
    ).then((res) => {
      resolve(res)
    }).catch((err) => [
      reject(err)
    ])
  })
  return promise

}
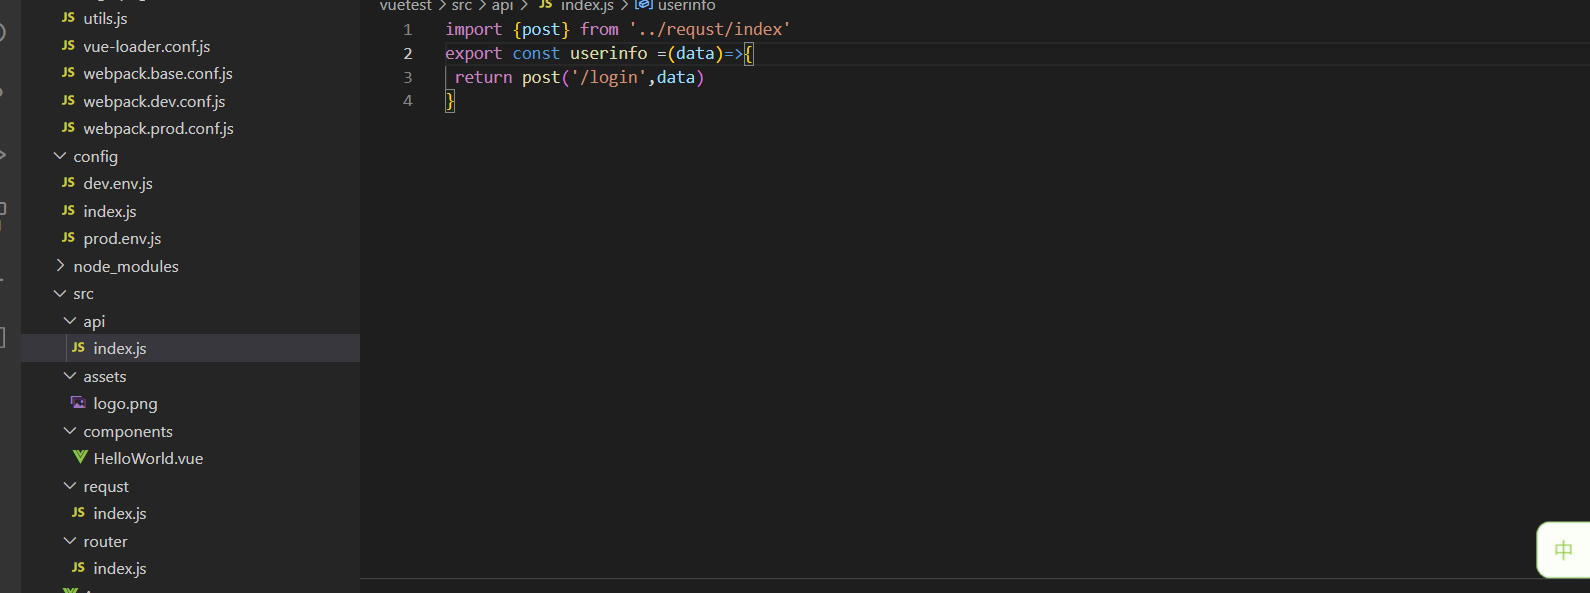
封装api
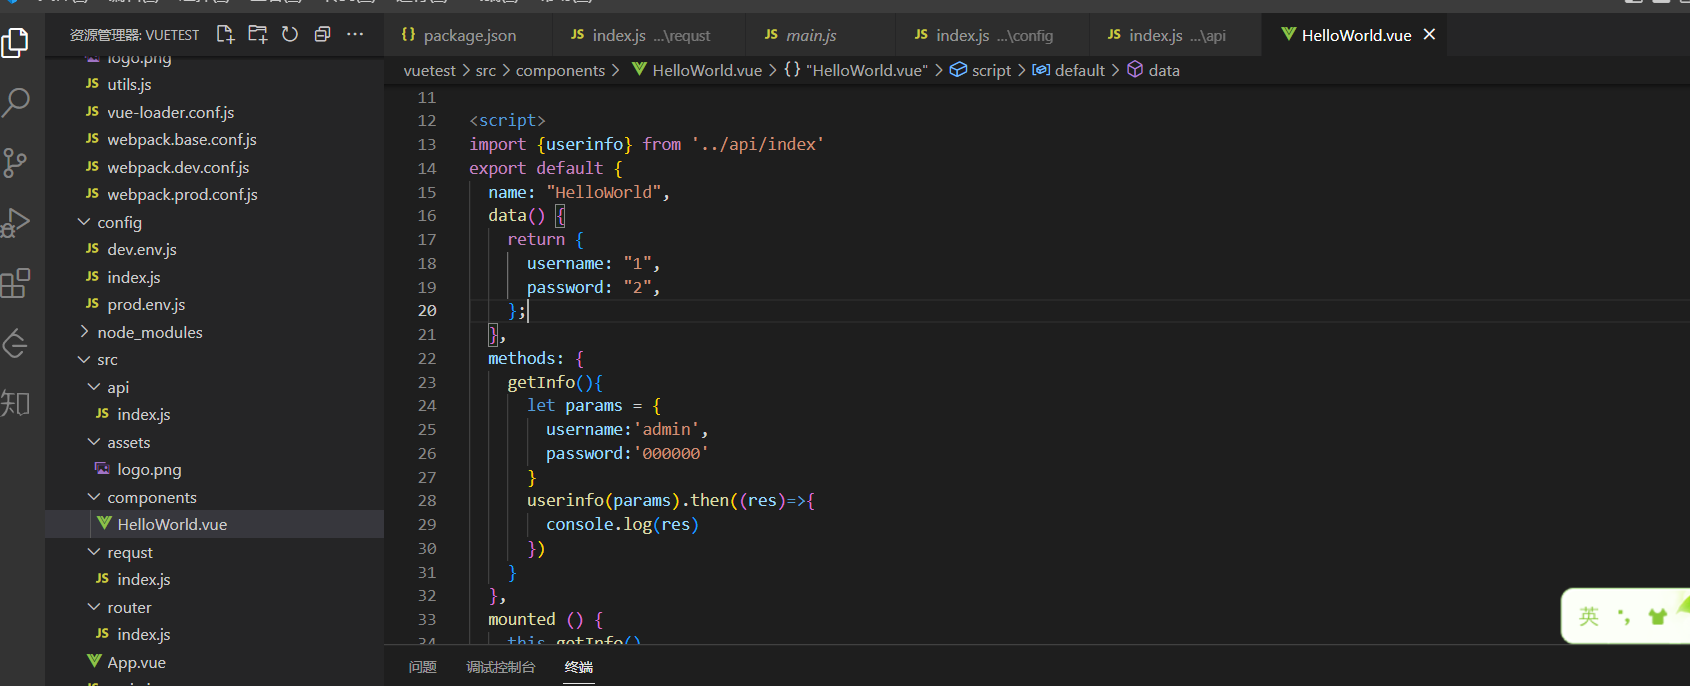
调用api
在config文件夹下的Index.js的proxyTable对象中配置跨域
'use strict'
// Template version: 1.3.1
// see http://vuejs-templates.github.io/webpack for documentation.

const path = require('path')

module.exports = {
  dev: {

    // Paths
    assetsSubDirectory: 'static',
    assetsPublicPath: '/',
    // Various Dev Server settings
    host: 'localhost', // can be overwritten by process.env.HOST
    port:81, // can be overwritten by process.env.PORT, if port is in use, a free one will be determined
    autoOpenBrowser: false,
    proxyTable:{
      '/api':{
        target:"http://127.0.0.1:80/api",
        changeOrigin: true,
        ws: true,
        pathRewrite: {
          "^/api": "",
        },
      }
    },
    errorOverlay: true,
    notifyOnErrors: true,
    poll: false, // https://webpack.js.org/configuration/dev-server/#devserver-watchoptions-


    /**
     * Source Maps
     */

    // https://webpack.js.org/configuration/devtool/#development
    devtool: 'cheap-module-eval-source-map',

    // If you have problems debugging vue-files in devtools,
    // set this to false - it *may* help
    // https://vue-loader.vuejs.org/en/options.html#cachebusting
    cacheBusting: true,

    cssSourceMap: true
  },

  build: {
    // Template for index.html
    index: path.resolve(__dirname, '../dist/index.html'),

    // Paths
    assetsRoot: path.resolve(__dirname, '../dist'),
    assetsSubDirectory: 'static',
    assetsPublicPath: '/',

    /**
     * Source Maps
     */

    productionSourceMap: true,
    // https://webpack.js.org/configuration/devtool/#production
    devtool: '#source-map',

    // Gzip off by default as many popular static hosts such as
    // Surge or Netlify already gzip all static assets for you.
    // Before setting to `true`, make sure to:
    // npm install --save-dev compression-webpack-plugin
    productionGzip: false,
    productionGzipExtensions: ['js', 'css'],

    // Run the build command with an extra argument to
    // View the bundle analyzer report after build finishes:
    // `npm run build --report`
    // Set to `true` or `false` to always turn it on or off
    bundleAnalyzerReport: process.env.npm_config_report
  },

}
配置完成之后将请求的baseurl换成/api即可,这是/api实际上就表示 http://127.0.0.1:80/api

 浙公网安备 33010602011771号