Let's started by creating a new web application in Visual Studio 2008 Team Suite.
Step 1:
create a class named PhotoManager to manage our photoes. In this class, we store the binary data in a memory stream no matter what the binary data comes from. (It may be from the database, or we create the image at real time, etc..)

 PhotoManager class
1 public class PhotoManager
2 {
{
3 public static Stream GetPhoto()
4
 {
{
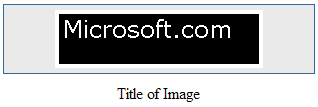
5 String strDisplay = "Microsoft.com";
6 Bitmap bmp = new Bitmap(200, 50);
7
8 Graphics g = Graphics.FromImage(bmp);
9 g.InterpolationMode = System.Drawing.Drawing2D.InterpolationMode.HighQualityBicubic;
10 g.FillRectangle(Brushes.Black, 0, 0, 200, 50);
11 g.DrawString(strDisplay, new Font("verdana", 18), new SolidBrush(Color.White), 0, 0);
12
13 MemoryStream ms = new MemoryStream();
14 bmp.Save(ms, System.Drawing.Imaging.ImageFormat.Png);
15 byte[] bmpBytes = ms.GetBuffer();
16 bmp.Dispose();
17 ms.Close();
18
19 return new MemoryStream(bmpBytes);
20 }
}
21 }
}
Step 2: Add a generic handler named MyHandler.ashx to the application. This handler will write the stream into our httpcontext.
MyHandler Class
1public class MyHandler : IHttpHandler
2{
3
4 public void ProcessRequest(HttpContext context)
5 {
6 Stream stream = null;
7 stream = PhotoManager.GetPhoto();
8
9 const int buffersize = 1024 * 16;
10 byte[] buffer = new byte[buffersize];
11 int count = stream.Read(buffer, 0, buffersize);
12
13 while (count > 0)
14 {
15 context.Response.OutputStream.Write(buffer, 0, count);
16 count = stream.Read(buffer, 0, buffersize);
17 }
18 }
19
20 public bool IsReusable
21 {
22 get
23 {
24 return true;
25 }
26 }
27}
Step 3: Use our images in the .aspx file and display it.
<img src="MyHandler.ashx" style="border:solid 4px white" alt="Photo from handler" />
The Result:
Happy coding!!


 浙公网安备 33010602011771号