Openstack Train(系统Centos7.6)之三:配置数据库,管理端haproxy配置环境服务
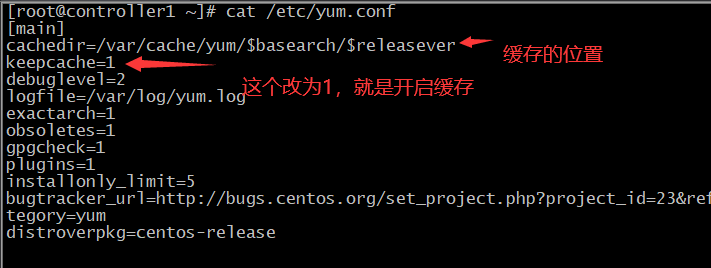
在安装之前,先说明,由于Openstack更新之猛,所以当开始使用每一版本,最好把Yum缓存开启,以免后面改版本后。找不到Yum源。
开启Yum缓存
vim /etc/yum.conf
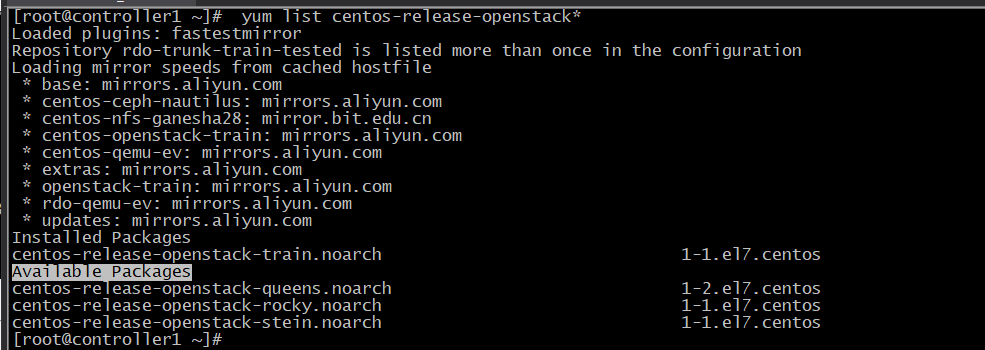
我现在安装的,正好可以使用阿里的Yum源。
使用命令查看
172.31.7.101 controller1 #管理端
172.31.7.103 openstack-mysql #数据库
172.31.7.105 haproxy1 #haproxy
使用hostnamectl set-hostname 把每个机器名称改好,方便自已管理
先按照下面定义,把相应的安装包安装在对应的机器 上
yum install -y centos-release-openstack-train.noarch #管理端( Node节点,后面加计算节点的时候再安装)
yum install -y https://rdoproject.org/repos/rdo-release.rpm #管理端 数据库 ( Node节点,后面加计算节点的时候再安装)
yum install -y python-openstackclient openstack-selinux openstack-utils #管理端( Node节点,后面加计算节点的时候再安装)
yum install -y mariadb mariadb-server # 数据库
yum install -y mariadb python2-PyMySQL libibverbs #管理端
yum install -y python-memcached#管理端
yum install -y keepalived haproxy #haproxy
数据库服务器172.31.7.103机器上操作:
安装三个服务,数据库mariadb,消息队列RabbitMQ和缓存Memcache
1、前面已经使用 yum install -y mariadb mariadb-server 安装了数据库,下面就直接配置。
vim /etc/my.cnf.d/openstack.cnf
[mysqld] bind-address = 0.0.0.0
default-storage-engine = innodb
innodb_file_per_table = on
max_connections = 4096
collation-server = utf8_general_ci
character-set-server = utf8
重启数据库,免设成开机自启
systemctl start mariadb
systemctl enable mariadb
2、安装消息队列服务RabbitMQ,并设为开机自启动。
yum install -y rabbitmq-server
systemctl enable rabbitmq-server.service
systemctl start rabbitmq-server.service
给RabbitMQ增加一用户openstack,密码设为openstack123,后面服务会使用到。
# rabbitmqctl add_user openstack RABBIT_PASS

Creating user "openstack" ...   #建立过程的提示
给刚才建的用户openstack 设授权: 允许配置、写入、读取访问
#rabbitmqctl set_permissions openstack ".*" ".*" ".*"

Setting permissions for user "openstack" in vhost "/" ... #建立成功的提示
RabbitMQ有一个web管理界面,我们现在开启。开启可以先查看一下已经有两个端口号 25672 ,5672.等开启web管理,还会增加一个15672端口
rabbitmq-plugins enable rabbitmq_management
现在我们就可以使用
http://172.31.7.103:15672访问,默认的用户名和密码都是guest

3、安装缓存服务器
yum install -y memcached
配置 :
vim /etc/sysconfig/memcached
PORT="11211"
USER="memcached"
MAXCONN="1024"
CACHESIZE="1024"
OPTIONS="-l 0.0.0.0,::1"
注:上面红色部分为修改的地方
启动,并设为开机自启动
systemctl restart memcached.service
systemctl enable memcached.service
Haproxy 配置
前面已经使用yum 安装了keepalived,haproxy 现在先配置 keepalived
1、配置keepalived
vim /etc/keepalived/keepalived.conf #结尾删除了很多
! Configuration File for keepalived

global_defs {
   notification_email {
     acassen@firewall.loc
     failover@firewall.loc
     sysadmin@firewall.loc
   }
   notification_email_from Alexandre.Cassen@firewall.loc
   smtp_server 192.168.200.1
   smtp_connect_timeout 30
   router_id LVS_DEVEL
   vrrp_skip_check_adv_addr
   vrrp_strict
        192.168.200.16
        192.168.200.17
! Configuration File for keepalived

global_defs {
   notification_email {
     acassen@firewall.loc
     failover@firewall.loc
     sysadmin@firewall.loc
   }
   notification_email_from Alexandre.Cassen@firewall.loc
   smtp_server 192.168.200.1
   smtp_connect_timeout 30
   router_id LVS_DEVEL
   vrrp_skip_check_adv_addr
   vrrp_strict
   vrrp_iptables     #这里是新增加的。
   vrrp_garp_interval 0
   vrrp_gna_interval 0
}

vrrp_instance VI_1 {
    state MASTER
    interface eth0
    virtual_router_id 58  #修改了这个Id号
    priority 100
    advert_int 1
    authentication {
        auth_type PASS
        auth_pass 1111
    }
    virtual_ipaddress {
        172.31.7.248 dev eth0 label eth0:0  #删除原来的,只加这一条
    }
}
启动和增加自启keepalived服务
systemctl start keepalived
systemctl enable keepalived
这时候,可以使用ifconfig命令查看,机器上会多一个eth0:0的网卡,IP地址为:172.31.7.248.
可以使用其它试Ping一下该IP,如果通,表示配置正常
2、配置haproxy
vim /etc/haproxy/haproxy.cfg
先对数据库,消息队列,缓存做高可用准备
#前面的不变,略
#---------------------------------------------------------------------
# main frontend which proxys to the backends
#---------------------------------------------------------------------
#之后面全删除,改为以下内容

listen openstack-mysql-3306
  bind 172.31.7.248:3306
  mode tcp
  server 172.31.7.103 172.31.7.103:3306 check inter 3s fall 3 rise 5
listen openstack-rabbitmq-5672
  bind 172.31.7.248:5672
  mode tcp
  server 172.31.7.103 172.31.7.103:5672 check inter 3s fall 3 rise 5
listen openstack-memcached-11211
  bind 172.31.7.248:11211
  mode tcp
  server 172.31.7.103 172.31.7.103:11211 check inter 3s fall 3 rise 5
启动服务并设为开机自启动
systemctl restart haproxy
systemctl enable haproxy
查看端口
ss -tnl

 浙公网安备 33010602011771号