
Jenkins+Bitbucket CI&CD 部署环境搭建
1. 安装JDK环境及相关yum源(此处系统为AWS REHL9)
sudo yum install java-1.8.0-openjdk-1.8.0.342
yum install -y http://mirrors.aliyun.com/epel/epel-release-latest-9.noarch.rpm
备份并使用命令替换repo里的地址
mv /etc/yum.repos.d/epel.repo /etc/yum.repos.d/epel.repo.backup
mv /etc/yum.repos.d/epel-testing.repo /etc/yum.repos.d/epel-testing.repo.backup
sed -i 's|^#baseurl=https://download.example/pub|baseurl=https://mirrors.aliyun.com|' /etc/yum.repos.d/epel*
sed -i 's|^metalink|#metalink|' /etc/yum.repos.d/epel*
下载安装Jenkins (JDK8的最高Jenkins版本为Jenkins_2.346.1_all)
sudo wget -O /etc/yum.repos.d/jenkins.repo \
    https://pkg.jenkins.io/redhat/jenkins.repo
sudo rpm --import https://pkg.jenkins.io/redhat/jenkins.io-2023.key
sudo yum upgrade
下载Jenkins 地址,安装时选择默认的官方推荐插件安装(包含git等)
sudo wget https://get.jenkins.io/redhat-stable/jenkins-2.346.3-1.1.noarch.rpm
yum install -y jenkins-2.346.3-1.1.noarch.rpm
2. 安装maven
mvn 3.6
sudo su - mkdir /usr/local/maven
wget https://mirrors.tuna.tsinghua.edu.cn/apache/maven/maven-3/3.8.8/binaries/apache-maven-3.8.8-bin.tar.gz
tar -zxvf apache-maven-3.8.1-bin.tar.gz
sudo vim /etc/profile
在配置文件内容:
HOSTNAME=****
*****
else
*****
fi
后添加:
export MAVEN_HOME=/usr/local/maven/apache-maven-3.8.8
export PATH=$MAVEN_HOME/bin:$PATH
终端运行以下命令:
source /etc/profile   // 使配置生效.
mvn -version    // 查看是否成功.
Redhat 系统需要安装一些额外的工具包,比如locate ,
yum install mlocate ,chronyd,openssh-clients

export PATH=/bin:/usr/local/sbin:/usr/local/bin:/sbin:/bin:/usr/sbin:/usr/bin
jdk 主目录 可通过which java 搜寻,
/usr/lib/jvm/java-1.8.0-openjdk-1.8.0.372.b07-2.el9.x86_64/jre/bin
java_home:/usr/lib/jvm/java-1.8.0-openjdk-1.8.0.372.b07-2.el9.x86_64/jre
Docker 安装
 https://developer.aliyun.com/mirror/docker-ce
 https://mirrors.aliyun.com/docker-ce/linux/rhel/9/s390x/stable/Packages/docker-ce-24.0.0-1.el9.s390x.rpm
# step 1: 安装必要的一些系统工具
sudo yum install -y yum-utils device-mapper-persistent-data lvm2
sudo yum install docker-ce.x86_64
sudo yum install docker-compose-plugin.x86_64
sudo systemctl start docker
常用shell脚本编写,如启动,停止java服务
***************stop***********
#!/bin/bash
echo "Stop Procedure : imdoc-0.0.1-SNAPSHOT.jar"
pid=`ps -ef |grep java|grep imdoc-0.0.1-SNAPSHOT.jar|awk '{print $2}'`
echo 'old Procedure pid:'$pid
if [ -n "$pid" ]
then
	kill -9 $pid
fi

******************start**************
 #!/bin/bash
 export JAVA_HOME=/usr/java/jdk1.8.0_131
 echo ${JAVA_HOME}
 echo 'Start the program : imdoc-0.0.1-SNAPSHOT.jar'
 chmod 777 /home/ldp/app/imdoc-0.0.1-SNAPSHOT.jar
 echo '-------Starting-------'
 cd /home/ldp/app/
 nohup ${JAVA_HOME}/bin/java -jar imdoc-0.0.1-SNAPSHOT.jar &
 echo 'start success'
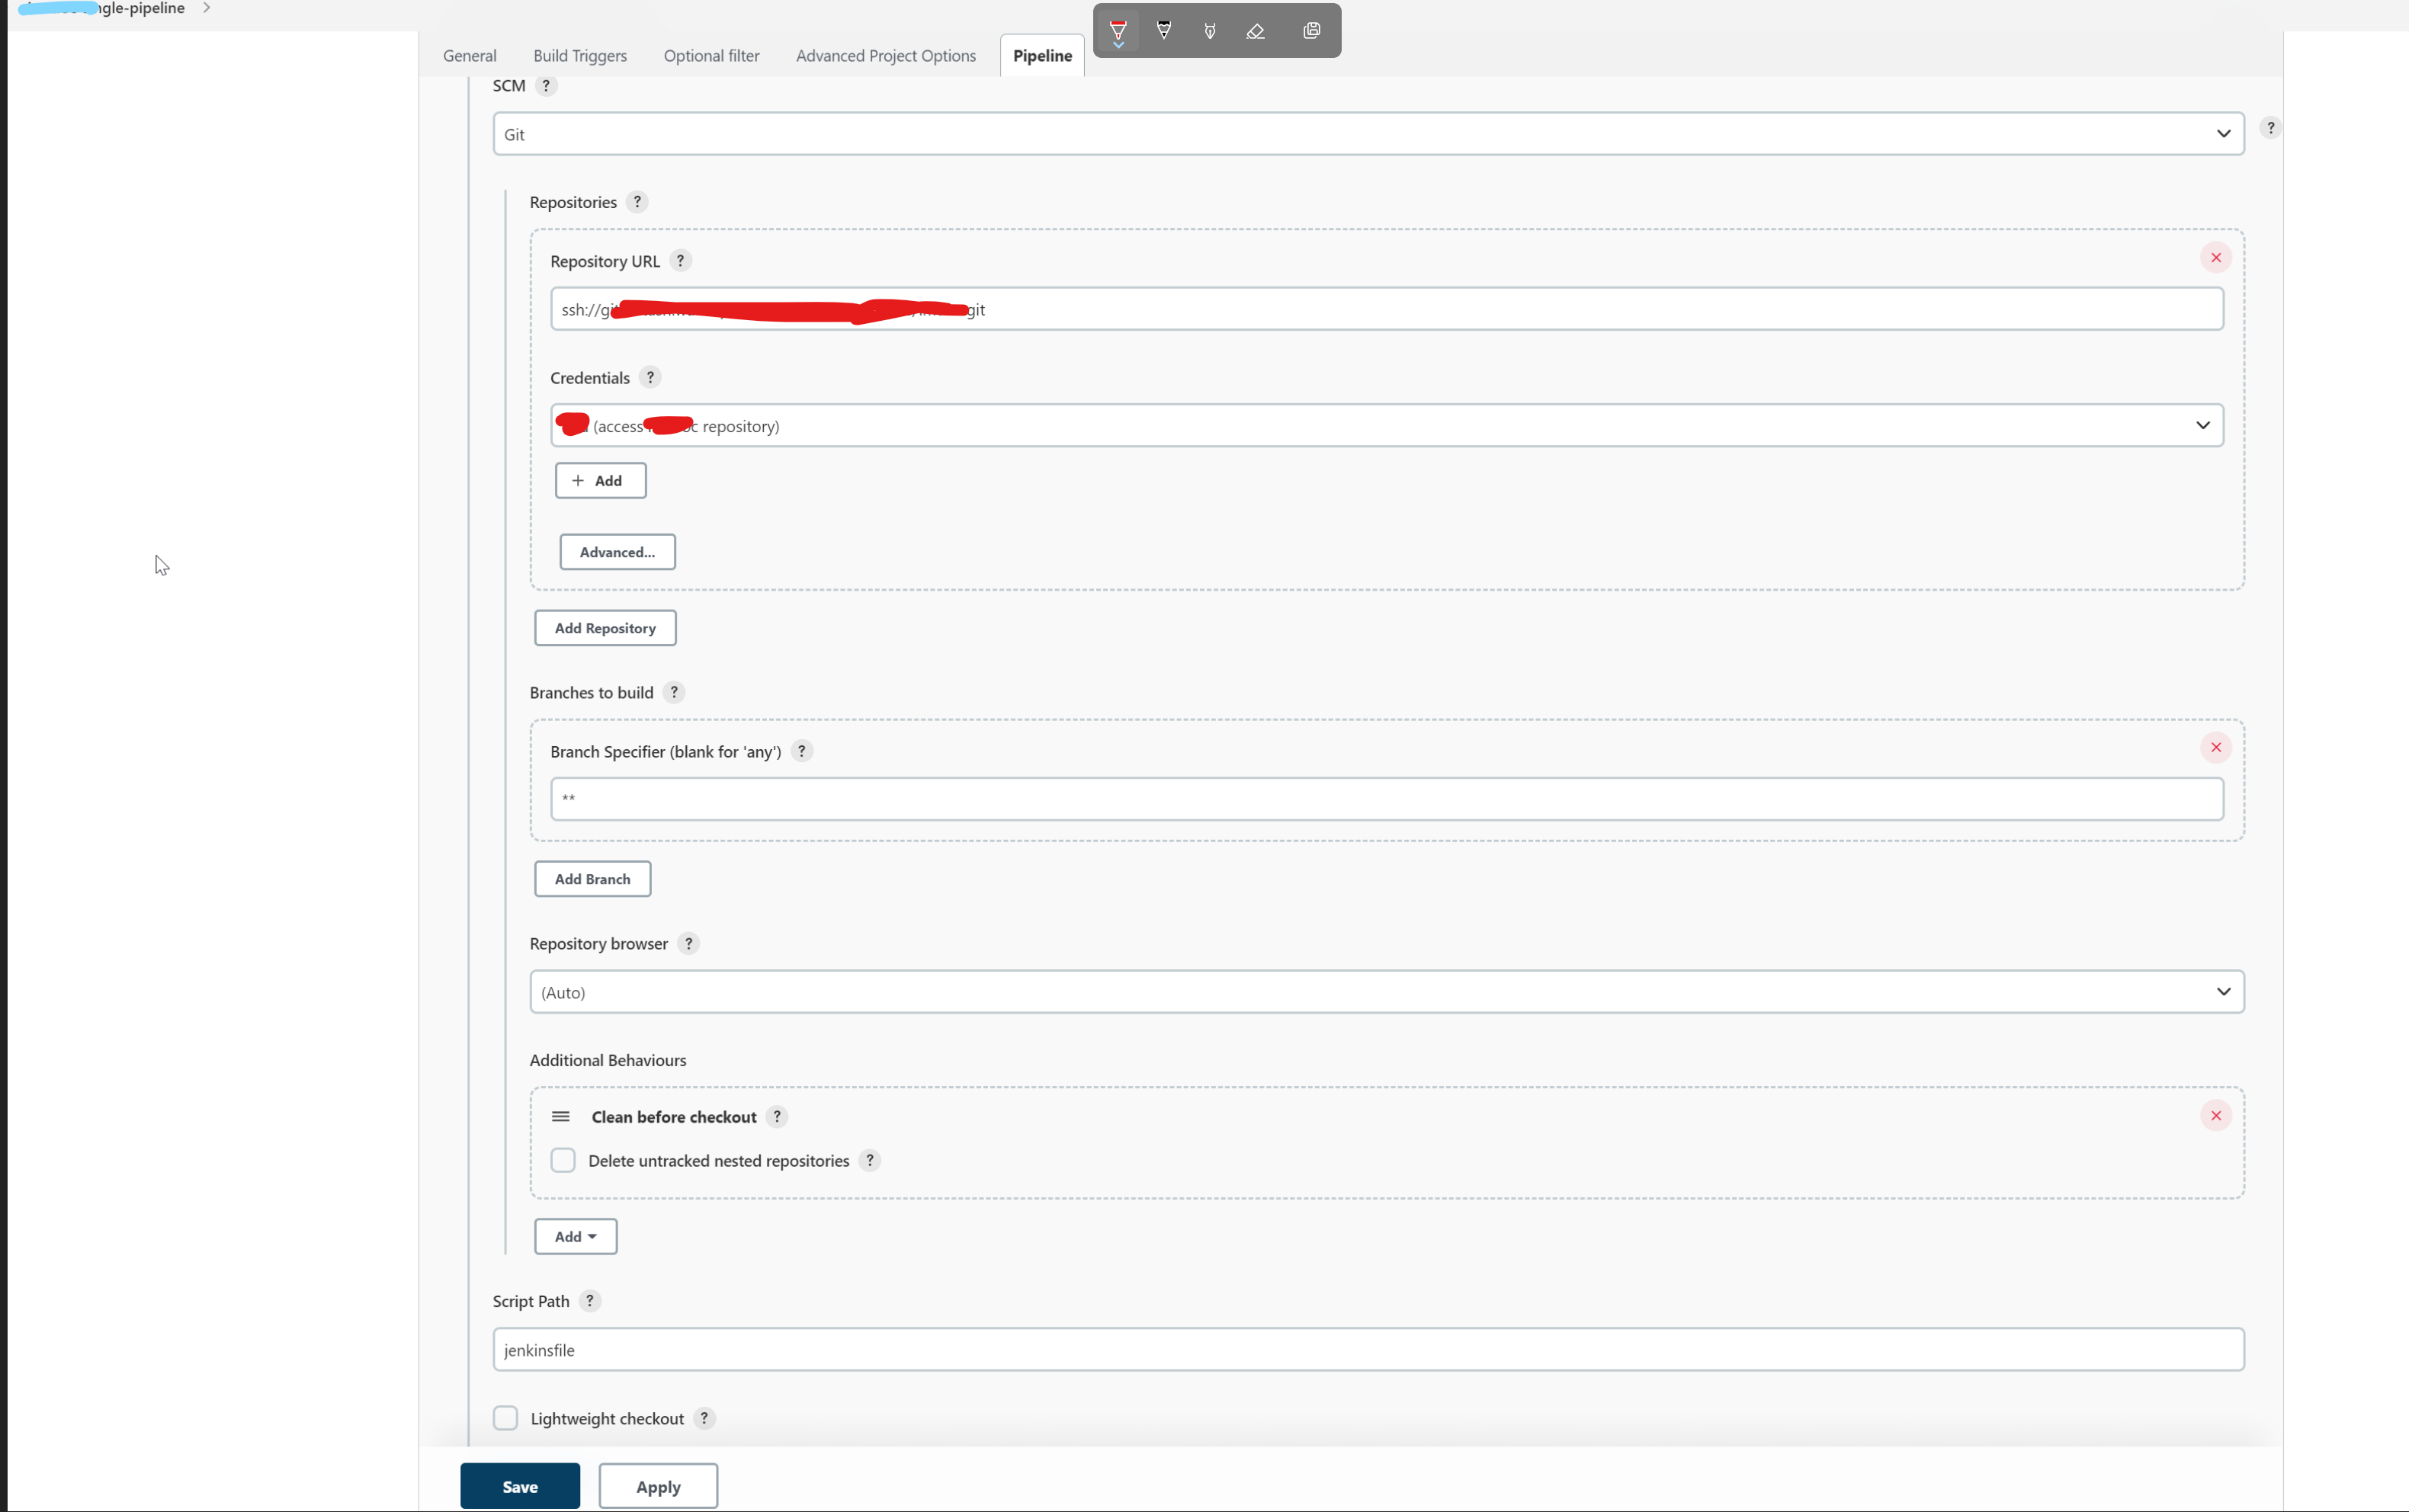
3.配置Jenkins 和Bitbucket repository
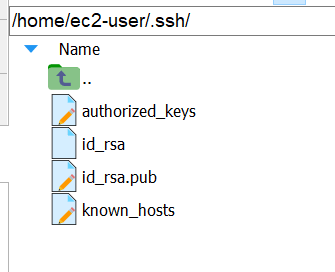
在Jenkins主机上生成ssh key
ssh-keygen -t rsa -C "mxxx@xxxxx.com"
将会在.ssh目录下生成公钥和私钥(此处方位aws主机通过ssh pem文件,aws官网可生成该文件)
将公钥粘贴到Bitbucket repository 设置中

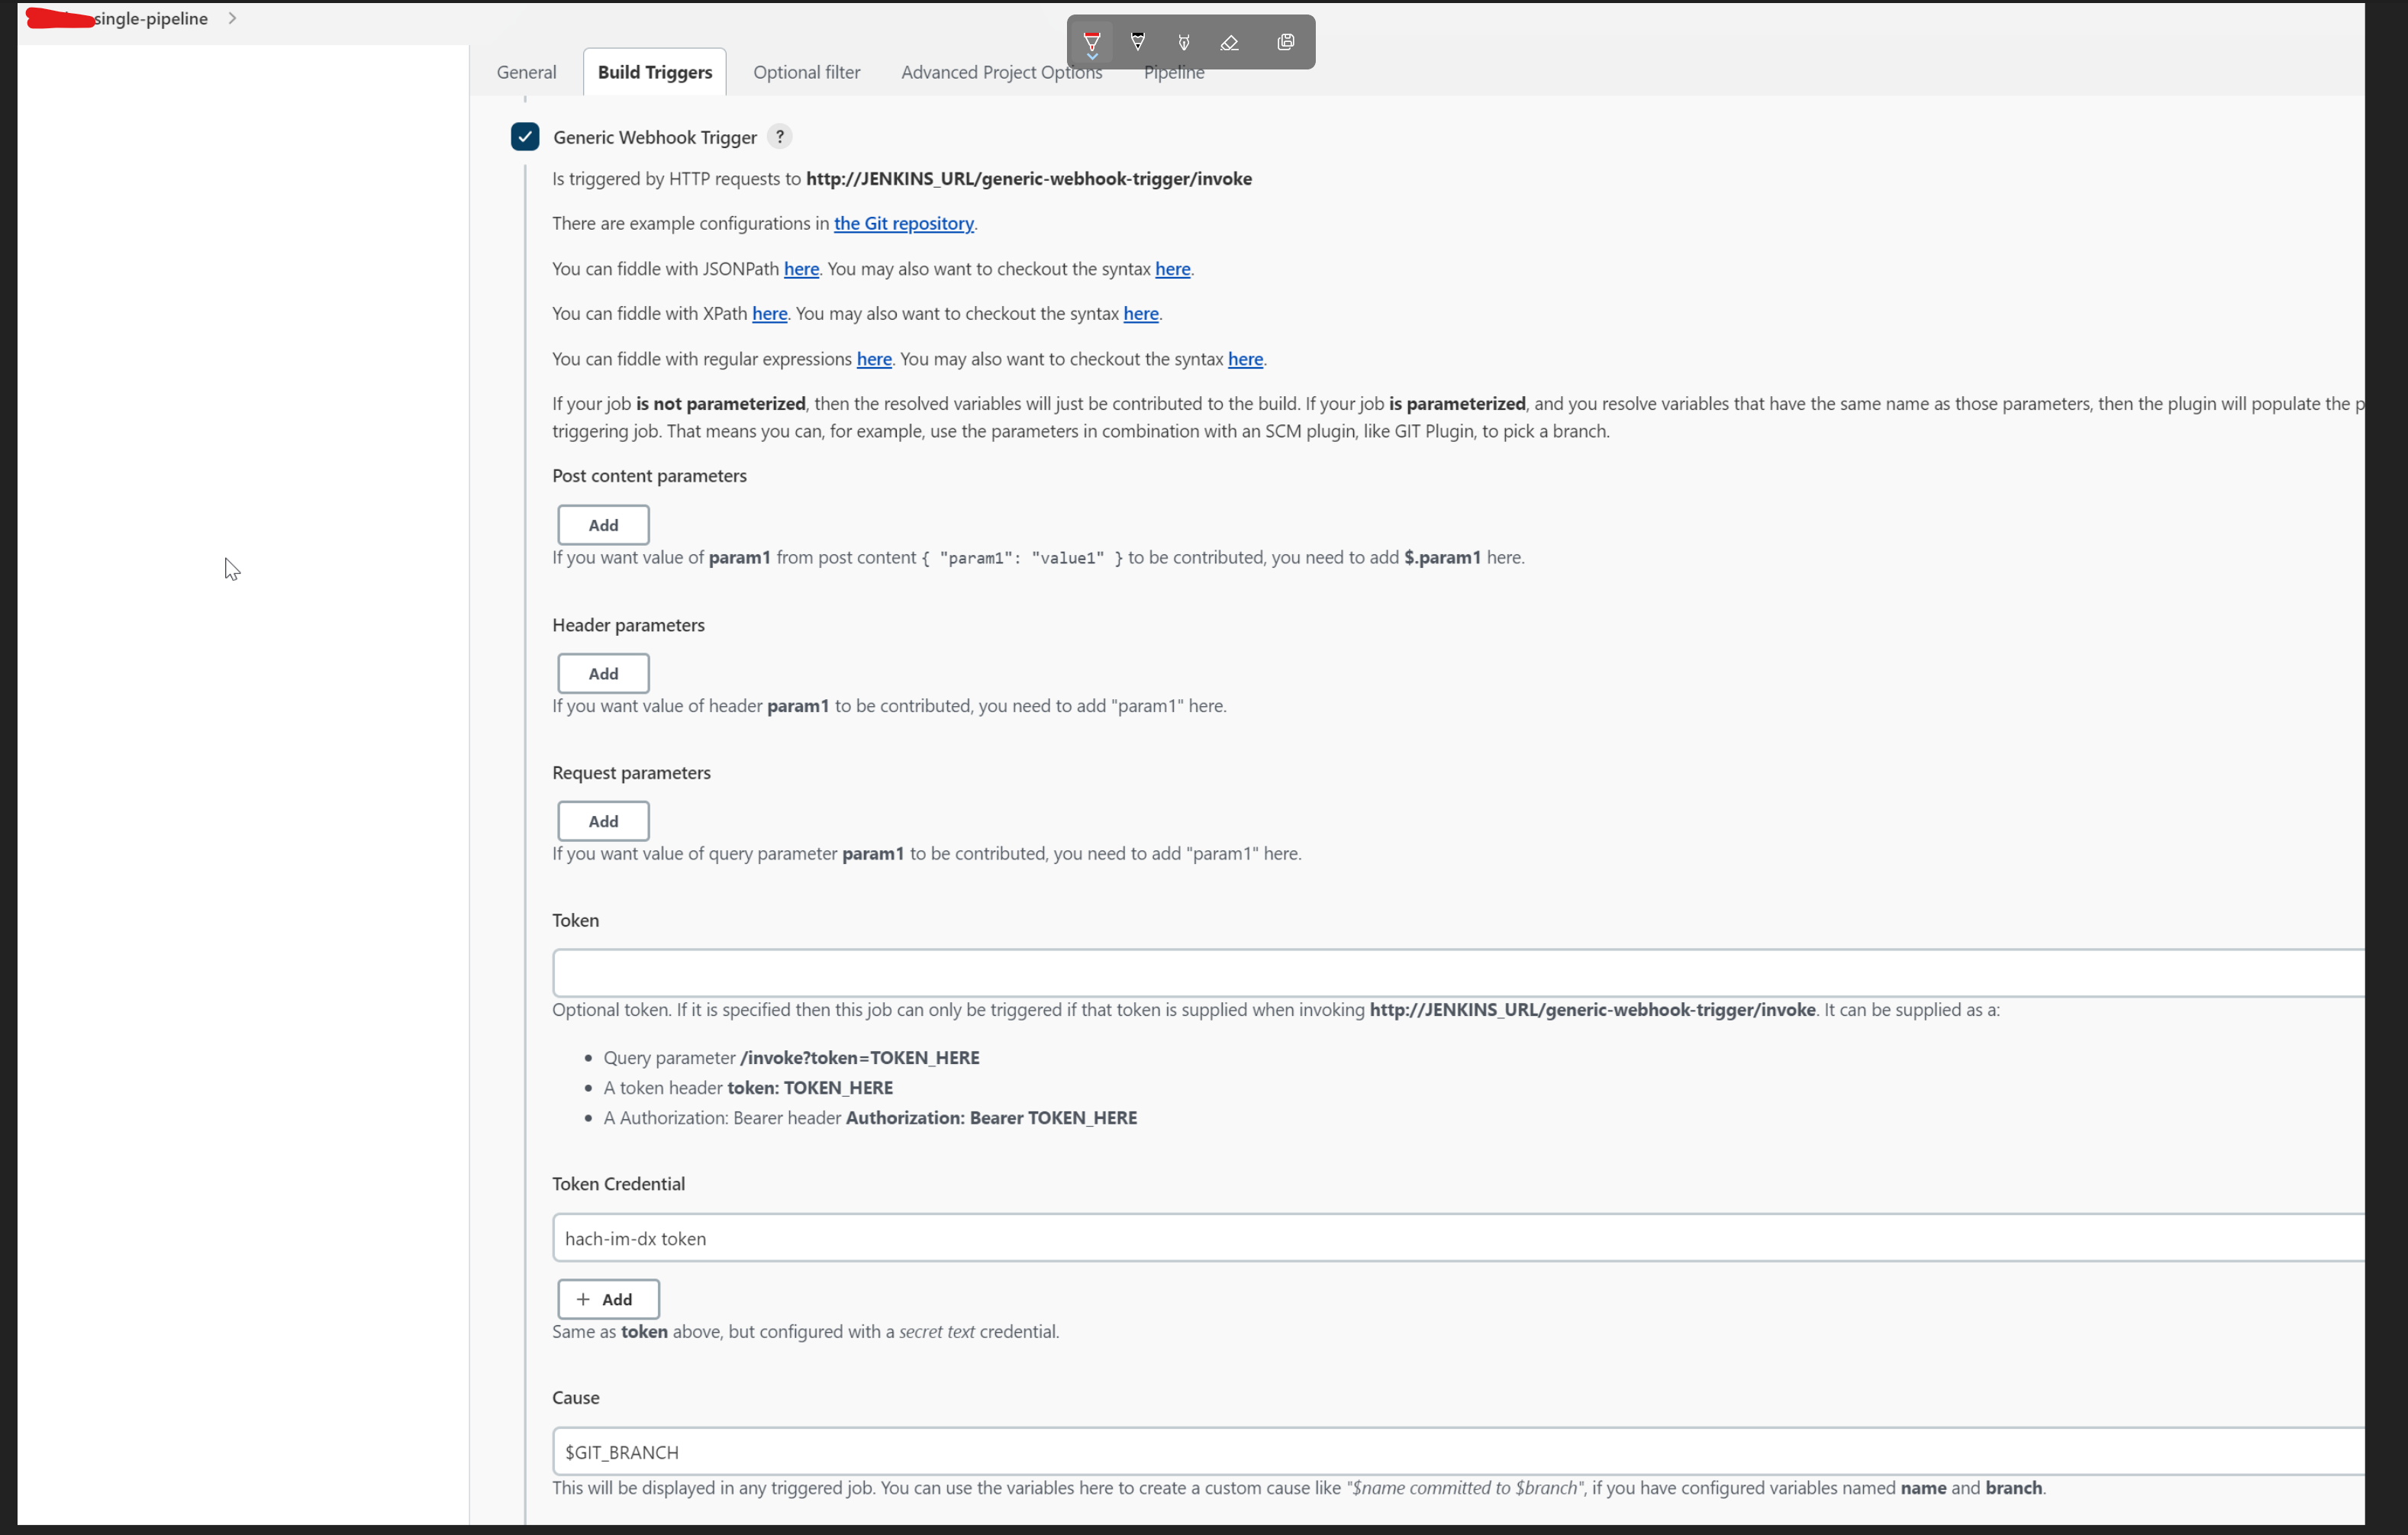
设置jenkins webhook(地址在下文,通过Jenkins插件,Generic Webhook Trigger Plugin Version1.86.3)
地址格式:http://ec2-11-223-33-115.cn-north-1.compute.amazonaws.com.cn:8080/generic-webhook-trigger/invoke?token=115c4XXXXXXXXXXXa2babc9
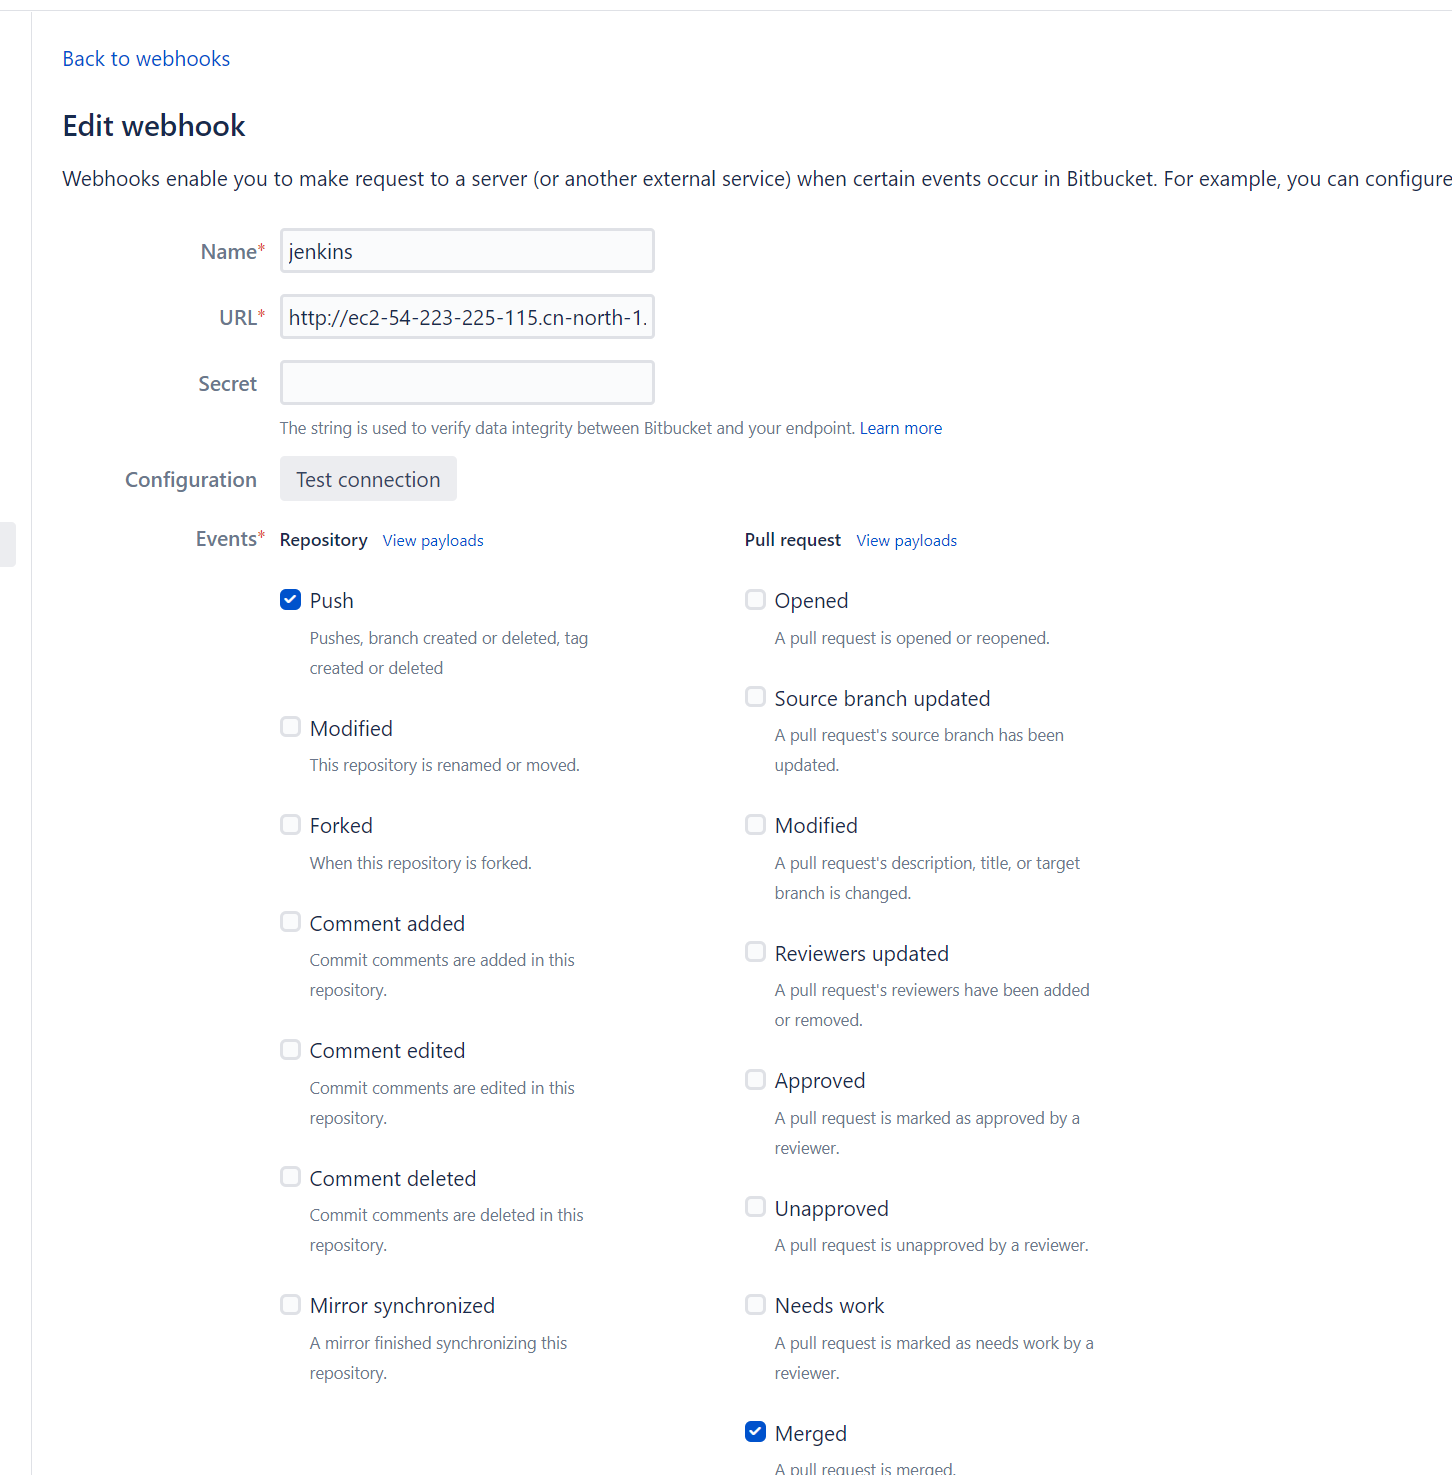
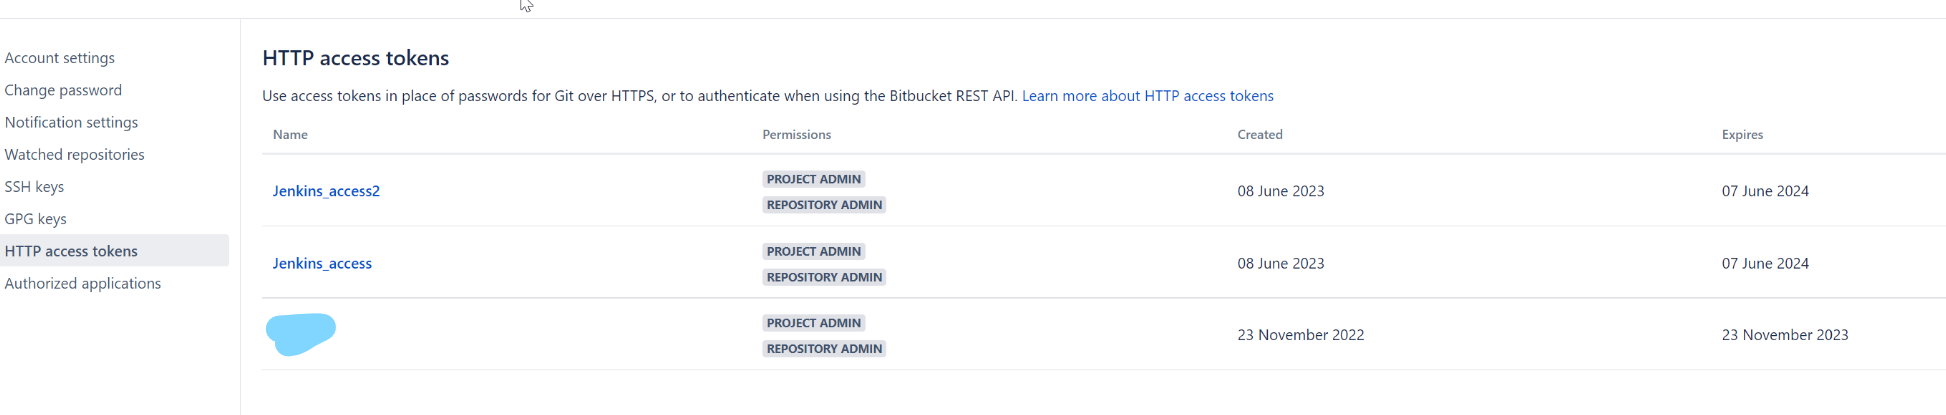
生成Http access tokens给Jenkins访问
安装Jenkins 插件:
Generic Webhook Trigger Plugin Version1.86.3
Bitbucket Server Notifier Version1.28 // This plugin notifies a Bitbucket server of build results.
Bitbucket Server Integration Version3.3.2 (插件官网:https://plugins.jenkins.io/atlassian-bitbucket-server-integration/)
Matrix Authorization Strategy Plugin Version3.1.5 (权限控制)
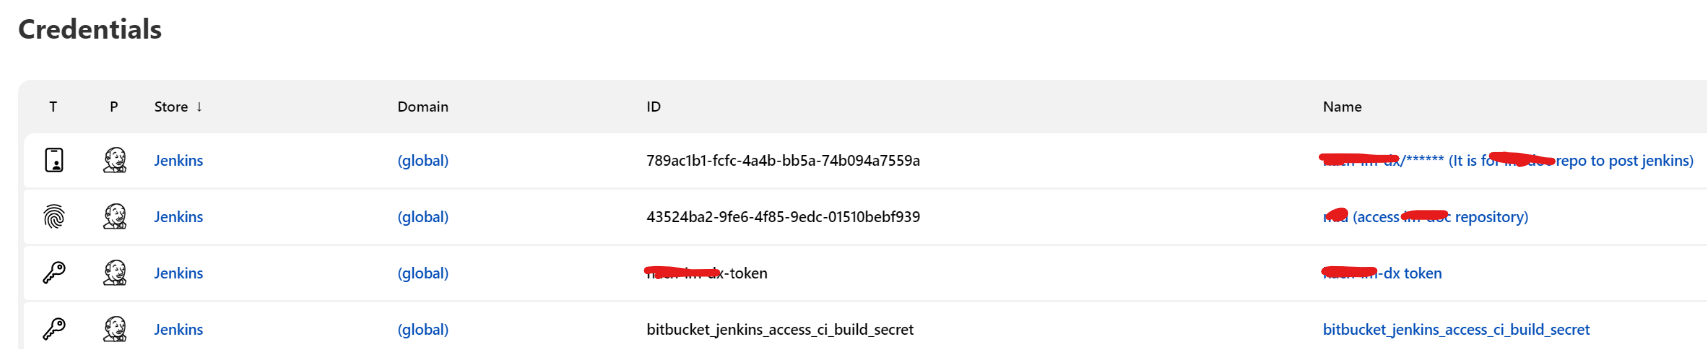
在Jenkins Credential中创建一些必要的访问账户(Bitbucket访问Jenkins,Jenkins访问Bitbucket repo等)
4. Jenkins全局配置Bitbucket ,JDK,Maven


在菜单 Dashboard >Manage Jenkins>Global Tool Configuration中配置全局工具变量和地址
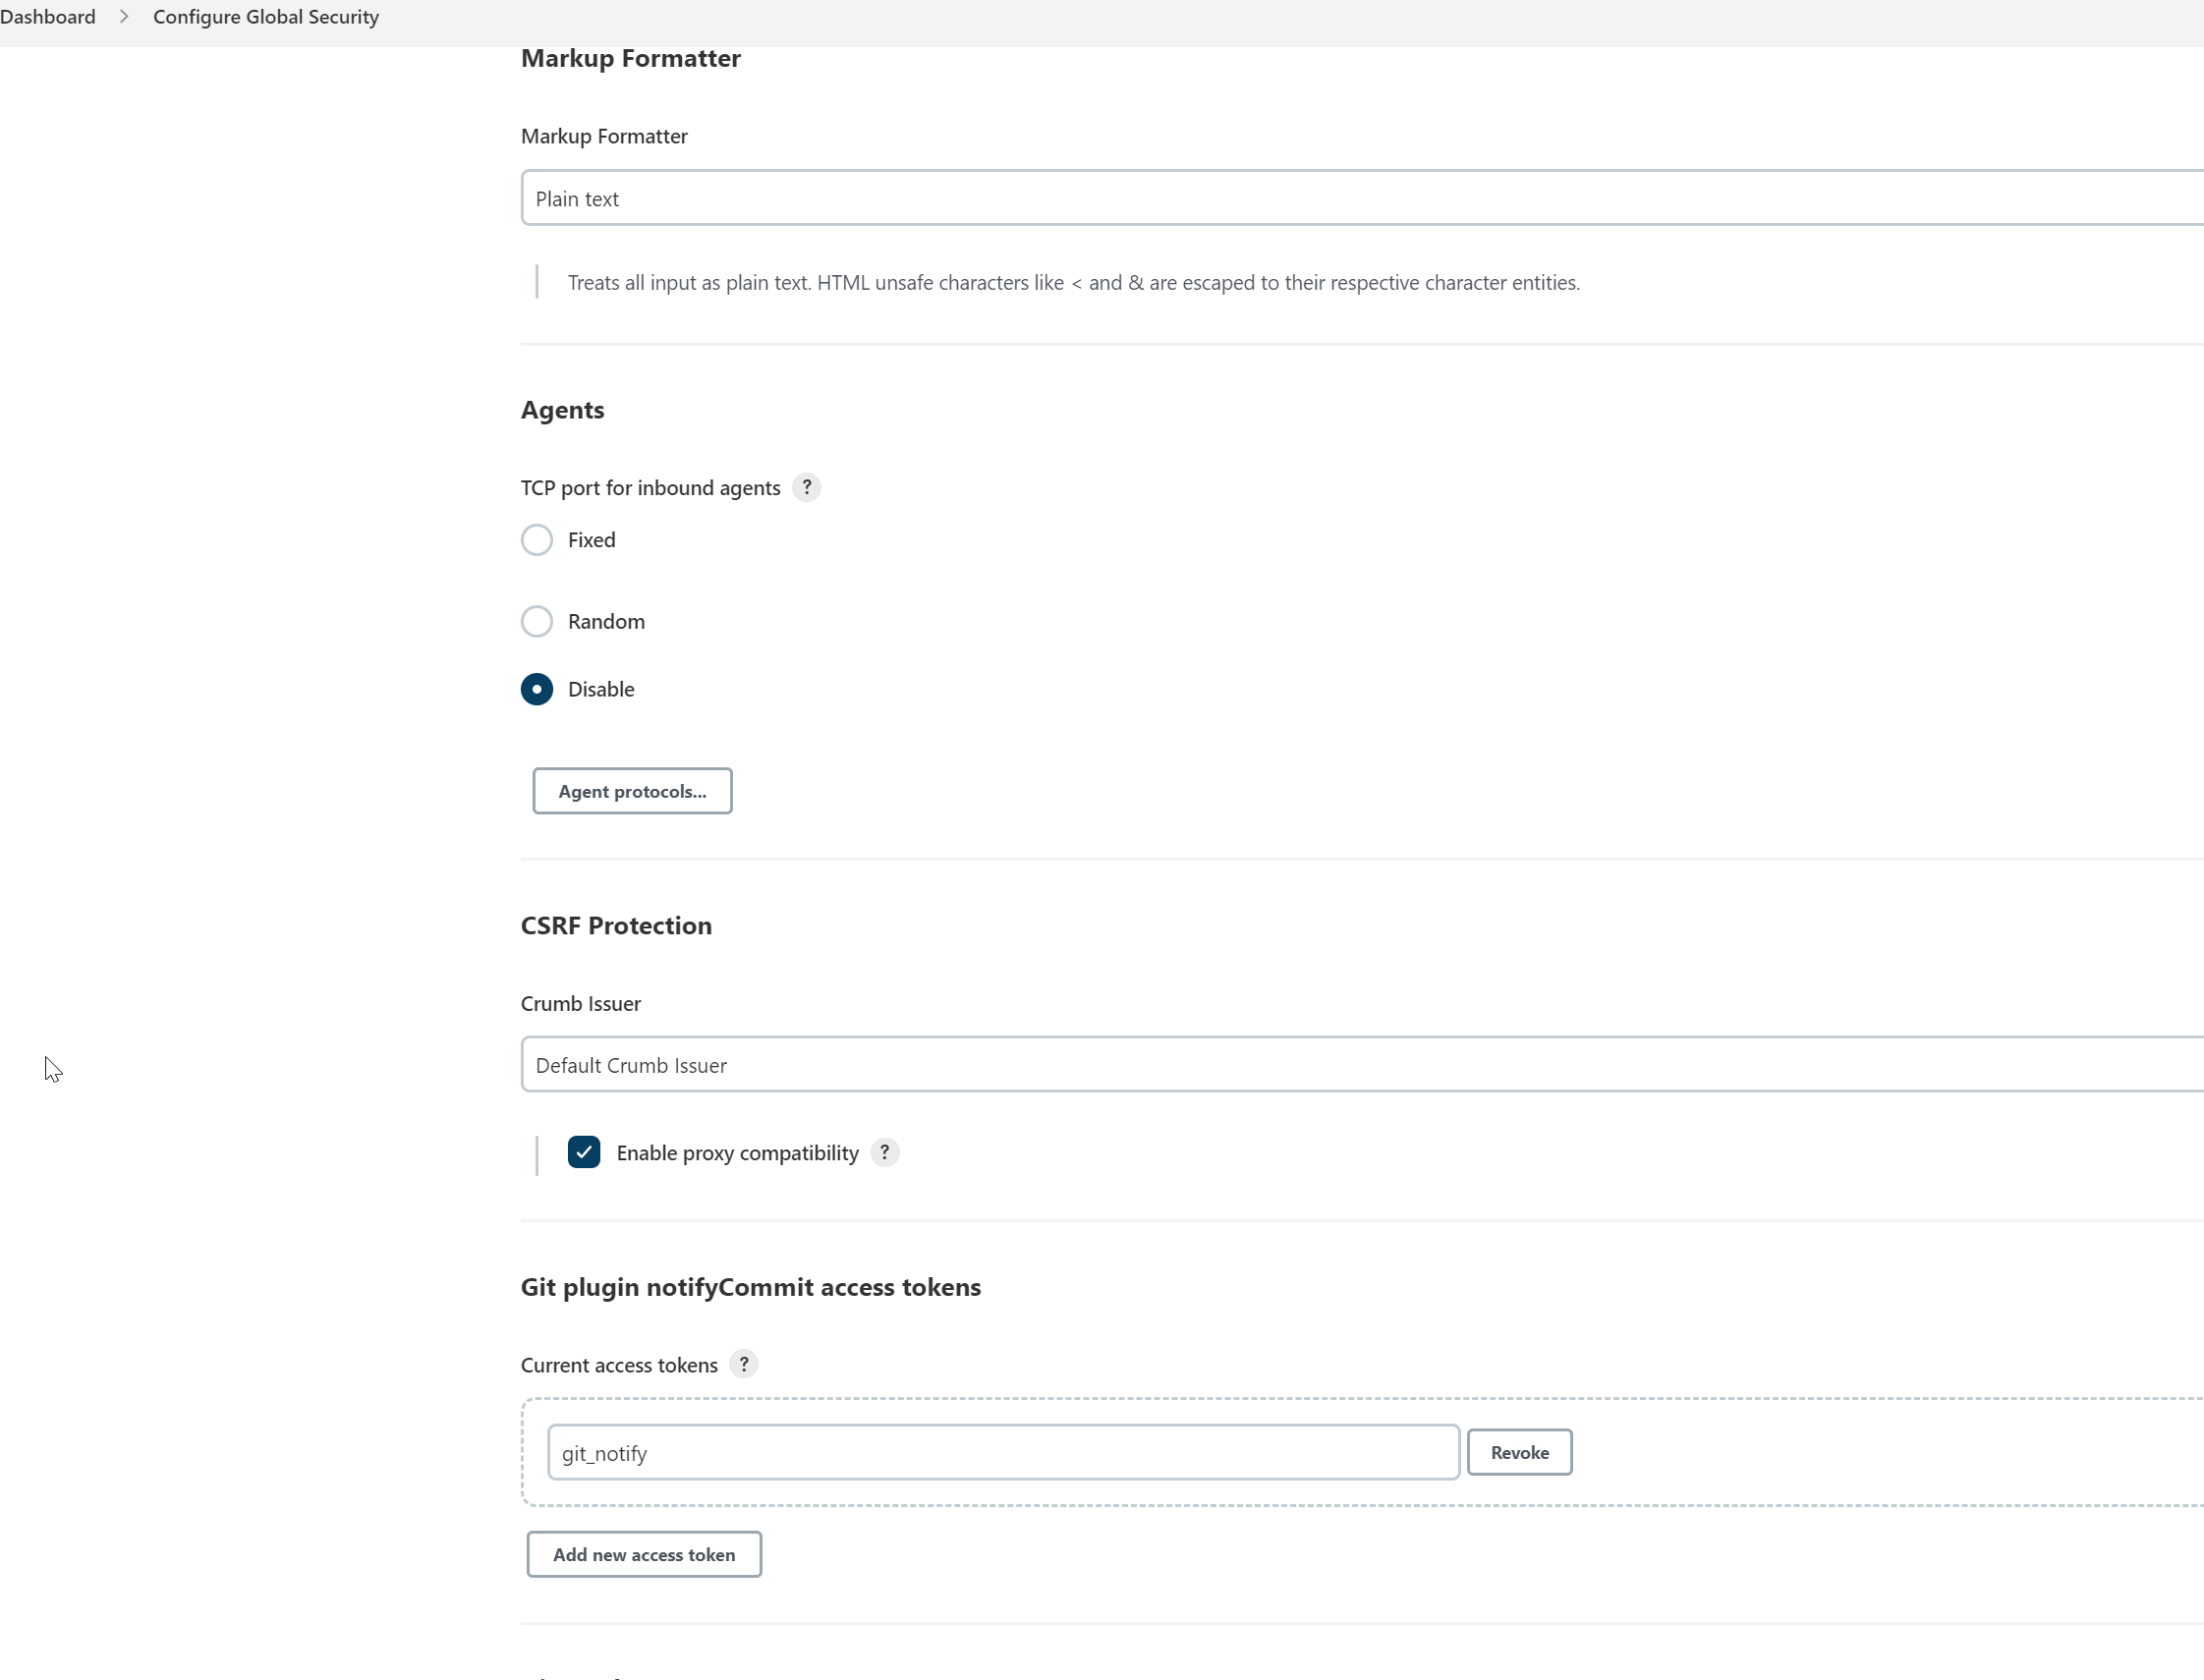
此处注意webhook配置时可能触发CSRF相关错误
创建一个single pipeline job,并配置 webhook插件
如果创建的是Freestyle Job
部分配置如下:
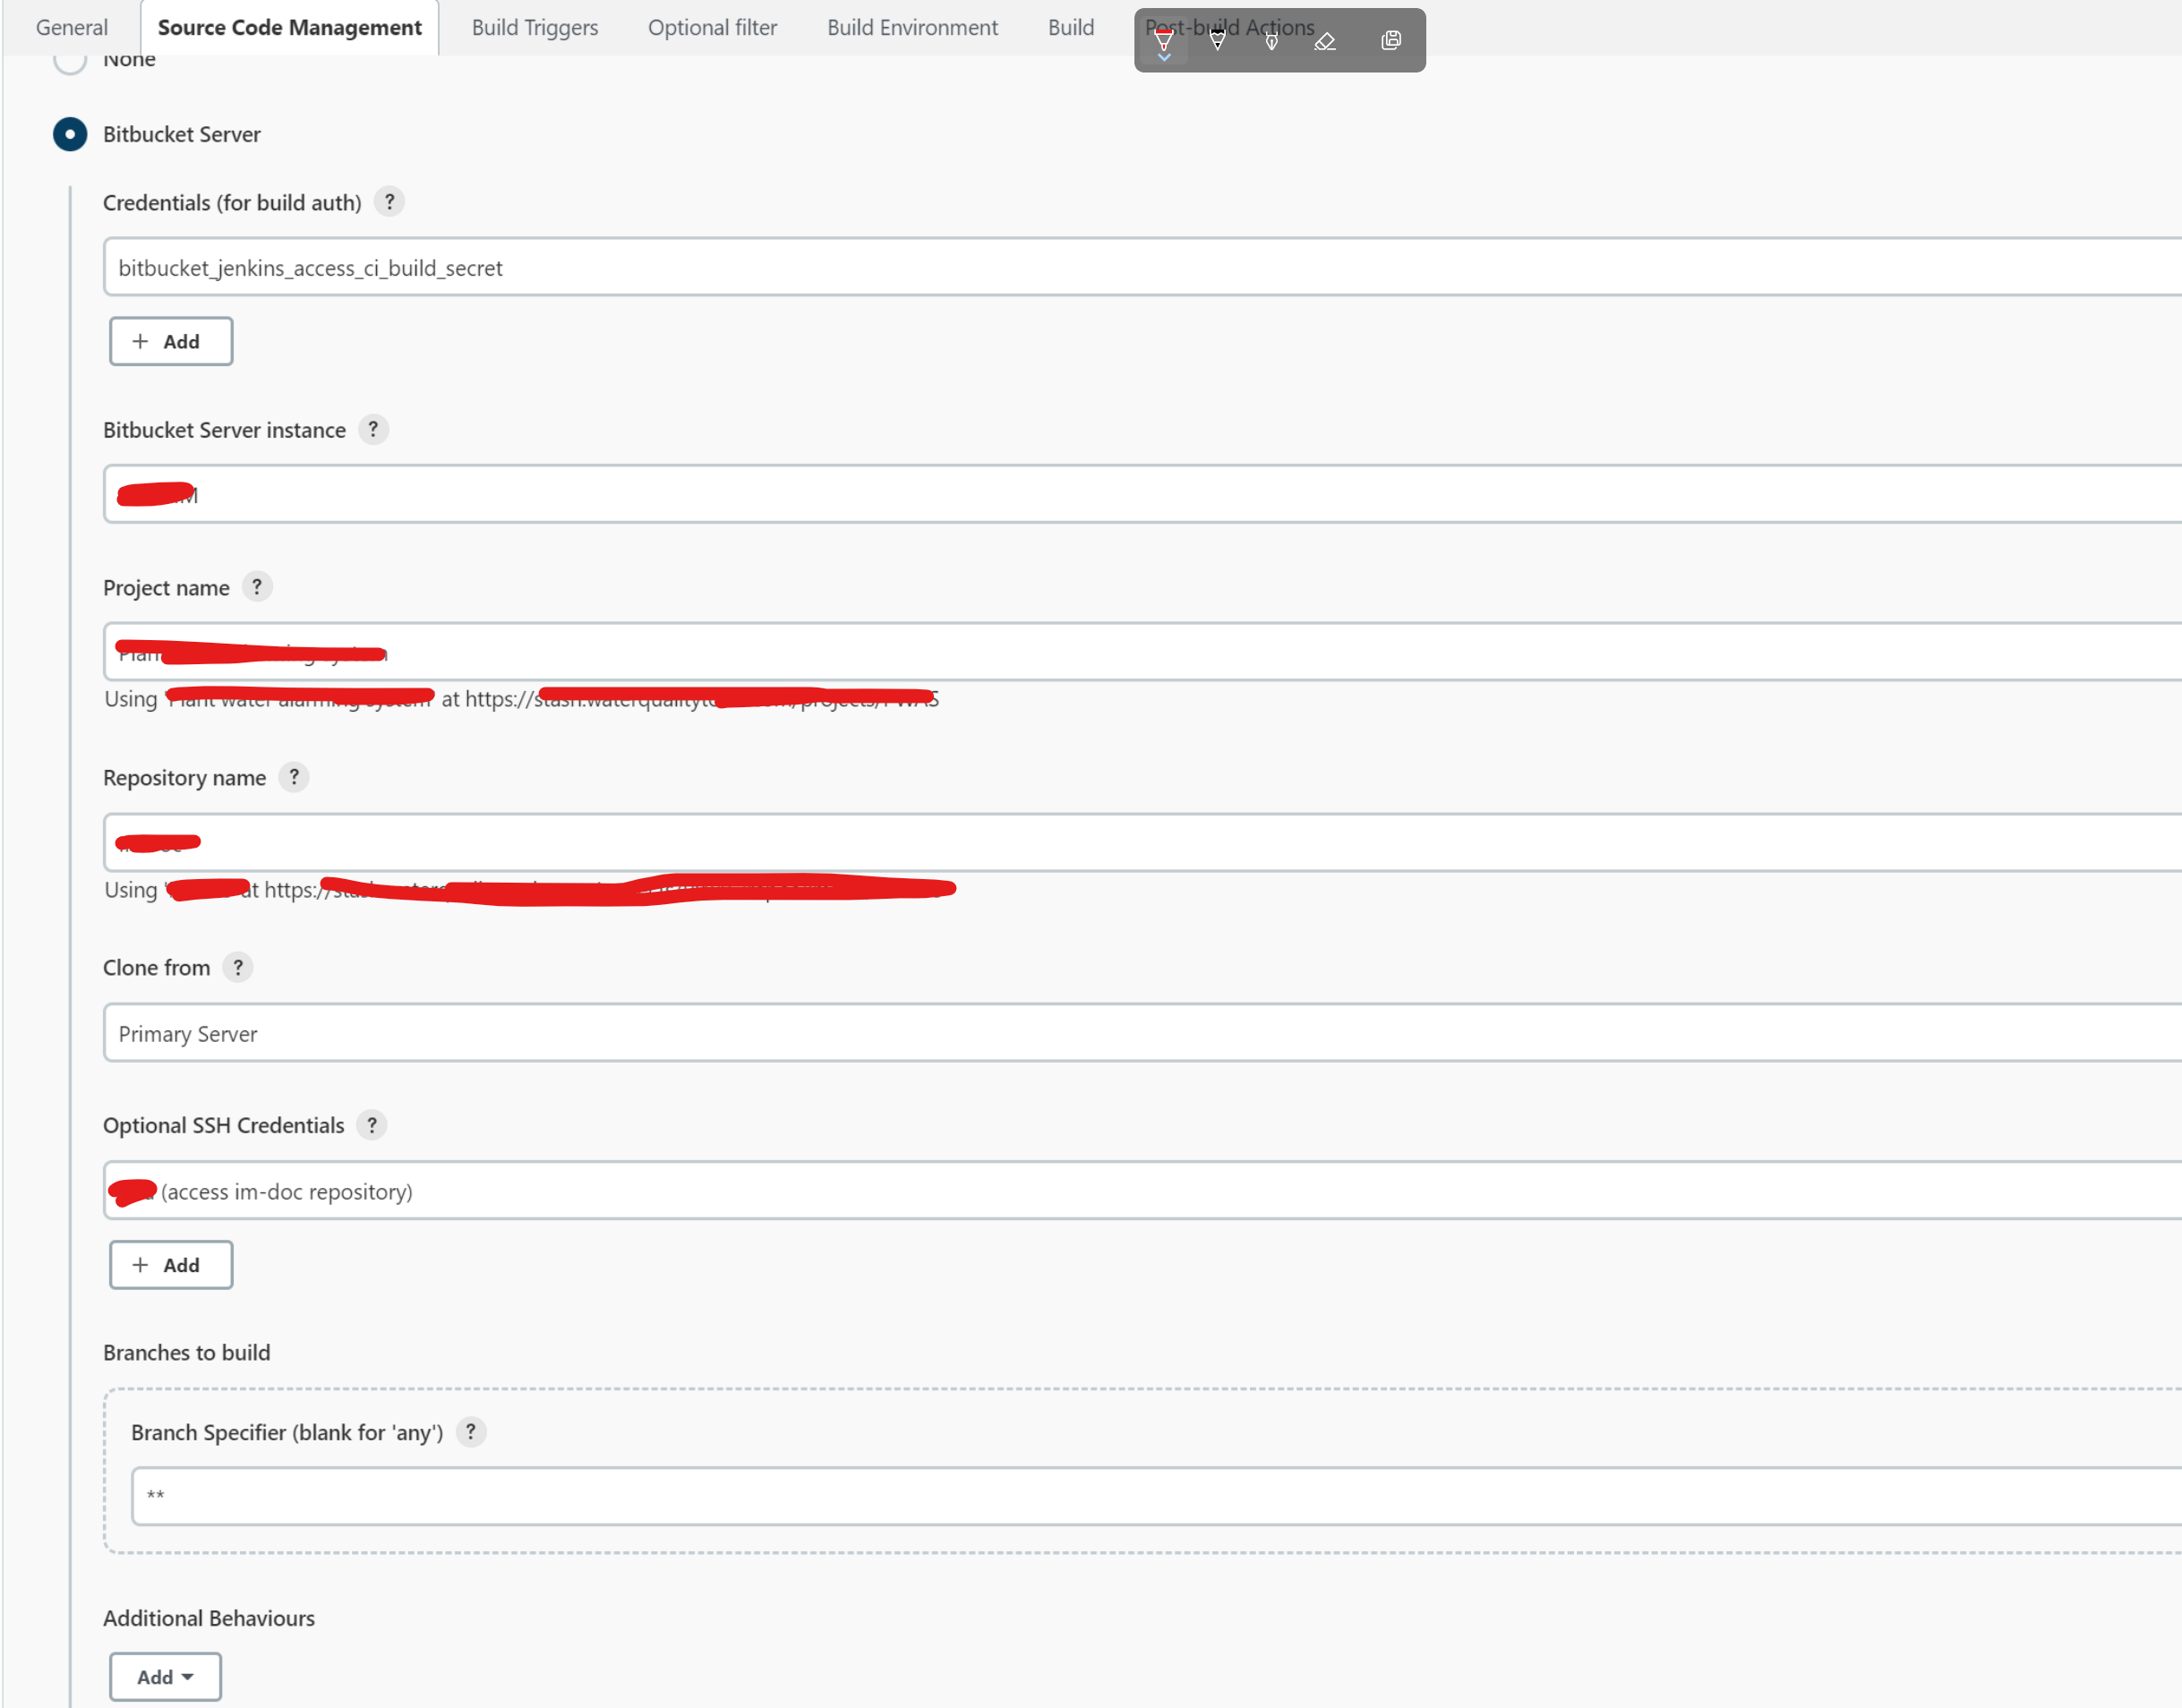
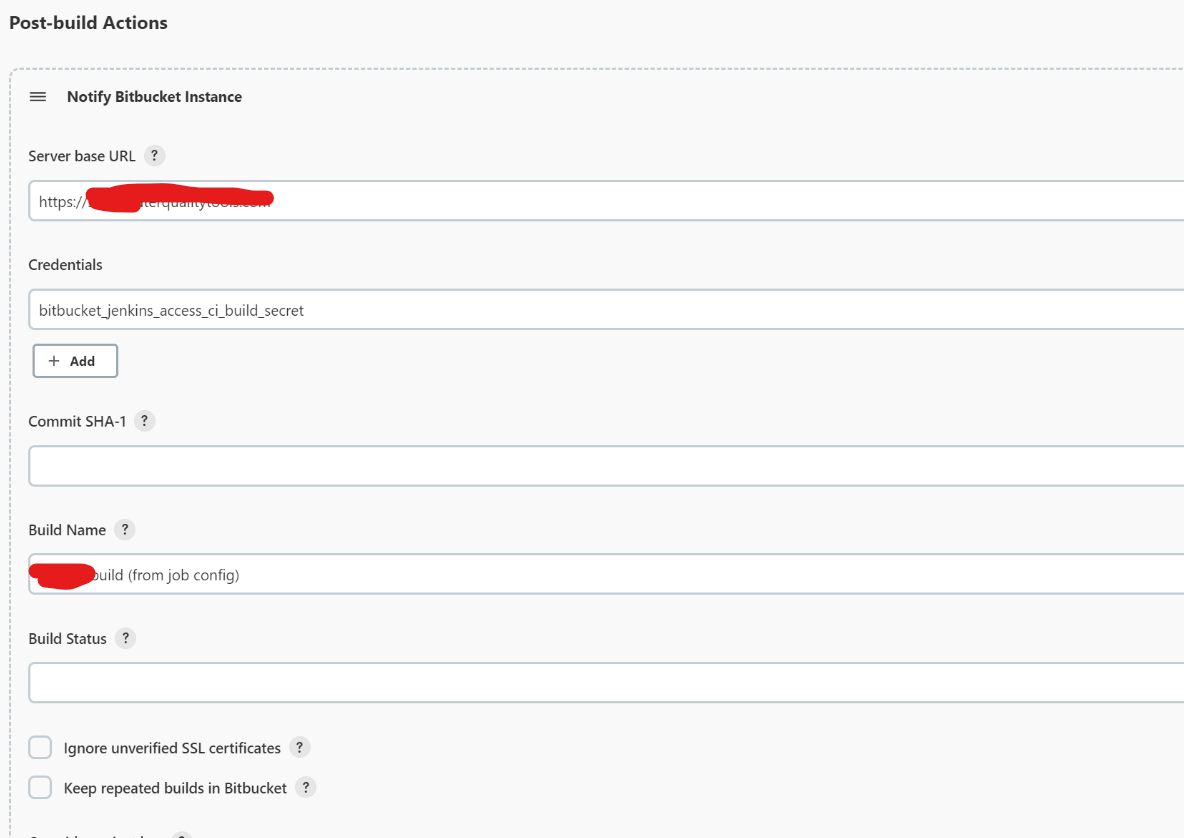
配置build结果通知到Bitbucket
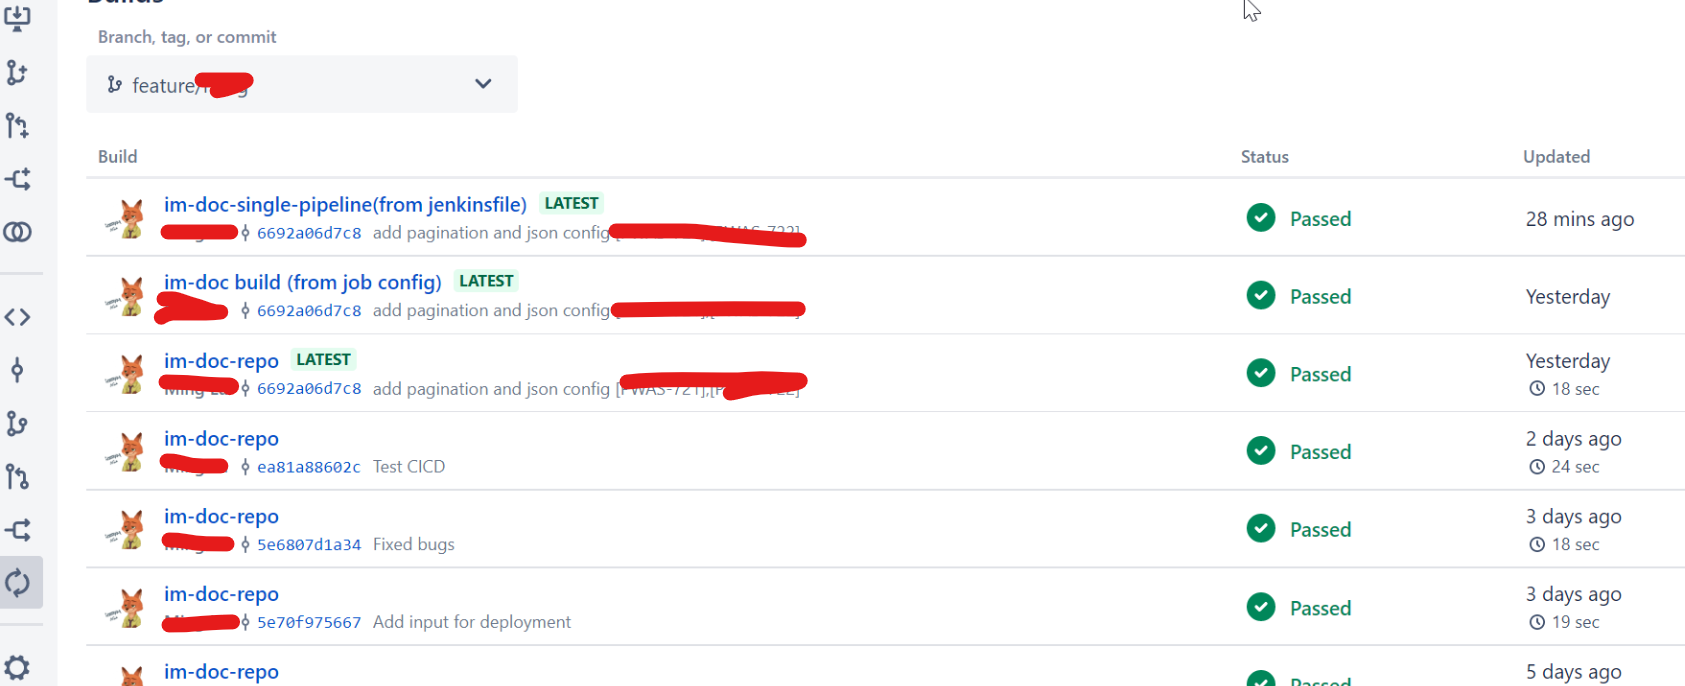
Bitbucket push build 状态效果展示:
Jenkinsfile pipeline 脚本如下:
pipeline {
    agent any

    stages {
        stage('Build') {
            steps {
                echo 'Building..'
            }
        }
        stage('Test') {
            steps {
                echo 'Testing..'
            }
        }
        stage('Deploy') {
            steps {
                echo 'Deploying....'
            }
        }
        stage('Deploy to DEV/UAT/PROD') {
                    steps {
                          script {
                                   def userChoice = input(
                                                id: 'userInput',
                                                message: 'Select environment:',
                                                parameters: [
                                                    choice(name: 'Environment', choices: ['DEV', 'UAT', 'PROD'])
                                                ]
                                            )
                                   echo "Deploying to ${userChoice}"
                                   // TODO: DEV,UAT,PROD deployment
                                   // ...
                                   }
                        //input(message: 'Confirm deployment to production?', ok: 'Deploy')
                        // TODO: DEV,UAT,PROD deployment
                        // ...
                    }
         }
    }
	post {
        success {
            echo 'im-doc have been performed successfully!'
			notifyBitbucket(
            commitSha1: '',
            credentialsId: 'bitbucket_jenkins_access_ci_build_secret',
            disableInprogressNotification: false,
            considerUnstableAsSuccess: true,
            ignoreUnverifiedSSLPeer: true,
            buildStatus: '',
            buildName: 'XX-XX-single-pipeline(from jenkinsfile)',
            includeBuildNumberInKey: false,
            prependParentProjectKey: false,
            projectKey: 'DWAS',
            stashServerBaseUrl: 'https://stash.xxxxxxx.com/')
        }
        failure {
            echo 'At least one build test has failed!'
            sh "echo 'Failed step: ' ${failedStep}"
            echo "Build time: ${new Date()}"
            echo "Build ID: ${env.BUILD_ID}"
            echo "Build URL: ${env.BUILD_URL}"
            emailext body: "${currentBuild.currentResult}: Job ${env.JOB_NAME} build ${env.BUILD_NUMBER}\n More info at: ${env.BUILD_URL}", recipientProviders: [brokenTestsSuspects(), brokenBuildSuspects(), developers()],
			subject: "xxxxx DevOps Notification ${currentBuild.currentResult}: Job ${env.JOB_NAME}", to: 'xxx@xxx.com', from: 'dev-ops@xxxx.com'
        }
        unstable {
            echo 'The pipeline has been marked as unstable!'
        }
        changed {
            echo 'The state of the Pipeline has changed!'
        }
    }
}
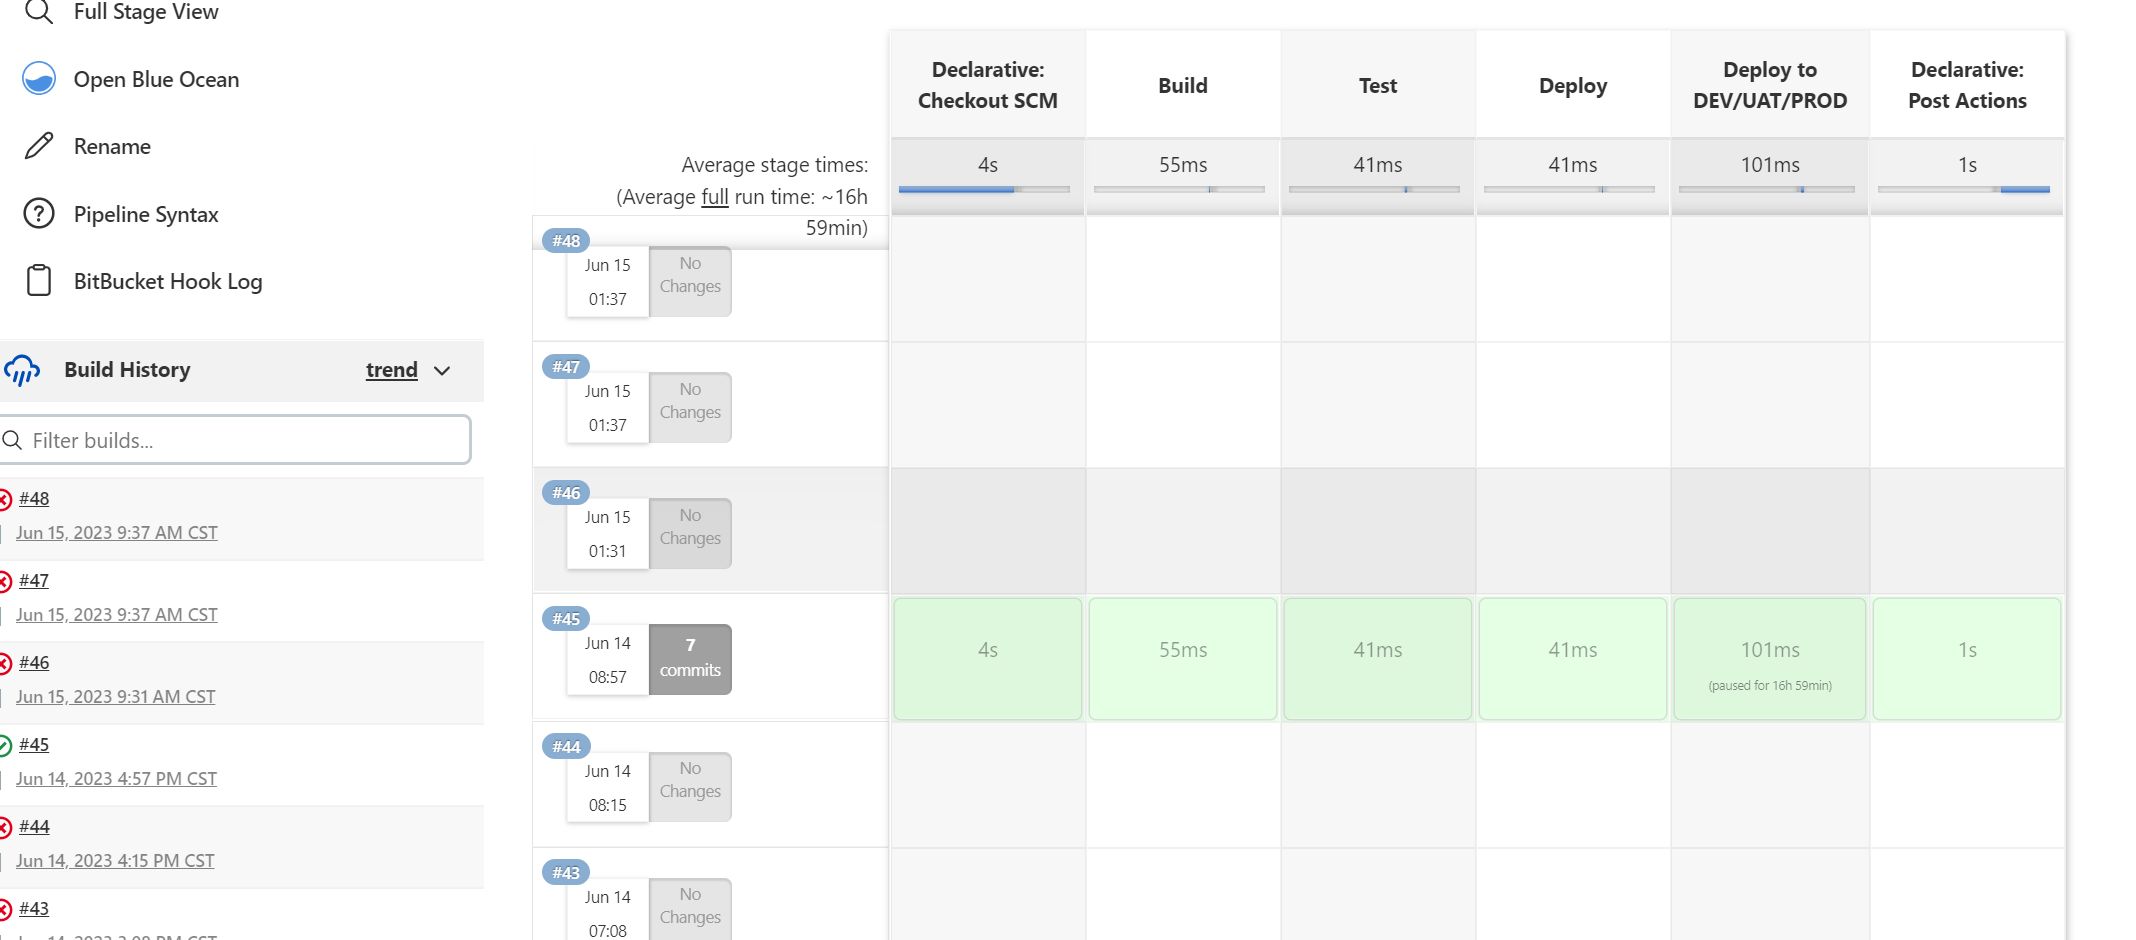
Jenkins执行效果如下:

 浙公网安备 33010602011771号