1-Python - NLP之基于百度AI案例
before
本篇主要介绍基于百度AI实现的NLP的小案例。
应用创建
无论要实现哪个案例,都需要进行接口认证,而认证的相关key在应用中提供。所以,我们要先创建NLP的应用。
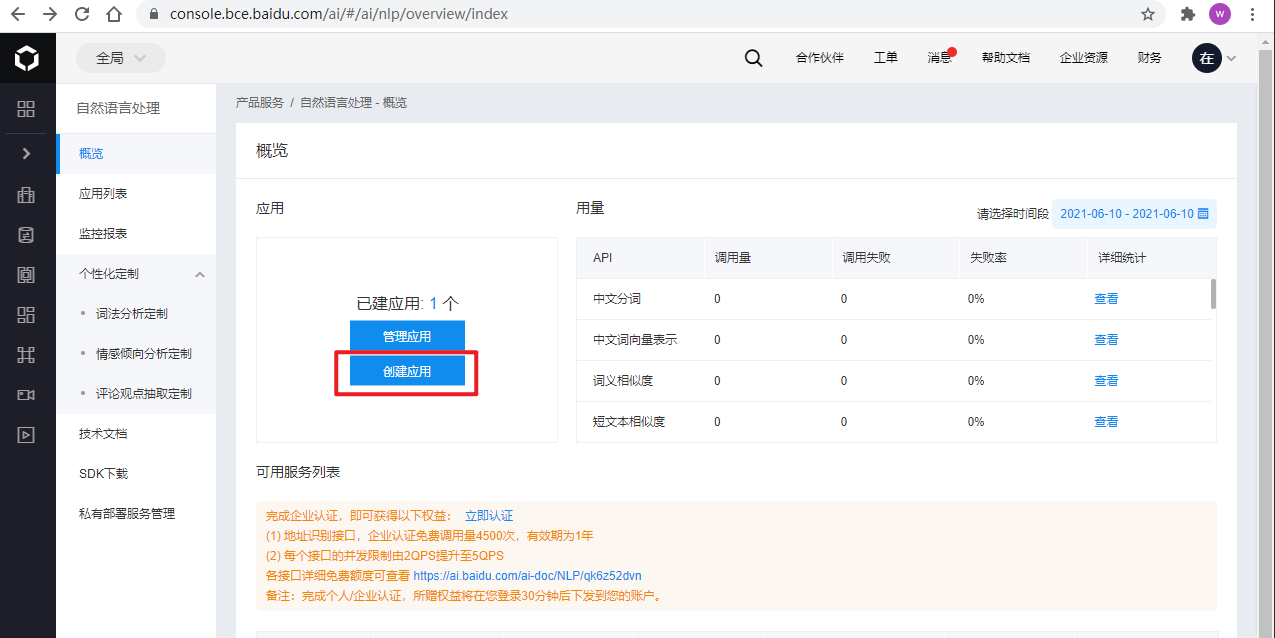
访问: https://console.bce.baidu.com/ai/#/ai/nlp/overview/index , 点击创建应用,填写相关信息之后,就生成了一个应用,相关key就有了。后续需要的时候,从这个应用找key就完了。
-
创建应用:
-
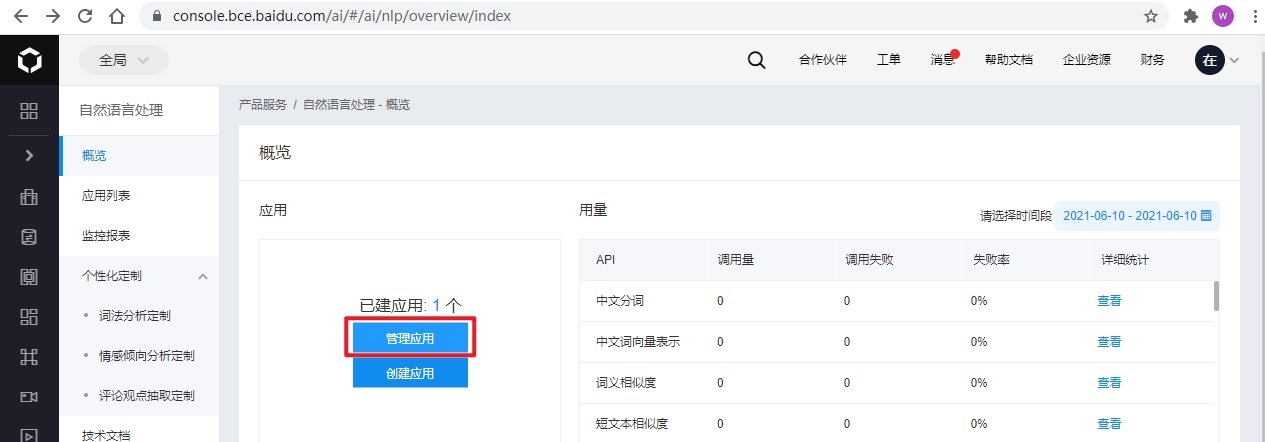
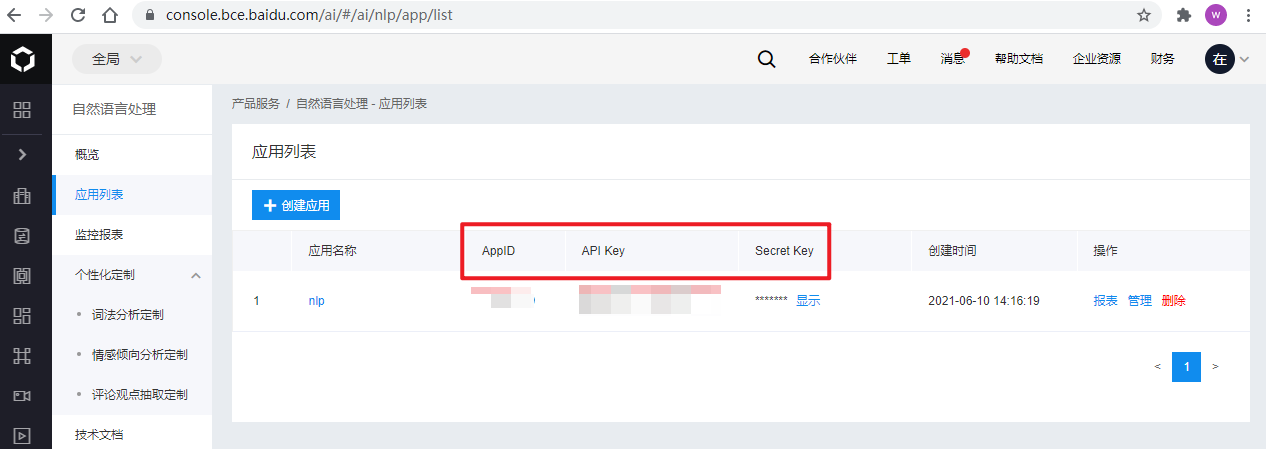
创建成功,点击管理应用按钮,新页面中,就会有后续需要的各种key。
案例1:智能春联
所谓的智能春联,也就是通过给百度提供的相关接口发送请求,根据请求中携带的关键字生成相应的关键字。
相关文档参考:
步骤是:
- 拿着API KEY 和 SECRET KEY向鉴权接口发送请求,得到access token。
- 拿着access token向智能春联接口发送请求,得到春联内容。
基本示例:
import requests

APIKey = "rjPMODzbVeT9UMIZYqtZL9We"
SecretKey = "DPZSVhzCEy3UuNETMGGT0CGU1N0fCTYY"

headers = {
    "Content-Type": "application/json"
}

# post请求也行,headers头带不带都行
access_token = requests.get(
    url=f'https://aip.baidubce.com/oauth/2.0/token?grant_type=client_credentials&client_id={APIKey}&client_secret={SecretKey}'
).json()['access_token']
# print(access_token)

body = {"text": "新春", "index": 0}
response = requests.post(url=f'https://aip.baidubce.com/rpc/2.0/nlp/v1/couplets?access_token={access_token}',
                         headers=headers, json=body)
print(response.json())  # {'couplets': {'center': '大业辉煌', 'first': '新春事业兴大业', 'second': '喜气中华庆小华'}}
结合PyQt5实现的带界面的示例,效果如下:
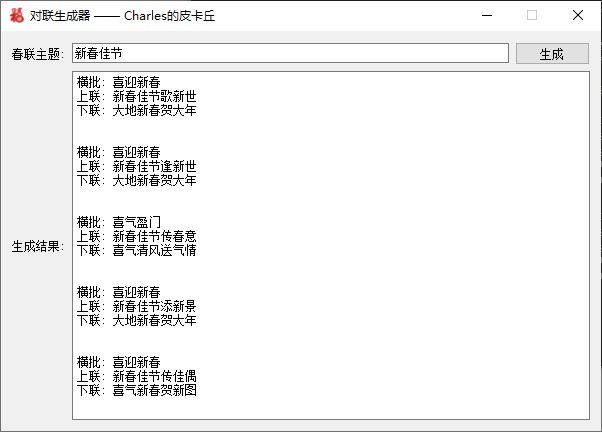
下面是代码,在代码文件的同级目录需要一个张图片,icon.png:

'''
Function:
    对联生成器
Author:
    Charles
微信公众号:
    Charles的皮卡丘

https://mp.weixin.qq.com/s/L1gmiMJ-M8T-QgSeJckYEw
pip install -i https://pypi.doubanio.com/simple PyQt5
pip install -i https://pypi.doubanio.com/simple requests
'''

import sys
import json
import random
import requests
from PyQt5 import *
from PyQt5.QtGui import *
from PyQt5.QtCore import *
from PyQt5.QtWidgets import *
from PyQt5 import QtWidgets, QtGui

'''对联生成器'''


class CoupletGenerator(QWidget):
    def __init__(self, parent=None, **kwargs):
        super(CoupletGenerator, self).__init__(parent)
        # 初始化, 相关key需要在https://console.bce.baidu.com/#/index/overview申请
        self.setWindowTitle('对联生成器 —— Charles的皮卡丘')
        self.setWindowIcon(QIcon('./icon.png'))
        self.setFixedSize(600, 400)
        self.error_codes = {
            '2': '后端连接超时请重试',
            '52001': '请求超时请重试',
            '52002': '系统错误请重试',
            '52003': '未授权用户',
            '52004': '输入解析失败',
            '52005': '输入字段有误',
            '52006': '输入文本长度不超过5',
            '52007': '输入文本包含政治&黄色内容',
            '52008': '后台服务返回错误请重试',
            '54003': '访问频率受限',
            '54100': '查询接口参数为空',
            '54102': '无写诗结果请重试'
        }
        self.api_key = 'rjPMODzbVeT9UMIZYqtZL9We'
        self.secret_key = 'DPZSVhzCEy3UuNETMGGT0CGU1N0fCTYY'
        self.access_token = self.gettoken()
        # 设置组件
        self.label_title = QLabel('春联主题:')
        self.line_title = QLineEdit('新春佳节')
        self.generate_btn = QPushButton('生成')
        self.label_result = QLabel('生成结果:')
        self.text_couple = QTextEdit()
        # 布局
        grid = QGridLayout()
        grid.addWidget(self.label_title, 1, 0)
        grid.addWidget(self.line_title, 1, 1, 1, 39)
        grid.addWidget(self.generate_btn, 1, 40)
        grid.addWidget(self.label_result, 2, 0)
        grid.addWidget(self.text_couple, 2, 1, 1, 40)
        self.setLayout(grid)
        # 事件关联
        self.generate_btn.clicked.connect(self.generate)

    '''生成对联'''

    def generate(self):
        if not self.line_title.text().strip():
            return
        url = f'https://aip.baidubce.com/rpc/2.0/nlp/v1/couplets?access_token={self.access_token}'
        headers = {
            'Content-Type': 'application/json'
        }
        all_couplets = []
        index_ranges = [(0, 2), (3, 5), (6, 8), (9, 11), (12, 14)]
        for idx in range(5):
            params = {
                'text': self.line_title.text(),
                'index': random.randint(*index_ranges[idx]),
            }
            response = requests.post(url, headers=headers, json=params)
            response_json = response.json()
            center = response_json['couplets']['center']
            first = response_json['couplets']['first']
            second = response_json['couplets']['second']
            text = f'横批: {center}\n上联: {first}\n下联: {second}'
            all_couplets.append(text)
        self.text_couple.setText('\n\n\n'.join(all_couplets))

    '''获取token'''

    def gettoken(self):
        url = f'https://aip.baidubce.com/oauth/2.0/token?grant_type=client_credentials&client_id={self.api_key}&client_secret={self.secret_key}'
        headers = {
            'Content-Type': 'application/json; charset=UTF-8'
        }
        response = requests.get(url, headers=headers)
        access_token = response.json()['access_token']
        return access_token


'''run'''
if __name__ == '__main__':
    app = QApplication(sys.argv)
    client = CoupletGenerator()
    client.show()
    sys.exit(app.exec_())
案例2:智能写诗
智能写诗和智能春联是一个套路。
相关文档参考:
步骤是:
- 拿着API KEY 和 SECRET KEY向鉴权接口发送请求,得到access token。
- 拿着access token向智能写诗接口发送请求,得到结果。
示例:
"""
pip install -i https://pypi.doubanio.com/simple requests
"""

import requests

APIKey = "rjPMODzbVeT9UMIZYqtZL9We"
SecretKey = "DPZSVhzCEy3UuNETMGGT0CGU1N0fCTYY"

headers = {
    "Content-Type": "application/json"
}

# post请求也行,headers头带不带都行
access_token = requests.get(
    url=f'https://aip.baidubce.com/oauth/2.0/token?grant_type=client_credentials&client_id={APIKey}&client_secret={SecretKey}'
).json()['access_token']
# print(access_token)

body = {"text": "新春", "index": 0}
response = requests.post(url=f'https://aip.baidubce.com/rpc/2.0/nlp/v1/poem?access_token={access_token}',
                         headers=headers, json=body)
print(response.json())  # {'poem': [{'content': '新春喜见燕双飞\t青瓦白门人未归\t窗外梨花千树雪\t东风带雨入帘帏', 'title': '新春'}]}

 浙公网安备 33010602011771号