1-Selenium - 截图
about
在selenium中,截取网页的图片有多种方式,这里简单介绍三种截屏:
- 截整个网页。
- 截取可见区域。
- 截取指定区域,即截取网页中的指定图片,如截取验证码部分的图片。
PS:后续会用到phantomjs,使用之前先按装:https://www.cnblogs.com/Neeo/articles/11837053.html#phantomjs
截取可见区域
可见区域,也就是你打开浏览器,看到的网页,我们通过selenium对这个范围的网页进行截图:
from selenium import webdriver
def get_img():
driver = webdriver.Chrome()
driver.implicitly_wait(time_to_wait=10)
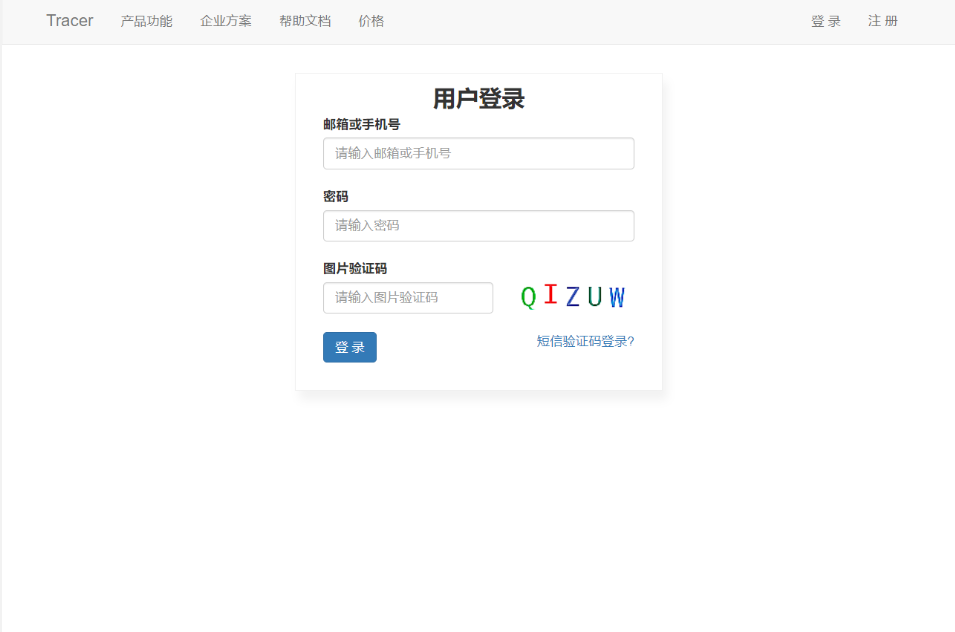
driver.get('http://www.neeo.cc:6005/login/')
driver.save_screenshot('./a.png') # 图片必须保存为 png 格式
driver.quit()
if __name__ == '__main__':
get_img()
截取指定区域
这一部分有两种办法来完成截取:
- 首先获取(可见)整个网页,然后获取指定区域的坐标点,然后算出指定区域的坐标位置(上,右上, 左下, 右下);根据坐标位置,从之前的大图中,把指定区域的图片抠出来,需要借助pillow模块。
- 直接使用selenium的方法论来截取。
法1:借助pillow模块抠图
使用pillow模块先下载:
pip install -i https://pypi.doubanio.com/simple pillow
from PIL import Image   # pillow模块是这样导入的
from selenium import webdriver
class VerificationCodeHandler(object):

    def __init__(self, url, timeout=10):
        self.url = url
        self.time_out = timeout
        self.driver = webdriver.Chrome()
        self.driver.implicitly_wait(time_to_wait=10)
        self.body_img_file_path = './BodyImage.png'
        self.code_img_file_path = './CodeImage.png'

    def get_pil_code(self):
        """
            获取验证码
            思路是先截取整个可视的body大图
            然后使用PIL从大图中定位到验证码所在的位置,然后再抠图
        """
        self.driver.get(self.url)
        # 截图 body 大图
        self.driver.save_screenshot(self.body_img_file_path)
        # 定位验证码所在的位置
        CodeImage = self.driver.find_element_by_id('imageCode')
        # print(CodeImage.location)  # {'x': 564, 'y': 310}
        # print(CodeImage.size)  # {'height': 30, 'width': 119}
        left = CodeImage.location['x']
        top = CodeImage.location['y']
        right = CodeImage.size['width'] + left
        height = CodeImage.size['height'] + top
        temporary_img = Image.open(self.body_img_file_path)
        temporary_img = temporary_img.crop((left, top, right, height))
        temporary_img.save(self.code_img_file_path)

    def __del__(self):
        self.driver.quit()

if __name__ == '__main__':
    VerificationCodeHandler(url='http://www.neeo.cc:6005/login/', timeout=10).get_pil_code()

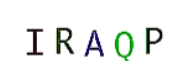
上图左侧为大图,右侧为从大图中抠出来的图片。
如果扣出来的图不对,解决办法在本文的最后。
法2:使用selenium的screenshot方法直接截图
from PIL import Image
from selenium import webdriver


class VerificationCodeHandler(object):

    def __init__(self, url, timeout=10):
        self.url = url
        self.time_out = timeout
        self.driver = webdriver.Chrome()
        self.driver.implicitly_wait(time_to_wait=10)

    def get_selenium_code(self):
        """ 使用 screenshot 方法直接截图 """
        self.driver.get(self.url)
        # 首先,获取验证码图片的标签对象
        CodeImage = self.driver.find_element_by_id('imageCode')
        # 通过标签的 screenshot 方法直接保存图片
        CodeImage.screenshot('./a.png')

    def __del__(self):
        self.driver.quit()

if __name__ == '__main__':
    VerificationCodeHandler(url='http://www.neeo.cc:6005/login/', timeout=10).get_selenium_code()
一步到位!
截取整个网页
这里也推荐使用Google插件来截取,非常好使:
- https://chrome.google.com/webstore/detail/take-webpage-screenshots/mcbpblocgmgfnpjjppndjkmgjaogfceg
- https://screenshot-program.com/
来,看Python怎么操作吧!
from selenium import webdriver

def get_img():

    driver = webdriver.PhantomJS()
    driver.implicitly_wait(time_to_wait=10)
    driver.get('http://www.neeo.cc:6005/index/')
    # 设置视图大小
    driver.viewportSize = driver.get_window_size()
    driver.save_screenshot('a.png')
    driver.quit()

if __name__ == '__main__':
    get_img()
question
关于截图位置不对问题
在使用selenium 加 pillow 扣图的时候,遇到定位不准的情况,也就是扣的图,位置不对,经过排查问题,发现不是代码的问题,是系统的分辨率和缩放引起的问题。解决办法:
- 在获取坐标点的时候,乘上缩放比。
- 使用无头浏览器来截图。
- 手动的将缩放比调整为100%。
法1
from PIL import Image   # pillow模块是这样导入的
from selenium import webdriver
class VerificationCodeHandler(object):

    def __init__(self, url, timeout=10):
        self.url = url
        self.time_out = timeout
        self.driver = webdriver.Chrome()
        self.driver.implicitly_wait(time_to_wait=10)
        self.body_img_file_path = './BodyImage.png'
        self.code_img_file_path = './CodeImage.png'

    def get_pil_code(self):
        """
            获取验证码
            思路是先截取整个可视的body大图
            然后使用PIL从大图中定位到验证码所在的位置,然后再抠图
        """
        self.driver.get(self.url)
        # 截图 body 大图
        self.driver.save_screenshot(self.body_img_file_path)
        # 定位验证码所在的位置
        CodeImage = self.driver.find_element_by_id('imageCode')
        # print(CodeImage.location)  # {'x': 564, 'y': 310}
        # print(CodeImage.size)  # {'height': 30, 'width': 119}
        # 就是下面两行, 我的缩放比是124%,就调整为1.24
        left = CodeImage.location['x'] * 1.24
        top = CodeImage.location['y'] * 1.24
        right = CodeImage.size['width'] + left
        height = CodeImage.size['height'] + top
        temporary_img = Image.open(self.body_img_file_path)
        temporary_img = temporary_img.crop((left, top, right, height))
        temporary_img.save(self.code_img_file_path)

    def __del__(self):
        self.driver.quit()

if __name__ == '__main__':
    VerificationCodeHandler(url='http://www.neeo.cc:6005/login/', timeout=10).get_pil_code()
这有个问题就是截的图能用,但是不是很标准,我也没时间细扣如何搞得很精确,有那时间,不如使用下面的方法了。
使用phantomjs
from PIL import Image   # pillow模块是这样导入的
from selenium import webdriver
class VerificationCodeHandler(object):

    def __init__(self, url, timeout=10):
        self.url = url
        self.time_out = timeout
        # 直接实例化一个phantomjs对象即可
        self.driver = webdriver.PhantomJS()
        self.driver.implicitly_wait(time_to_wait=10)
        self.body_img_file_path = './BodyImage.png'
        self.code_img_file_path = './CodeImage.png'

    def get_pil_code(self):
        """
            获取验证码
            思路是先截取整个可视的body大图
            然后使用PIL从大图中定位到验证码所在的位置,然后再抠图
        """
        self.driver.get(self.url)
        # 截图 body 大图
        self.driver.save_screenshot(self.body_img_file_path)
        # 定位验证码所在的位置
        CodeImage = self.driver.find_element_by_id('imageCode')
        # print(CodeImage.location)  # {'x': 564, 'y': 310}
        # print(CodeImage.size)  # {'height': 30, 'width': 119}
        left = CodeImage.location['x']
        top = CodeImage.location['y']
        right = CodeImage.size['width'] + left
        height = CodeImage.size['height'] + top
        temporary_img = Image.open(self.body_img_file_path)
        temporary_img = temporary_img.crop((left, top, right, height))
        temporary_img.save(self.code_img_file_path)

    def __del__(self):
        self.driver.quit()

if __name__ == '__main__':
    VerificationCodeHandler(url='http://www.neeo.cc:6005/login/', timeout=10).get_pil_code()
好用虽好用,但是如果你运行了会发现有有一个waring提示,意思是selenium现在不支持phantomjs了.......
当然,你可以使用Google无头浏览器来完成.....
Google无头,你值得拥有
from PIL import Image   # pillow模块是这样导入的
from selenium import webdriver
from selenium.webdriver.chrome.options import Options

class VerificationCodeHandler(object):

    def __init__(self, url, timeout=10):
        self.url = url
        self.time_out = timeout
        # 配置Google无头,其他代码不变
        chrome_options = Options()
        chrome_options.add_argument('--headless')
        chrome_options.add_argument('--disable-gpu')
        self.driver = webdriver.Chrome(chrome_options=chrome_options)

        self.driver.implicitly_wait(time_to_wait=10)
        self.body_img_file_path = './BodyImage.png'
        self.code_img_file_path = './CodeImage.png'

    def get_pil_code(self):
        """
            获取验证码
            思路是先截取整个可视的body大图
            然后使用PIL从大图中定位到验证码所在的位置,然后再抠图
        """
        self.driver.get(self.url)
        # 截图 body 大图
        self.driver.save_screenshot(self.body_img_file_path)
        # 定位验证码所在的位置
        CodeImage = self.driver.find_element_by_id('imageCode')
        # print(CodeImage.location)  # {'x': 564, 'y': 310}
        # print(CodeImage.size)  # {'height': 30, 'width': 119}
        left = CodeImage.location['x']
        top = CodeImage.location['y']
        right = CodeImage.size['width'] + left
        height = CodeImage.size['height'] + top
        temporary_img = Image.open(self.body_img_file_path)
        temporary_img = temporary_img.crop((left, top, right, height))
        temporary_img.save(self.code_img_file_path)

    def __del__(self):
        self.driver.quit()

if __name__ == '__main__':
    VerificationCodeHandler(url='http://www.neeo.cc:6005/login/', timeout=10).get_pil_code()
实战:截取验证码图片和百度文字识别
这里我们以http://www.neeo.cc:6005/login/页面的验证码为例,我们需要使用selenium和百度AI的文字识别来获取验证码。
import base64
import requests
from PIL import Image
from selenium import webdriver
from selenium.webdriver.chrome.options import Options

class VerificationCodeHandler(object):

    def __init__(self, url, timeout=10):
        self.url = url
        self.time_out = timeout
        chrome_options = Options()
        chrome_options.add_argument('--headless')
        chrome_options.add_argument('--disable-gpu')
        self.driver = webdriver.Chrome(chrome_options=chrome_options)
        self.driver.implicitly_wait(time_to_wait=10)
        self.body_img_file_path = './BodyImage.png'
        self.code_img_file_path = './CodeImage.png'

    def get_pil_code(self):
        """
            获取验证码
            思路是先截取整个可视的body大图
            然后使用PIL从大图中定位到验证码所在的位置,然后再抠图
        """
        self.driver.get(self.url)
        # 截图 body 大图
        # self.driver.maximize_window()
        self.driver.save_screenshot(self.body_img_file_path)

        # 定位验证码所在的位置
        CodeImage = self.driver.find_element_by_id('imageCode')
        # print(CodeImage.location)  # {'x': 564, 'y': 310}
        # print(CodeImage.size)  # {'height': 30, 'width': 119}
        left = CodeImage.location['x']
        top = CodeImage.location['y']
        right = CodeImage.size['width'] + left
        height = CodeImage.size['height'] + top
        temporary_img = Image.open(self.body_img_file_path)
        temporary_img = temporary_img.crop((left, top, right, height))
        temporary_img.save(self.code_img_file_path)


    def get_selenium_code(self):
        self.driver.get(self.url)
        CodeImage = self.driver.find_element_by_id('imageCode')
        CodeImage.screenshot(self.code_img_file_path)
        self.send_baidu_msg()

    def send_baidu_msg(self):
        """ 调用百度文字识别接口来提取图片中的验证码 """

        request_url = "https://aip.baidubce.com/rest/2.0/ocr/v1/general_basic"
        # 二进制方式打开图片文件
        f = open(self.code_img_file_path, 'rb')
        img = base64.b64encode(f.read())

        params = {"image": img}
        access_token = '24.16db7b39b86ebcda566bedec25b86103.2592000.1589356853.282335-16611607'
        request_url = request_url + "?access_token=" + access_token
        headers = {'content-type': 'application/x-www-form-urlencoded'}
        response = requests.post(request_url, data=params, headers=headers)
        if response:
            print(response.json())

    def __del__(self):
        self.driver.quit()


if __name__ == '__main__':
    # VerificationCodeHandler(url='http://www.neeo.cc:6005/login/', timeout=10).get_pil_code()
    VerificationCodeHandler(url='http://www.neeo.cc:6005/login/', timeout=10).get_selenium_code()
欢迎斧正,tha'ts all
see also:

 浙公网安备 33010602011771号