

基于芯片enc28j60移植Uip1.0 到stm32f10X 简历10M网络
马上开学做必设了,先准备做做提前工作,想要基于做个基于WEB的嵌入式开发,于是taobao买了个ENC28J60的焊好的芯片小板
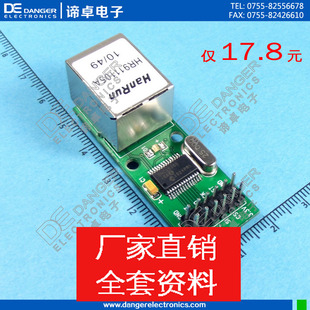
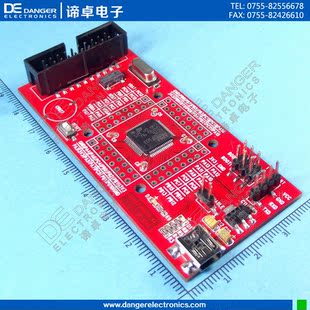
就是这一套,觉得核心板不错,方便开发,所以算是给老板打个广告,但是本身芯片是R8T6,所以RAM 20K ROM 64K,希望卖家能够加点片外RAM ROM
硬件有了,我开始搜搜有什么可以移植的嵌入式协议,发现两个 LWIP 和 uIP
可是对比发现 LWIP 需要占有的空间太大了,不够用啊~~ ,不过幸好有UIP,所以开始着手移植uIP,这里给大家提供 uIP下载
uIP 由瑞典计算机科学学院(网络嵌入式系统小组)的Adam Dunkels (http://dunkels.com/adam/uip/)开发。其源代码由C 语言编写,并完全公开,有了这个TCP/IP协议栈,让嵌入式可以实现的功能更为丰富。可以作为WebClient 向指定网站提交数据,可以作为WebServer作为网页服务器,提供一个小型的动态页面访问功能。由于是开源的免费协议栈,据说Uip没有考虑协议安全的问题。
首先推荐一个博客,他是我学uIP的入门鼻祖啊,是个牛人http://www.ichanging.org/uip-stm32.html 所以下文有些东西是我直接从那里 copy过来的,既然有他的blog 我问什么还要写呢? 其实我觉得 他的东西很有导向性,让你知道怎么做,但是还是有些不细致,这就导致我调三天也没调出来,最后集众人之所长,才找到了问题所在,所以大家可以兼并着看~
首先解压 下载下来的uIP 目录结构如下

上边的文件夹解释很清晰,我们可以看出 apps里边都是一些应用实例,所以首先需要在完成核心移植的基础上再去管它,那么lib uip unix 这三个文件夹里边的内容是我们首先需要的,我将以上三个文件夹直接放到了工程目录/lib下.
第一步基于st固件库v3.5建立的MDK模板,工程目录显示如下,插入文件时记住要在option 里边C/C++ 头文件当中指向所有包含*.h的目录

比较清晰的工程目录分类对于之后的移植产生有好处,
例如 上边std_periph_conf 是我建立起来专门写××_Configuration 的外设初始化,这样避免将其放在main所在文件当中导致该文件过长影响查阅主函数
再例如 uip文件夹主要放一些 核心处理文件,与底层函数接口无关的函数
再例如 dev文件夹显然是放一些与底层配置紧密相关的函数,clock-arch 配置时钟systick相关
tapdev 配置uip与 enc28j60芯片函数调用接口
enc28j60 通过spi 口控制芯片通讯(这个文件(.h + .c)在网上很多工程里边,大家可拿过来用)
SPI 初始化SPI配置
app文件夹是需要建立的 用来保存应用的文件夹,webserver 大家先不要去理会,也不要建立,基于移植成功之后,下一篇会讲怎么运行webserver
工程目录建立并且文件导入完成之后 我们首先看函数初始化
在std_periph_conf.c 内进行
GPIO初始化
 View Code

 1 void GPIO_Configuration()
 2 {
 3     GPIO_InitTypeDef GPIO_InitStructure;
 4       RCC_APB2PeriphClockCmd(RCC_APB2Periph_GPIOA|RCC_APB2Periph_GPIOB, ENABLE);
 5
 6     GPIO_InitStructure.GPIO_Pin = GPIO_Pin_0;
 7       GPIO_InitStructure.GPIO_Speed = GPIO_Speed_50MHz;
 8       GPIO_InitStructure.GPIO_Mode = GPIO_Mode_Out_PP;
 9       GPIO_Init(GPIOB,&GPIO_InitStructure);
10
11       /* Configure USART1 Tx (PA.09) as alternate function push-pull */
12       GPIO_InitStructure.GPIO_Pin = GPIO_Pin_9;
13       GPIO_InitStructure.GPIO_Mode = GPIO_Mode_AF_PP;
14       GPIO_Init(GPIOA, &GPIO_InitStructure);
15       /* Configure USART1 Rx (PA.10) as input floating */
16       GPIO_InitStructure.GPIO_Pin = GPIO_Pin_10;
17       GPIO_InitStructure.GPIO_Mode = GPIO_Mode_IN_FLOATING;
18       GPIO_Init(GPIOA, &GPIO_InitStructure);
19       //SPI Pin: SCK    MISO     MOSI
20       GPIO_InitStructure.GPIO_Pin = GPIO_Pin_5 | GPIO_Pin_6 | GPIO_Pin_7;
21       GPIO_InitStructure.GPIO_Speed = GPIO_Speed_10MHz;
22       GPIO_InitStructure.GPIO_Mode = GPIO_Mode_AF_PP;
23       GPIO_Init(GPIOA, &GPIO_InitStructure);
24       //SPI Pin: NSS
25       GPIO_InitStructure.GPIO_Pin = GPIO_Pin_4 ;
26       GPIO_InitStructure.GPIO_Mode = GPIO_Mode_Out_PP;
27       GPIO_InitStructure.GPIO_Speed = GPIO_Speed_50MHz;
28       GPIO_Init(GPIOA, &GPIO_InitStructure);
29 }
USART初始化
View Code
 1 void USART_Configuration(void)
 2 {
 3     USART_InitTypeDef USART_InitStructure;
 4     USART_ClockInitTypeDef  USART_ClockInitStructure;
 5
 6     RCC_APB2PeriphClockCmd(RCC_APB2Periph_USART1,ENABLE);
 7
 8     USART_ClockInitStructure.USART_Clock = USART_Clock_Disable;
 9     USART_ClockInitStructure.USART_CPOL = USART_CPOL_Low;
10     USART_ClockInitStructure.USART_CPHA = USART_CPHA_2Edge;
11     USART_ClockInitStructure.USART_LastBit = USART_LastBit_Disable;
12
13     USART_ClockInit(USART1,&USART_ClockInitStructure);
14
15     USART_InitStructure.USART_BaudRate = 115200;
16     USART_InitStructure.USART_WordLength = USART_WordLength_8b;
17     USART_InitStructure.USART_StopBits = USART_StopBits_1;
18     USART_InitStructure.USART_Parity = USART_Parity_No;
19     USART_InitStructure.USART_HardwareFlowControl = USART_HardwareFlowControl_None;
20     USART_InitStructure.USART_Mode = USART_Mode_Rx | USART_Mode_Tx;
21     /* Configure USART1 */
22     USART_Init(USART1, &USART_InitStructure);
23     USART_ITConfig(USART1,USART_IT_RXNE,ENABLE);
24     //USART_ITConfig(USART1,USART_IT_TXE,ENABLE);
25     USART_Cmd(USART1,ENABLE);
26 }
系统时钟systick初始化
View Code
1 void SysTick_Configuration(void)
2 {
3     /* Configure HCLK clock as SysTick clock source */
4        SysTick_CLKSourceConfig(SysTick_CLKSource_HCLK);
5     SysTick_Config(7200);
6 }
在SPI.c内进行
SPI初始化
View Code
 1 void SPI_Configuration(void)
 2 {
 3     SPI_InitTypeDef  SPI_InitStructure;
 4     RCC_APB2PeriphClockCmd(RCC_APB2Periph_SPI1, ENABLE);
 5     SPI_InitStructure.SPI_Direction = SPI_Direction_2Lines_FullDuplex;
 6     SPI_InitStructure.SPI_Mode = SPI_Mode_Master;
 7     SPI_InitStructure.SPI_DataSize = SPI_DataSize_8b;
 8     SPI_InitStructure.SPI_CPOL = SPI_CPOL_Low;
 9     SPI_InitStructure.SPI_CPHA = SPI_CPHA_1Edge;
10     SPI_InitStructure.SPI_NSS = SPI_NSS_Soft;
11     SPI_InitStructure.SPI_BaudRatePrescaler = SPI_BaudRatePrescaler_4;
12     SPI_InitStructure.SPI_FirstBit = SPI_FirstBit_MSB;
13     SPI_InitStructure.SPI_CRCPolynomial = 7;
14     SPI_Init(SPI1, &SPI_InitStructure);
15     /* Enable SPI1  */
16     SPI_Cmd(SPI1, ENABLE);
17 }
SPI 读写操作函数
View Code
 1 unsigned char SPI1_ReadWrite(unsigned char writedat)
 2 {
 3     /* Loop while DR register in not emplty */
 4     while(SPI_I2S_GetFlagStatus(SPI1, SPI_I2S_FLAG_TXE) == RESET);
 5     /* Send byte through the SPI1 peripheral */
 6     SPI_I2S_SendData(SPI1, writedat);
 7     /* Wait to receive a byte */
 8     while(SPI_I2S_GetFlagStatus(SPI1, SPI_I2S_FLAG_RXNE) == RESET);
 9     /* Return the byte read from the SPI bus */
10     return SPI_I2S_ReceiveData(SPI1);
11 }
至此,初始化就完成了,开始“移植”工作
因为网络协议需要进行超时重发的操作,所以首先配置计时时钟:
之前已在时钟初始化当中进行设置,配置时钟中断为0.1ms, 而uip当中 TCP超时处理时间为 0.5s ,ARP老化时间为10s,下面首先从时钟中断开始配置
在stm32f10x.c内进行
View Code所以在中断当中每次加一,则g_RunTime 每1ms 加 1 准确计时
然后设计uIP当中的接口函数
在clock-arch.c内进行修改 clock_time()
View Code
1 #include "clock-arch.h"
2 #include "stm32f10x.h"
3
4 extern __IO int32_t g_RunTime;  //外部申明
5 clock_time_t
6 clock_time(void)
7 {
8     return g_RunTime;
9 }
这样uip时钟设置完成了。
接下来就是进行 芯片与 uip 接口修改
在tapdev.c内进行修改,把该文件中其他无关函数以及申明删去,只保留以下部分,并且记得要在tapdev.h当中进行函数声明
tapdev_init(unsigned char *my_mac)的修改。
View Code
 1 #include "uip.h"
 2 #include "ENC28J60.h"
 3
 4 void
 5 tapdev_init(unsigned char *my_mac)
 6 {
 7     enc28j60Init(my_mac);
 8 }
 9
10 unsigned int
11 tapdev_read(void)
12 {
13     return enc28j60PacketReceive(UIP_CONF_BUFFER_SIZE,uip_buf);
14 }
15
16 void
17 tapdev_send(void)
18 {
19     enc28j60PacketSend(uip_len,uip_buf);
20 }
View Code
 1 //app_call.h
 2 #include "stm32f10x.h"
 3 #ifndef UIP_APPCALL
 4    #define UIP_APPCALL    Uip_Appcall
 5 #endif
 6 #ifndef UIP_UDP_APPCALL
 7     #define UIP_UDP_APPCALL    Udp_Appcall
 8 #endif
 9
10
11 void Uip_Appcall(void);
12 void Udp_Appcall(void);
View Code
 1 #include "app_call.h"
 2
 3 void Uip_Appcall(void)
 4 {
 5
 6
 7 }
 8 void Udp_Appcall(void)
 9 {
10
11
12 }
最后一步就是修改声明 uip-conf.h
View Code
 1 #define UIP_CONF_STATISTICS      1
 2 typedef int uip_tcp_appstate_t;      //¿ÉÒÔ×¢ÊÍ
 3 typedef int uip_udp_appstate_t;      //¿ÉÒÔ×¢ÊÍ
 4 /* Here we include the header file for the application(s) we use in
 5    our project. */
 6 /*#include "smtp.h"*/
 7 /*#include "hello-world.h"*/
 8 /*#include "telnetd.h"*/
 9 //#include "webserver.h"
10 /*#include "dhcpc.h"*/
11 /*#include "resolv.h"*/
12 /*#include "webclient.h"*/
13 #include "app_call.h"
14 #endif /* __UIP_CONF_H__ */
注释/*#include "webclient.h"*/,因为暂时不建立webserver
添加 #include "app_call.h" 作为声明刚定义的文件
添加声明
typedef int uip_tcp_appstate_t;
typedef int uip_udp_appstate_t;
之后 在uip-split.c 中注释所有的 tcpip_output()函数 消除uip_fw_output()函数的注释
最后一步就是修改main 函数
View Code
  1 /添加声明
  2 #include "uip.h"
  3 #include "uip_arp.h"
  4 #include "tapdev.h"
  5 #include "stm32f10x.h"
  6 #include "timer.h"
  7 #include "std_periph_conf.h"
  8 #include "SPI.h"
  9 #include "stdio.h"
 10 #include "enc28j60.h"
 11
 12 int
 13 main(void)
 14 {
 15       int i;
 16       uip_ipaddr_t ipaddr;
 17       struct timer periodic_timer, arp_timer;
 18
 19       GPIO_Configuration();
 20       USART_Configuration();
 21       SPI_Configuration();
 22
 23       timer_set(&periodic_timer, CLOCK_SECOND / 2);
 24       timer_set(&arp_timer, CLOCK_SECOND * 10);
 25
 26       SysTick_Configuration();
 27       tapdev_init(mymac);
 28       uip_init();
 29
 30       uip_ipaddr(ipaddr,192,168,1,15);
 31       uip_sethostaddr(ipaddr);
 32       printf("Local IP address :192.168.1.15\r\n");
 33       uip_ipaddr(ipaddr,192,168,1,1);
 34       uip_setdraddr(ipaddr);
 35       printf("Net gate :192.168.1.1\r\n");
 36       uip_ipaddr(ipaddr,255,255,255,0);
 37       uip_setnetmask(ipaddr);
 38       printf("Local net mask :255.255.255.0\r\n");
 39
 40     while(1)
 41     {
 42         uip_len = tapdev_read();
 43         if(uip_len > 0)
 44         {
 45               if(BUF->type == htons(UIP_ETHTYPE_IP))
 46             {
 47                 uip_arp_ipin();
 48                 uip_input();
 49                 /* If the above function invocation resulted in data that
 50                    should be sent out on the network, the global variable
 51                    uip_len is set to a value > 0. */
 52                 if(uip_len > 0)
 53                 {
 54                       uip_arp_out();
 55                       tapdev_send();
 56                 }
 57               }
 58             else if(BUF->type == htons(UIP_ETHTYPE_ARP))
 59             {
 60                 uip_arp_arpin();
 61                 /* If the above function invocation resulted in data that
 62                    should be sent out on the network, the global variable
 63                    uip_len is set to a value > 0. */
 64                 if(uip_len > 0)
 65                 {
 66                       tapdev_send();
 67                 }
 68               }
 69         }
 70         else if(timer_expired(&periodic_timer))
 71         {
 72               timer_reset(&periodic_timer);
 73               for(i = 0; i < UIP_CONNS; i++)
 74             {
 75                 uip_periodic(i);
 76                 /* If the above function invocation resulted in data that
 77                    should be sent out on the network, the global variable
 78                    uip_len is set to a value > 0. */
 79                 if(uip_len > 0)
 80                 {
 81                       uip_arp_out();
 82                       tapdev_send();
 83                 }
 84               }
 85         #if UIP_UDP
 86               for(i = 0; i < UIP_UDP_CONNS; i++)
 87             {
 88                 uip_udp_periodic(i);
 89                 /* If the above function invocation resulted in data that
 90                    should be sent out on the network, the global variable
 91                    uip_len is set to a value > 0. */
 92                 if(uip_len > 0)
 93                 {
 94                       uip_arp_out();
 95                       tapdev_send();
 96                 }
 97               }
 98         #endif /* UIP_UDP */
 99
100           /* Call the ARP timer function every 10 seconds. */
101           if(timer_expired(&arp_timer))
102         {
103             timer_reset(&arp_timer);
104             uip_arp_timer();
105           }
106         }
107       }
108       //return 0;
109 }
编译 会有些警告,不需要理会

但是需要强调的是 注意在enc28j60.c当中,要注意
View Code
 1 void
 2 tapdev_init(unsigned char *my_mac)
 3 {
 4     u8 i;
 5        enc28j60Init(my_mac);
 6        for (i = 0; i < 6; i++)
 7     {
 8         uip_ethaddr.addr[i] = my_mac[i];
 9     }
10     enc28j60PhyWrite(PHLCON,0x0476);
11     enc28j60clkout(2);
12 }
中间的循环很重要,之前按照位大仙的一直挑不出来就在于此,芯片虽然知道了mac地址,但是uip 不知道 所以要赋值
把我做的传上来供大家参看 项目打包里边集成了 webserver ,ping通 之后 浏览器可以试着访问 http;// 192.168.1.15


posted on 2013-02-27 19:52 MrYang_YoYo 阅读(1079) 评论(0) 收藏 举报


 浙公网安备 33010602011771号