[2]尝试用Unity3d制作一个王者荣耀(持续更新)->选择英雄-(上)
如果已经看过本章节:目录传送门:这是目录鸭~
1.场景搭建:
首先我们去AssetStore逛淘宝~~~

我淘到的是这个资源,其他好看的场景(消耗不高的都行)。
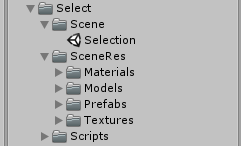
然后我们导入了这个资源后,把资源根文件夹的名字改为Select,把Demo场景文件的名字改为Selection,我这样修改的emmm...
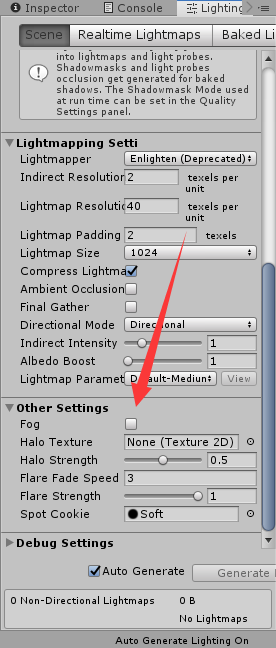
然后打开那个Demo场景,走到LightningSetting关闭雾效果(这个消耗有点大,关一下,你开心也可以不关的~):
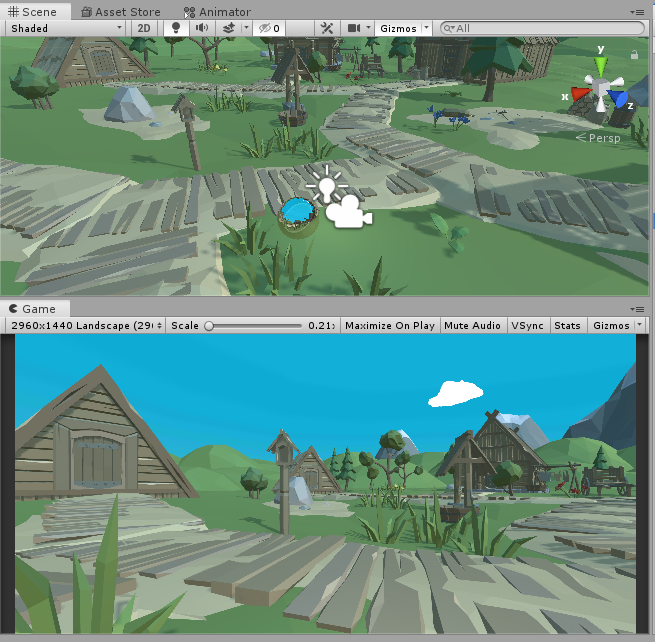
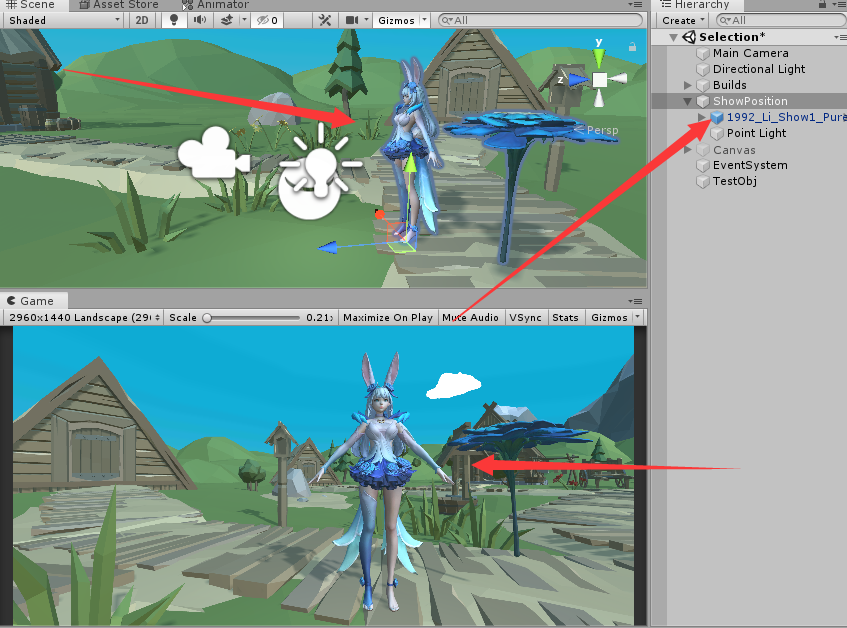
然后我们就在场景里移动Main Camera到你喜欢的好看的位置~
顺便创建个Reflection Probe(反射效果的):
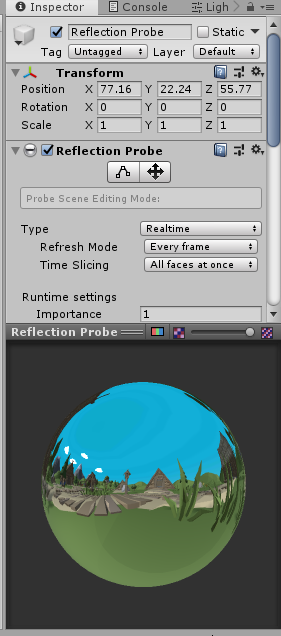
前面是没加的,后面是加了的,区别有点小,仔细看右边的更漂亮诶~~~

然后我们在场景中创建空对象,重新命名为你喜欢的名字,用于展示英雄的角色坐标的定位,我在里面放了个阿离并把相对坐标设置为零来测试站的位置是否准确(我这里面还有个光照是因为脸部比较暗,你可以自己调整光照的,对~说的就是你o(*^▽^*)o):
到此为止~我们的场景就搭建完毕了亲亲~
2.英雄资源的打包相关(重要!!!):
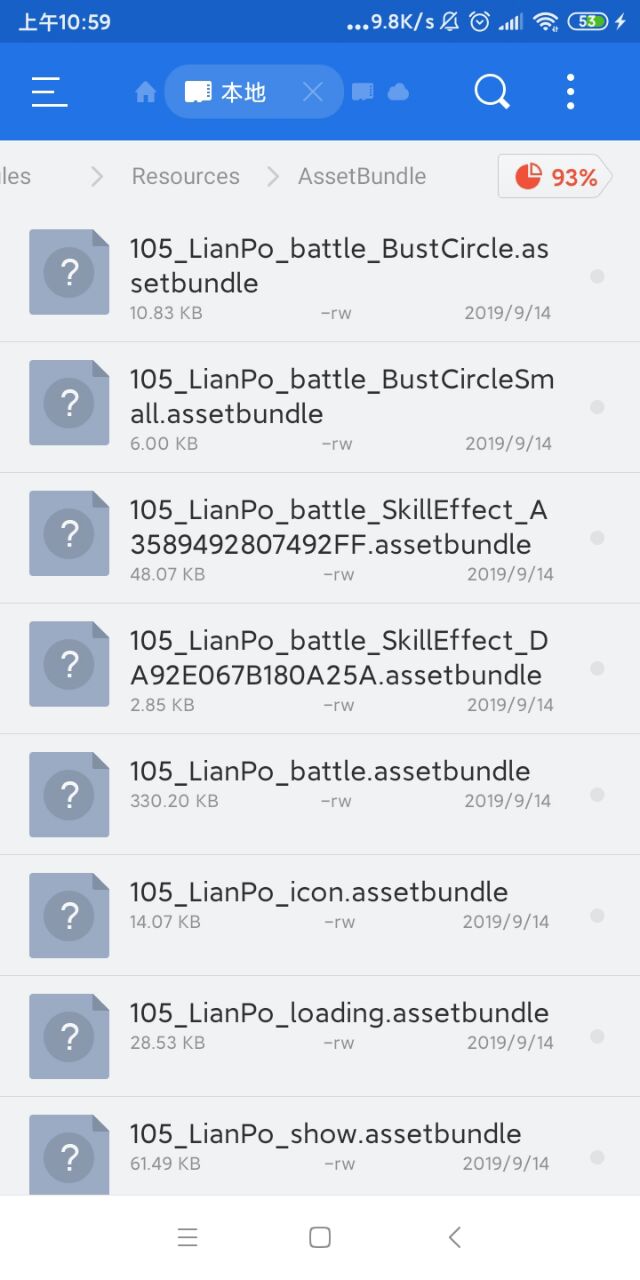
命名规则:我们可以看到,农药的AssetBundle命名结构是:英雄ID+皮肤编号(没有空格,比如说阿离的ID是199,这个花间舞是第二个皮肤,所以ID为1992,第一个默认皮肤不需要输入皮肤ID就199就好了)_英雄拼音_资源类型.assetbbundle。(下面可以看到廉颇ID是105,这个设定使得我们提资源十分方便~良心TX~):
然后我们也打算用这种规则来命名~
下面部分含有代码~
创建几个新文件夹在根工程目录下,路径是 ActorManager/Scripts,然后再在里面创建一个Csharp(即C#),名为ActorManager:
  1 /*
  2  * 编辑者:Miku酱
  3  * 版本:1
  4  * 首次编写日期:2019/09/15 13:53
  5  * 修改日期:2019/09/15 13:53
  6  * 强行加一行~~~
  7  */
  8
  9 using System.Collections;
 10 using System.Collections.Generic;
 11 using UnityEngine;
 12 using LuoHao.AssetBundleManager;
 13
 14 namespace LuoHao.Actor
 15 {
 16     public class ActorManager : MonoBehaviour
 17     {
 18         /// <summary>
 19         /// 角色信息文件的列表
 20         /// </summary>
 21         [TextArea]
 22         public List<string> actorFileList = new List<string>();
 23         /// <summary>
 24         /// 全部的角色信息
 25         /// </summary>
 26         public static Dictionary<int, ActorInfoData> allActor = new Dictionary<int, ActorInfoData>();
 27
 28         private void Awake()
 29         {
 30             LoadAllActor();//加载
 31             DontDestroyOnLoad(this.gameObject);//切换场景不销毁这个物体
 32         //    Debug.Log(allActor[100].actorName);//测试
 33
 34         }
 35         /// <summary>
 36         /// 加载角色信息
 37         /// </summary>
 38         public bool LoadAllActor()
 39         {
 40             for(int i = 0; i < actorFileList.Count; i++)
 41             {
 42                 //取得文件
 43              PackageForAssetBundle pfa=   AssetBundleManager.AssetBundleManager.GetAssetBundle(actorFileList[i]);
 44                 //加载资源
 45                 GameObject[] gms = pfa.GetAssetBundle().LoadAllAssets<GameObject>();
 46                 ActorInfo[] ai = gms[0].GetComponents<ActorInfo>();
 47                 if (ai.Length == 0)//数组长度为0则返回错误
 48                 {
 49                     Debug.LogError("加载角色信息文件失败!\n错误文件位置:"+actorFileList[i]);
 50                     return false;
 51                 }
 52                 else
 53                 {
 54                     for (int i1 = 0; i1 < ai.Length; i1++)
 55                         allActor.Add(ai[i1]._actorInfoData.actorID, ai[i1]._actorInfoData);
 56                     //信息载入字典....
 57                 }
 58                 pfa.UnLoadAssetBundle(true);//卸载ab包
 59             }
 60
 61             return true;
 62         }
 63
 64     }
 65
 66     /// <summary>
 67     /// 储存单个角色信息的类
 68     /// </summary>
 69     [System.Serializable]//序列化,注意要用System命名空间下面的
 70     public class ActorInfoData
 71     {
 72         /// <summary>
 73         /// 角色名字
 74         /// </summary>
 75         public string actorName = "英雄名字";
 76         /// <summary>
 77         /// 角色拼音
 78         /// </summary>
 79         public string actorPinYin = "PinYin";
 80         /// <summary>
 81         /// 角色ID
 82         /// </summary>
 83         public int actorID = 100;
 84         /// <summary>
 85         /// 屏蔽英雄
 86         /// </summary>
 87         public bool banActor = false;
 88         /// <summary>
 89         /// 角色背景
 90         /// </summary>
 91        [TextArea]//这个是文本框,显示在编辑器的
 92         public string actorBG = "背景故事";
 93
 94         /// <summary>
 95         /// 皮肤列表(第一个就是原皮,必填)
 96         /// </summary>
 97         public List<ActorSkin> actorSkins = new List<ActorSkin>();
 98
 99     }
100     /// <summary>
101     /// 储存单个皮肤的
102     /// </summary>
103     [System.Serializable]//序列化
104     public class ActorSkin
105     {
106         /// <summary>
107         /// 皮肤名字
108         /// </summary>
109         public string skinName = "皮肤名字";
110         /// <summary>
111         /// 皮肤展示模型资源路径
112         /// </summary>
113         [TextArea]//这个是文本框,显示在编辑器的
114         public string skinShowModelPath = "皮肤展示模型资源路径";
115         /// <summary>
116         /// 皮肤对战模型资源路径
117         /// </summary>
118         [TextArea]//这个是文本框,显示在编辑器的
119         public string skinBattleModelPath = "皮肤对战模型资源路径";
120         /// <summary>
121         /// 皮肤展示特效资源路径
122         /// </summary>
123         [TextArea]//这个是文本框,显示在编辑器的
124         public string skinShowEffectPath = "皮肤展示特效资源";
125         /// <summary>
126         /// 皮肤对战特效资源路径
127         /// </summary>
128         [TextArea]//这个是文本框,显示在编辑器的
129         public string skinBattleEffectPath = "皮肤对战特效资源";
130         /// <summary>
131         /// 皮肤原画位置
132         /// </summary>
133         [TextArea]//这个是文本框,显示在编辑器的
134         public string skinBannerPath = "皮肤原画位置";
135         /// <summary>
136         /// 皮肤小图标位置
137         /// </summary>
138         [TextArea]//这个是文本框,显示在编辑器的
139         public string skinIconPath = "皮肤小图标位置";
140     }
141 }
脚本ActorInfo(承载信息的载体):
 1 /*
 2  * 编辑者:Miku酱
 3  * 版本:1
 4  * 首次编写日期:2019/09/15 13:53
 5  * 修改日期:2019/09/15 13:53
 6  * 强行加一行~~~
 7  */
 8
 9 using System.Collections;
10 using System.Collections.Generic;
11 using UnityEngine;
12
13 namespace LuoHao.Actor {
14     public class ActorInfo : MonoBehaviour
15     {
16         [Header("角色信息")]
17         public ActorInfoData _actorInfoData;
18     }
19 }
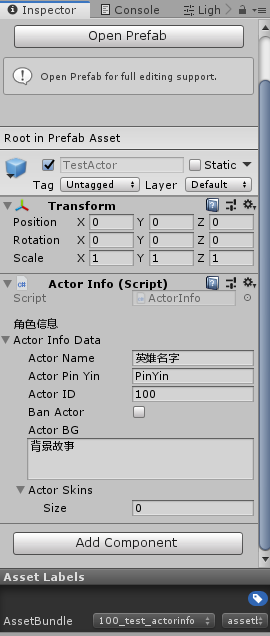
创建角色信息数据库:
新建一个物体,并挂上脚本ActorInfo,修改信息(你开心就好随便想改啥就改啥~),然后制作成预制体并且设置标签:

然后在点击工具栏的打包AssetBundle的按钮,打包这个预制体,最后我们在场景中随便找个物体挂上ActorManager,并增加一个路径(就是你预制体标签的名字加后缀,标签默认是全部小写,我们设置的时候大小写不影响文件读取):

这步加载没错误就OK了,记得删除测试用的Test对象,请看下一节。
施工了一个中午emmm~头发又少了几根,下一部分再见咯~
如果已经看过本章节:目录传送门:这是目录鸭~

 浙公网安备 33010602011771号