通过mycat实现mysql的读写分离
mysql的主从配置沿用上一篇博客的配置:https://www.cnblogs.com/MasterSword/p/9434169.html
mycat下载地址:http://www.mycat.io/
试验版本:Mycat-server-1.6-release
# cd /usr/local
# mv ~/Mycat-server-1.6-RELEASE-20161028204710-linux.tar.gz /usr/local
# tar -zxvf Mycat-server-1.6-RELEASE-20161028204710-linux.tar.gz
# cd /usr/local/mycat/conf/
# vim server.xml 查看mycat用户的默认配置
<!-- mycat的默认用户配置,保持不变即可 -->
<user name="root">
<property name="password">123456</property>
<property name="schemas">TESTDB</property>
</user>
# vim schema.xml 修改schema配置读写分离
<?xml version="1.0"?>
<!DOCTYPE mycat:schema SYSTEM "schema.dtd">
<mycat:schema xmlns:mycat="http://io.mycat/">
<schema name="TESTDB" checkSQLschema="false" sqlMaxLimit="100">
<!-- 设置物理表 -->
<table name="student" dataNode="dn1" />
</schema>
<!-- 设置物理库 -->
<dataNode name="dn1" dataHost="localhost1" database="test" />
<!-- balance=1设置为读写分离 -->
<dataHost name="localhost1" maxCon="1000" minCon="10" balance="1" writeType="0" dbType="mysql" dbDriver="native" switchType="1" slaveThreshold="100">
<heartbeat>select user()</heartbeat>
<!-- 读库配置 -->
<writeHost host="hostM1" url="xxx.xxx.xxx.xxx:3306" user="root" password="xxxxxx">
<!-- 读库配置,可配置多个读库 -->
<readHost host="hostS2" url="xxx.xxx.xxx.xxx:3316" user="root" password="xxxxxx" />
</writeHost>
</dataHost>
</mycat:schema>
# cd ../bin
# ./mycat start 启动mycat
# ps -aux | grep mycat 查看mycat是否启动成功
在客户端新建一个链接到mycat的数据库连接,用户名密码为server.xml中配置的用户
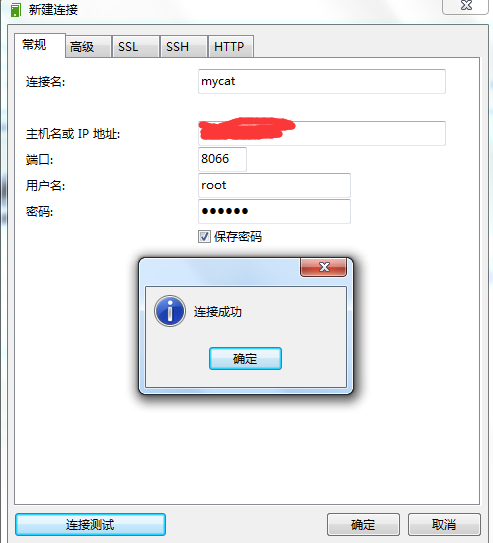
连接中库为TESTDB,也是在server.xm中配置的

下面验证读写分离
mycat:
写库:
读库: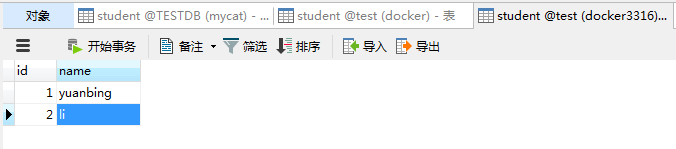
修改读库的数据: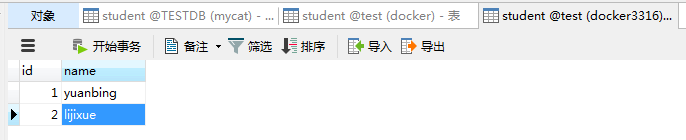
mycat中的数据和读库数据一致:
停止读库的服务:
mycat插入一条数据: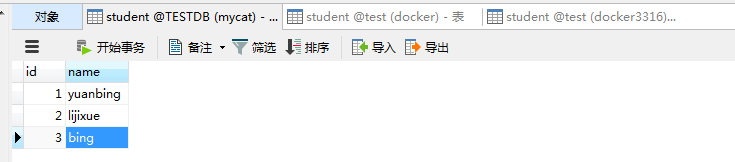
写库中存在插入的数据: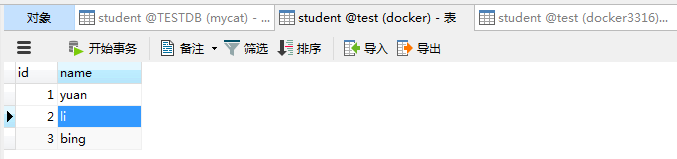
至此通过mycat实现mysql的读写分离配置成功。
ps.mycat最大的功能在于对数据库分片的处理,如果有机会,以后会进行相关的试验。

 浙公网安备 33010602011771号