Linux中NMON监控、分析系统性能
一.安装前准备:由CentOS和Linux ,确定安装的版本
(1)查看系统版本:
命令如下
[work@voice-classification-gputest.bj.sm engine]$ cat /proc/versionLinux version 3.10.0-957.el7.x86_64 (mockbuild@kbuilder.bsys.centos.org) (gcc version 4.8.5 20150623 (Red Hat 4.8.5-36) (GCC) ) #1 SMP Thu Nov 8 23:39:32 UTC 2018[work@voice-classification-gputest.bj.sm /]$ cat /etc/redhat-releaseCentOS Linux release 7.6.1810 (Core) |
从而确定:系统是64位,CentOS7.6的版本
二.安装:最好用root账号安装
下载nmon地址:http://nmon.sourceforge.net/pmwiki.php?n=Site.Download
[work@voice-classification-gputest.bj.sm engine]$ sudo su[root@voice-classification-gputest.bj.sm engine]# mkdir nmon --创建安装目录[root@voice-classification-gputest.bj.sm engine]# lsbe-classification-gpu be-classification-gpu.tgz be-score-service be-text-classification be-text-corrector be-text-detection be-vpr nmon re-voice[root@voice-classification-gputest.bj.sm engine]# cd nmon/[root@voice-classification-gputest.bj.sm nmon]# wget http://sourceforge.net/projects/nmon/files/nmon16d_x86.tar.gz --在线安装,跟进系统版本,选择安装包[root@voice-classification-gputest.bj.sm nmon]# tar -zxvf nmon16d_x86.tar.gz[root@test-tmp.bj.sm nmon]# lsdata nmon_power_64le_ubuntu14 nmon_x86_64_debian6 nmon_x86_64_rhel6 nmon_x86_debian8 nmon_x86_knoppix7 nmon_x86_peppermint4 nmon_x86_ubuntu10nmon16d_x86.tar.gz nmon_power_64le_ubuntu15 nmon_x86_64_debian8 nmon_x86_64_rhel7 nmon_x86_fedora17 nmon_x86_linux nmon_x86_precisepuppy nmon_x86_ubuntu13nmon_power_32_linux nmon_power_64le_ubuntu16 nmon_x86_64_fedora17 nmon_x86_64_sles13 nmon_x86_fedora18 nmon_x86_macpuppy nmon_x86_puppy_GNU_2.0.0 nmon_x86_ubuntu15nmon_power_32_rhel6 nmon_power_64_linux nmon_x86_64_fedora20 nmon_x86_64_ubuntu13 nmon_x86_fedora19 nmon_x86_mint16 nmon_x86_puppy_GNU_2.6.15 nmon_x86_ubuntu8nmon_power_32_sles11 nmon_power_64_rhel6 nmon_x86_64_fedora21 nmon_x86_64_ubuntu15 nmon_x86_fedora20 nmon_x86_mint17 nmon_x86_puppy_GNU_2.6.24 nmon_x86_ubuntu9nmon_power_64_kvm2 nmon_power_64_rhel7 nmon_x86_64_linux nmon_x86_centos6 nmon_x86_fedora21 nmon_x86_mint7 nmon_x86_rhel6 nmon_x86_zorin6nmon_power_64le_fedora22 nmon_power_64_sles11 nmon_x86_64_mint16 nmon_x86_debian5 nmon_x86_fedora22 nmon_x86_mint8 nmon_x86_sles12nmon_power_64le_linux nmon_x86_64_centos6 nmon_x86_64_mint17 nmon_x86_debian6 nmon_x86_knoppix5 nmon_x86_opensuse12 nmon_x86_sles13nmon_power_64le_rhel7 nmon_x86_64_centos7 nmon_x86_64_opensuse13 nmon_x86_debian7 nmon_x86_knoppix6 nmon_x86_opensuse13 nmon_x86_tahrpuppy[root@test-tmp.bj.sm nmon]# mv nmon_x86_64_centos7 /usr/local/bin/nmon --根据centos版本,选择对应的文件[root@test-tmp.bj.sm bin]# cd /usr/local/bin/[root@test-tmp.bj.sm bin]# lsbusybox-x86_64 instmodsh nmon nsight-sys nsys nsys-ui shasum[root@test
|

如下表示启用成功:
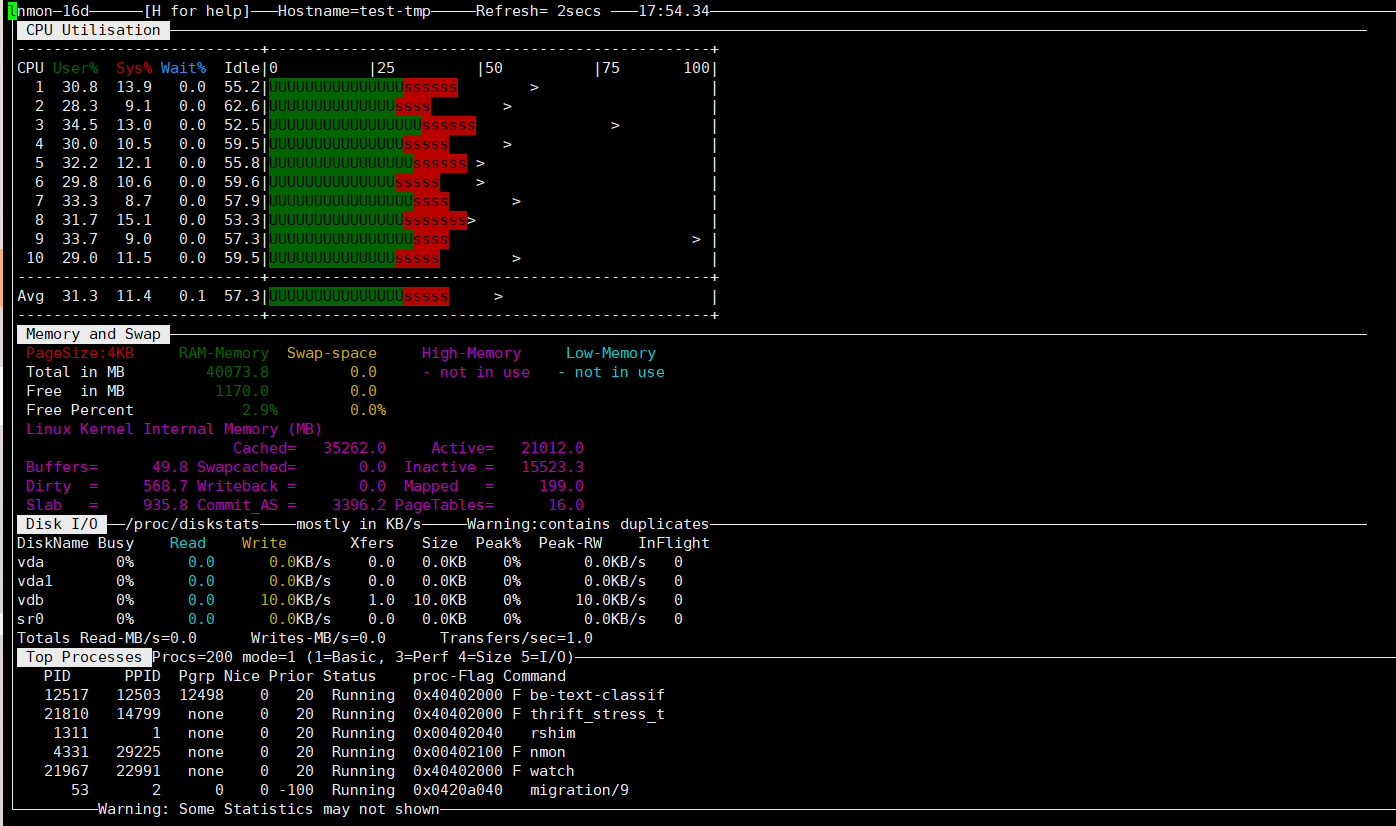
在上面的交互式窗口中,可以使用nmon 快捷键来显示不同的系统资源统计数据:
- q : 停止并退出 Nmon
- h : 查看帮助
- c : 查看 CPU 统计数据
- m : 查看内存统计数据
- d : 查看硬盘统计数据
- k : 查看内核统计数据
- n : 查看网络统计数据
- N : 查看 NFS 统计数据
- j : 查看文件系统统计数据
- t : 查看高耗进程
- V : 查看虚拟内存统计数据
- v : 详细模式
按下c,m,d后如下图,CPU、内存、磁盘的消耗情况都直观的展现出来了,按q键可以退出。
三.生成汇总结果
执行时,提示时:bash: nmon: command not found,需要提前安装下nmon
生成的文件,默认存在目录/mnt/work/engine/nmon/data/里,随着时间累增的数据
[root@test-tmp.bj.sm bin]# nmon -s10 -c60 -f -m /mnt/nmon/databash: nmon: command not found[root@voice-classification-gputest.bj.sm etc]# yum install nmon[root@voice-classification-gputest.bj.sm etc]# nmon -s10 -c60 -f -m /mnt/work/engine/nmon/data/[root@voice-classification-gputest.bj.sm etc]# cd /mnt/work/engine/nmon/data/[root@voice-classification-gputest.bj.sm data]# lsvoice-classification-gputest_210923_2155.nmon[root@voice-classification-gputest.bj.sm data]# sz voice-classification-gputest_210923_2155.nmon --传到本地 |
三.生成报告
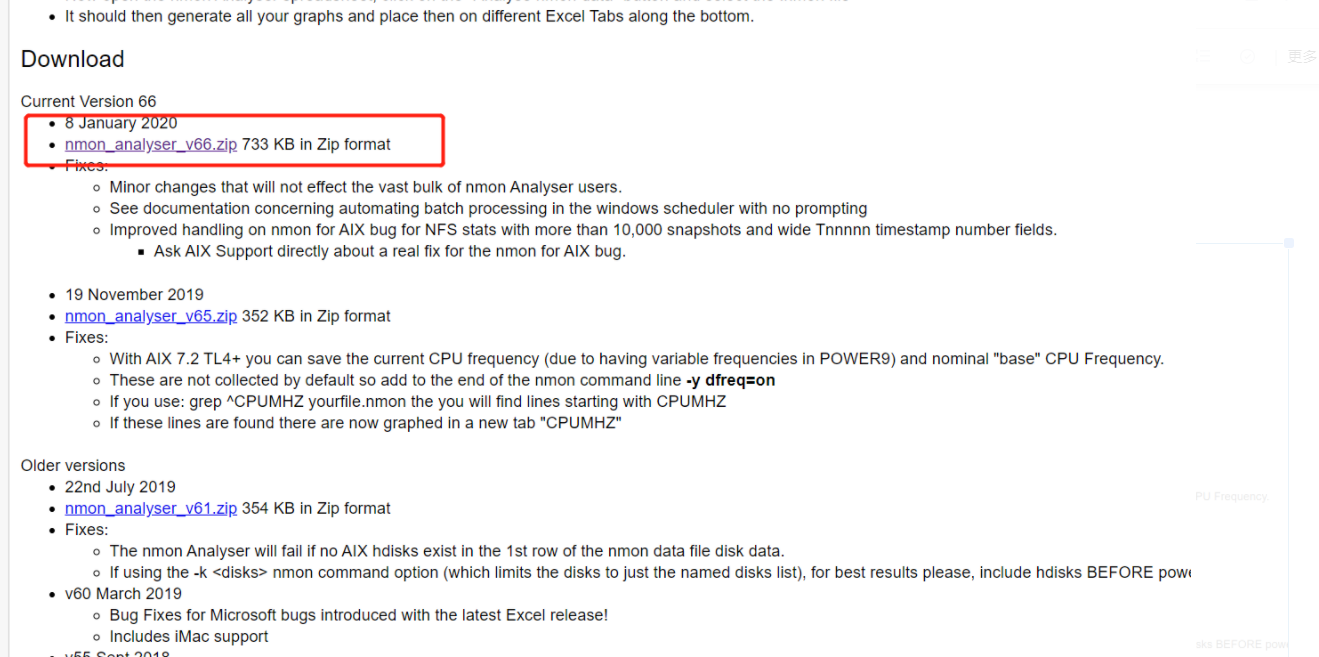
1、需要先下载分析器到本地下载nmon analyser,选择一个适合本机的版本,解压
http://nmon.sourceforge.net/pmwiki.php?n=Site.Nmon-Analyser
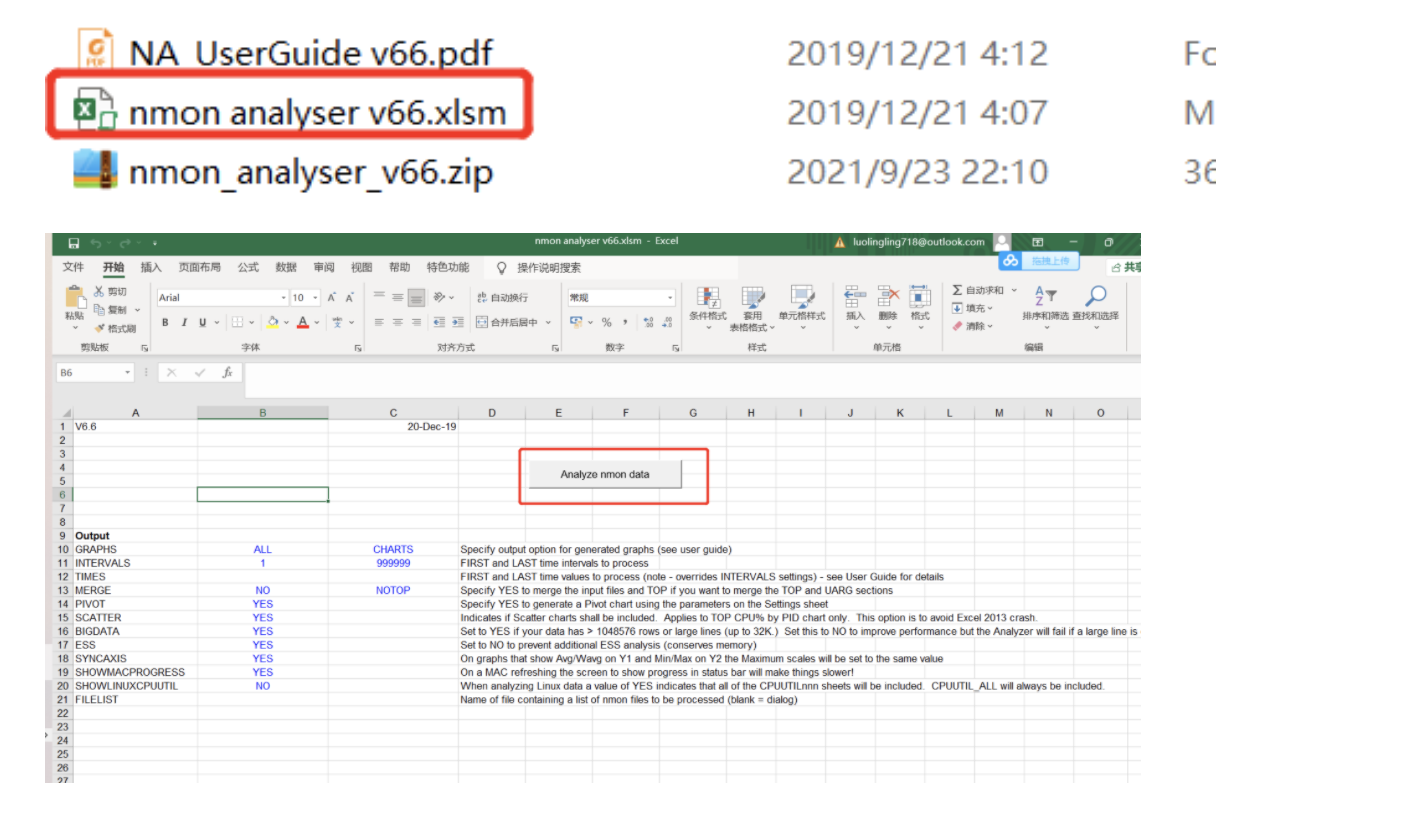
2、打开nmon analyser
双击打开nmon analyser v66.xlsm,点击Analyze nmon data按钮:选中从服务上下载的文件
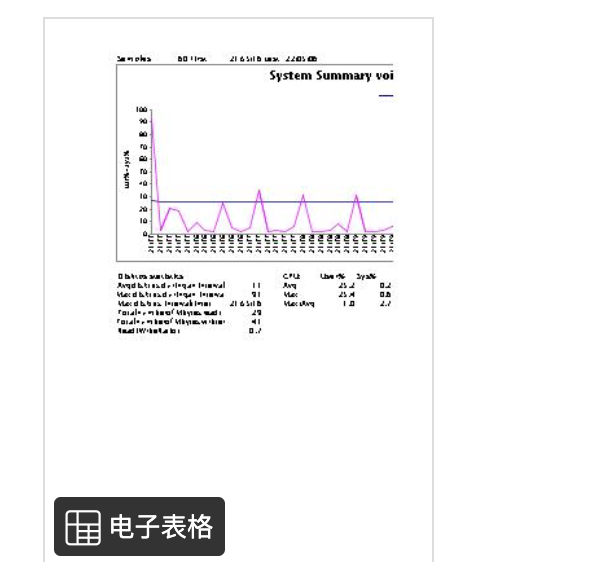
处理后的文件如下:
四、结果分析
参考如下:
https://blog.csdn.net/zhouping19851013/article/details/82899003

 浙公网安备 33010602011771号