Idea调试Tomcat源码
一、下载Tomcat
- 源码Source Code:https://dlcdn.apache.org/tomcat/tomcat-8/v8.5.93/src/apache-tomcat-8.5.93-src.zip
- Binary:https://dlcdn.apache.org/tomcat/tomcat-8/v8.5.93/bin/apache-tomcat-8.5.93.zip
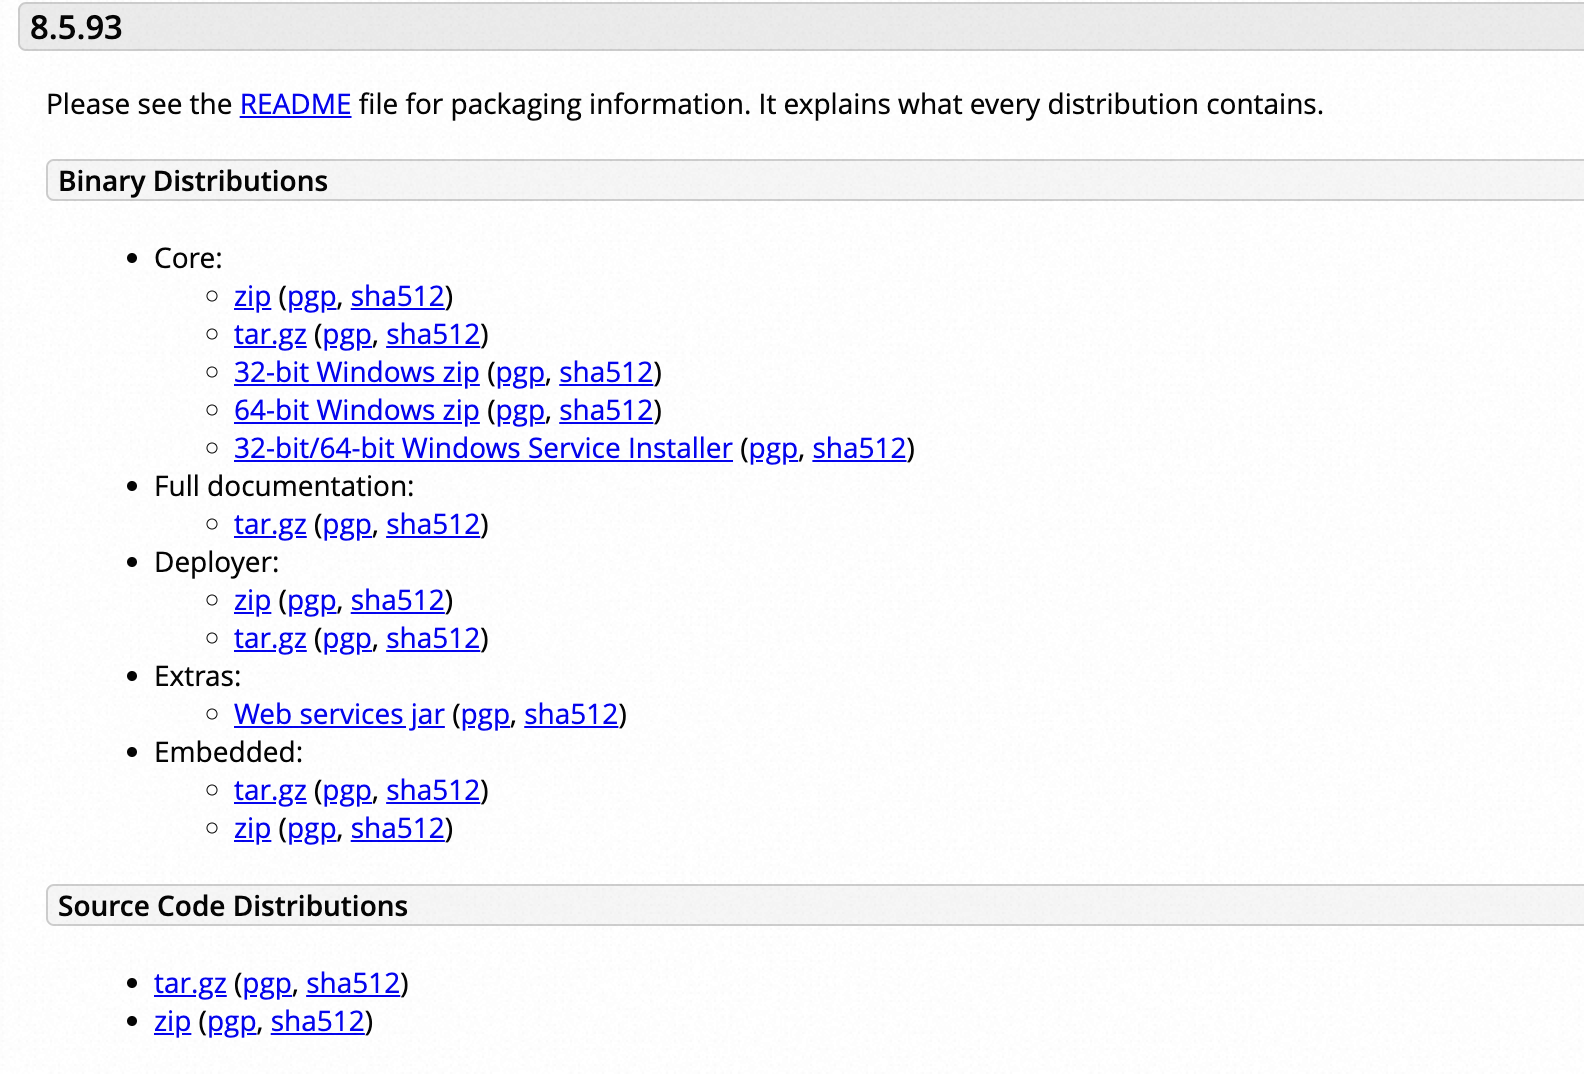
建议保持这俩版本一致,不然会出现各种找不到类,方法的情况等。
- 解压Binary
- 解压Source Code
参考链接:
https://archive.apache.org/dist/tomcat/tomcat-8/v8.5.93/src/
https://tomcat.apache.org/download-80.cgi
二、Tomcat调试环境配置
创建一个maven项目,
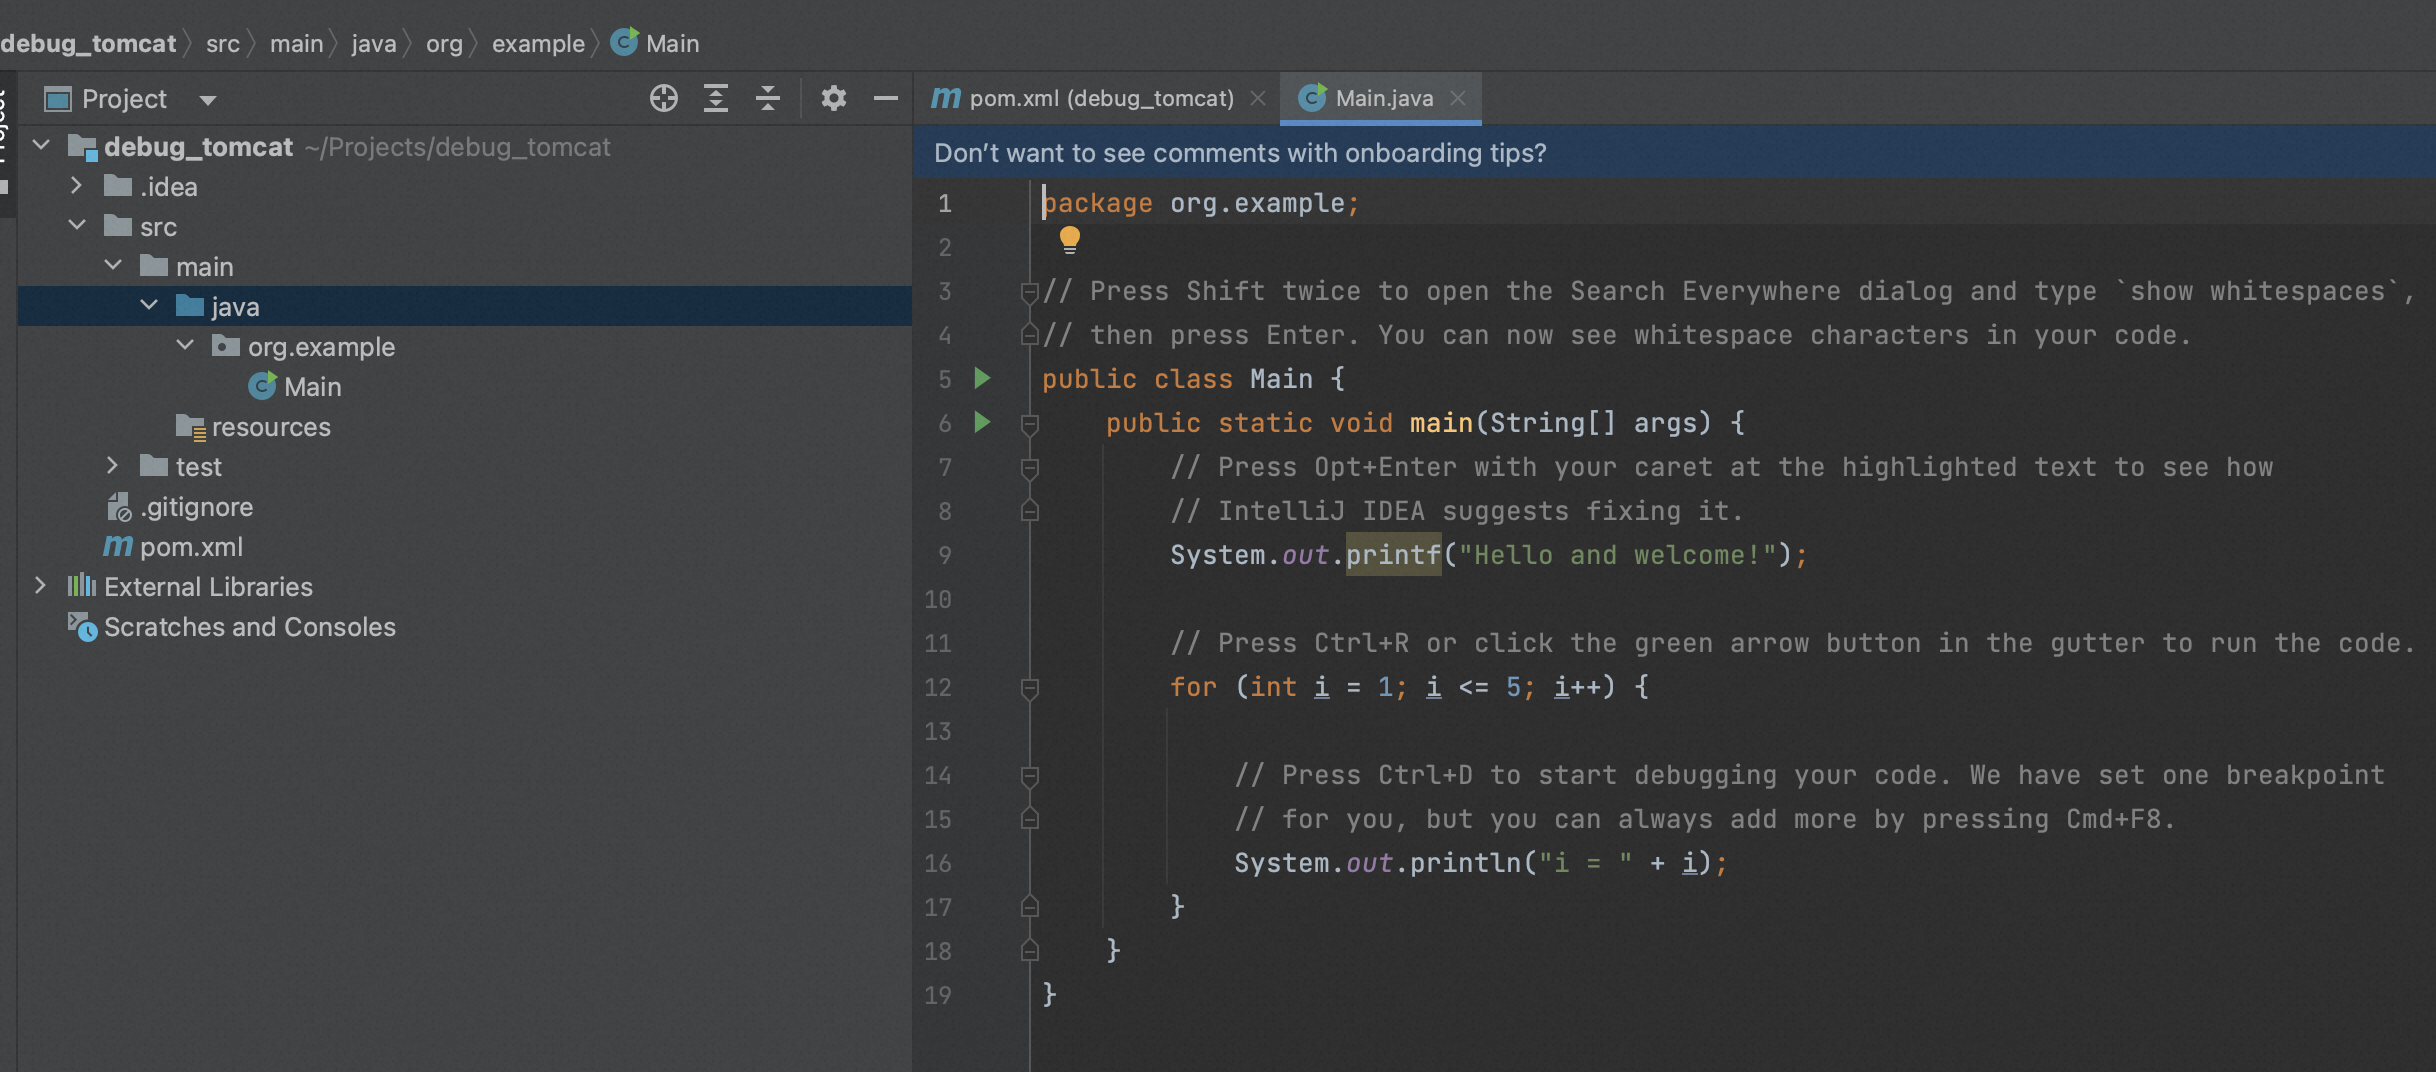
- 将源码解压目录中的 conf、webappas 直接复制到上面新建的项目根路径下/Users/zhenghan/Projects/debug_tomcat
- 将源码解压目录中的 java、modules 直接复制到 /Users/zhenghan/Projects/debug_tomcat/src/main
- 将Binary解压木马中的 lib 直接复制到 /Users/zhenghan/Projects/debug_tomcat
文件拷贝后目录结构如下,

修改 /Users/zhenghan/Projects/debug_tomcat/pom.xml,
<?xml version="1.0" encoding="UTF-8"?>
<project xmlns="http://maven.apache.org/POM/4.0.0"
         xmlns:xsi="http://www.w3.org/2001/XMLSchema-instance"
         xsi:schemaLocation="http://maven.apache.org/POM/4.0.0 http://maven.apache.org/xsd/maven-4.0.0.xsd">
    <modelVersion>4.0.0</modelVersion>

    <groupId>com.apache</groupId>
    <artifactId>tomcatcode</artifactId>
    <version>1.0-SNAPSHOT</version>
    <build>
        <plugins>
            <plugin>
                <groupId>org.apache.maven.plugins</groupId>
                <artifactId>maven-compiler-plugin</artifactId>
                <version>2.3</version>
                <configuration>
                    <encoding>UTF-8</encoding>
                    <source>1.8</source>
                    <target>1.8</target>
                </configuration>
            </plugin>
        </plugins>
    </build>

    <dependencies>
        <dependency>
            <groupId>org.easymock</groupId>
            <artifactId>easymock</artifactId>
            <version>3.4</version>
        </dependency>
        <dependency>
            <groupId>ant</groupId>
            <artifactId>ant</artifactId>
            <version>1.7.0</version>
        </dependency>
        <dependency>
            <groupId>wsdl4j</groupId>
            <artifactId>wsdl4j</artifactId>
            <version>1.6.2</version>
        </dependency>
        <dependency>
            <groupId>javax.xml</groupId>
            <artifactId>jaxrpc</artifactId>
            <version>1.1</version>
        </dependency>
        <dependency>
            <groupId>org.eclipse.jdt.core.compiler</groupId>
            <artifactId>ecj</artifactId>
            <version>4.5.1</version>
        </dependency>
    </dependencies>

</project>
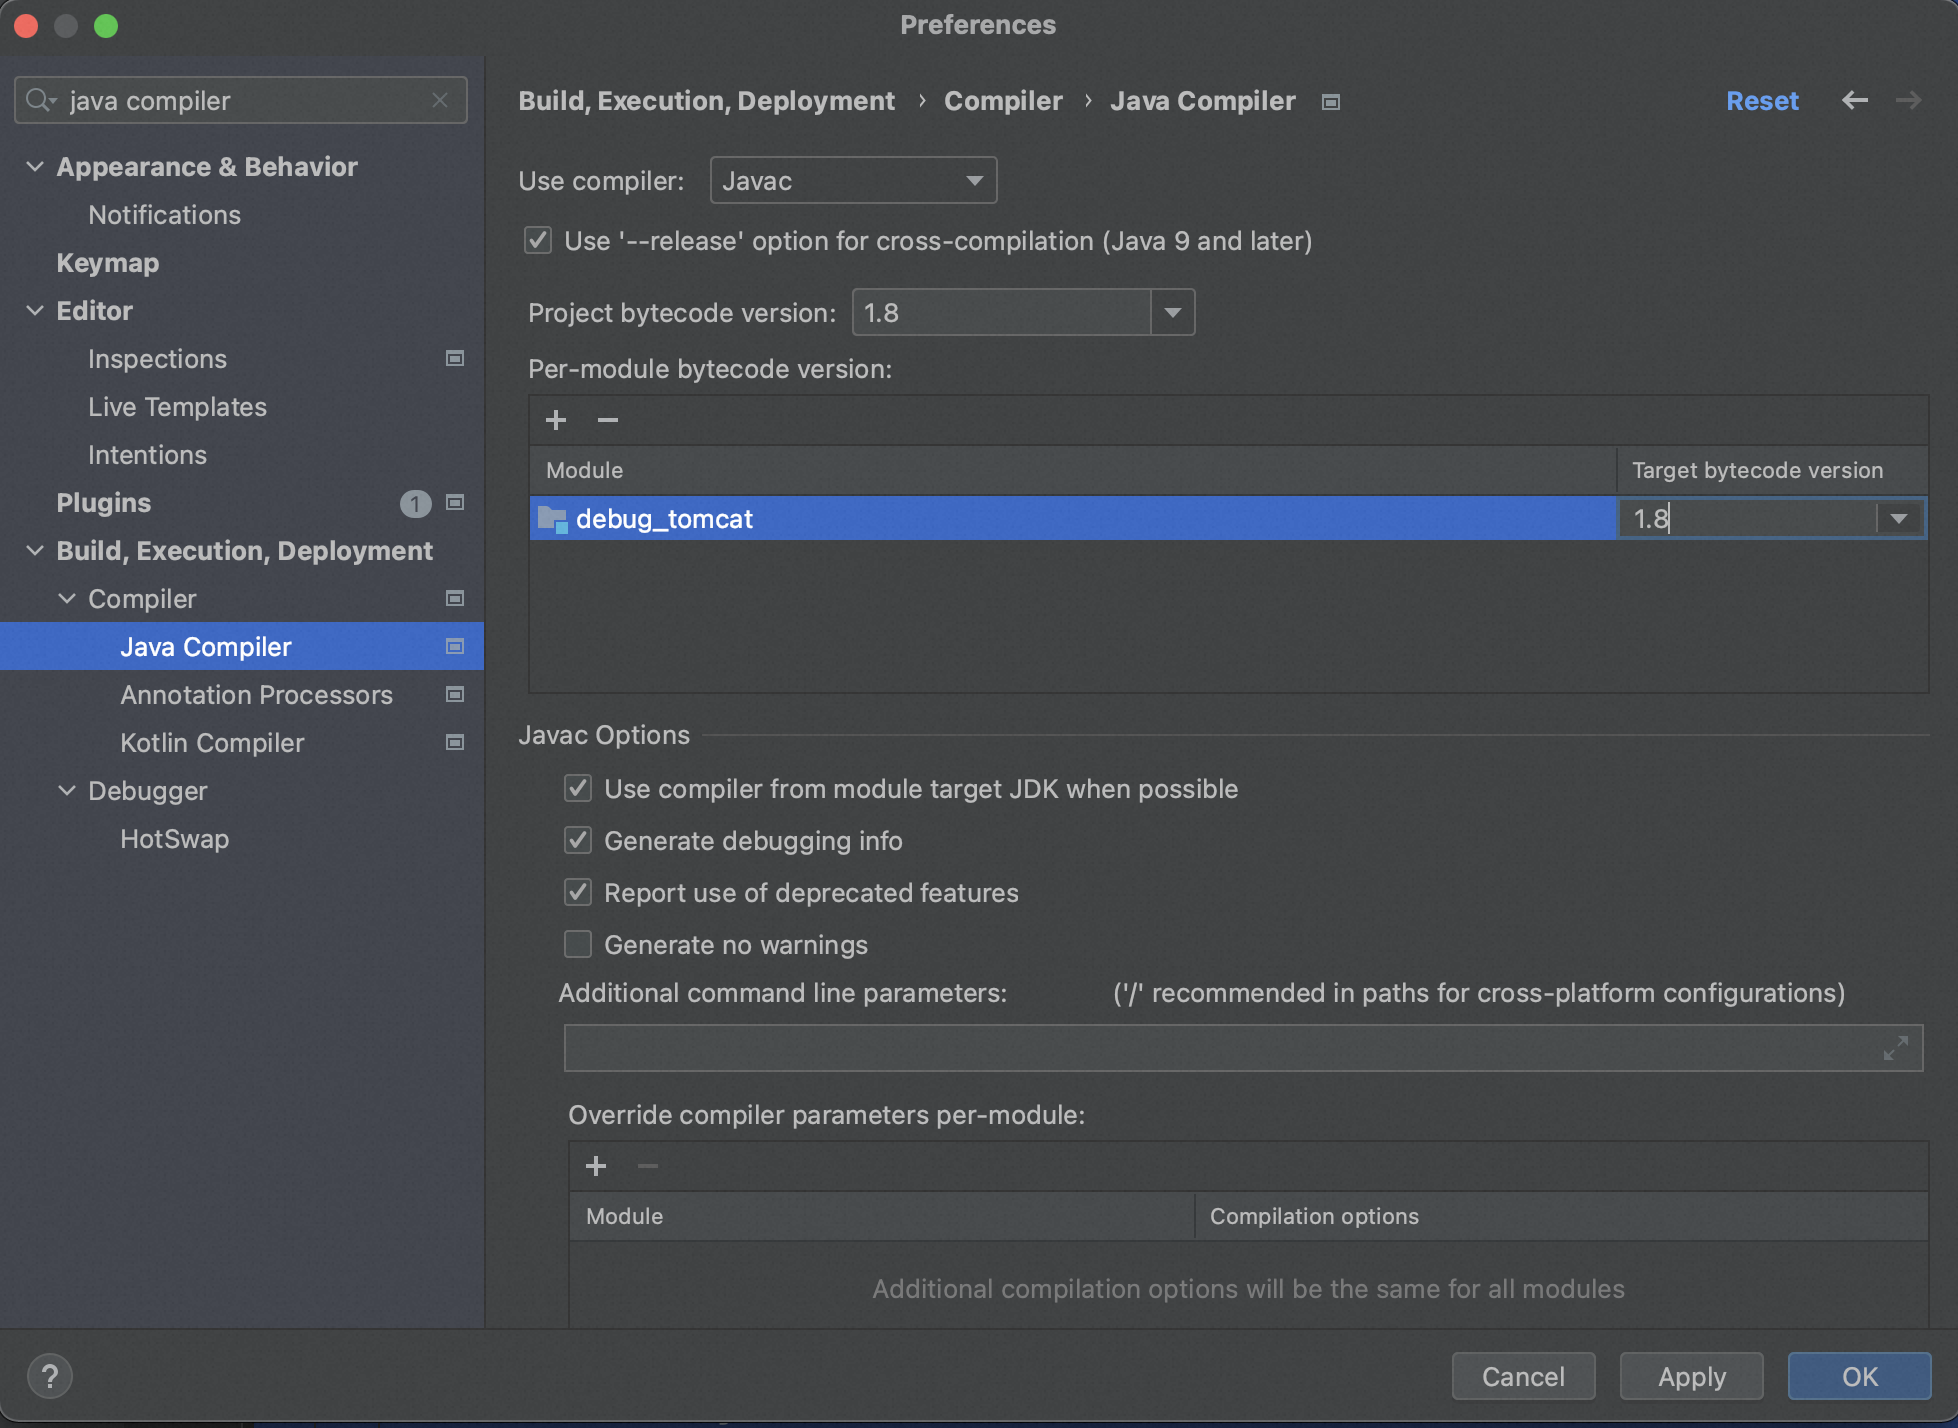
配置File->setting-> java compiler,
project bytecode version和jdk版本要一致,
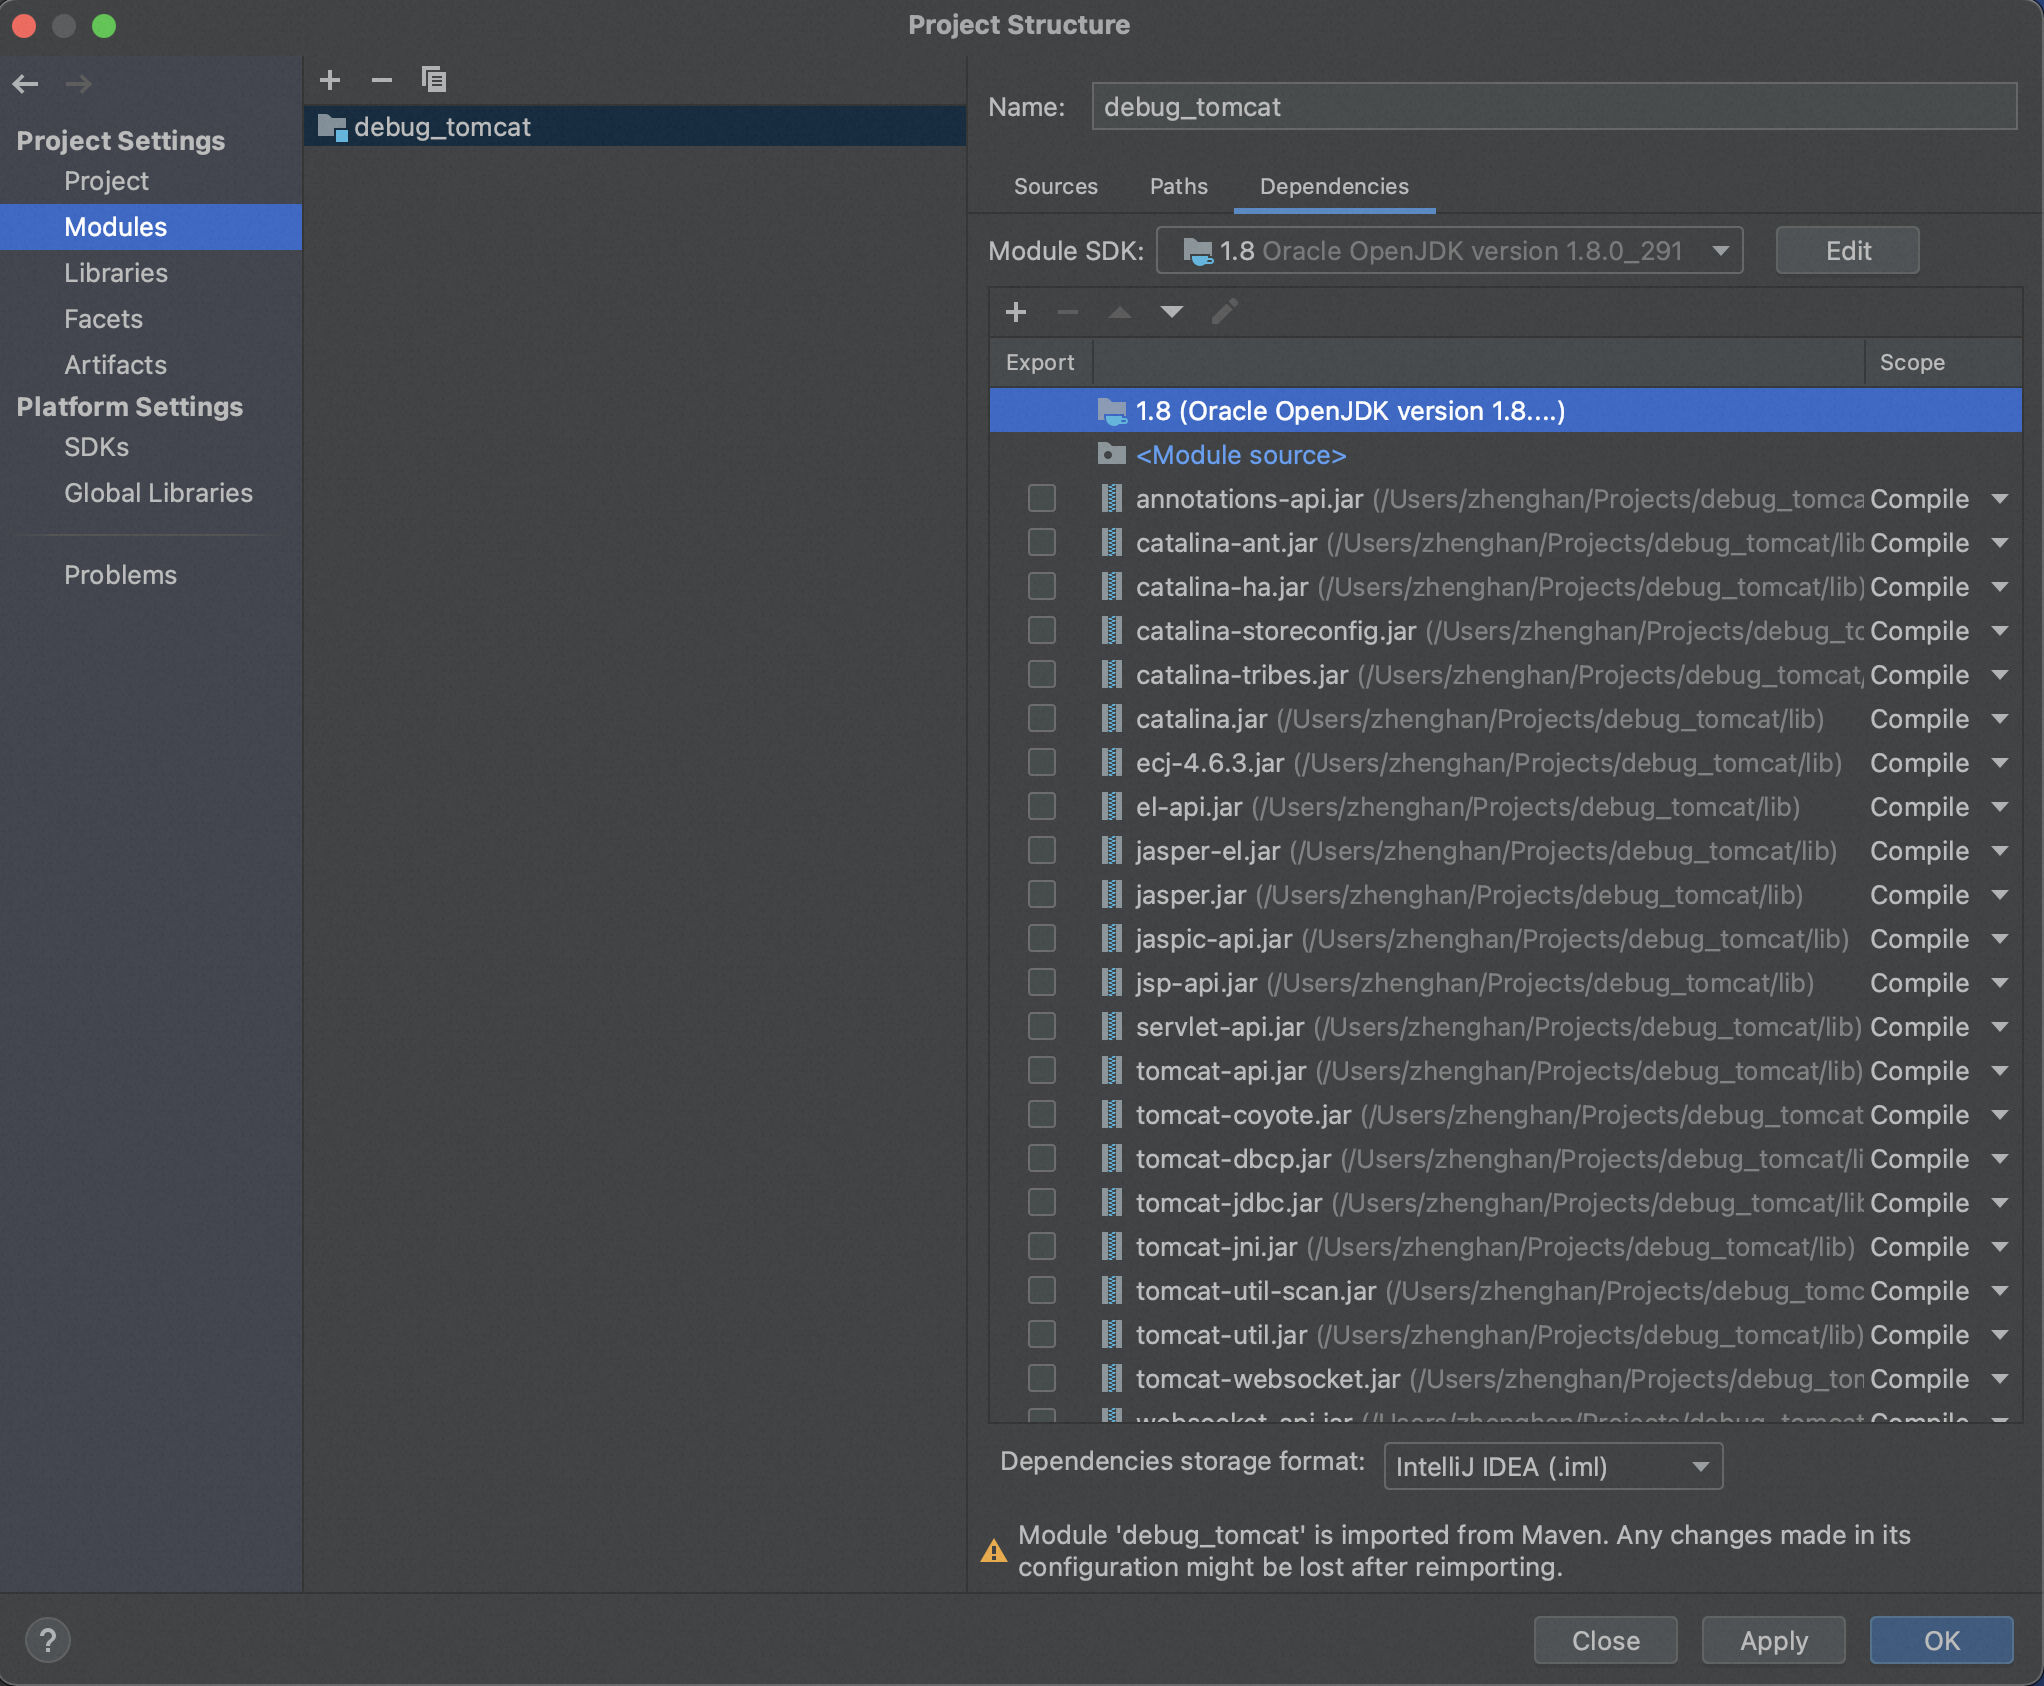
File->project structure->modules,先设置module sdk版本,和你的jdk版本一直,同时引入刚才复制到根目录的lib包中所有jar。
test模块会报错,删掉就行,

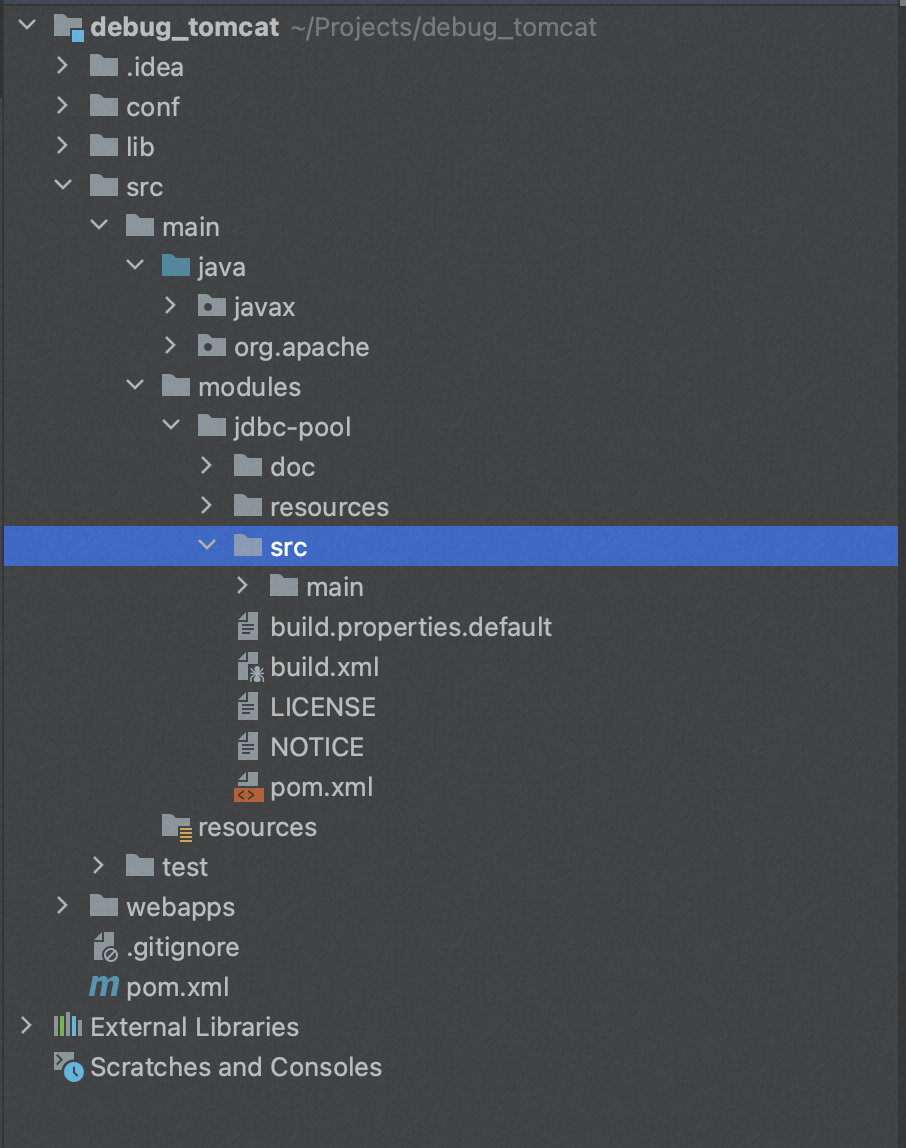
然后就可以配置启动程序了。
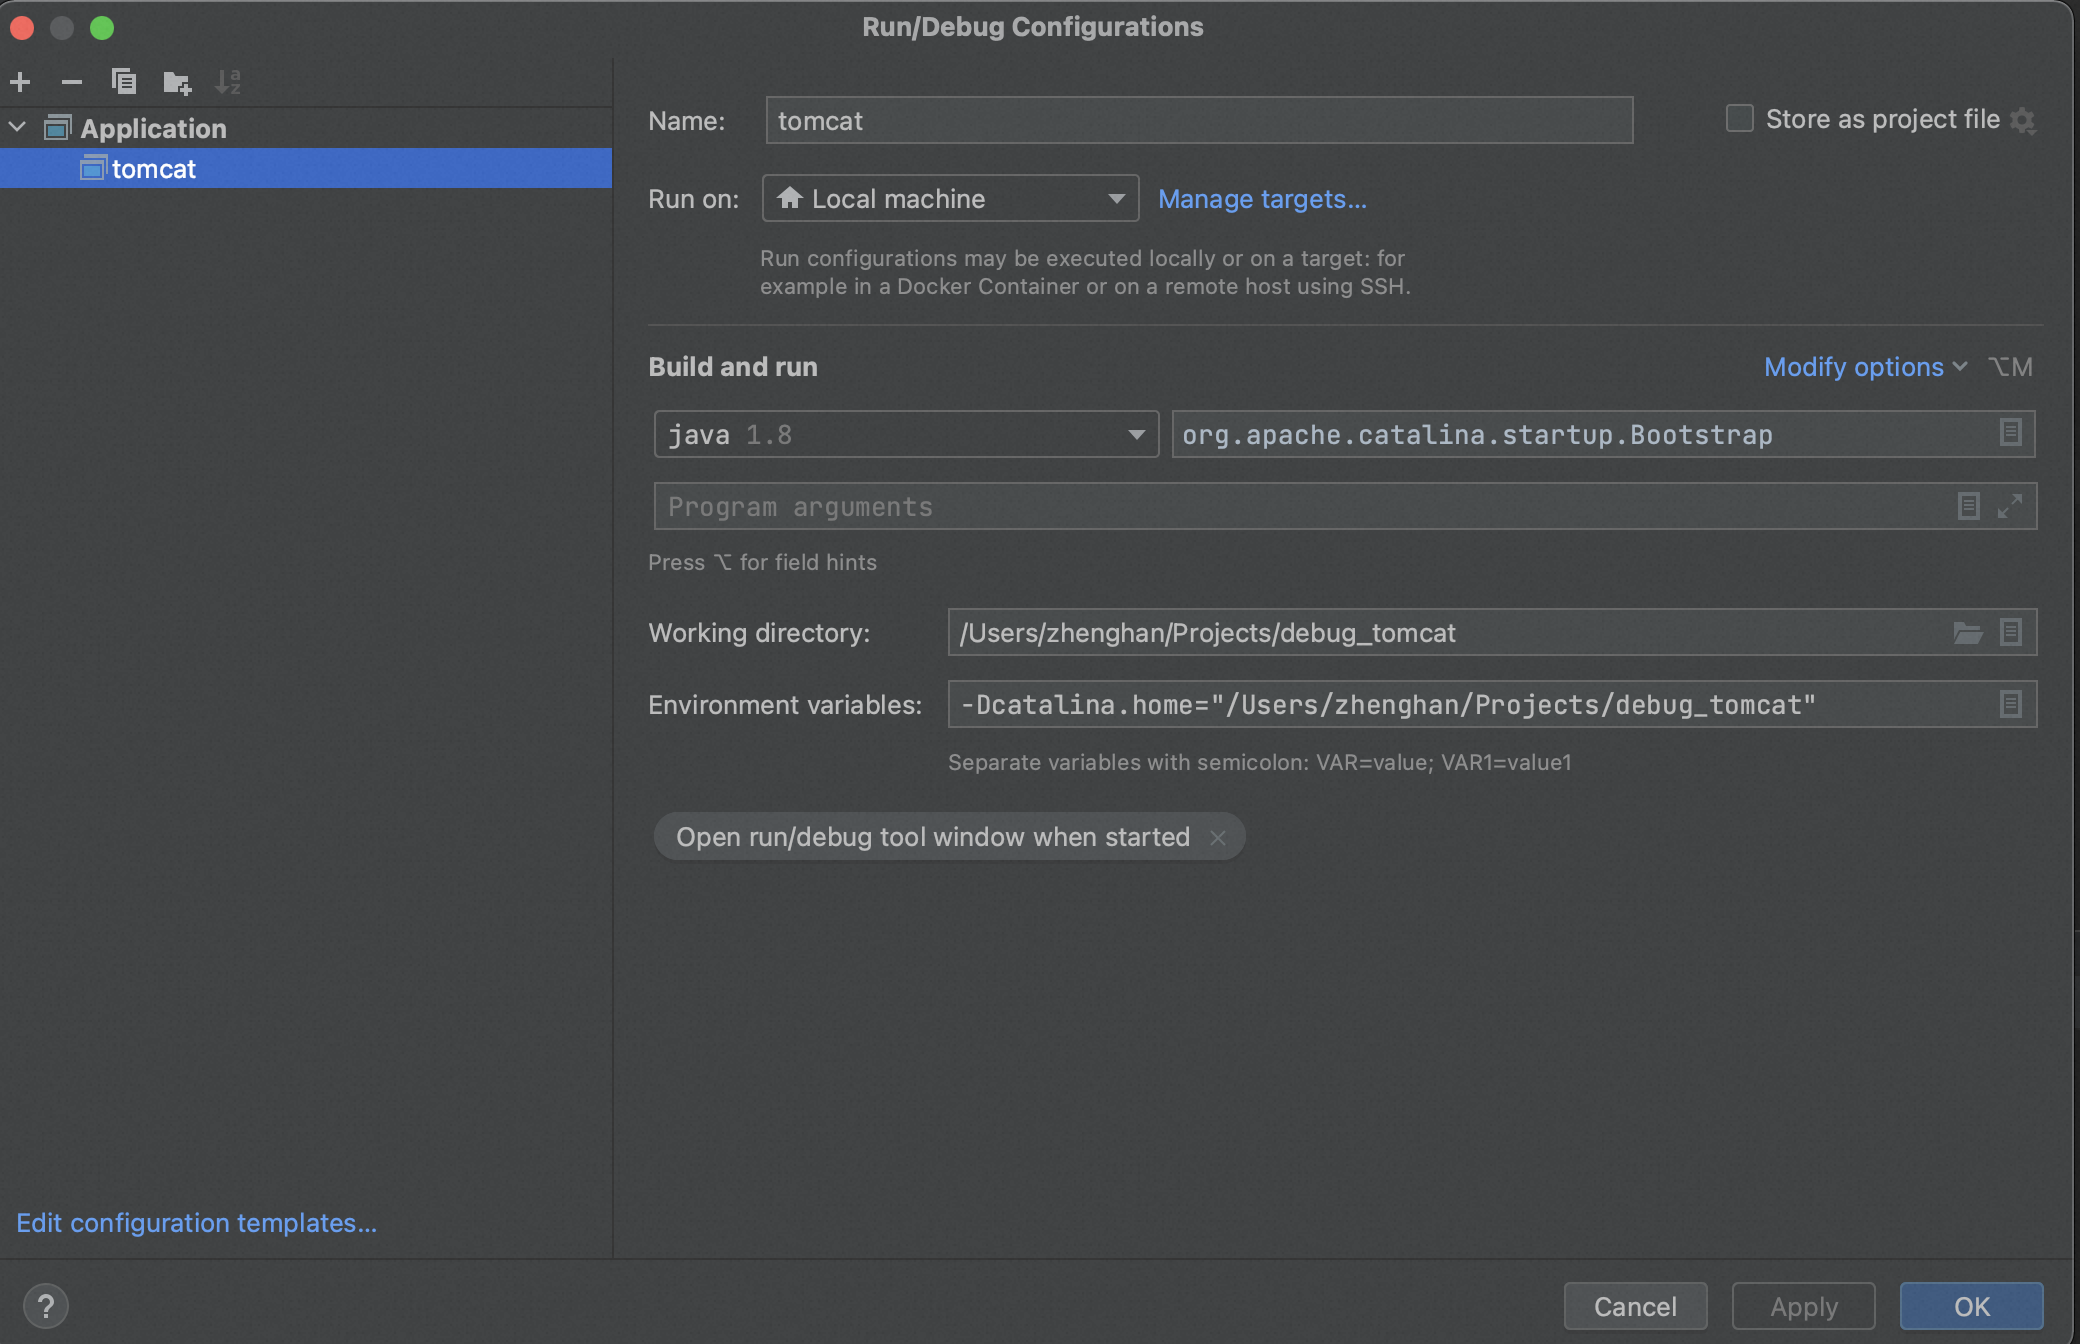
Run->Edit Configurations点击加号,增加Application,如下图配置
- org.apache.catalina.startup.Bootstrap
- -Dcatalina.home="/Users/zhenghan/Projects/debug_tomcat"(你的项目路径)
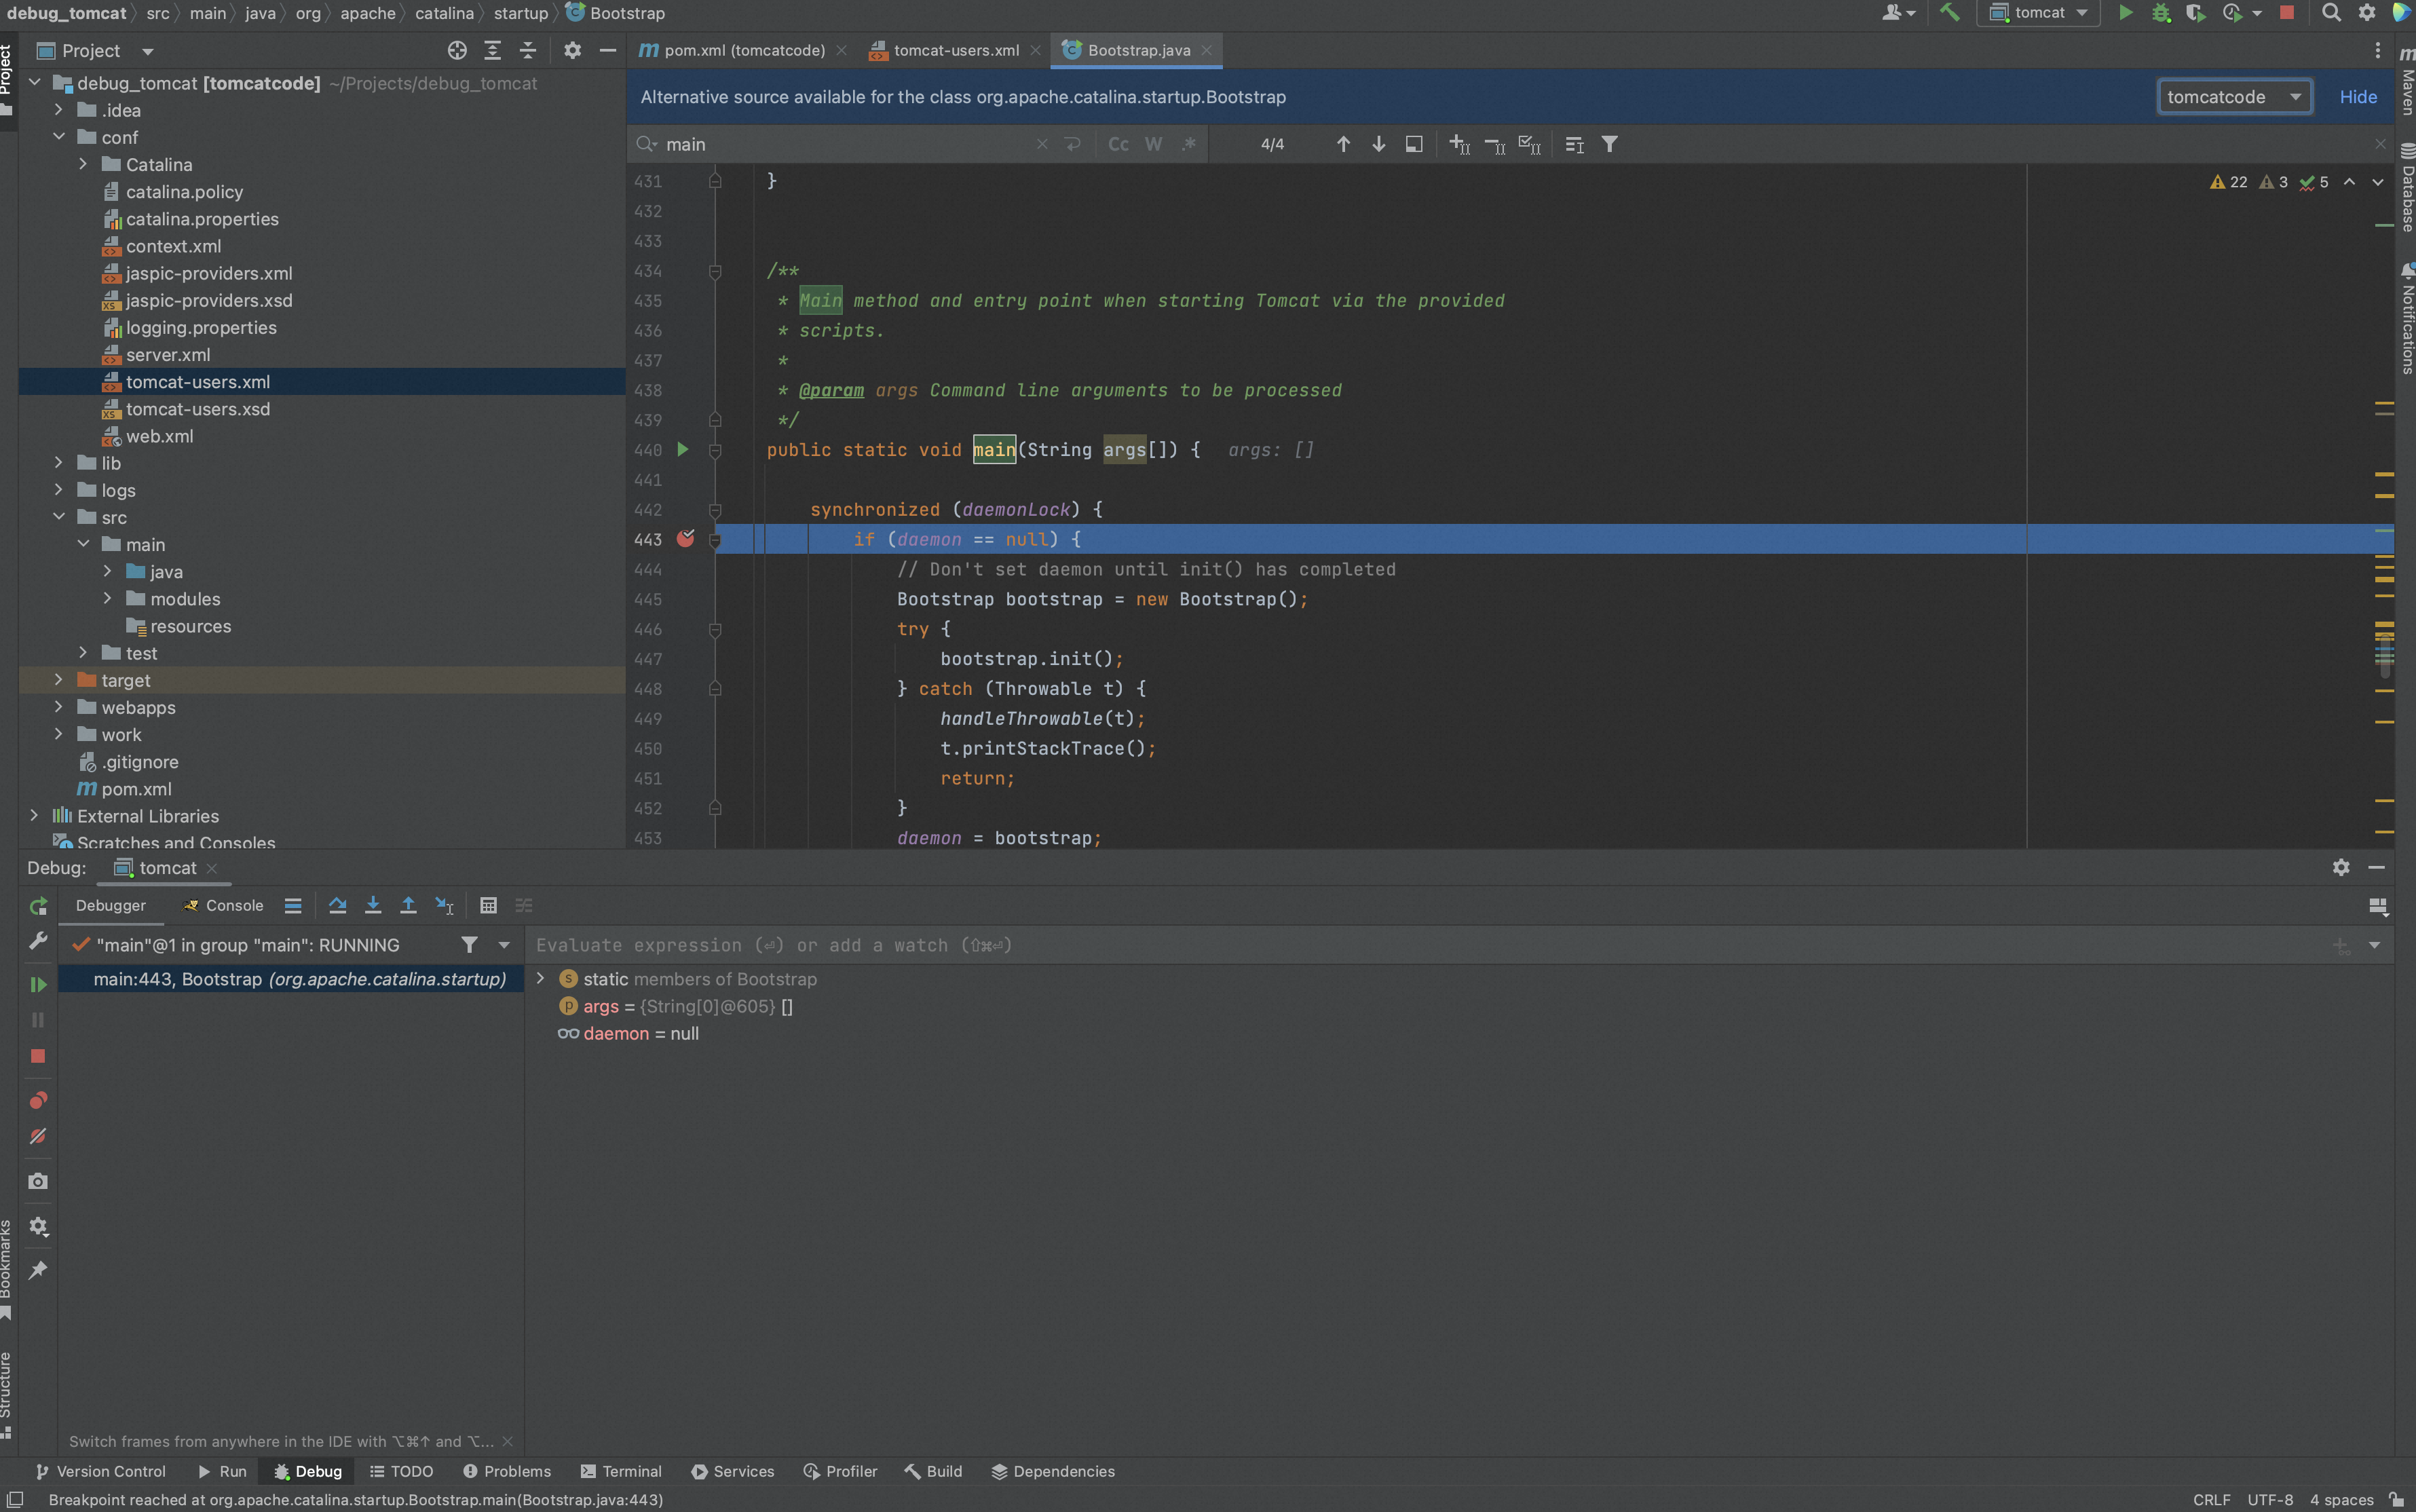
最后,启动tomcat,访问http://127.0.0.1:8080/


访问成功,就可以在Bootstrap类,main方法中打断点了。
参考链接:
https://zhuanlan.zhihu.com/p/35454131
https://developer.aliyun.com/article/666276
https://www.cnblogs.com/huim/p/16614196.html
https://blog.csdn.net/qq_35262405/article/details/101780644


 浙公网安备 33010602011771号