

yii2 RESTful API Develop
参考文档:http://www.yiiframework.com/doc-2.0/guide-rest.html
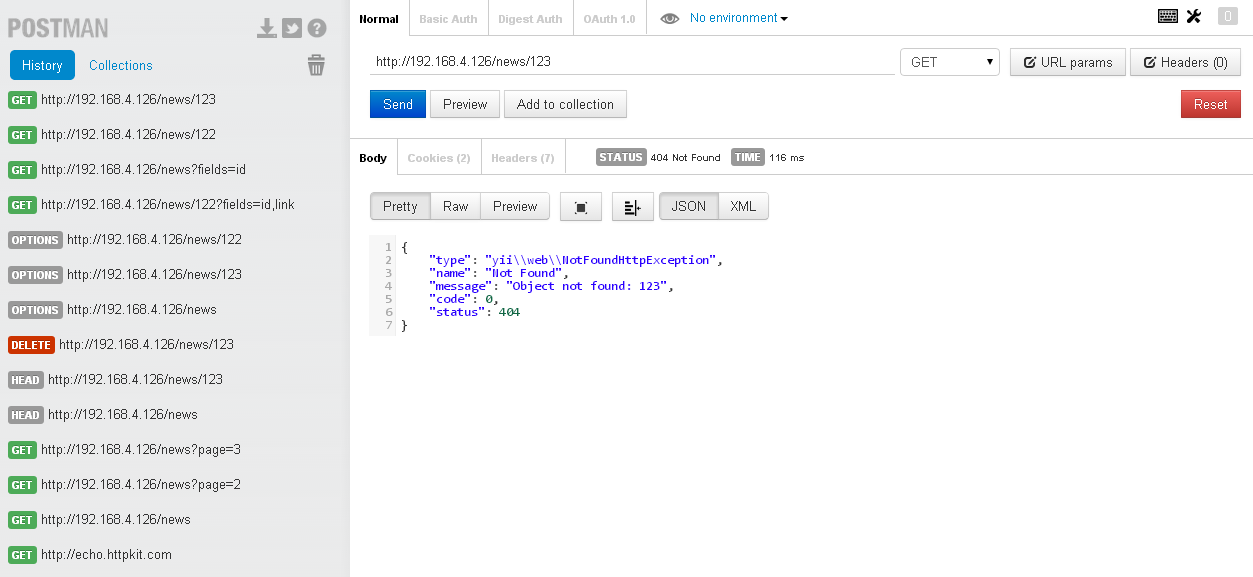
以 DB 中的 news 表为例创建该资源的 RESTful API,最终的测试通过工具 POSTMAN 测试如下图;
通过 yii2 ,非常方便的创建 RESTful API
步骤:
- 准备工作,配置友好的 URLManager
- 创建News Model (via gii)
- 创建News Controller
- 测试
- 高级
1. 配置 friendly Url
参看另一篇文章 http://www.cnblogs.com/ganiks/p/yii2-config.html
		'urlManager' => [
			'enablePrettyUrl' => true,
			'showScriptName' => false,
			'enableStrictParsing' => true,
			'rules' => [
				'<controller:\w+>/<id:\d+>' => '<controller>/view',
				'<controller:\w+>/<action:\w+>/<id:\d+>' => '<controller>/<action>',
				'<controller:\w+>/<action:\w+>' => '<controller>/<action>',
				['class' => 'yii\rest\UrlRule', 'controller' => ['user', 'news']],
			],
		]
原创文章,转载请注明 http://www.cnblogs.com/ganiks/
.htaccess 不要遗漏
2. 创建 News Model
3. 创建 News Controller
<?php

namespace app\controllers;

use yii\rest\ActiveController;

class NewsController extends ActiveController
{
    public $modelClass = 'app\models\News';
}
4. 用Chrome工具 POSTMAN 测试
GET /news: list all news page by page;
HEAD /news: show the overview information of new listing;
POST /news: create a new new;
GET /news/123: return the details of the new 123;
HEAD /news/123: show the overview information of new 123;
PATCH /news/123 and PUT /news/123: update the new 123;
DELETE /news/123: delete the new 123;
OPTIONS /news: show the supported verbs regarding endpoint /news;
OPTIONS /news/123: show the supported verbs regarding endpoint /news/123.
5. Restful Api 验证和授权
首先参看我的另一篇译文 http://www.cnblogs.com/ganiks/p/Yii2-RESTful-Authentication-and-Authorization.html
官方文档中介绍了3种发送 access-token 的方法, 方便测试的有 http basic Auth 以及 Query parameter 两种
这里简单介绍下配置的流程:
-
config/web.php 设置
enableSession'user' => [ 'identityClass' => 'app\models\User', 'enableAutoLogin' => true, 'enableSession' => false, ] -
controllers/news.php
use yii\filters\auth\HttpBasicAuth; use yii\helpers\ArrayHelper; use yii\filters\auth\CompositeAuth; use yii\filters\auth\HttpBearerAuth; use yii\filters\auth\QueryParamAuth; public function behaviors() { return ArrayHelper::merge(parent::behaviors(), [ 'authenticator' => [ #这个地方使用`ComopositeAuth` 混合认证 'class' => CompositeAuth::className(), #`authMethods` 中的每一个元素都应该是 一种 认证方式的类或者一个 配置数组 'authMethods' => [ HttpBasicAuth::className(), HttpBearerAuth::className(), QueryParamAuth::className(), ] ] ]); } -
models/User.php
    private static $users = [
        '100' => [
            'id' => '100',
            'username' => 'admin',
            'password' => 'admin',
            'authKey' => 'test100key',
            'accessToken' => '100-token',
        ],
        '101' => [
            'id' => '101',
            'username' => 'demo',
            'password' => 'demo',
            'authKey' => 'test101key',
            'accessToken' => '101-token',
        ],
    ];
    public static function findIdentityByAccessToken($token, $type = null)
    {
        foreach (self::$users as $user) {
            if ($user['accessToken'] === $token) {
                return new static($user);
            }
        }

    return null;
}
两种方式测试一下:
- 访问 http://192.168.4.126/news/122 ,在弹出的登录对话框中输入用户名
100-token 或者 101-token, 密码任意,登录 - 直接访问 http://192.168.4.126/news/122?access-token=101-token

 浙公网安备 33010602011771号