

identity server 4
1.简介
IdentityServer4 是为ASP.NET Core系列量身打造的一款基于 OpenID Connect 和 OAuth 2.0 认证授权框架。
官方文档:https://identityserver4.readthedocs.io/en/latest/
框架源码:https://github.com/IdentityServer/IdentityServer4
IdentityServer主要使用场景:
1)基于中台认证中心的saas系统/pass系统的单点登录或者做为统一认证授权入口(授权模式:授权码模式Authorization Code或者混合模式hybrid);
2)用于API服务与API服务之间的固定token通讯,或者某业务系统服务群集与其他业务系统的服务群集之间通信,或者某业务系统群集服务与中台服务群集之间通信,所使用的授权模式为客户端模式Client Credential;
3)用于移动客户端与API服务之间通信,授权码模式为自定义授权码。
4)用于给第三方客户端授权使用平台数据资源,类似微信、支付宝等用户授权给。主要授权模式为权码模式Authorization Code
2.Identity Server入门demo
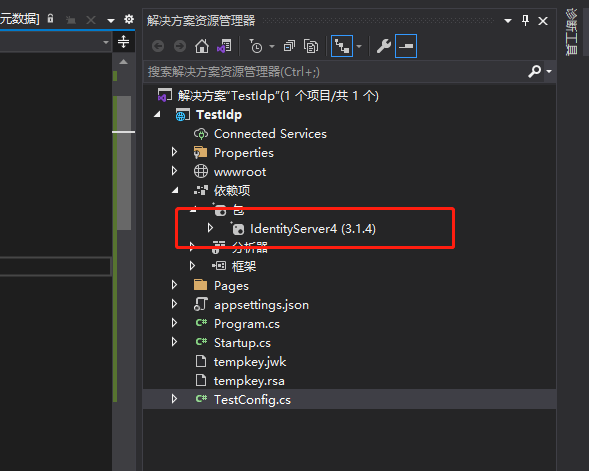
新建.net core 3.1项目,nuget安装IdentityServer4,我这里是3.14版本
正常来说,商业业务,Api资源、Client客户端、Identity资源、User等数据存储在数据库,token可以存储在数据库也可以存储到redis,这里为了入门演示,使用内存模式,快速搭建。
定义一个类,创建API资源,客户端client,我们这里只使用客户端模式授权,篇幅问题,其他授权方式就不一一写了,基本都差不多
|
1
2
3
4
5
6
7
8
9
10
11
12
13
14
15
16
17
18
19
20
21
22
23
24
25
26
27
28
29
30
31
32
33
34
35
36
37
38
39
40
41
42
43
44
45
46
47
48
49
50
51
52
53
54
55
56
57
58
59
60
61
62
63
64
65
66
67
68
69
70
71
72
|
public class TestConfig { /// <summary> /// Api资源 /// </summary> /// <returns></returns> public static IEnumerable<ApiResource> GetApiResources() { return new List<ApiResource> { new ApiResource(){ Name = "myapi", ApiSecrets= new List<Secret>(){ new Secret(){ Description = "secret", Value = "secret".Sha256() } }, Scopes = new List<Scope>(){ new Scope(){ Name = "apim" } } }, }; } /// <summary> /// client /// </summary> /// <returns></returns> public static IEnumerable<Client> GetClients() { return new List<Client> { new Client() { ClientId="client",//定义客户端ID //AllowedGrantTypes = new List<string>() //{ // GrantTypes.ResourceOwnerPassword.FirstOrDefault(), // GrantType.ClientCredentials, // GrantType.Hybrid //}, //必须是单个指定授权类型,可能是内存模式问题。 AllowedGrantTypes = GrantTypes.ClientCredentials, // 用于认证的密码 ClientSecrets = { new Secret("secret".Sha256()) }, AllowedScopes= {"apim"}, AccessTokenLifetime = 360000000 }, }; } public static List<TestUser> GetTestUsers() { return new List<TestUser> { new TestUser() { SubjectId = "1", Username = "test", Password = "123456" } }; } } |
在启动类注入
|
1
2
3
4
5
6
7
8
9
10
11
12
|
public void ConfigureServices(IServiceCollection services) { services.AddRazorPages(); #region 内存方式 services.AddIdentityServer() .AddDeveloperSigningCredential()//添加证书加密方式,执行该方法,会先判断tempkey.rsa证书文件是否存在,如果不存在的话,就创建一个新的tempkey.rsa证书文件,如果存在的话,就使用此证书文件。 .AddInMemoryApiResources(TestConfig.GetApiResources())//把受保护的Api资源添加到内存中 .AddInMemoryClients(TestConfig.GetClients())//客户端配置添加到内存中 .AddTestUsers(TestConfig.GetTestUsers())//测试的用户添加进来 .AddDeveloperSigningCredential(); #endregion }<br><br> |
|
1
2
3
4
5
6
7
8
9
10
11
12
13
14
15
16
17
18
19
20
21
22
23
24
|
public void Configure(IApplicationBuilder app, IWebHostEnvironment env) { if (env.IsDevelopment()) { app.UseDeveloperExceptionPage(); } else { app.UseExceptionHandler("/Error"); } app.UseStaticFiles(); app.UseRouting();<br> //添加中间件 //这个必须在UseRouting和UseEndpoints中间。如果IdentityServer服务端和API端要写在一起, //那么这个必须在UseAuthorization和UseAuthentication的上面。 app.UseIdentityServer(); app.UseAuthorization(); app.UseEndpoints(endpoints => { endpoints.MapRazorPages(); }); } |
然后启动服务,使用postman访问identity server 4默认的endpoint地址发现文档:

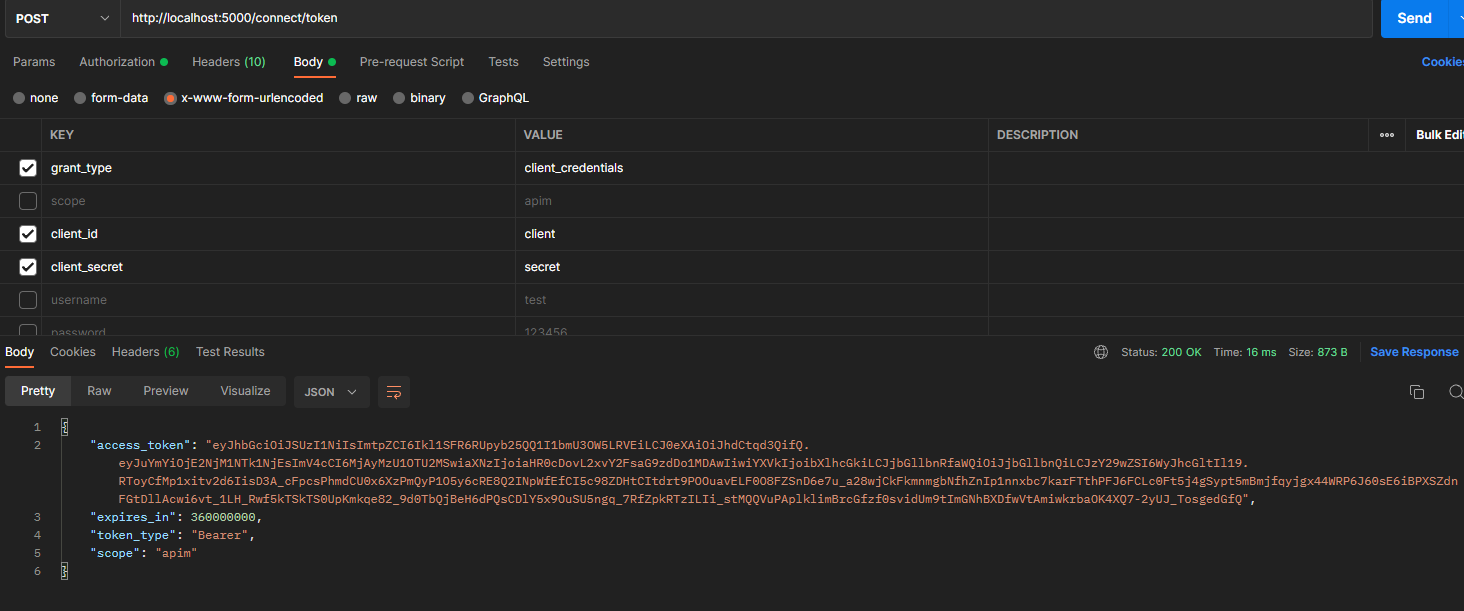
使用identityServer4的发现文档中的token_endpoint获取token
token已经获取了,可以使用发现文档里的introspection_endpoint来验证token

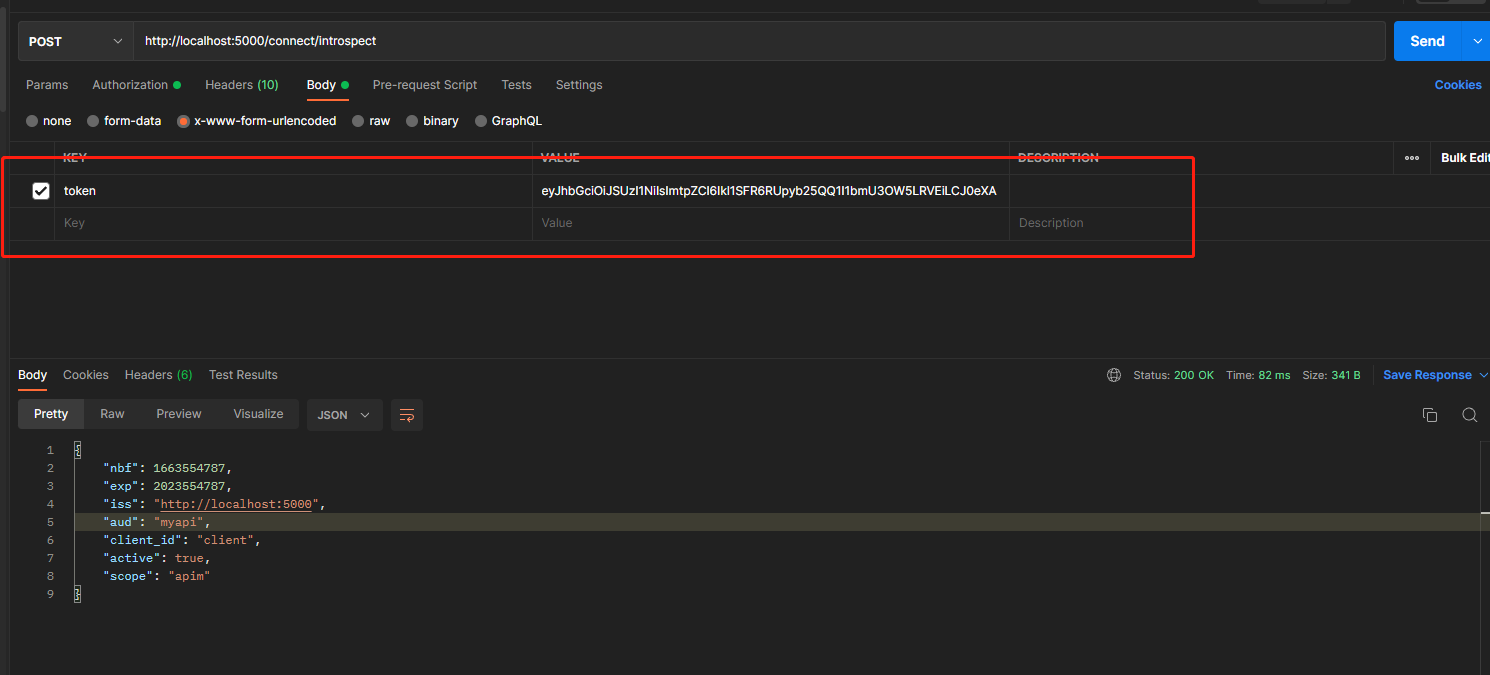
上图可见,我们已经为client客户端,创建了一个拥有访问scope为apim权限的token
接下来,创建一个受保护的api服务,同样创建一个.net core 3.1服务,并nuget包安装Microsoft.AspNetCore.Authentication.JwtBearer,选择3.14版本,根据.net core版本来
在启动类中,配置认证和授权DI,和添加认证授权中间件:
|
1
2
3
4
5
6
7
8
9
10
11
12
13
14
15
16
17
18
19
20
21
22
23
24
25
26
27
28
29
30
31
32
33
34
35
36
37
38
39
40
41
42
43
44
45
46
47
48
49
50
51
52
53
54
55
56
57
58
59
60
61
62
63
64
65
66
67
68
69
70
71
72
73
74
75
76
77
78
79
80
81
82
83
|
public class Startup { // This method gets called by the runtime. Use this method to add services to the container. // For more information on how to configure your application, visit https://go.microsoft.com/fwlink/?LinkID=398940 readonly string MyAllowSpecificOrigins = "_myAllowSpecificOrigins"; public void ConfigureServices(IServiceCollection services) { //配置认证 services.AddAuthentication("Bearer") .AddJwtBearer(options => { options.Authority = "http://localhost:5000";//刚才启动的授权认证服务 options.RequireHttpsMetadata = false; options.TokenValidationParameters = new TokenValidationParameters //不验证jwt的aud信息 { ValidateAudience = false }; }); // 配置授权策略 services.AddAuthorization(options => { //定义授权策略,这个名字可以随便起 options.AddPolicy("ApiScope", policy => { policy.RequireAuthenticatedUser(); // policy.RequireClaim("scope", "apim");//策略需要scope有apim }); options.AddPolicy("ApiScope2", policy => { policy.RequireAuthenticatedUser(); // policy.RequireClaim("scope", "apim2"); }); }); services.AddSingleton<IHttpContextAccessor, HttpContextAccessor>(); services .AddCors(options => { options.AddPolicy(MyAllowSpecificOrigins, builder => builder.AllowAnyOrigin() .WithMethods("GET", "POST", "HEAD", "PUT", "DELETE", "OPTIONS") ); }).AddMvc(); services.AddControllers(); } // This method gets called by the runtime. Use this method to configure the HTTP request pipeline. public void Configure(IApplicationBuilder app, IWebHostEnvironment env) { if (env.IsDevelopment()) { app.UseDeveloperExceptionPage(); } app.Use((context, next) => { context.Request.EnableBuffering(); return next(); }); app.UseRouting(); //跨域设置 app.UseCors(MyAllowSpecificOrigins); //身份验证中间件 (身份验证必须在授权的前面) app.UseAuthentication(); //授权验证中间件 app.UseAuthorization(); app.UseEndpoints(endpoints => { endpoints.MapControllers(); }); app.UseEndpoints(endpoints => { endpoints.MapGet("/", async context => { await context.Response.WriteAsync("Hello World!"); }); }); } } |
写2个接口
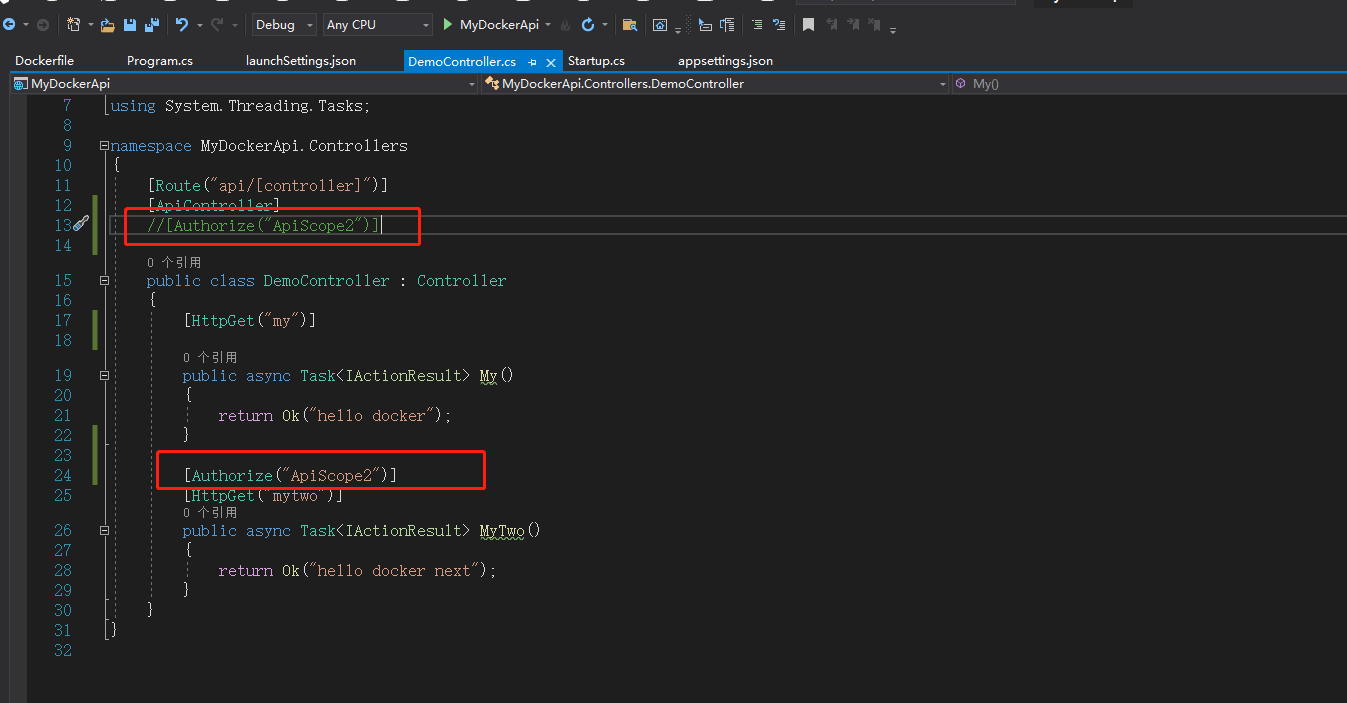
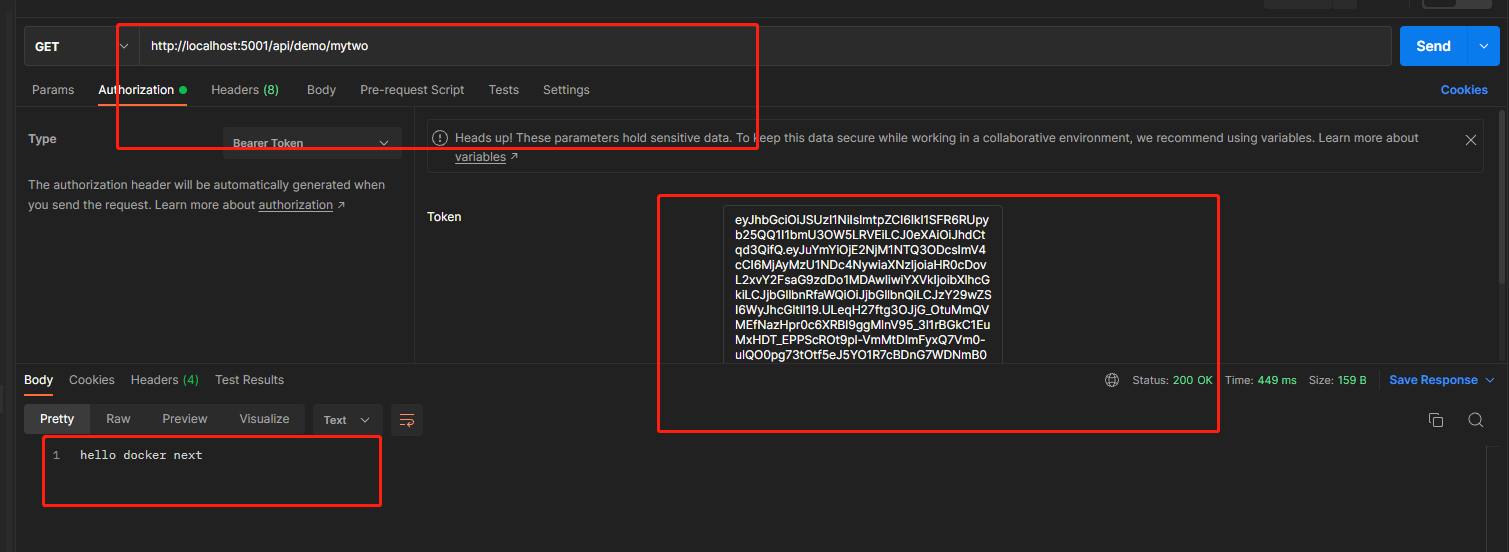
注意,Authorize标签可生效于类或者方法上,,根据不同的授权策略来合理安排需要保护的资源。最后,可以用刚才的token来访问这个API,,如果token错误会401,如果根据授权策略的不同,比如mytwo接口受到apiScope2策略保护,apiScope2策略需要apim2这个scope权限,因为刚才我们获取的token只包含apim这个scope权限,所以访问会返回403权限不足,大家可以去试试,我试过了就不贴图。
至此demo结束,大家可以去试试其他模式的获取token方式
3.IdentityServer4的数据存储
商业级项目,授权资源是需要持久化存储的,官方已经提供了基于ef core的来维护我们授权资源和token的管理模型、上下文、仓储接口等,具体我就不写了,推荐参考这篇文章.net core 3.1 Identity Server4 (EntityFramework Core 配置) - 尘叶心繁的专栏 - TNBLOG。下面贴几张基于Identity Server4 EFCore包管理的APIResource、Client、Identity资源、Token的相关代码简介

services.AddIdentityServer()
                    .AddConfigurationStore(options =>  //注入idenity相关资源上下文
                    {
                        options.ResolveDbContextOptions = (provider, builder) =>
                        {
                            builder.UseSqlServer(Configuration.GetSection("Database:ConnectString").Value,
                                sql => sql.MigrationsAssembly(migrationsAssembly));
                        };
                    })
                    .AddOperationalStore(options =>  //注入Token管理上下文
                    {
                        options.ConfigureDbContext = builder =>
                            builder.UseSqlServer(Configuration.GetSection("Database:ConnectString").Value,
                                sql => sql.MigrationsAssembly(migrationsAssembly));
                        options.EnableTokenCleanup = true;
                        options.TokenCleanupInterval = 3600;
                    })
                   .AddDeveloperSigningCredential();
   private ConfigurationDbContext _dbContext;
        private PersistedGrantDbContext _grantdbContext; //这个就是identity资源上下文
        private IOptions<IdentityOption> _identityOption; //这个就是token上下文
        private IMediator _mediator;
        public ClientManager(ConfigurationDbContext dbContext, IOptions<IdentityOption> identityOption, PersistedGrantDbContext grantdbContext, IMediator mediator)
        {
            _dbContext = dbContext;
            _identityOption = identityOption;
            _grantdbContext = grantdbContext;
            _mediator = mediator;
        }
下面是部分Client客户端管理代码
 View Code
下面以部分token管理代码
View Code下面还有一段关于修改token过期时间的代码
View Code再来一段自定义授权模式代码
View CodeIdentityServer4还可以扩展endpoint,但是扩展完后,在发现文档不显示,但是可以作为http使用,以下代码截图供参考

4.结尾
identityServer4要写的东西实在太多,整体的把握理解还是有一定的复杂性的,我之前公司一个pass平台项目,是基于认证中心,其他业务系统实现快速集成,我当时负责的就是授权资源、token管理,还有对IDP的授权类型、endpoint一些扩展,现在总结成博客,写的不是很细,希望对后来者带来一些帮助和参考意义。

 浙公网安备 33010602011771号