

Introduction
This series of blog posts is an exploration of how to achieve multi-tenancy in an ASP.NET Core web application. There’s a lot of code snippets so you can follow along with your own sample app. There’s no NuGet package you can plug and play at the end of this but it is a great learning exercise. It touches a few “core” (sorry, not sorry) parts of the framework 😉
In this part of the series we resolve a request to a tenant and introduce the ability to access information about that tenant.
2019-12-03: This post is compatible with .NET Core 3.1 which is a LTS release
Parts in the series
- Part 1: Tenant resolution (this post)
- Part 2: Tenant containers
- Part 3: Options configuration per tenant
- Part 4: Authentication per tenant
- Extra: Upgrading to .NET Core 3.1 (LTS)
What is a multi-tenant app exactly?
It’s a single codebase that responds differently depending on which “tenant” is accessing it, there’s a few different patterns you can use like
- Application level isolation: Spin up a new website and associated dependencies for each tenant
- Multi-tenant app each with their own database: Tenants use the same website, but have their own database
- Multi-tenant app with multi-tenant database: Tenants use the same website and the same database (need to be careful about not exposing data to the wrong tenant!!)
Here’s a great in-depth guide about each pattern. In this series we are exploring the multi-tenant app option.
What’s required in a multi-tenat app?
There’s a few core requirements a multi-teant app will need to meet.
Tenant resolution
From the HTTP Request we will need to be able to decide which tenant context to run the request under. This impacts things like which database to access, or what configuration to use.
Per-tenant app configuration
The application might be configured differently depending on which tenant context is loaded, e.g. Authentication keys for OAuth providers, connection strings etc.
Per-tenant data isolation
A tenant will need to be able to access their data, and their data alone. This could be achieved by partitioning data within a single datastore or by using a datastore per-tenant. Whatever pattern we use we should make it difficult for a developer to expose data in cross tenant scenarios to avoid coding errors.
Tenant resolution
With any multi-tenant application we need to be able to identify which tenant a request is running under, but before we get too excited we need to decide what data we require to be able to look up a tenant. We really just need one piece of information at this stage, the tenant identifier.
/// <summary>
/// Tenant information
/// </summary>
public class Tenant
{
    /// <summary>
    /// The tenant Id
    /// </summary>
    public string Id { get; set; }

    /// <summary>
    /// The tenant identifier
    /// </summary>
    public string Identifier { get; set; }

    /// <summary>
    /// Tenant items
    /// </summary>
    public Dictionary<string, object> Items { get; private set; } = new Dictionary<string, object>();
}
We will use the Identifier to match a tenant based on our resolution strategy (Might be the tenat’s domain name like https://{tenant}.myapplication.com).
We will use the Id as a durable reference to the tenant (the Identifier may change e.g. the host domain changes).
The property Items is just there to let develops add other things to the tenant during the request pipeline, they could also extend the class if they want specific properties or methods.
Common tenant resolution strategies
We will use a resolution strategy to match a request to a tenant, the strategy should not rely on any external data to make it nice and fast.
Host header
The tenant will be inferred based on the host header sent by the browser, this is perfect if all your tenants have different domains e.g. https://host1.example.com, https://host2.example.com or https://host3.com if you are supporting custom domains.
E.g. if the host header was https://host1.example.com we would load the Tenant with the Identifier holding the value host1.example.com.
Request Path
The tenant could be inferred based on the route, e.g. https://example.com/host1/...
Header value
The tenant could be inferred based on a header value e.g. x-tenant: host1, this might be useful if all the tenants are accessable on a core api like https://api.example.com and the client can specify the tenant to use with a specific header.
Defining the tenant resolution strategy
To let the application know which strategy to use we should be able to implement a ITenantResolutionStrategy service which resolves the request into a tenant identifier.
public interface ITenantResolutionStrategy
{
    Task<string> GetTenantIdentifierAsync();
}
In this post, we will implement a strategy which resolves the tenant from the host.
/// <summary>
/// Resolve the host to a tenant identifier
/// </summary>
public class HostResolutionStrategy : ITenantResolutionStrategy
{
    private readonly IHttpContextAccessor _httpContextAccessor;

    public HostResolutionStrategy(IHttpContextAccessor httpContextAccessor)
    {
        _httpContextAccessor = httpContextAccessor;
    }

    /// <summary>
    /// Get the tenant identifier
    /// </summary>
    /// <param name="context"></param>
    /// <returns></returns>
    public async Task<string> GetTenantIdentifierAsync()
    {
        return await Task.FromResult(_httpContextAccessor.HttpContext.Request.Host.Host);
    }
}
Tenant storage
Now we know which tenant to load, where do we fetch it from? That will need to be some kind of tenant store. We will need to implement a ITenantStore which accepts the tenant identifier and returns the Tenant information.
public interface ITenantStore<T> where T : Tenant
{
    Task<T> GetTenantAsync(string identifier);
}
Why’d I make the store generic? Just incase we wanted more application specific tenant info in the project that uses our library - we can just extend tenant to have any other properties that we need at the application level and configure the store appropriately
If you want to store things like connection strings against a tenant it will need to be somewhere secure and probably best to use the Options configuration per tenant pattern and load those strings from somewhere secure like Azure Key Vault.
In this post we are going to just do a hard-coded in-memory implentation for our tenant store for simplicity.
 /// <summary>
/// In memory store for testing
/// </summary>
public class InMemoryTenantStore : ITenantStore<Tenant>
{
    /// <summary>
    /// Get a tenant for a given identifier
    /// </summary>
    /// <param name="identifier"></param>
    /// <returns></returns>
    public async Task<Tenant> GetTenantAsync(string identifier)
    {
        var tenant = new[]
            {
                new Tenant{ Id = "80fdb3c0-5888-4295-bf40-ebee0e3cd8f3", Identifier = "localhost" }
            }.SingleOrDefault(t => t.Identifier == identifier);

        return await Task.FromResult(tenant);
    }
}
Intergrate with ASP.NET Core pipeline
There are two main components
- Registering your services so they can be resolved
- Regsitering some middleware so you can add the tenant information to the current
HttpContextduring the request pipeline which makes it avaialble to downstream consumers
Registering the services
Now we have a strategy in place for getting a tenant, and a location to retreive the tenant from, we need to register these services with the application container. We want the library to be easy to use so we will use a builder pattern to give a positive service registration experience.
First we have a little extension to support the nice .AddMultiTenancy() syntax.
/// <summary>
/// Nice method to create the tenant builder
/// </summary>
public static class ServiceCollectionExtensions
{
    /// <summary>
    /// Add the services (application specific tenant class)
    /// </summary>
    /// <param name="services"></param>
    /// <returns></returns>
    public static TenantBuilder<T> AddMultiTenancy<T>(this IServiceCollection services) where T : Tenant
        => new TenantBuilder<T>(services);

    /// <summary>
    /// Add the services (default tenant class)
    /// </summary>
    /// <param name="services"></param>
    /// <returns></returns>
    public static TenantBuilder<Tenant> AddMultiTenancy(this IServiceCollection services)
        => new TenantBuilder<Tenant>(services);
}
Then we have the builder to provide the ‘fluent’ extensions.
/// <summary>
/// Configure tenant services
/// </summary>
public class TenantBuilder<T> where T : Tenant
{
    private readonly IServiceCollection _services;

    public TenantBuilder(IServiceCollection services)
    {
        _services = services;
    }

    /// <summary>
    /// Register the tenant resolver implementation
    /// </summary>
    /// <typeparam name="V"></typeparam>
    /// <param name="lifetime"></param>
    /// <returns></returns>
    public TenantBuilder<T> WithResolutionStrategy<V>(ServiceLifetime lifetime = ServiceLifetime.Transient) where V : class, ITenantResolutionStrategy
    {
        _services.TryAddSingleton<IHttpContextAccessor, HttpContextAccessor>();
        _services.Add(ServiceDescriptor.Describe(typeof(ITenantResolutionStrategy), typeof(V), lifetime));
        return this;
    }

    /// <summary>
    /// Register the tenant store implementation
    /// </summary>
    /// <typeparam name="V"></typeparam>
    /// <param name="lifetime"></param>
    /// <returns></returns>
    public TenantBuilder<T> WithStore<V>(ServiceLifetime lifetime = ServiceLifetime.Transient) where V : class, ITenantStore<T>
    {
        _services.Add(ServiceDescriptor.Describe(typeof(ITenantStore<T>), typeof(V), lifetime));
        return this;
    }
}
Now in the ConfigureServices section of the StartUp class in your .NET Core web application you can add the following.
services.AddMultiTenancy()
    .WithResolutionStrategy<HostResolutionStrategy>()
    .WithStore<InMemoryTenantStore>();
This is a great start, but down the line you’d want to support passing through options e.g. maybe a pattern to extract the tenantId from the host if not using the entire domain etc, but it gets the job done for now.
At this point you will be able to inject the store or resolution strategy into a controller, but that’s all a bit low level. You don’t want to have to perform these resolution steps everywhere you want to access the Tenant. Let’s next create a service to allow us to access the current tenant object.
/// <summary>
/// Tenant access service
/// </summary>
/// <typeparam name="T"></typeparam>
public class TenantAccessService<T> where T : Tenant
{
    private readonly ITenantResolutionStrategy _tenantResolutionStrategy;
    private readonly ITenantStore<T> _tenantStore;

    public TenantAccessService(ITenantResolutionStrategy tenantResolutionStrategy, ITenantStore<T> tenantStore)
    {
        _tenantResolutionStrategy = tenantResolutionStrategy;
        _tenantStore = tenantStore;
    }

    /// <summary>
    /// Get the current tenant
    /// </summary>
    /// <returns></returns>
    public async Task<T> GetTenantAsync()
    {
        var tenantIdentifier = await _tenantResolutionStrategy.GetTenantIdentifierAsync();
        return await _tenantStore.GetTenantAsync(tenantIdentifier);
    }
}
And update the builder to also register this service
public TenantBuilder(IServiceCollection services)
{
    services.AddTransient<TenantAccessService<T>>();
    _services = services;
}
Cool cool cool cool cool. Now you can access the current tenant by injecting the service into your controller
/// <summary>
/// A controller that returns a value
/// </summary>
[Route("api/values")]
[ApiController]
public class Values : Controller
{
private readonly TenantAccessService<Tenant> _tenantService;
/// <summary>
/// Constructor with required services
/// </summary>
/// <param name="tenantService"></param>
public Values(TenantAccessService<Tenant> tenantService)
{
_tenantService = tenantService;
}
/// <summary>
/// Get the value
/// </summary>
/// <param name="definitionId"></param>
/// <returns></returns>
[HttpGet("")]
public async Task<string> GetValue(Guid definitionId)
{
return (await _tenantService.GetTenantAsync()).Id;
}
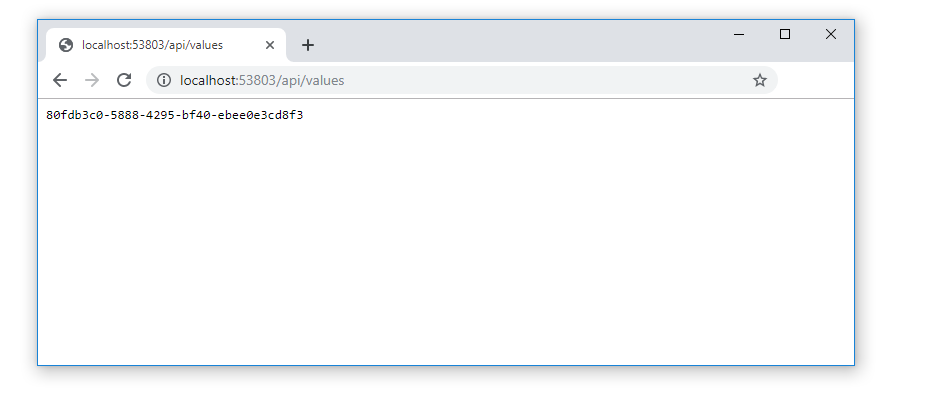
}And if you hit the endpoint you should see the tenant Id returned based on the URL
Next we can add some middleware to inject the curret Tenant into the HttpContext, this means we can get the Tenant wherever we can access the HttpContext for a bit more convienence. This will mean we no longer need to go around injecting our TenantAccessService so much.
Registering the middleware
Middleware in ASP.NET Core allows you to place some logic into the request processing pipeline. In our case we should have our middleware registered before anything that needs to access Tenant information, like the MVC middleware. That will likely need the tenant context in the controllers processing the request.
First let’s create our middleware class, this will process the request and inject the Tenant into the current HttpContext - super simple.
internal class TenantMiddleware<T> where T : Tenant
{
    private readonly RequestDelegate next;

    public TenantMiddleware(RequestDelegate next)
    {
        this.next = next;
    }

    public async Task Invoke(HttpContext context)
    {
        if (!context.Items.ContainsKey(Constants.HttpContextTenantKey))
        {
            var tenantService = context.RequestServices.GetService(typeof(TenantAccessService<T>)) as TenantAccessService<T>;
            context.Items.Add(Constants.HttpContextTenantKey, await tenantService.GetTenantAsync());
        }

        //Continue processing
        if (next != null)
            await next(context);
    }
}
Next we create a little syntatic sugar to register it
/// <summary>
/// Nice method to register our middleware
/// </summary>
public static class IApplicationBuilderExtensions
{
    /// <summary>
    /// Use the Teanant Middleware to process the request
    /// </summary>
    /// <typeparam name="T"></typeparam>
    /// <param name="builder"></param>
    /// <returns></returns>
    public static IApplicationBuilder UseMultiTenancy<T>(this IApplicationBuilder builder) where T : Tenant
        => builder.UseMiddleware<TenantMiddleware<T>>();


    /// <summary>
    /// Use the Teanant Middleware to process the request
    /// </summary>
    /// <typeparam name="T"></typeparam>
    /// <param name="builder"></param>
    /// <returns></returns>
    public static IApplicationBuilder UseMultiTenancy(this IApplicationBuilder builder)
        => builder.UseMiddleware<TenantMiddleware<Tenant>>();
}
Finally we can register our middleware, the best place to do this is before middleware such as MVC which may require access to the Tenant information.
app.UseMultiTenancy();
app.UseMvc()
Now the Tenant will be in the items collection but we don’t really want to force the developer to find out where we’ve stored it, remember the type, need to cast it etc. So we’ll create a nice extension method to pull out the current tenant information.
/// <summary>
/// Extensions to HttpContext to make multi-tenancy easier to use
/// </summary>
public static class HttpContextExtensions
{
    /// <summary>
    /// Returns the current tenant
    /// </summary>
    /// <typeparam name="T"></typeparam>
    /// <param name="context"></param>
    /// <returns></returns>
    public static T GetTenant<T>(this HttpContext context) where T : Tenant
    {
        if (!context.Items.ContainsKey(Constants.HttpContextTenantKey))
            return null;
        return context.Items[Constants.HttpContextTenantKey] as T;
    }

    /// <summary>
    /// Returns the current Tenant
    /// </summary>
    /// <param name="context"></param>
    /// <returns></returns>
    public static Tenant GetTenant(this HttpContext context)
    {
        return context.GetTenant<Tenant>();
    }
}
Now we can upgrade our values controller to demostrate using the current HttpContext instead of injecting a service.
/// <summary>
/// A controller that returns a value
/// </summary>
[Route("api/values")]
[ApiController]
public class Values : Controller
{
    /// <summary>
    /// Get the value
    /// </summary>
    /// <param name="definitionId"></param>
    /// <returns></returns>
    [HttpGet("")]
    public async Task<string> GetValue(Guid definitionId)
    {
        return await Task.FromResult(HttpContext.GetTenant().Id);
    }
}
If you run that you will get the same result 🙌
Woohoo, our application is ‘tenant aware’. That’s a big milestone.
Bonus, the tenant context accessor
In ASP.NET Core, to access the HttpContext in services you use the IHttpContextAccessor service, to provide a familiar access pattern to the Tenant information for a developer working on our application we can create a ITenantAccessor service. This will make the library feel familiar to developers used to the existing pattern.
First the interface
public interface ITenantAccessor<T> where T : Tenant
{
    T Tenant { get; }
}
Then the implementation
public class TenantAccessor<T> : ITenantAccessor<T> where T : Tenant
{
    private readonly IHttpContextAccessor _httpContextAccessor;

    public TenantAccessor(IHttpContextAccessor httpContextAccessor)
    {
        _httpContextAccessor = httpContextAccessor;
    }

    public T Tenant => _httpContextAccessor.HttpContext.GetTenant<T>();
}
Now if a downstream developer wants to add a service to your app which needs to access the current tenant context they can just inject ITenantAccessor<T> in the exact same way as using IHttpContextAccessor ⚡⚡
Just go back an mark the TenantAccessService<T> class as internal so it’s not used outside our assembly by mistake.
Wrapping up
In this post we looked at how we can map a request to a tenant. We configured the application container to be able to resolve our tenancy services and even created an ITenantAccessor service to allow the tenant to be accessible inside other services just like IHttpContextAccessor. We also wrote custom middleware to inject the current tenant information into the HttpContext so it’s easily accessable to downstream middleware and created a nice extension method so you can grab the current Tenant as easy as HttpContext.GetTenant(). In the next post (upcoming) we will look at isolating data acess on a per tenant basis.
Next up in the series we look at how to configure services on a per-tenant basis so that we can resolve a different implementation based on which tenant is active.
如何自行实现一个多租户系统
如何自行实现一个多租户系统
注意:前情概要描述的文字比较多,说的是我的思考过程,不感兴趣的可以直接到跳到 “解析租户信息” 一节。
现如今框架满天飞的环境下,好像很少机会需要自己来实现一个模块。毕竟这样能节省很多的开发时间,提高效率。
这就是框架的好处,也是我们使用框架的直接原因。
情况总有例外,假设刚好我们公司没有用到框架,用的就是 .netcore 平台新建项目,直接开干一把唆。由于前期工作没有考虑周全,现在发现公司新建的平台项目的业务数据越来越大,提供给用户的数量越来越多。但是这些不同的用户的数据肯定不能互相干扰。
举个例子说明,例如我举个跟我公司接近的一种情况,公司再搭建数据平台,来给不同学校提供资料。并且我们的数据平台要记录合作学校对应的学生和老师。前面有假设提到公司前期考虑不周,我们把所有的学校放在 school 表中,所有学生放在 student 表中。所有老师放在 teacher 表中。这样当公司系统在给他们(用户)提供数据的时候,是不是每次都要判断当前用户在哪个学校,然后再把对应的学校资料推送给他们。不仅如此,对数据敏感的增删改操作对这种混在一起数据要各位小心。一不小心,可能就会发生误删其他学校的信息。
为了有效的解决这个问题,我们第一要做的就是要将数据分开管理,彼此互不干扰。这是我们要实现的最终目的。
想要的效果有了,现在的问题是能不能实现,该如何实现,怎么实现才算好。
我们做事情的目的就是解决问题,在前面我们分析了我们要把数据在一个系统中隔离。那么我们自然能想到的就是以学校为领域划分为不同的库。这样我们在系统运行的时候就能做到在用户选择对应的学校登陆系统时,就只能访问这个学校的所有信息了。
到这里,我们就很清晰了,如果我们平时多看多听到别人谈论新的知识点或框架时,我们就会知道对于这种情况,“多租户”就是为了这种情况而诞生的。
既然要做 “多租户” 系统,并且团队之间没有使用市面上的多租户框架。那么我们就得自己实现一个了。那么要做的第一件就是要了解 “多租户” 的概念。正所谓知己知彼,方能战无不胜。
什么是多租户
我们来看下维基百科对多租户的定义是什么(以下是概述)
多租户软件架构就是在同一个系统实例上运行不同用户,能做到应用程序共享,服务自治,并且还能做到数据互相隔离的软件架构思想。一个租户就相当于一组用户(比如针对学校来说,一个学校就是一个租户,这个租户下有学生,老师作为用户(一组用户))。
现在我们总结一下我们要做什么?
我们要实现:
- 相同的应用程序 app 下
- 解析出登陆系统的(当前用户)是属于哪一个租户(对应到例子就是学校)。
- 根据解析出来的租户信息,来访问对应的数据库信息。
现在我们就来实现上面说的步骤。第一步不用想,肯定要得一个 app 下。
解析租户信息
现在我们要设计如何才能让系统检测到当前用户的租户信息。
现阶段我们能想到的解析方式有三种:
- 域名:例如 tenant1.example.com,tenant2.example.com
- URL:例如 www.example.com/tenant1/,www.example.com/tenant2
- header:例如 [x-header: 'tenant1'],[x-header: 'tenant2']
一下子有这么多解决方式,是不是自信心起来了,有木有。
具体如何用代码实现呢?首先要定义一个 “租户” 的信息体,为了方便表述我这里用的是类(当然也可以用接口)
public class Tenant {
	public string Identifier { get; set;}
  public string Id { get; set;}
}
只要继承了这个租户类,就表示拥有了这个租户信息。有了租户之后,我们紧接着要做的就是解析了。因为前面有讨论我们解析方式有三种,这里我主要讨论第一种的实现方案。正是因为有多种可能,解析方式对于架构来说是不稳定的,所以我们要封装变化来抽象画。我们先定一个解析租户接口类,然后提供一个实现类具体以域名方式解析,这样封装就达到对修改封闭,新增开放(OCP)的目的了。例如用户可以自行继承接口用 URL 方式解析租户信息。
public interface ITenantResolver {
	Task<string> GetTenantIdentifierAsync();
}

public class DomainTenantResolver : ITenantResolver {
  private readonly IHttpContextAccessor _accessor;
  public DomainTenantResolver(IHttpContextAccessor accessor) {
    _accessor = accessor;
  }
  // 这里就解析道了具体的域名了,从而就能得知当前租户
  public async Task<string> GetTenantIdentifierAsync() {
    return await Task.FromResult(_accessor.HttpContext.Request.Host.Host);
  }
}
接着我们拿到租户标识符,要干嘛呢?自然是要存起来的,好让系统很方便的获取当前用户的租户信息。
存储租户信息
关于存储功能,同样我们选择抽象出来一个 ITenantStore 接口。为什么要抽象出来,作为一个基础功能架构设计。我们就应该考虑这个功能的解决方案是否是稳定的。明显,对于存储来说,方式太多了。所以作为系统,要提供一个基本实现的同时还要供开发者方便选择其他方式。
public interface ITenantStore {
	Task<T> GetTenantAsync(string identifier);
}
关于存储,其实我们可以选择将租户信息放入内存中,也可以选择放入配置文件,当然你选择将租户信息放入数据库也是没问题的。
现在的最佳实践是将一些敏感信息,比如每个租户对应的链接字符串都是以 Option 配置文件方式存储的。利用 .netcore 内置 DI 做到即拿即用。
这里为了简便,我选择用硬编码的方式存储租户信息
public class InMemoryTenantStore: ITenantStore {
  private Tenant[] tenantSource = new[] {
			new Tenant{ Id = "4da254ff-2c02-488d-b860-cb3b6363c19a", Identifier = "localhost" }
	};
	public async Task<T> GetTenantAsync(string identifier) {
    var tenant = tenantSource.FirstOrDefault(p => p.Identifier == identifier);
		return await Task.FromResult(tenant);
	}
}
好了,现在我们租户信息有了,解析器也提供了,存储服务也决定了。那么接下来就只剩下什么了?
进入管道捕获源头
剩下的就是找到请求的源头,很显然,.netcore 优良的设计,我们可以很方便的将上述我们准备的服务安排至管道中。那就是注册服务(AddXXXService)和中间件(UseXXX)。
所以我们这一步要做的就是
- 注册解析租户信息服务
- 注册中间件,好让每一次请求发起时截获信息将用户的租户信息存至这个请求(HttpContext)里面,好让系统随时访问当前用户租户信息。
注册服务类
这个太简单了,.netcore 的源代码给了我们很好的范例
public static class ServiceCollectionExtensions {
	public static AddMultiTenancy<T>(this IServiceColletion services, Action<IServiceCollection> registerAction) where T : Tenant {
		service.TryAddSingleton<IHttpContextAccessor,HttpContextAccessotr>();  // 这一步很重要
		registerAction?.Invoke(services);
	}
}
调用:
// Startup.cs ConfigureServices

services.AddMultiTenancy<Tenant>(s => {
	// 注册解析类
	s.AddScoped(typeof(ITenantResolver), typeof(DomainTenantResolver));
	// 注册存储
	s.AddScoped(typeof(ITenantStore), typeof(InMemoryStore));
})
这样我们就能在系统中比如控制器,注入这两个类来完成对当前租户信息的访问。
注册服务解决了,然后是中间件
注册中间件
中间件所干的事,很简单,就是捕获进来管道的请求上下文,然后解析得出租户信息,然后把对应的租户信息放入请求上下文中。
class MultiTenantMiddleware<T> where T : Tenant {
	private readonly RequestDelegate _next;

  public TenantMiddleware(RequestDelegate next)
  {
      _next = next;
  }

  public async Task InvokeAsync(HttpContext context)
  {
      if (!context.Items.ContainsKey("localhost"))
      {
          var tenantService = context.RequestServices.GetService(typeof(TenantAppService<T>)) as TenantAppService<T>;
          // 这里也可以放到其他地方,比如 context.User.Cliams 中
          context.Items.Add("localhost", await tenantService.GetTenantAsync());
      }

      if (_next != null)
          await _next(context);
  }
}
这样我们就实现了整个请求对当前租户操作过程了。所以本文就结束了。
不好意思,开个玩笑。还没结束,其实上面是我第一版的写法。不知道大家有没有发现,我这样写其实是有 “问题” 的。大毛病没有,就是对开发者不友好。
首先,在 ConfigureServices 方法里的注册操作,我的 AddMultiTenancy 方法不纯粹。这是我当时写这个 demo 时候感觉特别明显的。因为起初我的方法签名是不带回调函数 action 的。
public static IServiceCollection AddMultiTenancy<T>(this IServiceColletion services) where T : Tenant {
  services.TryAddSingleton<IHttpContextAccessor,HttpContextAccessotr>();  // 这一步很重要
  services.Add(typeof(ITenantResolver), typeof(ImlITenantResolver), LifetimeScope);
  services.Add(typeof(ITenantStore), typeof(ImlITenantStore), LifetimeScope);
  return services;
}
但是在注册租户解析类和存储类时,发现没有实现类型和生命周期做参数,根本无法注册。如果把两个参数当成方法签名,那不仅使这个方法变得丑陋,还固话了这个方法的使用。
所以最后我改成了上面用回调的方式,暴露给开发者自己去注册。所以这就要求开发者必须要清楚要注册那些内容。
所以后来一次偶然的机会看到相关的资料,告诉我其实可以借助 Program.cs 中的 Builder 模式改善代码,可以让代码结构更加表义化。第二版如下
public static class ServiceCollectionExtensions {
	public static TenantBuilder<T> AddMultiTenancy<T>(this IServiceColletion services) where T : Tenant {
		return new TenantBuilder<T>(services);
	}
}
public class TenantBuilder<T> where T : Tenant {
	private readonly IServiceCollection _services;
	public TenantBuilder(IServiceCollection services) {
		_services = services;
	}

	public TenantBuilder<T> WithTenantResolver<TIml>(ServiceLifetime lifttime = ServiceLifetime.Transient) where TIml : ITenantResolver {
		_services.TryAddSingleton<IHttpContextAccessor,HttpContextAccessotr>();  // 这一步很重要
		_services.Add(typeof(ITenantResolver), typeof(TImp), lifttime);
		return this;
	}

	public TenantBuilder<T> WithStore<TIml>(ServiceLifetime lifttime = ServiceLifetime.Transient) {
		_services.Add(typeof(ITenantStore), typeof(TIml), lifetime);
		return this;
	}
}
所以调用我们就变成这样了
services.AddMultiTenancy()
		.WithTenantResolver<DomainTenantResolver>()
		.WithTenantStore<InMemoryTenatnStore>();
这样看起来是不是更具表义化和优雅了呢。
我们重构了这一点,还有一点让我不满意。那就是为了获取当前用户租户信息,我必须得注入两个服务类 —— 解析类和存储类。这点既然想到了还是要解决的,因为很简单。就是平常我们使用的外观模式。
我们加入一个特定租户服务类来代替这两个类不就好了么。
public class TenantAppService<T> where T : Tenant {
	private readonly ITenantResolver _tenantResolver;
	private readonly ITenantStore _tenantStore;

	public TenantAppService(ITenantResolver tenantResolver, ITenantStore tenantStore) {
		_tenantResolver = tenantResolver;
		_tenantStore = tenantStore;
	}

	public async Task<T> GetTenantAsync() {
		var identifier = await _tenantResolver.GetTenantIdentifierAsync();
		return await _tenantStore.GetTenantAsync(identifier);
	}
}
这样我们就只需要注入 TenantAppService 即可。
其实现在我们实现一个多租户系统已经达到 90% 了。剩下的就是如何在数据访问层根据获取的租户信息切换数据库。实现方法其实也很简单,就是在注册完多租户后,在数据库上下文选择链接字符串那里替换你获取的多租户信息所对应的数据库 ID 即可。具体的代码实现这个后面再聊。
总结
回顾一下,我们目前做的事。
- 发现问题:数据混在在一起无法做到完美的数据隔离,不好控制。
- 了解原理:什么是多租户
- 解决方案:为了解决问题想到的可实现的技术方案
- 在架构上考虑如何优化重构一个模块。
发现没有,我们做事一定是要 “带着问题解决问题”。首先是解决问题,然后才是重构。千万不要在一开始就想着要重构。
其实我们在解决一个问题时,我们项目架构可能没有其中某一个模块,当要用到这个模块时,我们怎么做的。其实一个快速有效的访问,就是去看有这个模块功能开源框架,去学习里面的思想。看他们是如何做的。然后有了思路就可以依葫芦画瓢了,甚至是可以直接粘贴拷贝。
参考资料:https://michael-mckenna.com/multi-tenant-asp-dot-net-core-application-tenant-resolution 推荐阅读

 浙公网安备 33010602011771号