
SpringAOP基础实战知识------hello!AspectJ (使用IDEA进行编程)
AspectJ:
AspectJ是Eclipse基金组织的开源项目,它是Java语言的一个AOP实现,是最早、功能比较强大的AOP实现之一,对整套AOP机制都有较好的实现,很多其他语言的AOP实现也借鉴或者采纳了AspectJ中的很多设计。在Java领域,AspectJ中的很多语法结构基本上已经成为AOP领域的标准。
--------------------------详情请看:https://blog.csdn.net/gavin_john/article/details/80156963
1)首先到AspectJ官网下载Jar包:https://www.eclipse.org/aspectj/downloads.php
2)下载完成后双击jar包,开始安装(花费不到2分钟)
3)安装完成后,把 文件夹里面的jar包导入到IDEA的Spring项目的lib文件夹中

添加到项目中:

经过这里已经配置好了!
开始编程:
1)新建一个接口:AtithmeticCalculator
package SpringAOP2;

public interface AtithmeticCalculator {
    int add(int i, int j);
    int sub(int i, int j);
    int mul(int i, int j);
    int div(int i, int j);
}
2)建一个接口的实现类:AtithmeticCalculatorImpl
package SpringAOP2;

import org.springframework.stereotype.Component;

@Component
public class AtithmeticCalculatorImpl implements AtithmeticCalculator {
    @Override
    public int add(int i, int j) {
        int result=i+j;
        return result;
    }

    @Override
    public int sub(int i, int j) {
        int result=i-j;
        return result;
    }

    @Override
    public int mul(int i, int j) {
        int result=i*j;
        return result;
    }

    @Override
    public int div(int i, int j) {
        int result=i/j;
        return result;
    }
}
3)一个main方法 :这个时候应该尝试运行,验证Bean的自动装配是否成功,切面的作用就是在不影响原有代码的基础上,添加代码。
public class Main {
    public static void main(String[] args) {
        ApplicationContext context=new ClassPathXmlApplicationContext("springConfig.xml");
        //由于AtithmeticCalculatorImpl实现了AtithmeticCalculator接口,所以强制转换必须用父类AtithmeticCalculator来定义
        AtithmeticCalculator atithmeticCalculator=(AtithmeticCalculator)context.getBean("atithmeticCalculatorImpl");
        int result=atithmeticCalculator.add(1,2);
        System.out.println("--------->"+result);
        result=atithmeticCalculator.div(8,2);
        System.out.println("--------->"+result);
    }
}
4)创建切面:
@Component
@Aspect
class LoggingAspect {
    //通过注解配置bean是正确的,下面的代码有错误

    @Before("execution(public int SpringAOP2.AtithmeticCalculatorImpl.*(..))")
    private void beforeMethod(JoinPoint joinPoint) {
        String methodName=joinPoint.getSignature().getName();
        Object args[]=joinPoint.getArgs();
        System.out.println("方法名:"+methodName+",参数:"+ Arrays.asList(args));
        System.out.println("这上面是前置切面啊");
    }
    @After("execution(public int SpringAOP2.AtithmeticCalculatorImpl.*(..))")
    private void afterMethod(){
        System.out.println("后置切面啊");
    }
}
5)通过配置文件进行配置:springConfig
        <!--1.扫描,自动配置bean-->
        <context:component-scan base-package="SpringAOP2"/>
        <!--2.使AOP生效-->
        <aop:aspectj-autoproxy >
        </aop:aspectj-autoproxy>
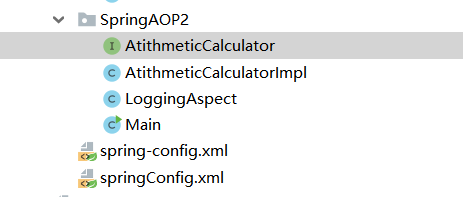
文件夹:
这时就可以得到运行结果:

最后说一下在这过程中我遇到的问题:
AspectJ遇到的坑:
报错信息:
Exception in thread "main" java.lang.ClassCastException: class com.sun.proxy.$Proxy9 cannot be cast to class SpringAOP2.AtithmeticCalculatorImpl
错误代码: 在main方法里边,获取Bean实例的时候,把获取到的对象转换成子类对象。
AtithmeticCalculator atithmeticCalculator=(AtithmeticCalculatorImpl)context.getBean("atithmeticCalculatorImpl");
解决方法1:报这个错,只有一个原因,就是转化的类型不对.
接口过父类的子类,在强制转换的时候,一定要用接口父类来定义。!!
//由于AtithmeticCalculatorImpl实现了AtithmeticCalculator接口,所以强制转换必须用父类AtithmeticCalculator来定义
AtithmeticCalculator atithmeticCalculator=(AtithmeticCalculator)context.getBean("atithmeticCalculatorImpl");
解决方法2:在AOP里面设置proxy-target-class="true"属性
<aop:aspectj-autoproxy proxy-target-class="true">
</aop:aspectj-autoproxy>

 浙公网安备 33010602011771号