整合流程
##第一步
--| WebContent
--|WEB-INF
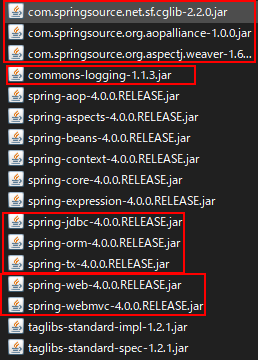
--| lib(放jar包)
<!-- 1、导入 Spring 相关依赖 -->
<!-- 2、导入 MyBatis 相关依赖 -->

<!-- 3、导入 数据库连接 相关依赖 -->

<!-- 4、导入 MyBatis和Spring适配包 相关依赖 -->

##第二步
<!-- 1、配置MyBatis -->
--| src
--| com.leavescai.mybatis.bean
--| Employee.java(新建)
--| com.leavescai.mybatis.dao
--| EmployeeMapper.java(新建)
--| conf
--| mybatis.mapper
--| EmployeeMapper.xml(新建)
--| dbconfig.properties(新建)
jdbc.driver=com.mysql.jdbc.Driver
jdbc.url=jdbc:mysql://localhost:3306/mybatis?allowMultiQueries=true
jdbc.username=root
jdbc.password=123456
orcl.driver=oracle.jdbc.OracleDriver
orcl.url=jdbc:oracle:thin:@localhost:1521:orcl
orcl.username=scott
orcl.password=123456
--| mybatis-config.xml(新建)
<settings>
<setting name="mapUnderscoreToCamelCase" value="true"/>
<setting name="jdbcTypeForNull" value="NULL"/>
<!--显式的指定每个我们需要更改的配置的值,即使他是默认的。防止版本更新带来的问题 -->
<setting name="cacheEnabled" value="true"/>
<setting name="lazyLoadingEnabled" value="true"/>
<setting name="aggressiveLazyLoading" value="false"/>
</settings>
<databaseIdProvider type="DB_VENDOR">
<property name="MySQL" value="mysql"/>
<property name="Oracle" value="oracle"/>
<property name="SQL Server" value="sqlserver"/>
</databaseIdProvider>
<!-- 2、配置Spring、SpringMVC web.xml -->
--| WebContent
--|WEB-INF
--| web.xml
<!--Spring配置: needed for ContextLoaderListener -->
<context-param>
<param-name>contextConfigLocation</param-name>
<param-value>classpath:applicationContext.xml</param-value>
</context-param>
<!-- Bootstraps the root web application context before servlet initialization -->
<listener>
<listener-class>org.springframework.web.context.ContextLoaderListener</listener-class>
</listener>
<!-- SpringMVC配置 -->
<!-- The front controller of this Spring Web application, responsible for handling all application requests -->
<servlet>
<servlet-name>spring</servlet-name>
<servlet-class>org.springframework.web.servlet.DispatcherServlet</servlet-class>
<load-on-startup>1</load-on-startup>
</servlet>
<!-- Map all requests to the DispatcherServlet for handling -->
<servlet-mapping>
<servlet-name>spring</servlet-name>
<url-pattern>/</url-pattern>
</servlet-mapping>
--| conf
--| applicationContext.xml(新建)
<!-- 配约定 spring-servlet.xml -->
--| WebContent
--|WEB-INF
--| spring-servlet.xml(新建)
1> namespaces: 添加context
2> 自动扫描组件
<!-- SpringMVC只是控制网站跳转逻辑 -->
<!-- 只扫描控制器 -->
<!-- annotation 根据注解扫描-->
<!-- use-default-filters="false" 禁用默认的控制器 -->
<!-- org.springframework.stereotype.Controller 标了注解的所有控制器-->
<context:component-scan base-package="com.leavescai.mybatis" use-default-filters="false">
<context:include-filter type="annotation" expression="org.springframework.stereotype.Controller"/>
</context:component-scan>
3> namespaces: 添加mvc
4> 配置mvc
<mvc:annotation-driven></mvc:annotation-driven>
<mvc:default-servlet-handler/>
5> 配置视图解析器
<!-- 视图解析器 -->
<!-- name="prefix" 所有页面的前置-->
<!-- name="suffix" 所有页面的后置-->
<bean class="org.springframework.web.servlet.view.InternalResourceViewResolver">
<property name="prefix" value="/WEB-INF/pages/"></property>
<property name="suffix" value=".jsp"></property>
</bean>
<!-- 重头戏 SpringMVC 的配置 applicationContext.xml配置 -->
1、组件扫描
<!-- Spring希望管理所有的业务逻辑组件,等。。。 -->
<context:component-scan base-package="com.leavescai.mybatis">
<context:exclude-filter type="annotation" expression="org.springframework.stereotype.Controller" />
</context:component-scan>
2、配置数据源 c3p0
<!-- 引入数据库的配置文件 -->
<context:property-placeholder location="classpath:dbconfig.properties" />
<!-- Spring用来控制业务逻辑。数据源、事务控制、aop -->
<bean id="dataSource" class="com.mchange.v2.c3p0.ComboPooledDataSource">
<property name="jdbcUrl" value="${jdbc.url}"></property>
<property name="driverClass" value="${jdbc.driver}"></property>
<property name="user" value="${jdbc.username}"></property>
<property name="password" value="${jdbc.password}"></property>
</bean>
3、配置事务管理器
<!-- spring事务管理 -->
<bean id="dataSourceTransactionManager" class="org.springframework.jdbc.datasource.DataSourceTransactionManager">
<property name="dataSource" ref="dataSource"></property>
</bean>
4、开启基于注解的事务
<tx:annotation-driven transaction-manager="dataSourceTransactionManager"/>
5、整合 MyBatis
<!-- 整合mybatis
目的:1、spring管理所有组件。包括mapper的实现类。service 调用 Dao @Autowired:自动注入mapper;
2、spring用来管理事务,spring声明式事务 -->
1> 创建出SqlSessionFactory对象
<!-- 创建出SqlSessionFactory对象 -->
<bean id="sqlSessionFactoryBean" class="org.mybatis.spring.SqlSessionFactoryBean">
<property name="dataSource" ref="dataSource"></property>
<!-- configLocation指定全局配置文件的位置 -->
<property name="configLocation" value="classpath:mybatis-config.xml"></property>
<!--mapperLocations: 指定mapper文件的位置-->
<property name="mapperLocations" value="classpath:mybatis/mapper/*.xml"></property>
</bean>
2> 配置mybatis-spring:scan
引入namespace mybatis-spring 空间
<!-- 扫描所有的mapper接口的实现,让这些mapper能够自动注入;
base-package:指定mapper接口的包名-->
<mybatis-spring:scan base-package="com.atguigu.mybatis.dao"/>


 浙公网安备 33010602011771号