Docker内安装Nginx和Tomcat
一)部署Nginx
-
1.搜索镜像:docker search nginx
-
2.下载镜像:docker pull nginx 建议下载镜像前先去dockerhub搜索镜像版本、还能看见帮助文档及详细信息
-
3.查看容器镜像:docker images
-
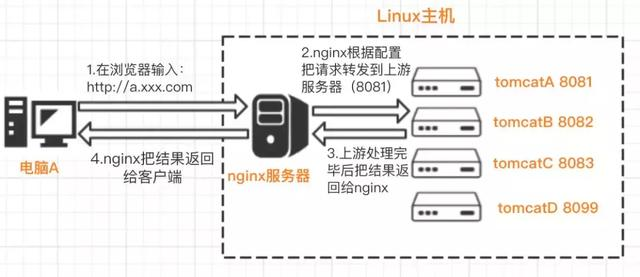
4.接口暴露的原理
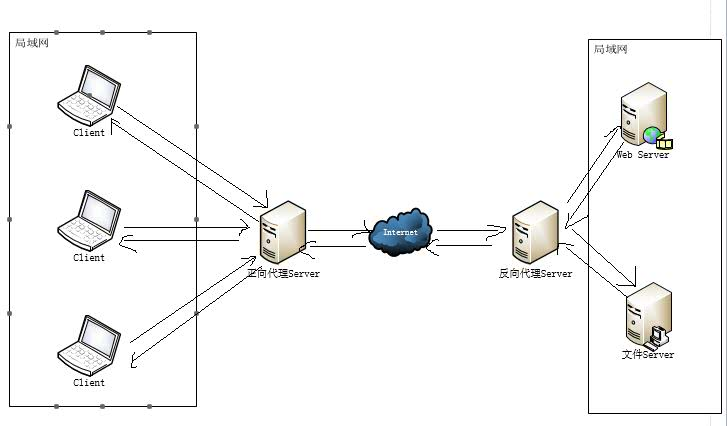
这里对正向代理和反向代理做一个小的概括
正向代理和反向代理的区别在于代理的对象不一样、正向代理的代理对象是客户端、反向代理的代理对象是服务端。
代理服务器站在客户端那边就是正向代理
代理服务器站在服务器那边就是反向代理
Nginx通过proxy_pass可以设置代理服务
-
5.启动Nginx
[root@xiaozhang1999 ~]# docker images
REPOSITORY    TAG       IMAGE ID       CREATED        SIZE
mysql         5.7       2c9028880e58   5 weeks ago    447MB
mysql         latest    c0cdc95609f1   5 weeks ago    556MB
hello-world   latest    d1165f221234   3 months ago   13.3kB
latest        latest    f6d0b4767a6c   5 months ago   133MB
nginx         latest    f6d0b4767a6c   5 months ago   133MB
centos        latest    300e315adb2f   6 months ago   209MB
登录Nginx
-d 后台运行
-p 宿主机端口(EG:阿里云服务器):容器(EG:Nginx)端口、暴露--name 给(Nginx)容器命名 docker run -d --name nginx01 -p 3344:80 nginx
[root@xiaozhang1999 ~]# docker run -d -p 3344:80 nginx
d0ceb7c4b4191caf174cd73eb269c7824a245b6ac3f9642aa6aed0e9a84603a2
[root@xiaozhang1999 ~]# docker ps
CONTAINER ID   IMAGE     COMMAND                  CREATED          STATUS          PORTS                                   NAMES
d0ceb7c4b419   nginx     "/docker-entrypoint.…"   15 seconds ago   Up 13 seconds   0.0.0.0:3344->80/tcp, :::3344->80/tcp   exciting_sammet
访问本地Nginx
[root@xiaozhang1999 ~]# curl localhost:3344
<!DOCTYPE html>
<html>
<head>
<title>Welcome to nginx!</title>
<style>
    body {
        width: 35em;
        margin: 0 auto;
        font-family: Tahoma, Verdana, Arial, sans-serif;
    }
</style>
</head>
<body>
<h1>Welcome to nginx!</h1>
<p>If you see this page, the nginx web server is successfully installed and
working. Further configuration is required.</p>

<p>For online documentation and support please refer to
<a href="http://nginx.org/">nginx.org</a>.<br/>
Commercial support is available at
<a href="http://nginx.com/">nginx.com</a>.</p>

<p><em>Thank you for using nginx.</em></p>
</body>
</html>
编辑Nginx配置文件
[root@xiaozhang1999 ~]# docker exec -it exciting_sammet /bin/bash
确定Nignx安装目录
root@d0ceb7c4b419:/# whereis nginx
nginx: /usr/sbin/nginx /usr/lib/nginx /etc/nginx /usr/share/nginx
root@d0ceb7c4b419:/# cd /etc/nginx
root@d0ceb7c4b419:/etc/nginx# exit
exit
[root@xiaozhang1999 ~]# docker ps
CONTAINER ID   IMAGE     COMMAND                  CREATED          STATUS          PORTS                                   NAMES
d0ceb7c4b419   nginx     "/docker-entrypoint.…"   28 minutes ago   Up 28 minutes   0.0.0.0:3344->80/tcp, :::3344->80/tcp   exciting_sammet
停止Nginx容器
[root@xiaozhang1999 ~]# docker stop exciting_sammet
exciting_sammet
启动Nginx成功后输入:IP+映射端口(映射端口号需在服务器上设置成开放)也能访问

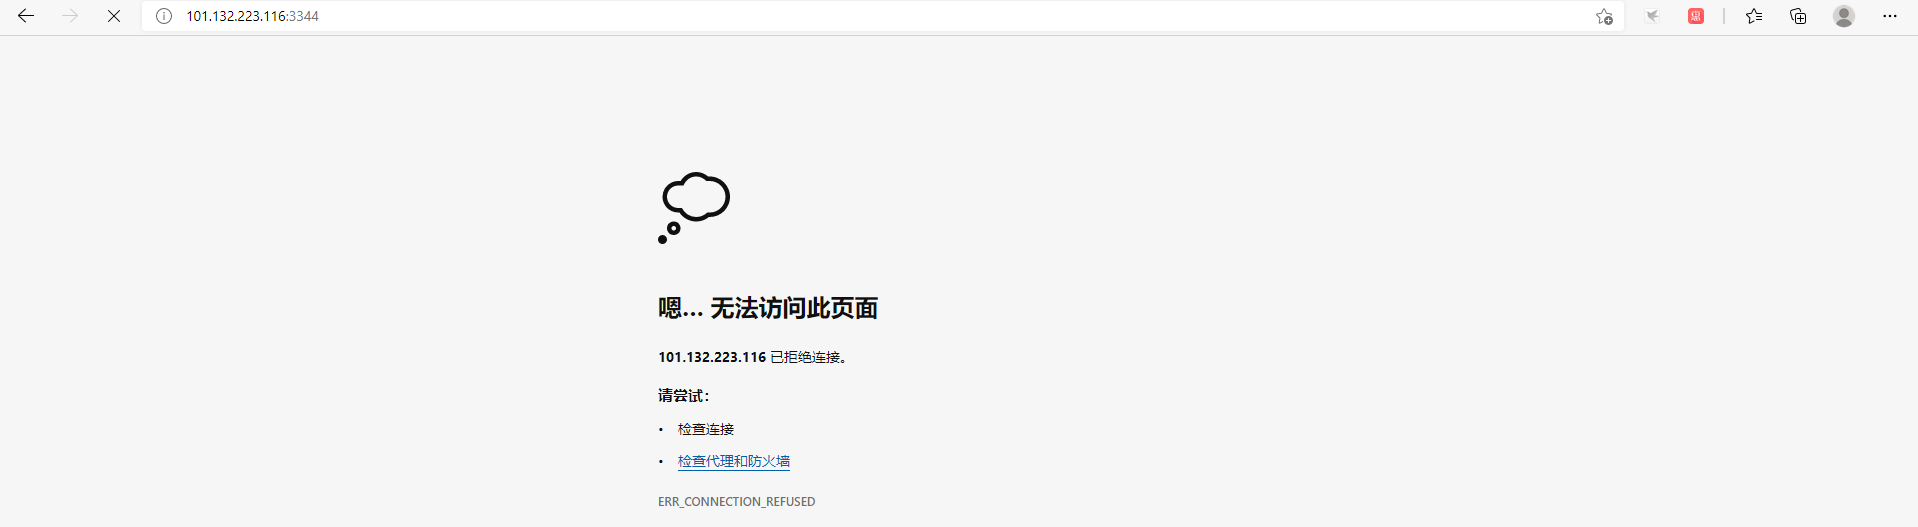
关闭Nginx后、无法访问
发现个问题:每次改动Nginx配置文件、都需要进入容器的内部?十分的麻烦。我要是可以在外部提供一个映射路径、达到在容器外部修改文件、容器内部就可以自动修改。——此后用数据卷可以解决
二)部署Tomcat
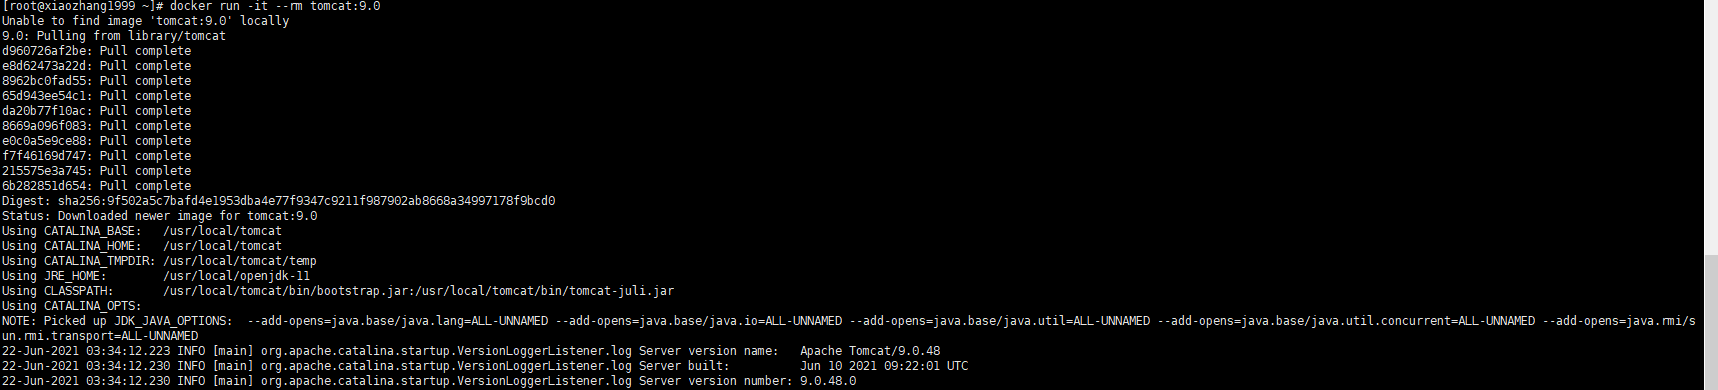
在官方文档中Tomcat的使用:docker run -it --rm tomcat:9.0
我们之前的启动都是-d后台启动、停止了容器之后、容器还是可以查到、而官网中docker run -it --rm tomcat:9.0一般用来测试、用完即删。如下所示:

-
1下载Tomcat
docker pull tomcat:9.0
-
2启动运行
docker run -d -p 9999:8080 --name tomcat01 tomcat
-
3测试访问没有问题
-
4进入容器
docker exec -it tomcat01 /bin/bash
发现问题:1.其tomcat容器下liunx命令少了、2.没有webapp是阿里云的原因、默认是最小的镜像、所有不必要的都删除掉,保证最小可运行环境

 浙公网安备 33010602011771号