树莓派利用dlib实现静态68点人脸标识
参考 https://www.cnblogs.com/AdaminXie/p/8137580.html
安装好dlib等库后,还需下载官方的 Dlib 官方训练好的模型 “shape_predictor_68_face_landmarks.dat” 进行 68 个点标定; http://www.luyixian.cn/news_show_36757.aspx 这里可以下载
https://blog.csdn.net/Viadimir/article/details/105035660 这里有5点
在执行代码时出现两个问题
1.dat文件打开失败,在网上研究了一番,直接下载dat文件是ok的,如果下载zip压缩包解压出来的dat文件就不行
RuntimeError: Error deserializing object of type short
2.路径填写错误
img_gray = cv2.cvtColor(img_rd, cv2.COLOR_RGB2GRAY)
cv2.error: OpenCV(3.4.1) /home/pi/opencv-3.4.1/modules/imgproc/src/color.cpp:11147: error: (-215) scn == 3 || scn == 4 in function cvtColor

仔细看 jpg后多了一个空格!
修改后执行
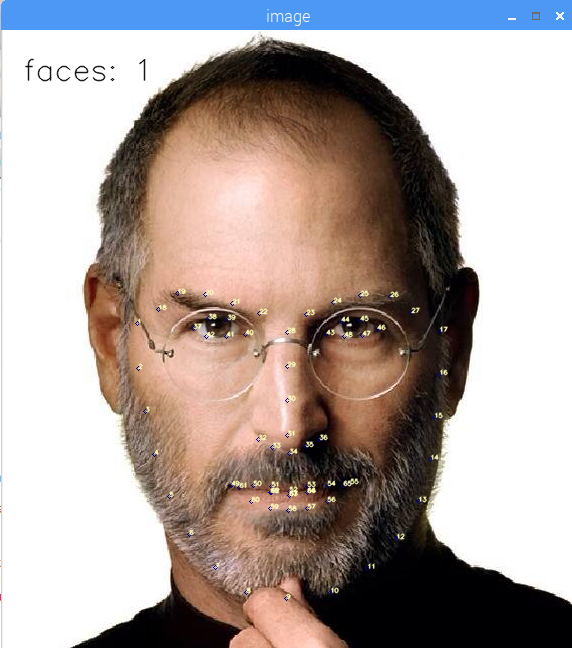
# 对静态人脸图像文件进行68个特征点的标定

import dlib         # 人脸识别的库 Dlib
import numpy as np  # 数据处理的库 numpy
import cv2          # 图像处理的库 OpenCv

# Dlib 检测器和预测器
detector = dlib.get_frontal_face_detector()
predictor = dlib.shape_predictor('/home/pi/Desktop/face_landmark_model/shape_predictor_68_face_landmarks.dat')

# 读取图像文件
img_rd = cv2.imread("/home/pi/Desktop/face/jobs1.jpg")
img_gray = cv2.cvtColor(img_rd, cv2.COLOR_RGB2GRAY)

# 人脸数
faces = detector(img_gray, 0)

# 待会要写的字体
font = cv2.FONT_HERSHEY_SIMPLEX

# 标 68 个点
if len(faces) != 0:
    # 检测到人脸
    for i in range(len(faces)):
        # 取特征点坐标
        landmarks = np.matrix([[p.x, p.y] for p in predictor(img_rd, faces[i]).parts()])
        for idx, point in enumerate(landmarks):
            # 68 点的坐标
            pos = (point[0, 0], point[0, 1])

            # 利用 cv2.circle 给每个特征点画一个圈,共 68 个
            cv2.circle(img_rd, pos, 2, color=(139, 0, 0))
            # 利用 cv2.putText 写数字 1-68
            cv2.putText(img_rd, str(idx + 1), pos, font, 0.2, (187, 255, 255), 1, cv2.LINE_AA)

    cv2.putText(img_rd, "faces: " + str(len(faces)), (20, 50), font, 1, (0, 0, 0), 1, cv2.LINE_AA)
else:
    # 没有检测到人脸
    cv2.putText(img_rd, "no face", (20, 50), font, 1, (0, 0, 0), 1, cv2.LINE_AA)

# 窗口显示
# 参数取 0 可以拖动缩放窗口,为 1 不可以
# cv2.namedWindow("image", 0)
cv2.namedWindow("image", 1)

cv2.imshow("image", img_rd)
cv2.waitKey(0)
对于画图函数的解释,上面给出的地址讲的很详细

 浙公网安备 33010602011771号