
docker安装redis、tomcat、mysql、nginx
docker 基础命令
docker rmi 删除镜像
#1.删除指定的镜像id
[root@iZwz99sm8v95sckz8bd2c4Z ~]# docker rmi -f  镜像id
#2.删除多个镜像id
[root@iZwz99sm8v95sckz8bd2c4Z ~]# docker rmi -f  镜像id 镜像id 镜像id
#3.删除全部的镜像id
[root@iZwz99sm8v95sckz8bd2c4Z ~]# docker rmi -f  $(docker images -aq)
docker rm 删除容器
#1.删除指定的容器,不能删除正在运行的容器,强制删除使用 rm -f
[root@iZwz99sm8v95sckz8bd2c4Z ~]# docker rm 容器id
#2.删除所有的容器
[root@iZwz99sm8v95sckz8bd2c4Z ~]# docker rm -f $(docker ps -aq)
#3.删除所有的容器
[root@iZwz99sm8v95sckz8bd2c4Z ~]# docker ps -a -q|xargs docker rm
运行容器的命令说明:
docker run [可选参数] image

#参数说明
--name="名字"           指定容器名字
-d                     后台方式运行
-it                    使用交互方式运行,进入容器查看内容
-p                     指定容器的端口
(
-p ip:主机端口:容器端口  配置主机端口映射到容器端口
-p 主机端口:容器端口
-p 容器端口
)
-P                     随机指定端口(大写的P)
运行并进入容器
[root@iZwz99sm8v95sckz8bd2c4Z ~]# docker run -it centos /bin/bash
[root@bd1b8900c547 /]# ls
bin  dev  etc  home  lib  lib64  lost+found  media  mnt  opt  proc  root  run  sbin  srv  sys  tmp  usr  var
docker 安装 redis
第一步 pull redis
命令:docker pull redis
第二步 创建redis管理目录,方便后期管理
命令:#可以自定义,因为我的docker的一些配置文件都是存放在/data目录下面的,所以我依然在/data目录下创建一个redis目录,这样是为了方便后期管理
mkdir -p /data/redis
mkdir -p /data/redis/data
第三步 redis 启动
命令:
docker run -p 6379:6379 --name redis
-v /data/redis/redis.conf:/etc/redis/redis.conf
-v /data/redis/data:/data
-d redis redis-server /etc/redis/redis.conf --appendonly yes
注:解析-p 6379:6379,-p 端口:映射端口;为了好看所以做了换行,执行的时候还是需要改成一行,每行一个空格隔开就可以了;
参数解释:
-p 6379:6379 #把容器内的6379端口映射到宿主机6379端口
-v /data/redis/redis.conf:/etc/redis/redis.conf#把宿主机配置好的redis.conf放到容器内的这个位置中
-v /data/redis/data:/data#把redis持久化的数据在宿主机内显示,做数据备份
redis-server /etc/redis/redis.conf#这个是关键配置,让redis不是无配置启动,而是按照这个redis.conf的配置启动
–appendonly yes #redis启动后数据持久化
第四步 查看是否启成功
命令:docker ps
可以查看一下日志:sudo docker logs redis
第五步 进入容器测试 redis
# 进入的时候可以写容器名或者容器ID,redis是我的容器名
docker exec -it redis /bin/bash # 进入redis 容器
redis-cli # 执行客户端命令

127.0.0.1:6379> set test 1 # 存数据测试
OK
127.0.0.1:6379> get test # 取数据测试
"1"
结束,用redis客户端连接就好了,密码为空~~
修改密码:
1.设置密码:config set requirepass 123456
2.连接redis,认证:auth 123456
注:如果没有看到启动成功,可能存在的问题:
优先查看日志:
命令:docker logs 容器ID(可以用docker ps -a 查看)
问题如下:
1、chown: changing ownership of '.': Permission denied
解决:1)命令:vim /etc/sysconfig/selinux
2)将SELINUX=enforcing 改为 SELINUX=disabled
3)重启linux,命令:reboot
4)删除容器,docker rm 容器ID
5)执行第三步重新启动
目的是关掉selinux,如果是生产环境,请用其它方式处理
docker 安装 Tomcat
第一步 下载并运行
[root@iZwz99sm8v95sckz8bd2c4Z ~]# docker pull tomcat
Using default tag: latest
latest: Pulling from library/tomcat
6c33745f49b4: Pull complete
ef072fc32a84: Pull complete
c0afb8e68e0b: Pull complete
d599c07d28e6: Pull complete
e8a829023b97: Pull complete
d04be46a31d1: Pull complete
db6007c69c35: Pull complete
e4ad4c894bce: Pull complete
248895fda357: Pull complete
277059b4cba2: Pull complete
Digest: sha256:57dae7dfb9b62a413cde65334c8a18893795cac70afc3be589c8336d8244655d
Status: Downloaded newer image for tomcat:latest
docker.io/library/tomcat:latest
[root@iZwz99sm8v95sckz8bd2c4Z ~]# docker run -d -p 3335:8080 --name tomcat01 tomcat
7136295a6082cb0f805b025a1471bde02ead4864be3e2c9dcd337b1dde0a3113
第二步 进入容器
1.容器中的命令是少了
2.阿里云镜像默认下载的是最小的镜像,保证最小的运行环境。
[root@iZwz99sm8v95sckz8bd2c4Z ~]# docker exec -it tomcat01 /bin/bash
root@7136295a6082:/usr/local/tomcat# ls
BUILDING.txt  CONTRIBUTING.md  LICENSE  NOTICE  README.md  RELEASE-NOTES  RUNNING.txt  bin  conf  lib  logs  native-jni-lib  temp  webapps  webapps.dist  work
root@7136295a6082:/usr/local/tomcat# cd webapps.dist
root@7136295a6082:/usr/local/tomcat/webapps.dist# ls
ROOT  docs  examples  host-manager  manager
root@7136295a6082:/usr/local/tomcat/webapps.dist# cd ROOT
root@7136295a6082:/usr/local/tomcat/webapps.dist/ROOT# ls
RELEASE-NOTES.txt  WEB-INF  asf-logo-wide.svg  bg-button.png  bg-middle.png  bg-nav.png  bg-upper.png  favicon.ico  index.jsp  tomcat.css  tomcat.svg
root@7136295a6082:/usr/local/tomcat/webapps.dist/ROOT# cd ../../
root@7136295a6082:/usr/local/tomcat# cd webapps
root@7136295a6082:/usr/local/tomcat/webapps# ls
root@7136295a6082:/usr/local/tomcat/webapps# cp -r /usr/local/tomcat/webapps.dist/* /usr/local/tomcat/webapps/
root@7136295a6082:/usr/local/tomcat/webapps# ls
ROOT  docs  examples  host-manager  manager
root@7136295a6082:/usr/local/tomcat/webapps# exit
exit
第三步 访问测试
[root@iZwz99sm8v95sckz8bd2c4Z ~]# curl localhost:3335

<!DOCTYPE html>
<html lang="en">
    <head>
        <meta charset="UTF-8" />
        <title>Apache Tomcat/9.0.41</title>
        <link href="favicon.ico" rel="icon" type="image/x-icon" />
        <link href="tomcat.css" rel="stylesheet" type="text/css" />
    </head>

    <body>
        <div id="wrapper">
            <div id="navigation" class="curved container">
                <span id="nav-home"><a href="https://tomcat.apache.org/">Home</a></span>
                <span id="nav-hosts"><a href="/docs/">Documentation</a></span>
                <span id="nav-config"><a href="/docs/config/">Configuration</a></span>
                <span id="nav-examples"><a href="/examples/">Examples</a></span>
                <span id="nav-wiki"><a href="https://wiki.apache.org/tomcat/FrontPage">Wiki</a></span>
                <span id="nav-lists"><a href="https://tomcat.apache.org/lists.html">Mailing Lists</a></span>
                <span id="nav-help"><a href="https://tomcat.apache.org/findhelp.html">Find Help</a></span>
                <br class="separator" />
            </div>
docker 安装 MySQL
第一步 下载并运行
#拉取并运行容器
docker run -d --name mysql -p 3306:3306 -e MYSQL_ROOT_PASSWORD=123456 mysql
参数说明:
-p 3306:3306 :映射容器服务的 3306 端口到宿主机的 3306 端口,外部主机可以直接通过 宿主机ip:3306 访问到 MySQL 的服务。
MYSQL_ROOT_PASSWORD=123456:设置 MySQL 服务 默认账号root 用户的密码。
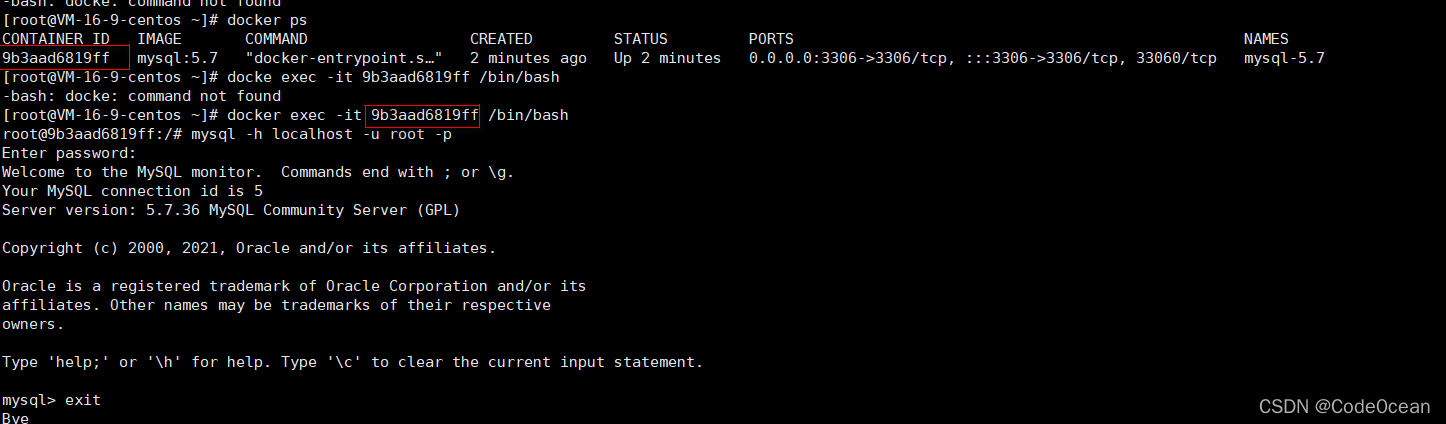
第二步 进入容器查看MySQL服务
进入容器,并通过账号root查看MySQL服务能否正常连接
docker exec -it 9b3aad6819ff /bin/bash
mysql -h localhost -u root -p
docker 安装 Nginx
第一步 搜索并下载镜像
[root@iZwz99sm8v95sckz8bd2c4Z ~]# docker search nginx
NAME                               DESCRIPTION                                     STARS     OFFICIAL   AUTOMATED
nginx                              Official build of Nginx.                        14207     [OK]
jwilder/nginx-proxy                Automated Nginx reverse proxy for docker con…   1932                 [OK]
richarvey/nginx-php-fpm            Container running Nginx + PHP-FPM capable of…   797                  [OK]
linuxserver/nginx                  An Nginx container, brought to you by LinuxS…   137
jc21/nginx-proxy-manager           Docker container for managing Nginx proxy ho…   123
tiangolo/nginx-rtmp                Docker image with Nginx using the nginx-rtmp…   107                  [OK]
[root@iZwz99sm8v95sckz8bd2c4Z ~]# docker pull nginx
Using default tag: latest
latest: Pulling from library/nginx
6ec7b7d162b2: Already exists
cb420a90068e: Pull complete
2766c0bf2b07: Pull complete
e05167b6a99d: Pull complete
70ac9d795e79: Pull complete
Digest: sha256:4cf620a5c81390ee209398ecc18e5fb9dd0f5155cd82adcbae532fec94006fb9
Status: Downloaded newer image for nginx:latest
docker.io/library/nginx:latest
[root@iZwz99sm8v95sckz8bd2c4Z ~]# docker images;
REPOSITORY   TAG       IMAGE D       CREATED       SIZE
mysql        5.7       f07dfa83b528   5 days ago    448MB
nginx        latest    ae2feff98a0c   11 days ago   133MB
centos       latest    300e315adb2f   2 weeks ago   209MB
可以到dockerhub官网查看Nginx的详细版本信息 :https://hub.docker.com/_/nginx
第二步 运行测试
docker run -d --name nginx01 -p 3334:80 nginx

-d 后台运行
--name 给容器命名
-p 3334:80 将宿主机的端口3334映射到该容器的80端口
运行结果:
[root@iZwz99sm8v95sckz8bd2c4Z ~]# docker exec -it nginx01 /bin/bash
Error: No such container: nginx01
[root@iZwz99sm8v95sckz8bd2c4Z ~]# docker run -d --name nginx01 -p 3334:80 nginx
20c896637ff5de8be835797109d62ee2465e28d9d716be5a8d550ef7d547fcf5
[root@iZwz99sm8v95sckz8bd2c4Z ~]# docker ps
CONTAINER ID   IMAGE     COMMAND                  CREATED         STATUS         PORTS                  NAMES
20c896637ff5   nginx     "/docker-entrypoint.…"   7 seconds ago   Up 5 seconds   0.0.0.0:3334->80/tcp   nginx01
第三步 配置文件
进入容器,自定义配置文件
[root@iZwz99sm8v95sckz8bd2c4Z ~]# docker exec -it nginx01 /bin/bash
root@20c896637ff5:/# whereis nginx
nginx: /usr/sbin/nginx /usr/lib/nginx /etc/nginx /usr/share/nginx
root@20c896637ff5:/# cd /etc/nginx
root@20c896637ff5:/etc/nginx# ls
conf.d	fastcgi_params	koi-utf  koi-win  mime.types  modules  nginx.conf  scgi_params	uwsgi_params  win-utf
root@20c896637ff5:/# cd /etc/nginx
root@20c896637ff5:/etc/nginx# ls
conf.d	fastcgi_params	koi-utf  koi-win  mime.types  modules  nginx.conf  scgi_params	uwsgi_params  win-utf
第四步 访问测试
本地主机访问测试,curl命令发起请求,如果使用阿里云服务器需要设置安全组。
[root@iZwz99sm8v95sckz8bd2c4Z ~]# docker ps
CONTAINER ID   IMAGE     COMMAND                  CREATED         STATUS         PORTS                  NAMES
20c896637ff5   nginx     "/docker-entrypoint.…"   7 minutes ago   Up 7 minutes   0.0.0.0:3334->80/tcp   nginx01
[root@iZwz99sm8v95sckz8bd2c4Z ~]# curl localhost:3334
<!DOCTYPE html>
<html>
<head>
<title>Welcome to nginx!</title>
<style>
    body {
        width: 35em;
        margin: 0 auto;
        font-family: Tahoma, Verdana, Arial, sans-serif;
    }
</style>
</head>
<body>
<h1>Welcome to nginx!</h1>
<p>If you see this page, the nginx web server is successfully installed and
working. Further configuration is required.</p>

<p>For online documentation and support please refer to
<a href="http://nginx.org/">nginx.org</a>.<br/>
Commercial support is available at
<a href="http://nginx.com/">nginx.com</a>.</p>

<p><em>Thank you for using nginx.</em></p>
</body>
</html>
第五步 安装vim
我们使用Nginx往往需要编写配置文件,但是Nginx官方镜像没有安装vim,需要我们手动进行安装。使用以下命令进行安装:
apt-get install vim
如果执行上述命令出现提示:
        Reading package lists... Done
        Building depndency tree
        Reading state information... Done
        E: Unable to locate package vim
则需要先同步 /etc/apt/sources.list 和 /etc/apt/sources.list.d 中列出的源的索引,这样才能获取到最新的软件包。执行以下命令来更新:
apt-get update
更新完毕再安装即可。我们修改了配置文件,只要重新启动容器docker restart 容器id,改动就可以生效了。
解决vim在终端不能复制的问题:在vim 中输入 :set mouse=r。
拓展:启动项目并设置数据卷,为避免nginx因为修改配置文件导致的错误而无法启动容器,我们可以通过cp命令覆盖配置文件,但是设置数据卷会更为方便。启动Nginx容器的同时设置数据卷的命令:
docker run
--name my_nginx
-d -p 80:80
-v /data/nginx/conf/nginx.conf:/etc/nginx/nginx.conf
-v /data/nginx/log:/var/log/nginx
-v /data/nginx/html:/usr/share/nginx/html
nginx
参数说明:
第一个-v:挂载nginx的主配置文件,以方便在宿主机上直接修改容器的配置文件
第二个-v:挂载容器内nginx的日志,容器运行起来之后,可以直接在宿主机的这个目录中查看nginx日志
第三个-v:挂载静态页面目录

 浙公网安备 33010602011771号