Spring Boot 集成 MyBatis
Spring Boot 集成 MyBatis
MyBatis 是一款优秀的持久层框架。本文将从依赖配置、数据源设置、代码实现到测试验证,一步步讲解 Spring Boot 整合 MyBatis 的全过程。
配置核心依赖
在 build.gradle 中添加 MyBatis 核心依赖、MySQL 驱动依赖,以及其他基础依赖(如 Web、Lombok 等)。完整依赖配置如下:
plugins {
    id 'java'
    id 'org.springframework.boot' version '4.0.1'
    id 'io.spring.dependency-management' version '1.1.7'
}

group = 'com'
version = '0.0.1-SNAPSHOT'
description = 'springboot'

java {
    toolchain {
        languageVersion = JavaLanguageVersion.of(21) // 对应项目 JDK 版本
    }
}

configurations {
    compileOnly {
        extendsFrom annotationProcessor
    }
}

repositories {
    mavenCentral() // 从 Maven 中央仓库下载依赖
}

dependencies {
    // Spring Boot 基础依赖
    implementation 'org.springframework.boot:spring-boot-starter'
    // Web 依赖(支持接口开发,可选,根据项目需求添加)
    implementation 'org.springframework.boot:spring-boot-starter-web'

    // MyBatis 与 Spring Boot 整合 Starter(核心依赖)
    implementation 'org.mybatis.spring.boot:mybatis-spring-boot-starter:4.0.1'
    // MySQL 驱动依赖(适配 MySQL 8.x 版本)
    implementation 'mysql:mysql-connector-java:8.0.33'

    // Lombok 依赖(简化实体类代码)
    compileOnly 'org.projectlombok:lombok'
    // 开发工具依赖(热部署等)
    developmentOnly 'org.springframework.boot:spring-boot-devtools'
    // 配置处理器(自定义配置提示)
    annotationProcessor 'org.springframework.boot:spring-boot-configuration-processor'
    annotationProcessor 'org.projectlombok:lombok'

    // 测试依赖
    testImplementation 'org.springframework.boot:spring-boot-starter-test'
    testRuntimeOnly 'org.junit.platform:junit-platform-launcher'
}

tasks.named('test') {
    useJUnitPlatform() // 使用 JUnit 5 测试框架
}
配置数据源及 MyBatis 相关参数
在 application.yml(或 application.properties)中配置 MySQL 数据源信息、MyBatis 映射规则等。
完整配置示例(yml 格式)
server:
  port: 80 # 项目启动端口(可选,默认 8080)

spring:
  # 数据源配置(适配 MySQL 8.x)
  datasource:
    driver-class-name: com.mysql.cj.jdbc.Driver
    # 数据库连接 URL:指定数据库名、编码、SSL 配置等
    url: jdbc:mysql://localhost:3306/cuit_scss?useUnicode=true&characterEncoding=utf-8&useSSL=false&allowPublicKeyRetrieval=true&zeroDateTimeBehavior=convertToNull&transformedBitIsBoolean=true&allowMultiQueries=true
    username: root # 数据库用户名(替换为你的 MySQL 用户名)
    password: root # 数据库密码(替换为你的 MySQL 密码)

mybatis:
  type-aliases-package: com.springboot.entity # 实体类别名包(简化 XML 中 resultType 配置)
  configuration:
    log-impl: org.apache.ibatis.logging.stdout.StdOutImpl # 配置 mybatis 控制台输出 sql
    map-underscore-to-camel-case: true # 启用驼峰映射
关键配置说明
- 数据源 URL 参数:
useSSL=false:关闭 SSL 连接(开发环境推荐,生产环境根据需求开启)。allowPublicKeyRetrieval=true:允许从 MySQL 服务器获取公钥(避免连接报错)。zeroDateTimeBehavior=convertToNull:将0000-00-00日期转为null(避免日期格式异常)。
type-aliases-package:配置后,XML 中resultType可直接写实体类名(如user),无需写全类名(com.springboot.entity.User)。log-impl:为了在控制台中输出SQL语句。map-underscore-to-camel-case:启用驼峰映射。
启动类添加 Mapper 扫描注解
在 Spring Boot 主启动类上添加 @MapperScan 注解,指定 MyBatis Mapper 接口所在包,让 Spring 自动扫描并管理 Mapper 实例。
package com.springboot;

import org.mybatis.spring.annotation.MapperScan;
import org.springframework.boot.SpringApplication;
import org.springframework.boot.autoconfigure.SpringBootApplication;

@SpringBootApplication
@MapperScan("com.springboot.mapper") // 扫描 Mapper 接口所在包
public class SpringbootApplication {
    public static void main(String[] args) {
        SpringApplication.run(SpringbootApplication.class, args);
    }
}
代码实现(分层开发)
按实体类 → Mapper 接口 → Mapper XML → Service 接口 → Service 实现类的顺序实现。
实体类(Entity):映射数据库表
创建 User 实体类,对应 MySQL 中的 user 表,使用 Lombok 简化代码。
package com.springboot.entity;

import lombok.Data;
import lombok.experimental.Accessors;

@Data // 自动生成 getter/setter、toString、equals 等方法
@Accessors(chain = true) // 支持链式调用(如 new User().setId(1).setUsername("test"))
public class User {
    private Integer id;       // 对应表中 id 字段(自增主键)
    private String username;  // 对应表中 username 字段
    private String password;  // 对应表中 password 字段
}
数据库表创建 SQL
在 MySQL 中创建 user 表,字段与实体类一致:
CREATE TABLE `user` (
  `id` int NOT NULL AUTO_INCREMENT,
  `username` varchar(12) NOT NULL,
  `password` varchar(36) NOT NULL,
  PRIMARY KEY (`id`),
  UNIQUE KEY `username` (`username`) -- 用户名唯一约束
) ENGINE=InnoDB AUTO_INCREMENT=5 DEFAULT CHARSET=utf8mb4 COLLATE=utf8mb4_0900_ai_ci;
Mapper 接口:定义数据操作方法
创建 UserMapper 接口,声明 CRUD(增删改查)操作方法,无需实现(由 MyBatis 通过 XML 映射实现)。
package com.springboot.mapper;

import com.springboot.entity.User;

public interface UserMapper {
    // 根据 id 查询用户
    User getById(int id);
    // 根据用户名查询用户
    User getByUsername(String username);
    // 新增用户
    int insert(User user);
    // 更新用户信息
    int update(User user);
    // 根据 id 删除用户
    int deleteById(int id);
}
Mapper XML:编写 SQL 语句
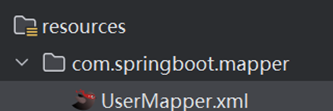
创建 UserMapper.xml 文件,映射 Mapper 接口的方法与 SQL 语句,文件路径需与 Mapper 接口包结构一致(resources/com/springboot/mapper/)。
<?xml version="1.0" encoding="UTF-8" ?>
<!DOCTYPE mapper
        PUBLIC "-//mybatis.org//DTD Mapper 3.0//EN"
        "https://mybatis.org/dtd/mybatis-3-mapper.dtd">

<!-- namespace 必须与 Mapper 接口全类名一致 -->
<mapper namespace="com.springboot.mapper.UserMapper">

    <!-- 新增用户:id 自增,无需传入 -->
    <insert id="insert">
        insert into user(username, password) values(#{username}, #{password})
    </insert>

    <!-- 更新用户:根据 id 修改用户名和密码 -->
    <update id="update">
        update user set username = #{username}, password = #{password} where id = #{id}
    </update>

    <!-- 删除用户:根据 id 删除 -->
    <delete id="deleteById">
        delete from user where id = #{id}
    </delete>

    <!-- 根据 id 查询:resultType 为实体类别名(因配置了 type-aliases-package) -->
    <select id="getById" resultType="user">
        select * from user where id = #{id}
    </select>

    <!-- 根据用户名查询 -->
    <select id="getByUsername" resultType="user">
        select * from user where username = #{username}
    </select>
</mapper>
Mapper XML 文件路径说明
文件需放在 resources 目录下,且包结构与 Mapper 接口一致(示例路径:resources/com/springboot/mapper/UserMapper.xml)。
Service 层:封装业务逻辑
Service 层负责封装业务逻辑,调用 Mapper 层完成数据操作,分为接口和实现类。
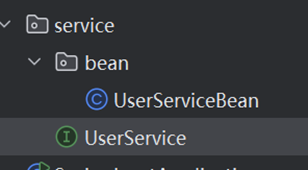
Service 接口
package com.springboot.service;

import com.springboot.entity.User;

// 业务逻辑接口,定义与 Mapper 一致的 CRUD 方法(可根据业务扩展)
public interface UserService {
    User getById(int id);
    User getByUsername(String username);
    int insert(User user);
    int update(User user);
    int deleteById(int id);
}
Service 实现类
package com.springboot.service.bean;

import com.github.pagehelper.PageHelper;
import com.github.pagehelper.PageInfo;
import com.springboot.entity.User;
import com.springboot.mapper.UserMapper;
import com.springboot.service.UserService;
import jakarta.annotation.Resource;
import org.springframework.stereotype.Service;
import org.springframework.transaction.annotation.Propagation;
import org.springframework.transaction.annotation.Transactional;

@Service
@Transactional
public class UserServiceBean implements UserService {
    @Resource
    private UserMapper userMapper;

    @Override
    public User getById(int id) {
        return userMapper.getById(id);
    }

    @Override
    public User getByUsername(String username) {
        return userMapper.getByUsername(username);
    }

    @Override @Transactional(propagation = Propagation.REQUIRED )
    public int insert(User user) {
        return userMapper.insert(user);
    }

    @Override @Transactional(propagation = Propagation.REQUIRED )
    public int update(User user) {
        return userMapper.update(user);
    }

    @Override @Transactional(propagation = Propagation.REQUIRED )
    public int deleteById(int id) {
        return userMapper.deleteById(id);
    }
}
@Transactional 事务管理注解。
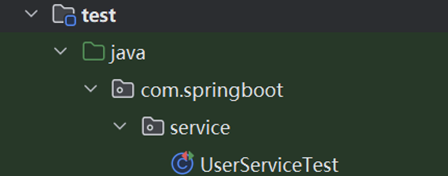
测试 Service 层方法
使用 Spring Boot 内置的测试框架(JUnit 5)测试 Service 层的 CRUD 方法,验证集成是否成功。
测试类编写
创建测试类 UserServiceTest,放在 test/java/com/springboot/service/ 目录下:
package com.springboot.service;

import com.springboot.entity.User;
import org.junit.jupiter.api.Test;
import org.springframework.beans.factory.annotation.Autowired;
import org.springframework.boot.test.context.SpringBootTest;

@SpringBootTest // 标识为 Spring Boot 测试类,加载完整 Spring 上下文
public class UserServiceTest {

    // 注入 Service 实例
    @Autowired
    private UserService userService;

    // 测试新增用户
    @Test
    void insert() {
        User user = new User().setUsername("test").setPassword("test");
        int result = userService.insert(user);
        System.out.println("新增用户影响行数:" + result); // 成功返回 1
    }

    // 测试更新用户
    @Test
    void update() {
        // 假设已存在 id=4 的用户,修改其密码为 123
        User user = new User().setId(4).setUsername("test").setPassword("123");
        int result = userService.update(user);
        System.out.println("更新用户影响行数:" + result); // 成功返回 1
    }

    // 测试删除用户
    @Test
    void delete() {
        int result = userService.deleteById(4);
        System.out.println("删除用户影响行数:" + result); // 成功返回 1
    }

    // 测试根据 id 查询
    @Test
    void getById() {
        User user = userService.getById(1);
        System.out.println("查询到的用户:" + user); // 输出用户信息
    }

    // 测试根据用户名查询
    @Test
    void getByUsername() {
        User user = userService.getByUsername("Peppa");
        System.out.println("查询到的用户:" + user); // 输出用户信息
    }
}
测试结果验证
-
运行
insert()方法:数据库user表中新增一条username=test、password=test的记录。
![image]()
-
其他的方法同理即可


 浙公网安备 33010602011771号