
JMonkeyEngine3——NiftyGui布局&大小
前言
每一个Nifty元素都有一堆属性,比如id,childLayout,width,height等,具体参考NiftyGui Wiki,本文将主要介绍childLayout属性,即布局属性,每个Nifty元素都有这个属性,该属性用于定义child如何放置在parent中,同时介绍width/height这两个场景的属性,介绍几种定义元素的大小的方式。
创建一个NiftyGui xml文件,命名为NiftyGui02,然后开始我们的布局之旅。
absolute布局
这是最简单的布局,即绝对定位,通常用于固定分辨率的游戏GUI界面使用,因为绝对定义在分辨率改变后,显然会不能自动适配。
修改NiftyGui02.xml,添加如下代码:
 1 <?xml version="1.0" encoding="UTF-8" standalone="yes"?>
 2 <nifty xmlns:xsi="http://www.w3.org/2001/XMLSchema-instance" xmlns="http://nifty-gui.lessvoid.com/nifty-gui" xsi:schemaLocation="https://raw.githubusercontent.com/void256/nifty-gui/1.4/nifty-core/src/main/resources/nifty.xsd https://raw.githubusercontent.com/void256/nifty-gui/1.4/nifty-core/src/main/resources/nifty.xsd">
 3     <useControls filename="nifty-default-controls.xml"/>
 4     <useStyles filename="nifty-default-styles.xml"/>
 5     <screen id="TestScreen">
 6         <layer id="layer0" childLayout="absolute">
 7             <panel id="panel0" height="30%" style="nifty-panel-simple" width="50%" childLayout="absolute" y="123" x="23"/>
 8         </layer>
 9     </screen>
10 </nifty>
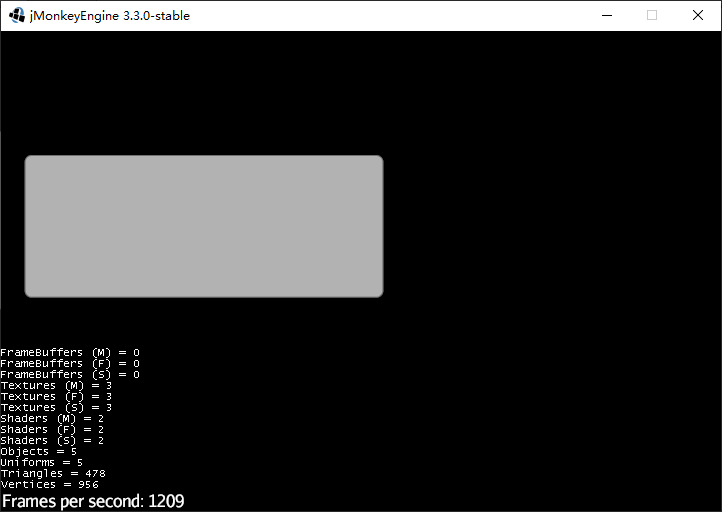
如上,我们添加了一个TestScreen,包含一个layer0,layer0设置子元素按absolute方式布局,layer0的下包含一个子元素panel0,通过x,y属性定义位置(即绝对位置,只有absolute布局下,x,y属性才有效,其他布局下会忽略这两个属性)。
以720x480启动:
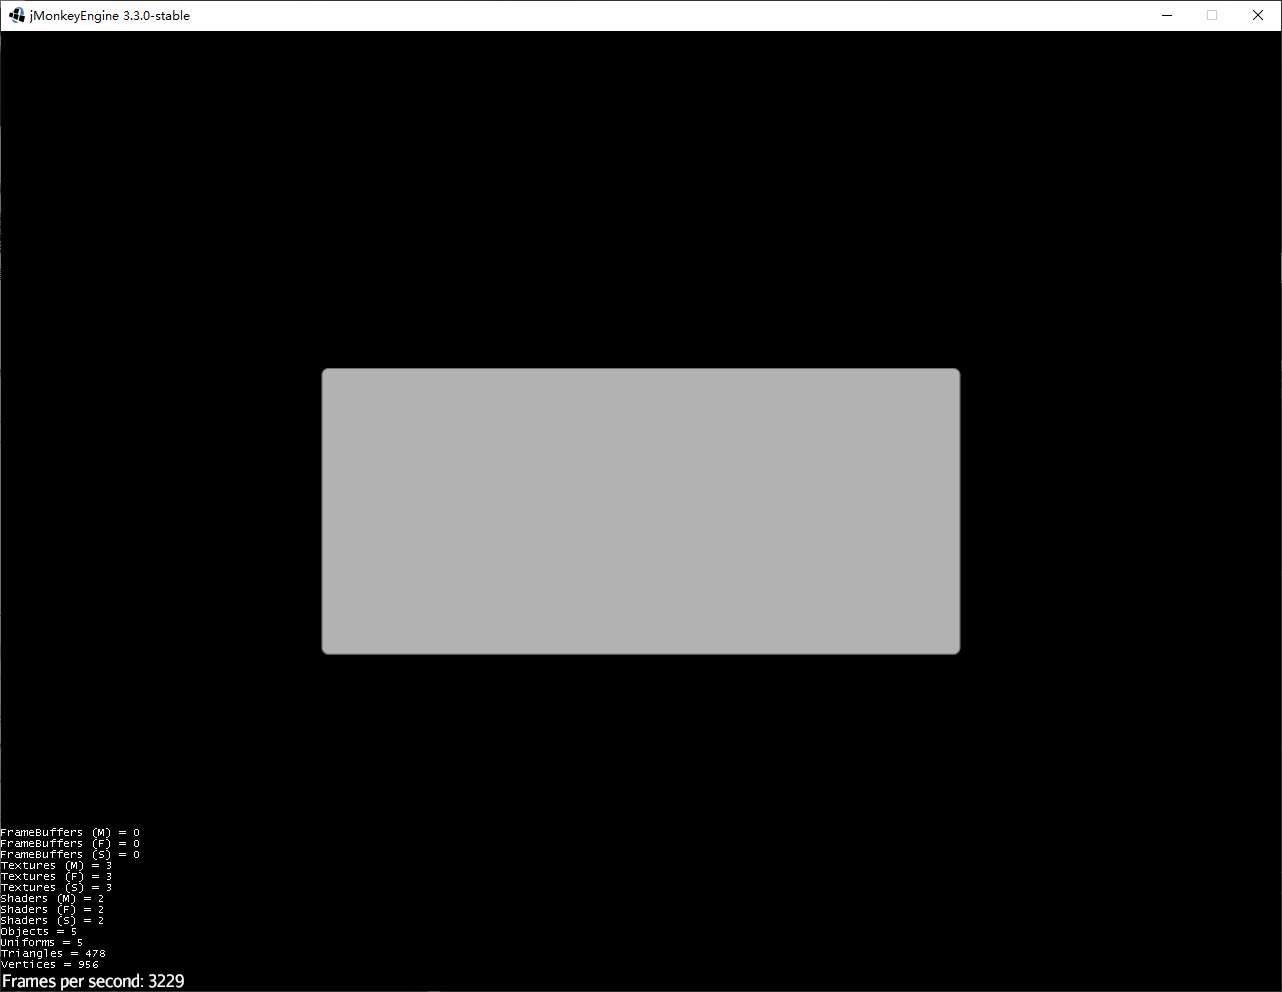
以1280*960启动:

可以看到下方空白处不能自适应。
center布局
修改xml代码,如下:
 1 <?xml version="1.0" encoding="UTF-8" standalone="yes"?>
 2 <nifty xmlns:xsi="http://www.w3.org/2001/XMLSchema-instance" xmlns="http://nifty-gui.lessvoid.com/nifty-gui" xsi:schemaLocation="https://raw.githubusercontent.com/void256/nifty-gui/1.4/nifty-core/src/main/resources/nifty.xsd https://raw.githubusercontent.com/void256/nifty-gui/1.4/nifty-core/src/main/resources/nifty.xsd">
 3     <useControls filename="nifty-default-controls.xml"/>
 4     <useStyles filename="nifty-default-styles.xml"/>
 5     <screen id="TestScreen">
 6         <layer id="layer0" childLayout="center">
 7             <panel id="panel0" height="30%" style="nifty-panel-simple" width="50%" childLayout="absolute" y="123" x="23"/>
 8         </layer>
 9     </screen>
10 </nifty>
注意第6行layer0的childLayout="center",当我们使用center布局时,即使子元素包含x,y位置,也会忽略,强制子元素处于中心位置。
以720x480启动:

以1280x960启动:
无论以那种分辨率启动,都会居中。
继续修改xml,我们添加两个panel:
 1 <?xml version="1.0" encoding="UTF-8" standalone="yes"?>
 2 <nifty xmlns:xsi="http://www.w3.org/2001/XMLSchema-instance" xmlns="http://nifty-gui.lessvoid.com/nifty-gui" xsi:schemaLocation="https://raw.githubusercontent.com/void256/nifty-gui/1.4/nifty-core/src/main/resources/nifty.xsd https://raw.githubusercontent.com/void256/nifty-gui/1.4/nifty-core/src/main/resources/nifty.xsd">
 3     <useControls filename="nifty-default-controls.xml"/>
 4     <useStyles filename="nifty-default-styles.xml"/>
 5     <screen id="TestScreen">
 6         <layer id="layer0" childLayout="center">
 7             <panel id="panel0" height="30%" style="nifty-panel-simple" backgroundColor="#ff3333ff" width="50%" childLayout="absolute" y="123" x="23"/>
 8             <panel id="panel1" height="30%" style="nifty-panel-simple" backgroundColor="#0066ffff" width="25.0%" childLayout="absolute"/>
 9         </layer>
10     </screen>
11 </nifty>
启动如下:
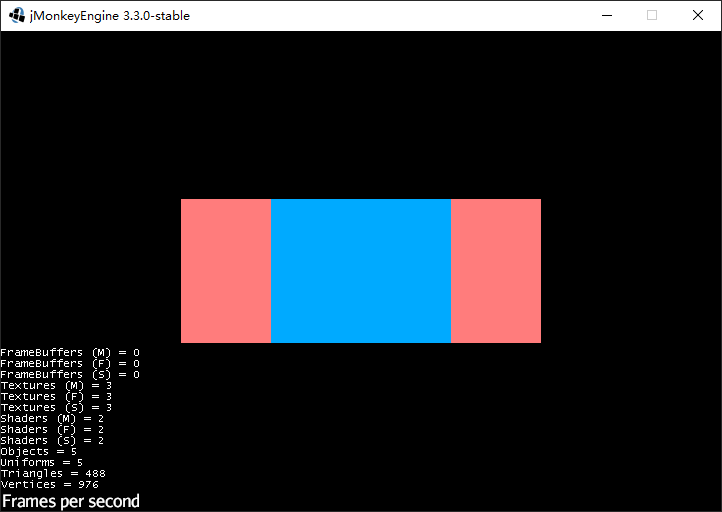
可以看到,子元素都居中显示了。
vertical布局
将元素按垂直方式依次渲染,也是会忽略子元素的x,y属性,启动如下:
当我们添加四个元素时,即使无法显示完整,也不会出现滚动条:
 1 <?xml version="1.0" encoding="UTF-8" standalone="yes"?>
 2 <nifty xmlns:xsi="http://www.w3.org/2001/XMLSchema-instance" xmlns="http://nifty-gui.lessvoid.com/nifty-gui" xsi:schemaLocation="https://raw.githubusercontent.com/void256/nifty-gui/1.4/nifty-core/src/main/resources/nifty.xsd https://raw.githubusercontent.com/void256/nifty-gui/1.4/nifty-core/src/main/resources/nifty.xsd">
 3     <useControls filename="nifty-default-controls.xml"/>
 4     <useStyles filename="nifty-default-styles.xml"/>
 5     <screen id="TestScreen">
 6         <layer id="layer0" childLayout="vertical">
 7             <panel id="panel0" height="30%" style="nifty-panel-simple" backgroundColor="#ff3333ff" width="50%" childLayout="absolute" y="123" x="23"/>
 8             <panel id="panel1" height="30%" style="nifty-panel-simple" backgroundColor="#0066ffff" width="25.0%" childLayout="absolute"/>
 9             <panel id="panel2" height="30%" style="nifty-panel-simple" width="50%" childLayout="absolute"/>
10             <panel id="panel4" height="30%" style="nifty-panel-simple" backgroundColor="#66ff66ff" width="50%" childLayout="absolute"/>
11         </layer>
12     </screen>
13 </nifty>
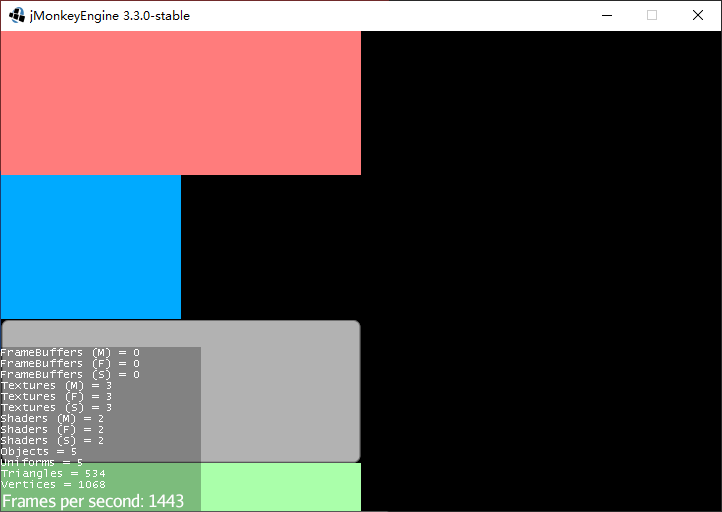
我们需要添加滚动条组件才能显示滚动条(参考后面的教程)。
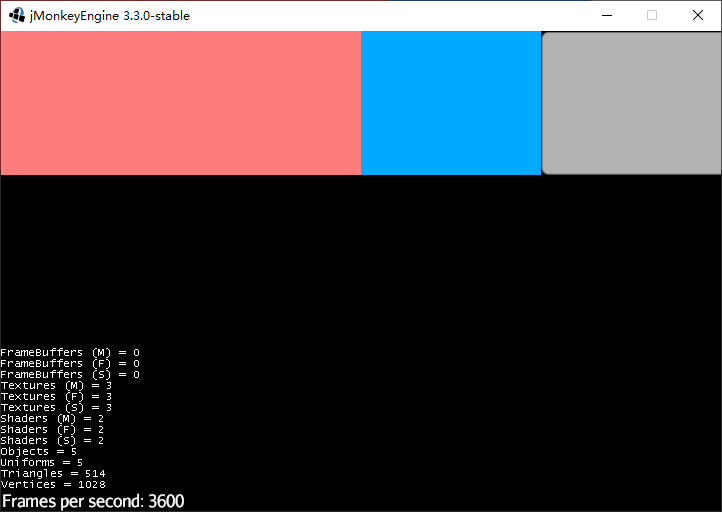
horizontal布局
与垂直布局一样,只是变成了水平渲染元素,即使我们无法显示完整元素,也不会有水平滚动条,更不会自动换行显示子元素,如下:
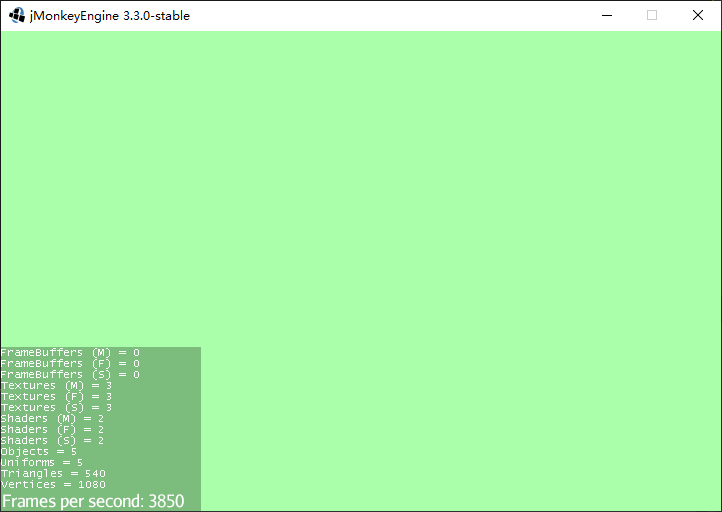
overlay布局
比较特殊,很少使用,overlay布局会强制忽略子元素所有属性(包括width,height,x,y等),然后最后一个子元素渲染会覆盖整个父元素,有点类似一个screen中多个layer覆盖渲染,修改xml如下:
 1 <?xml version="1.0" encoding="UTF-8" standalone="yes"?>
 2 <nifty xmlns:xsi="http://www.w3.org/2001/XMLSchema-instance" xmlns="http://nifty-gui.lessvoid.com/nifty-gui" xsi:schemaLocation="https://raw.githubusercontent.com/void256/nifty-gui/1.4/nifty-core/src/main/resources/nifty.xsd https://raw.githubusercontent.com/void256/nifty-gui/1.4/nifty-core/src/main/resources/nifty.xsd">
 3     <useControls filename="nifty-default-controls.xml"/>
 4     <useStyles filename="nifty-default-styles.xml"/>
 5     <screen id="TestScreen">
 6         <layer id="layer0" childLayout="vertical">
 7             <panel id="panel0" height="30%" style="nifty-panel-simple" backgroundColor="#ff3333ff" width="50%" childLayout="absolute" y="123" x="23"/>
 8             <panel id="panel1" height="30%" style="nifty-panel-simple" backgroundColor="#0066ffff" width="25.0%" childLayout="absolute"/>
 9             <panel id="panel2" height="30%" style="nifty-panel-simple" width="50%" childLayout="absolute"/>
10             <panel id="panel4" height="30%" style="nifty-panel-simple" backgroundColor="#66ff66ff" width="50%" childLayout="absolute"/>
11         </layer>
12     </screen>
13 </nifty>
启动如下:
width&height属性
我们首先将layer0设置为vertical布局,然后调整子元素panel的height,width和height可以设置绝对像素大小,相对父元素百分比大小,以及*号按布局填充余下空间。我们调整每个panel的height为25%,4个子元素加起来刚好100%,即不管什么分辨率,都可以看到4个panel,如下:
 1 <?xml version="1.0" encoding="UTF-8" standalone="yes"?>
 2 <nifty xmlns:xsi="http://www.w3.org/2001/XMLSchema-instance" xmlns="http://nifty-gui.lessvoid.com/nifty-gui" xsi:schemaLocation="https://raw.githubusercontent.com/void256/nifty-gui/1.4/nifty-core/src/main/resources/nifty.xsd https://raw.githubusercontent.com/void256/nifty-gui/1.4/nifty-core/src/main/resources/nifty.xsd">
 3     <useControls filename="nifty-default-controls.xml"/>
 4     <useStyles filename="nifty-default-styles.xml"/>
 5     <screen id="TestScreen">
 6         <layer id="layer0" childLayout="vertical">
 7             <panel id="panel0" height="25.0%" style="nifty-panel-simple" backgroundColor="#ff3333ff" width="50%" childLayout="absolute" y="123" x="23"/>
 8             <panel id="panel1" height="25.0%" style="nifty-panel-simple" backgroundColor="#0066ffff" width="25.0%" childLayout="absolute"/>
 9             <panel id="panel2" height="25.0%" style="nifty-panel-simple" width="50%" childLayout="absolute" y="342" x="333"/>
10             <panel id="panel4" height="25.0%" style="nifty-panel-simple" backgroundColor="#66ff66ff" width="213.0px" childLayout="absolute" y="20" x="516"/>
11         </layer>
12     </screen>
13 </nifty>
启动程序如下:
可见不管以哪种分辨率显示,都会看到4个子元素刚好看到。
接着我们修改xml如下:
 1 <?xml version="1.0" encoding="UTF-8" standalone="yes"?>
 2 <nifty xmlns:xsi="http://www.w3.org/2001/XMLSchema-instance" xmlns="http://nifty-gui.lessvoid.com/nifty-gui" xsi:schemaLocation="https://raw.githubusercontent.com/void256/nifty-gui/1.4/nifty-core/src/main/resources/nifty.xsd https://raw.githubusercontent.com/void256/nifty-gui/1.4/nifty-core/src/main/resources/nifty.xsd">
 3     <useControls filename="nifty-default-controls.xml"/>
 4     <useStyles filename="nifty-default-styles.xml"/>
 5     <screen id="TestScreen">
 6         <layer id="layer0" childLayout="vertical">
 7             <panel id="panel0" height="25.0%" style="nifty-panel-simple" backgroundColor="#ff3333ff" width="*" childLayout="absolute" y="123" x="23"/>
 8             <panel id="panel1" height="25.0%" style="nifty-panel-simple" backgroundColor="#0066ffff" width="25.0%" childLayout="absolute"/>
 9             <panel id="panel2" height="10.0%" style="nifty-panel-simple" width="50%" childLayout="absolute" y="342" x="333"/>
10             <panel id="panel4" height="25.0%" style="nifty-panel-simple" backgroundColor="#66ff66ff" width="213.0px" childLayout="absolute" y="20" x="516"/>
11         </layer>
12     </screen>
13 </nifty>
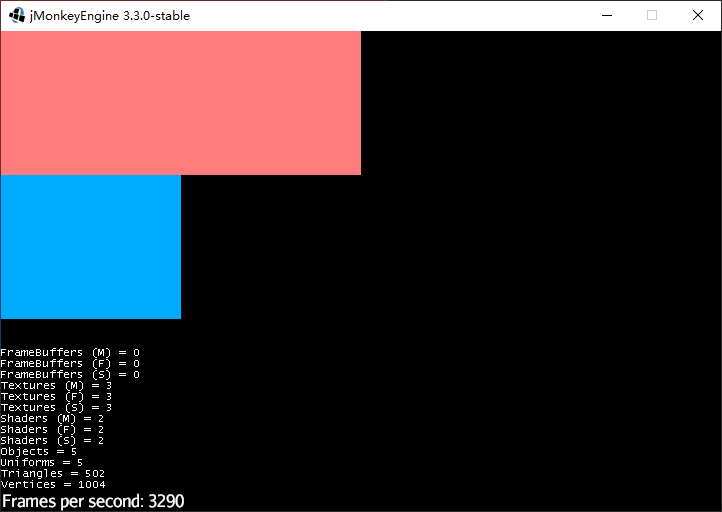
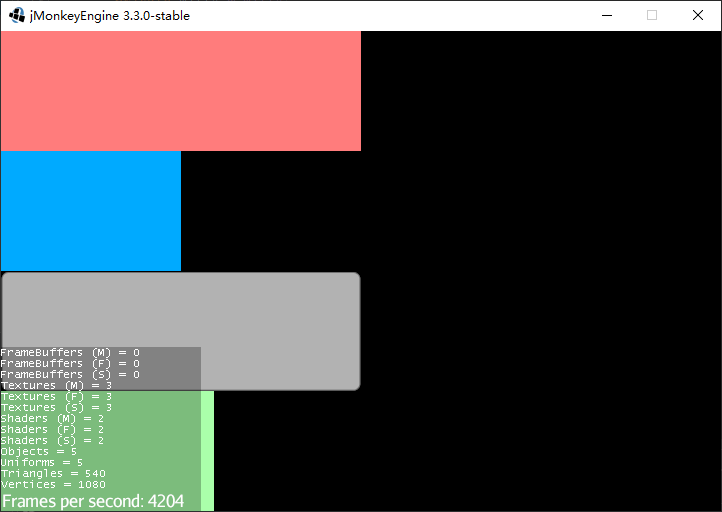
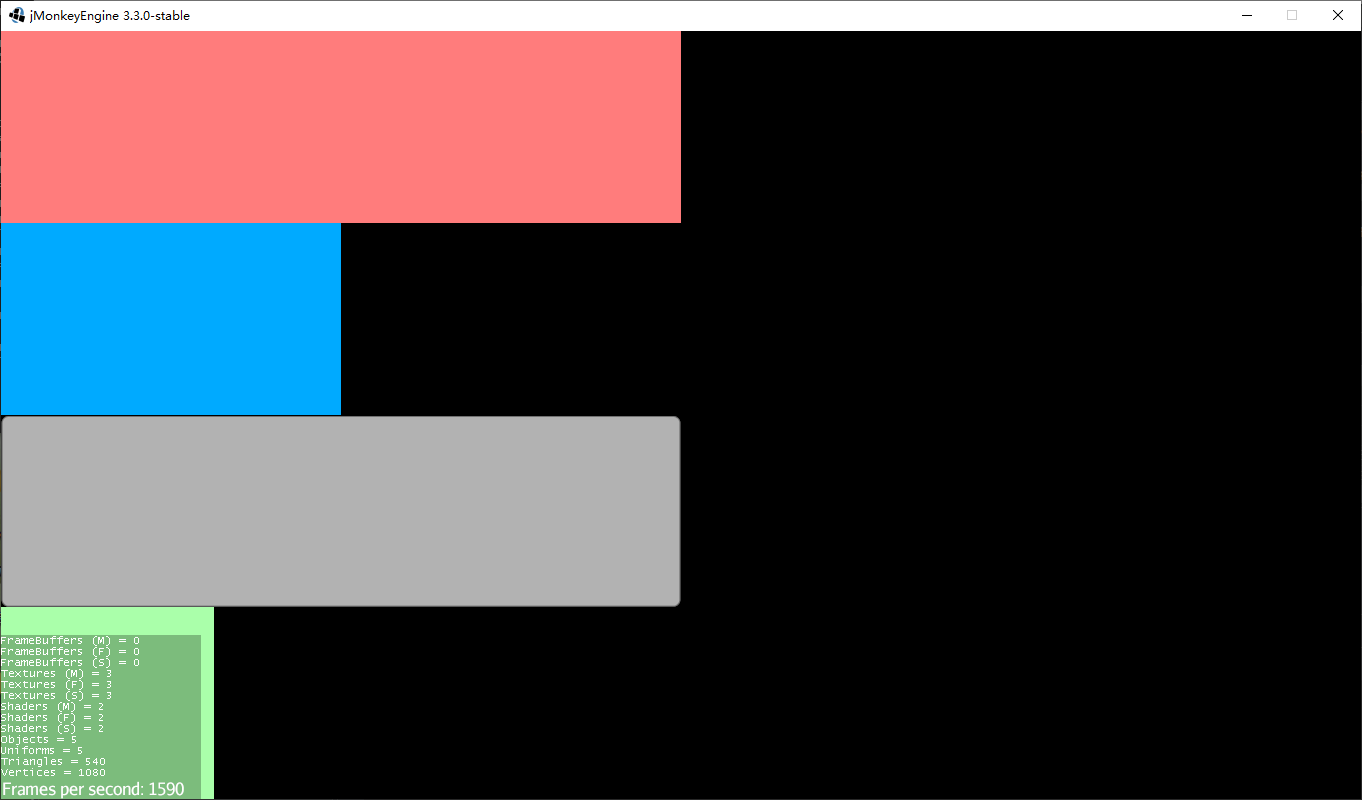
panel0的width设置为*,即宽度自动填充余下空白,panel2的height设置为10.0%,显示如下:
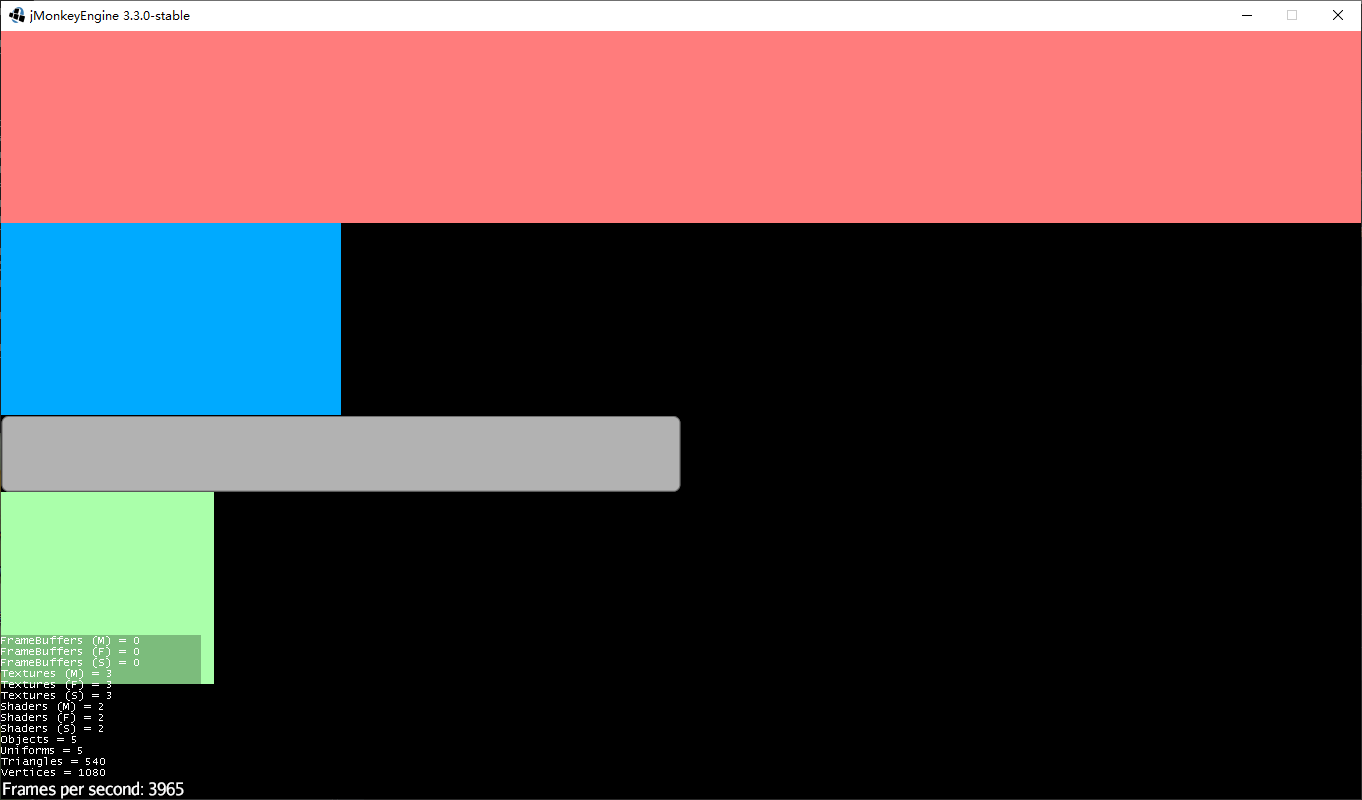
接着我们把panel1的height设置为*,即自动填充余下空白空间,显示如下:

布局和大小控制基本了解这些就足够用了。

 浙公网安备 33010602011771号