
Nginx最新版安装和配置详细教程(Windows和Linux)
一、Windows安装
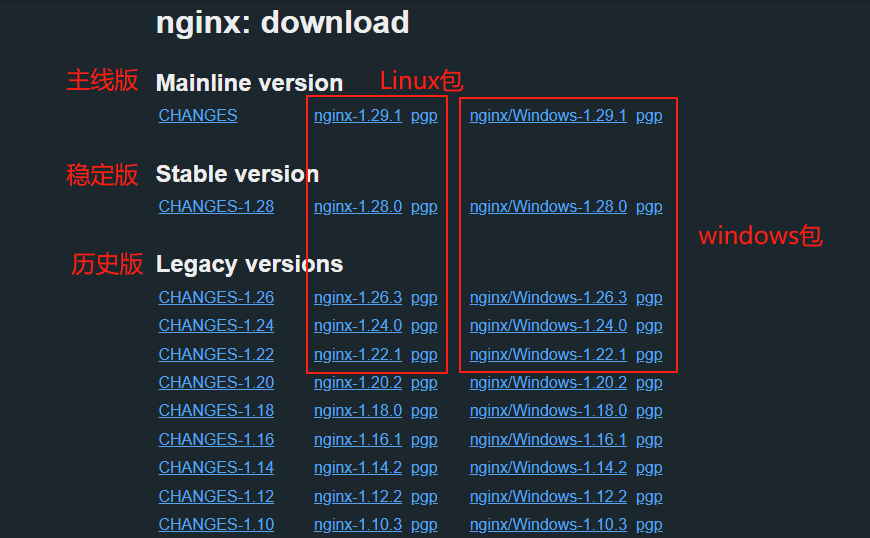
1.nginx官网下载
官网地址:nginx官网
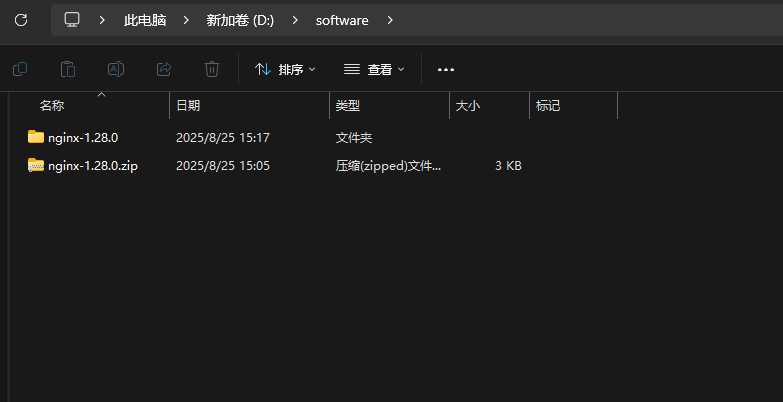
2.切换到安装路径,解压到当前文件夹
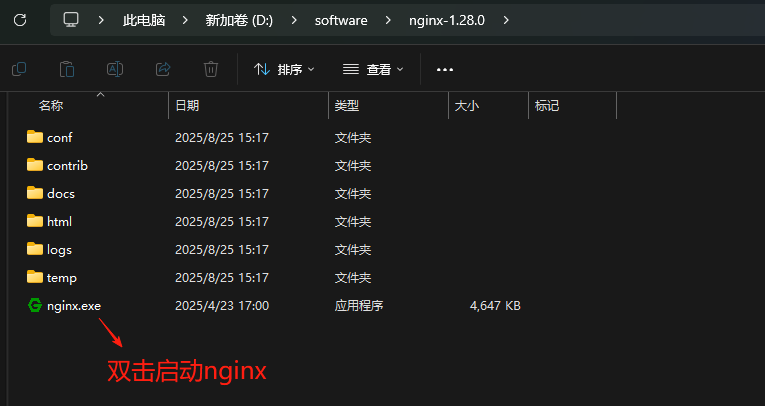
3.双击nginx.exe启动nginx
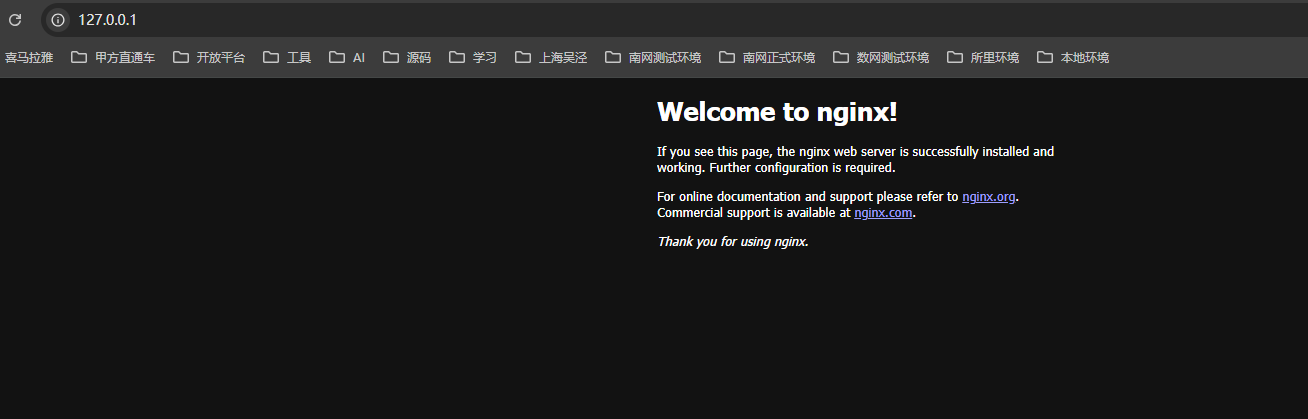
4.验证nginx
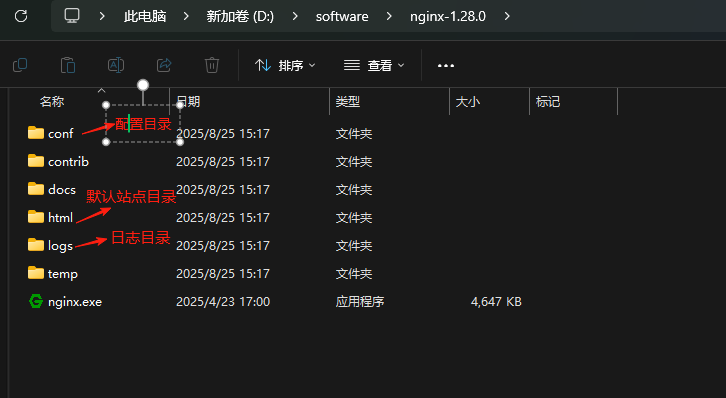
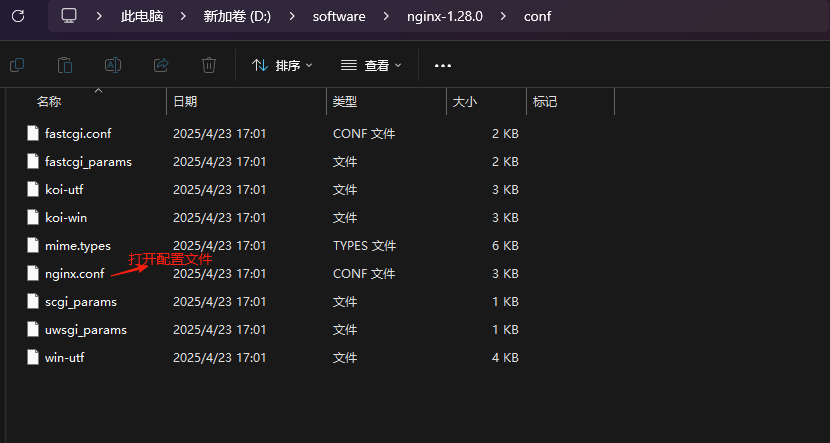
5.nginx配置说明
配置文件路径(实际以自己安装路径为准): D:/software/nginx-1.28.0/conf/nginx.conf
nginx.con配置文件说明
#运行用户
#user nobody;
#启动进程,通常设置成和cpu的数量相等
worker_processes 1;
#全局错误日志
#error_log logs/error.log;
#error_log logs/error.log notice;
#error_log logs/error.log info;
#PID文件,记录当前启动的nginx的进程ID
#pid logs/nginx.pid;
#工作模式及连接数上限
events {
worker_connections 1024; #单个后台worker process进程的最大并发链接数
}
#设定http服务器,利用它的反向代理功能提供负载均衡支持
http {
#设定mime类型(邮件支持类型),类型由mime.types文件定义
include mime.types;
default_type application/octet-stream;
#设定日志
#log_format main '$remote_addr - $remote_user [$time_local] "$request" '
# '$status $body_bytes_sent "$http_referer" '
# '"$http_user_agent" "$http_x_forwarded_for"';
#access_log logs/access.log main;
#sendfile 指令指定 nginx 是否调用 sendfile 函数(zero copy 方式)来输出文件,对于普通应用,
sendfile on;
#tcp_nopush on;
#连接超时时间
#keepalive_timeout 0;
keepalive_timeout 65;
#gzip压缩开关
#gzip on;
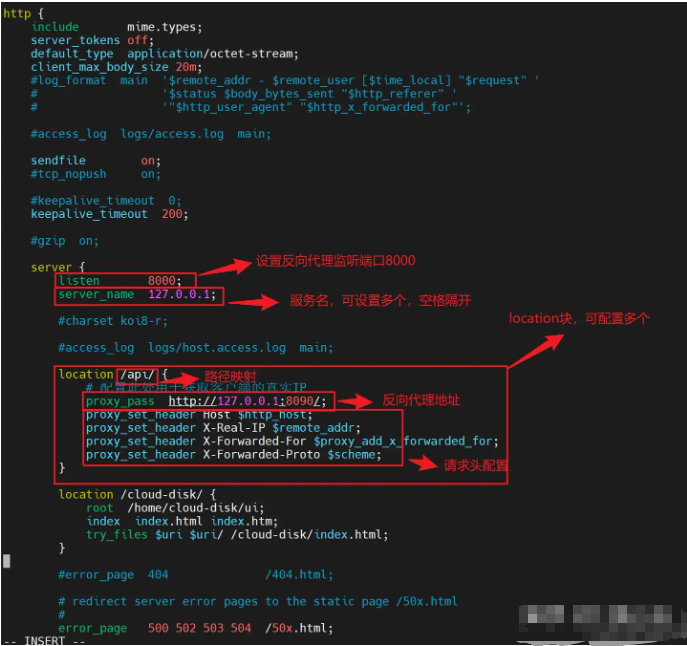
#HTTP服务器
server {
#监听8080端口,8080端口是知名端口号,用于HTTP协议
listen 8080;
#定义使用localhost访问
server_name localhost;
#编码格式
#charset koi8-r;
#access_log logs/host.access.log main;
#反向代理的路径,location 后面设置映射的路径
location / {
root html;
index index.html index.htm;
}
#错误处理页面(可选择性配置)
#error_page 404 /404.html;
# redirect server error pages to the static page /50x.html
#
error_page 500 502 503 504 /50x.html;
location = /50x.html {
root html;
}
}
}
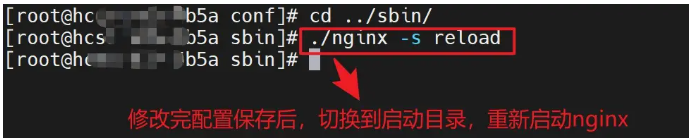
6.重新加载nginx
# 打开cmd,切换到nginx安装路径
D:
cd D:/software/nginx-1.28.0
# 重新加载
nginx.exe -s reload
# 停止
nginx.exe -s stop
二、Linux安装
1.安装Nginx相关依赖
# 检查相关依赖是否已安装
gcc -v
g++ -v
rpm -qa | grep pcre
rpm -qa | grep zlib
openssl version

# 在线安装nginx所需要的依赖包
yum install -y gcc-c++  zlib zlib-devel openssl openssl-devel pcre pcre-devel
注意:离线安装包请进入以下博客进行安装,包含安装说明。

2.nginx官网下载
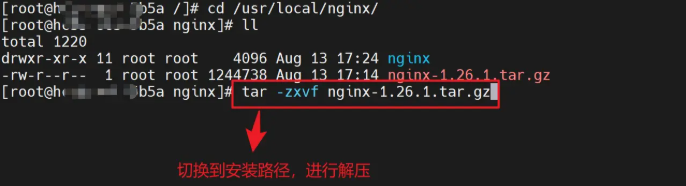
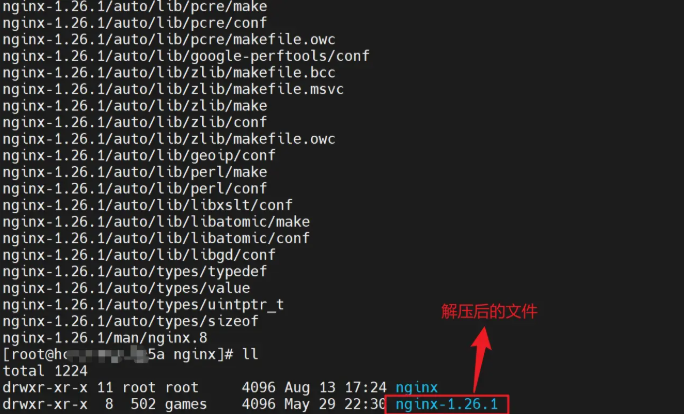
3.切换指定路径进行解压
# 切换路径,没有进行创建
cd /usr/local/nginx/
# 解压
tar -zxvf nginx-1.26.1.tar.gz
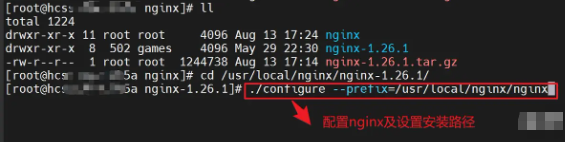
4.执行配置脚本,--prefix是指定安装目录
# 进入nginx目录
cd /usr/local/nginx/nginx-1.26.1
# 执行配置脚本 --prefix是指定安装目录
./configure --prefix=/usr/local/nginx/nginx
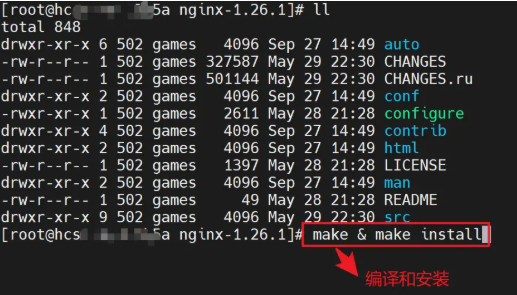
5.编译安装
# 编译和安装
make & make install
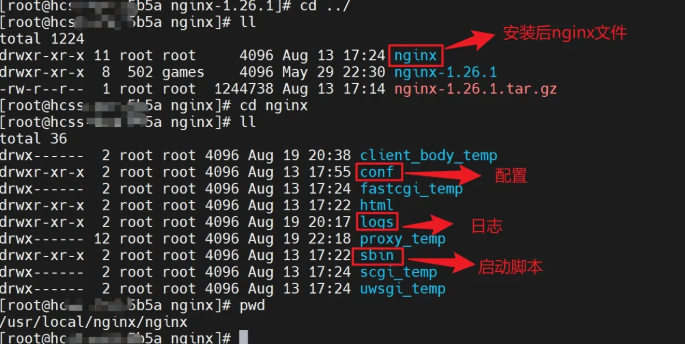
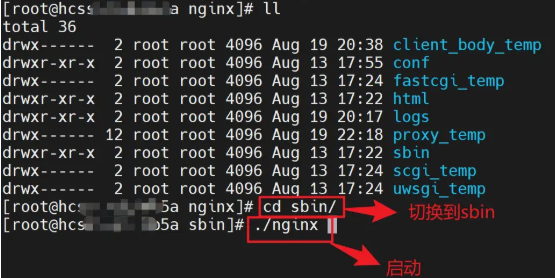
6.启动Nginx
# 进入nginx/sbin目录
cd /usr/local/nginx/sbin
# 启动脚本
./nginx
# 停止
./nginx -s stop
# 重载
./nginx -s reload
# 杀掉nginx
./nginx -s quit
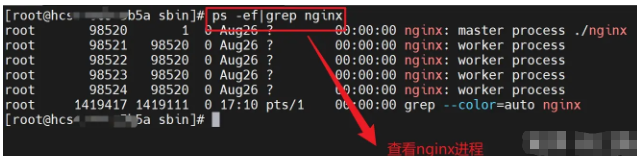
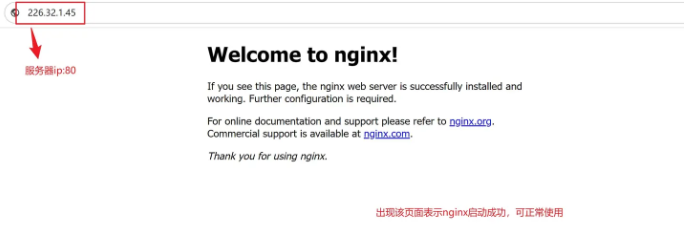
7.查询nginx是否启动成功
# 查看进程
ps -ef | grep nginx
# 访问页面
在浏览器中输入 ip + 端口号访问(端口默认80)
8.如果浏览器无法访问,检查是否开启防火墙限制
# 查看已放行的端口
firewall-cmd --list-all
# 将80端口加入到防火墙放行白名单中,并重载防火墙
firewall-cmd --add-port=80/tcp --permanent
firewall-cmd --reload
9.nginx配置说明
同上Windows安装,第5节
10.nginx配置修改
# 进入配置文件夹
cd /usr/local/nginx/nginx/conf/
# 修改配置文件nginx.conf
vim nginx.conf
三、Windows下常见Nginx的启动、停止、重新加载等命令
https://juejin.cn/post/7462208347485454399

 浙公网安备 33010602011771号