

leakcanary内存泄漏:此篇有加了内存泄漏的apk demo
概括:
·用Android studio写一个demo
·配置leakcanary
·加入内存泄漏代码片段
·安装apk 验证结果
·源码地址
一、android studio创建项目demo
1.不多写这一步了,正常按指示填写即可,不需要什么配置类的东西

2.创建打开后,先布局一个登录页面
打开路径:app-main-res-layout 或者到java下的mainActivity文件activity_main ,ctr+右击进去也可以定位到这个页面
Desgi:直观可以看到ui
text:用xml的方式布局页面
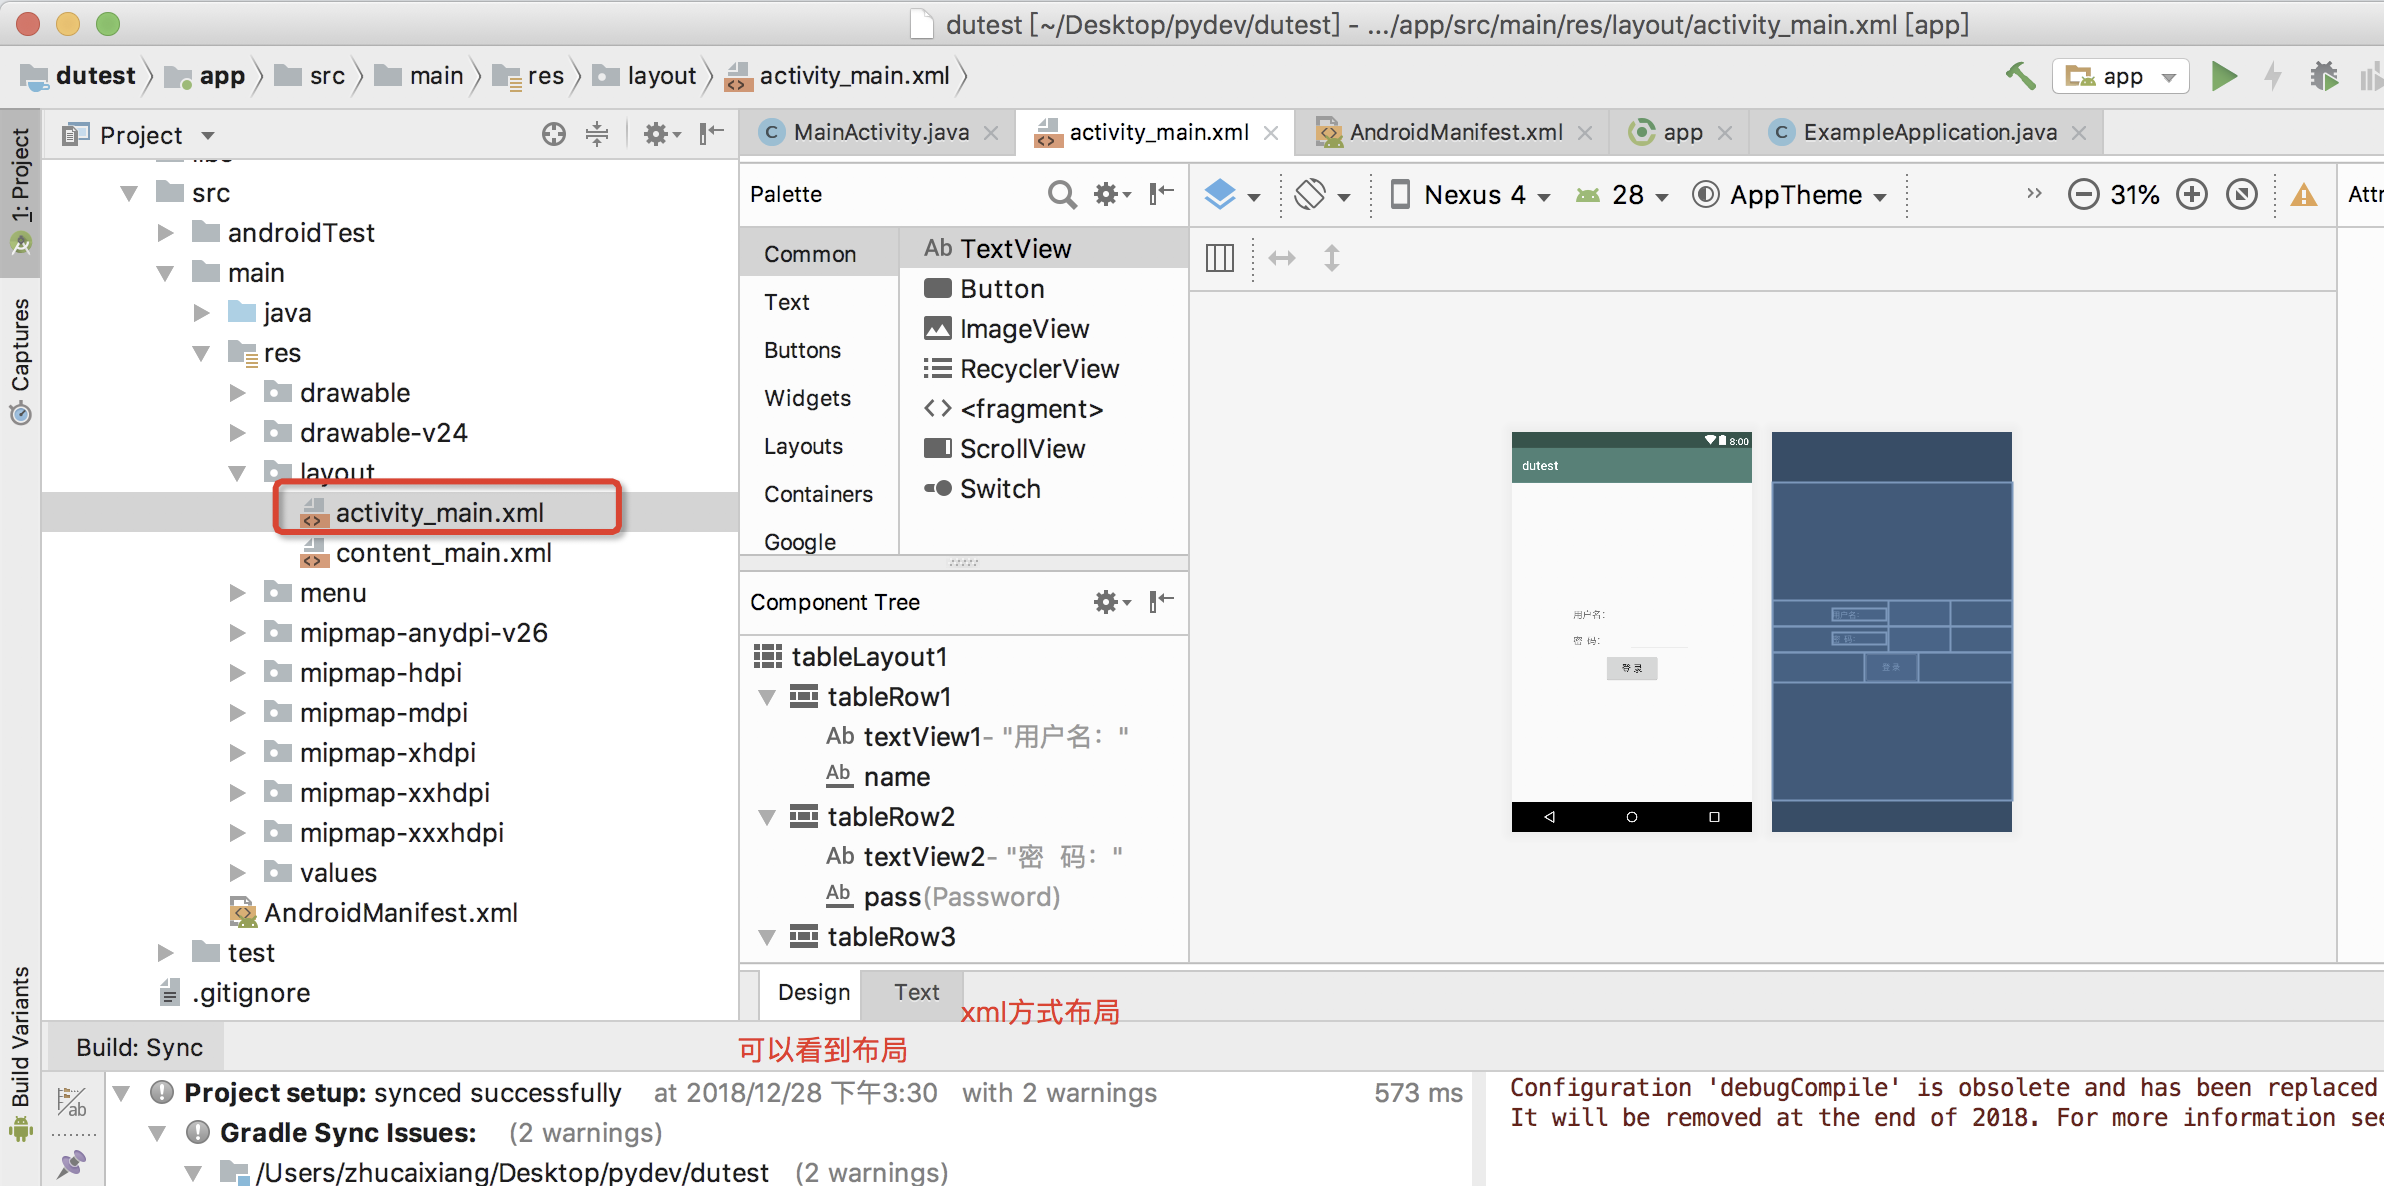
3.xml的方式布局一个登录页面(复制粘贴进去即可)
<TableLayout xmlns:android="http://schemas.android.com/apk/res/android"
    android:id="@+id/tableLayout1"
    android:layout_height="match_parent"
    android:layout_width="match_parent"
    android:gravity="center"
    >

    //第一行
    <TableRow
        android:id="@+id/tableRow1"
        android:gravity="center"
        android:layout_width="wrap_content"
        android:layout_height="wrap_content">

        <TextView
            android:id="@+id/textView1"
            android:layout_width="wrap_content"
            android:layout_height="wrap_content"
            android:text="用户名:"
            android:textSize="30px"
            />

        <EditText
            android:id="@+id/name"
            android:layout_width="wrap_content"
            android:layout_height="wrap_content"
            android:minWidth="200px"
            android:textSize="30px"
            />
    </TableRow>

    //第二行
    <TableRow
        android:id="@+id/tableRow2"
        android:gravity="center"
        android:layout_width="wrap_content"
        android:layout_height="wrap_content">

        <TextView
            android:id="@+id/textView2"
            android:layout_width="wrap_content"
            android:layout_height="wrap_content"
            android:text="密  码:"
            android:textSize="30px"
            />

        <EditText
            android:id="@+id/pass"
            android:layout_width="wrap_content"
            android:layout_height="wrap_content"
            android:minWidth="200px"
            android:textSize="30px"
            android:inputType="textPassword"
            />
    </TableRow>

    //第三行
    <TableRow
        android:id="@+id/tableRow3"
        android:gravity="center"
        android:layout_width="wrap_content"
        android:layout_height="wrap_content">

        <Button
            android:id="@+id/Login"
            android:layout_width="wrap_content"
            android:layout_height="wrap_content"
            android:text="登 录"
            android:textSize="30px"
            android:onClick="Check"
            />

    </TableRow>

</TableLayout>
4.页面现在有了,在MainActivity文件写一个事件和加入内存泄漏的片段
MainActivity路径:app-java-包下面的java文件如下
@内存泄漏加在了onCreate下面,理论上打开app会出现泄漏,如果出现不了就多操作打开app试下
@这里有个小问题,如果你没有操作上面的步骤直接用源码apk,泄漏后会报错是因为没有开启存储权限
package com.example.dutest.dutest;

import android.os.Bundle;
import android.support.design.widget.FloatingActionButton;
import android.support.design.widget.Snackbar;
import android.support.v7.app.AppCompatActivity;
import android.support.v7.widget.Toolbar;
import android.view.View;
import android.widget.EditText;
import android.widget.Toast;

public class MainActivity extends AppCompatActivity {
    EditText name;   //用户名
    EditText pass;    //密码
    //内存泄漏
    private static TestResource mResource = null;//


    @Override
    protected void onCreate(Bundle savedInstanceState) {
        super.onCreate(savedInstanceState);

        setContentView(R.layout.activity_main);
         //内存泄漏
        if(mResource == null){
            mResource = new TestResource();
            mResource = new TestResource();
            mResource = new TestResource();
            mResource = new TestResource();

        }//

        name = (EditText) findViewById(R.id.name);  //获取用户名
        pass = (EditText) findViewById(R.id.pass);  //获取密码
    }


    public void Check(View view) {
        String mname = "du";
        String mpass = "du";
        String user = name.getText().toString().trim();
        String pwd = pass.getText().toString().trim();
        if (user.equals(mname) && pwd.equals(mpass)) {
            Toast.makeText(this,
                    "密码正确", Toast.LENGTH_SHORT).show();
            if(mResource == null){
                mResource = new TestResource();
            }
        } else {
            Toast.makeText(this,
                    "密码错误", Toast.LENGTH_SHORT).show();

        }
    }
    //内存泄漏
    class TestResource {
       //
    }//


}
这样就写好一个apk的demo了,下面需要对demo配置leakcanary
二、配置leakcanary
1.android studio打开源码app的build.gradle中加入配置如下:
    debugCompile 'com.squareup.leakcanary:leakcanary-android:1.5.4'
    releaseCompile 'com.squareup.leakcanary:leakcanary-android-no-op:1.5.4'

2.自定义Application用来安装leakcanary
在app-src-java-com.xxx.项目下新建ExampleApplication类文件
package com.example.dutest.dutest;

import android.app.Application;
import com.squareup.leakcanary.LeakCanary;
import android.support.v7.app.AppCompatActivity;

//import com.squareup.leakcanary.RefWatcher;

public class ExampleApplication extends Application {

//    private RefWatcher mRefWatcher;

    @Override
    public void onCreate() {
        super.onCreate();
        LeakCanary.install(this);
    }

}
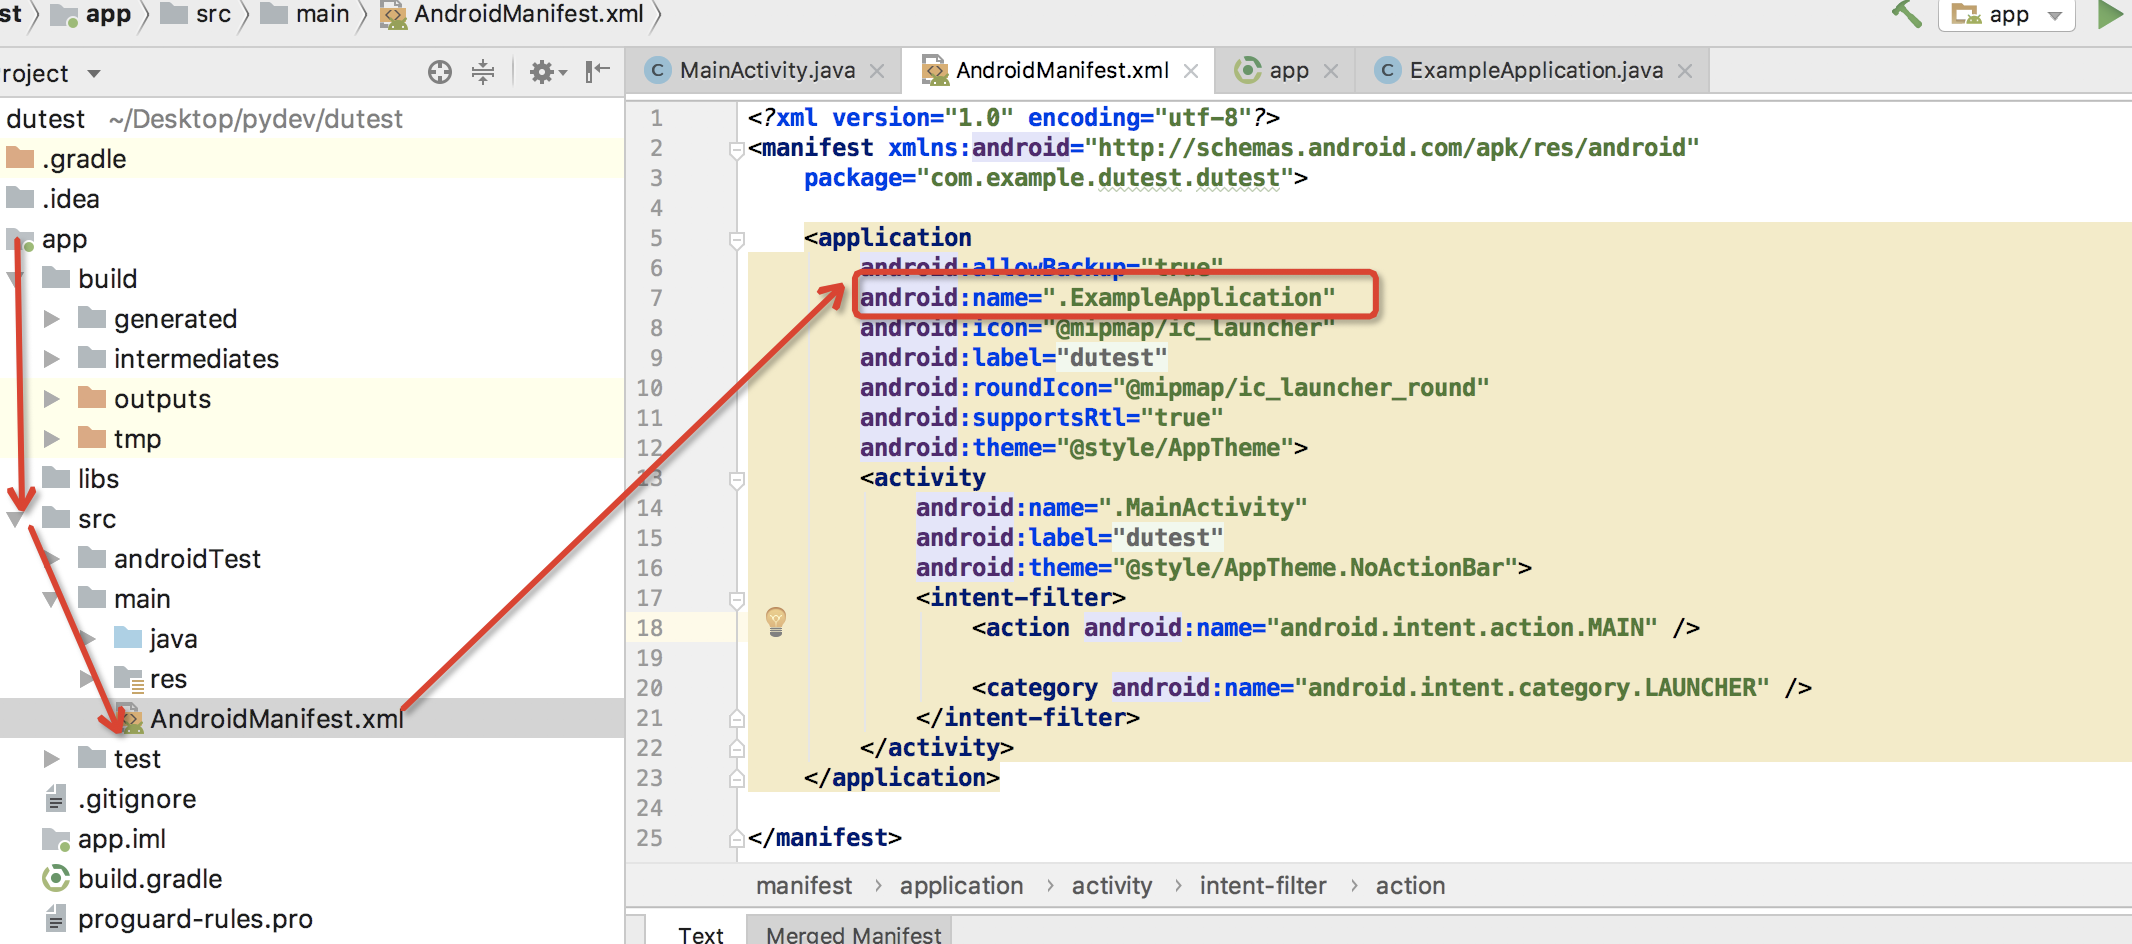
2.把自定义的ExampleApplication注册androidManifest.xml(l路径:../app-src-main同级的文件)
只要加这个android:name=".ExampleApplication"即可,如下图
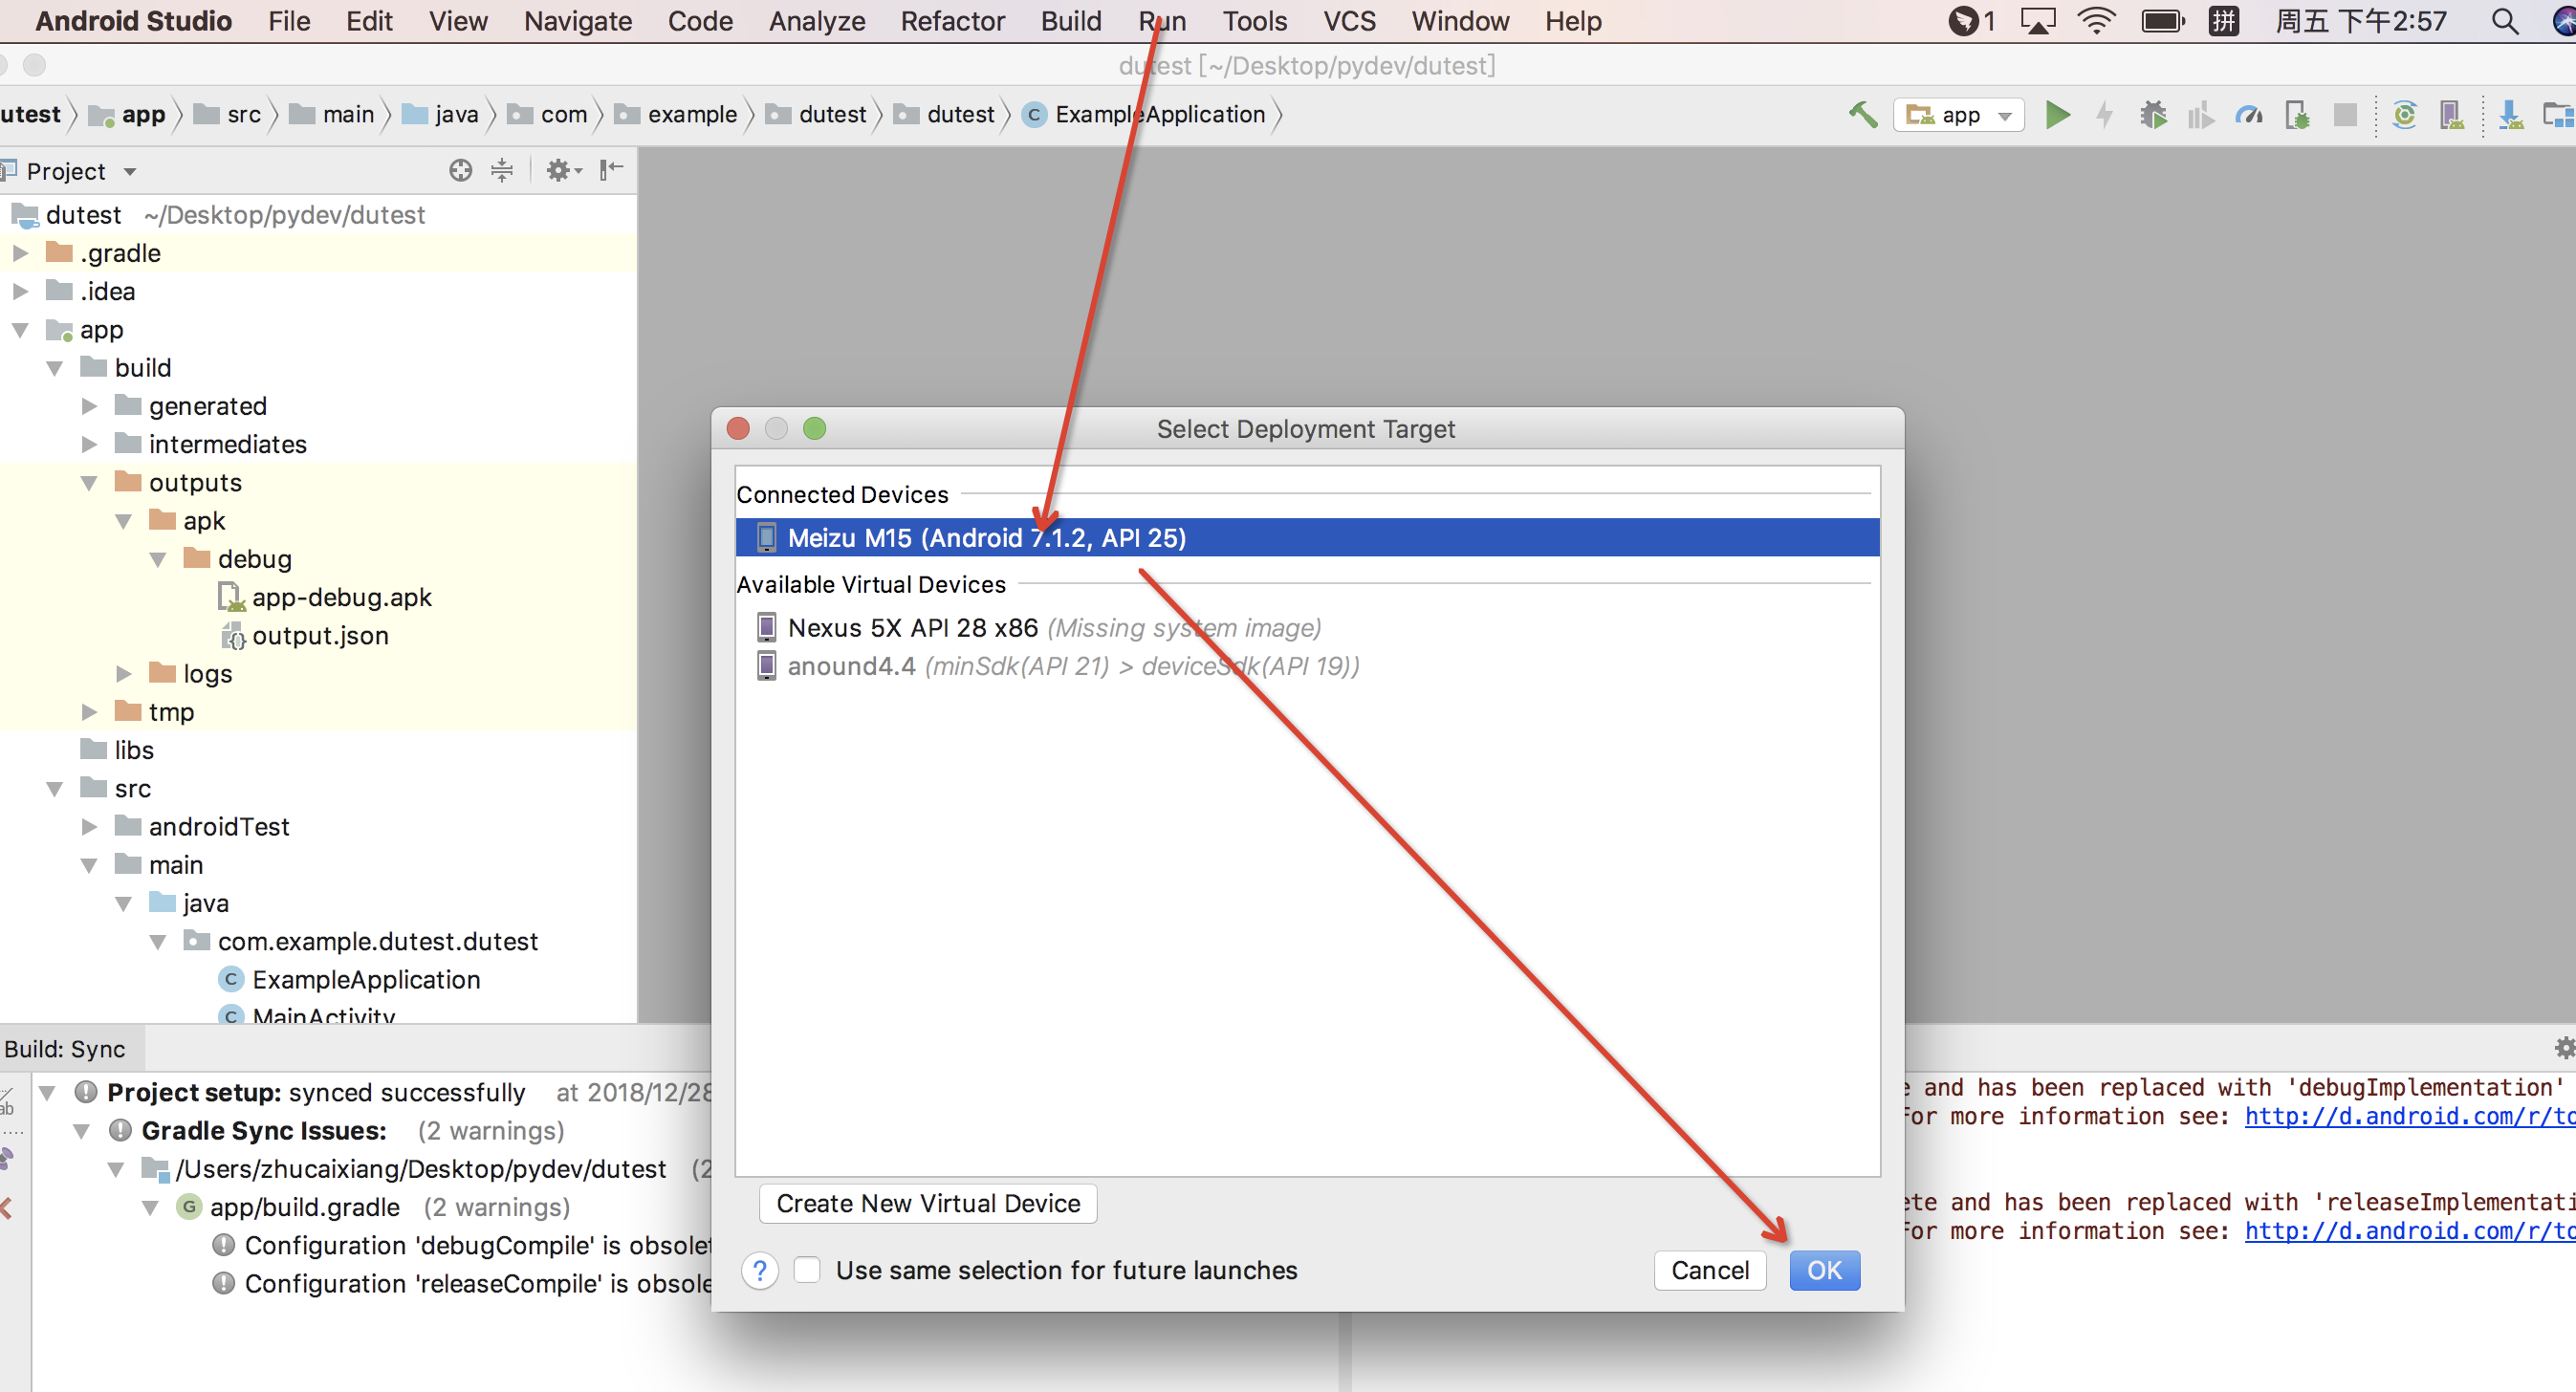
3.使用android studio打开生成debug包到手机
4.验证内存泄漏
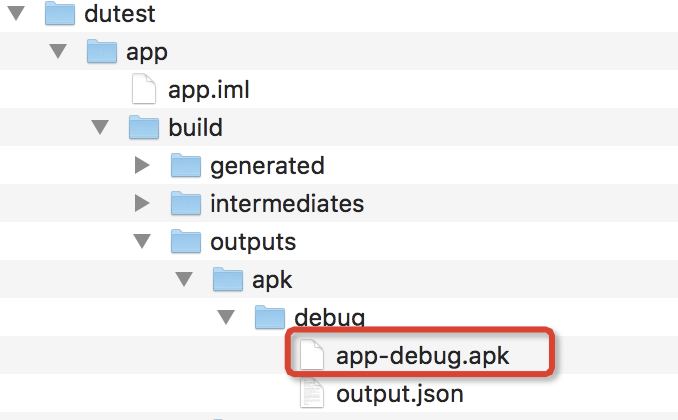
1.打包后桌面可见到:

2.打开apk(注意需要授予apk储存权限)打开apk的界面会出现内存泄漏,出现leakcanary会提示,如果没有提示尝试多次打开退出app操作

三、源码
git地址
2.用android stuido打开build debug包
3.打开包在指定路径下直接安装apk,如下图:

 浙公网安备 33010602011771号