YII1 安装smarty模版引擎
虽然说现在已经前后端分离了,但是的有的时候 还是需要做全站开发的,自己找个现成的后台 ,然后开始套框架,yii本身用的是render方法,返回数据和页面映射。
不错我以前常用thinkphp,习惯了smarty,决定把smarty集成到yii里,接下来就开始吧。
1.下载smarty包 去官网下载啊,https://www.smarty.net/download 不去官网下载也没事
下载完了 吧里面的libs文件夹 复制出来,放到yii框架的extensions目录下,并把文件夹命名为smarty,为了好记,你也可以不改名,或者随便起别的名字。
2.在extensions目录下新建一个CSmarty.php文件,粘贴如下代码:
<?php

require_once(Yii::getPathOfAlias('application.extensions.smarty').DIRECTORY_SEPARATOR.'Smarty.class.php');

define('SMARTY_VIEW_DIR', Yii::getPathOfAlias('application.views.smarty'));

class CSmarty extends Smarty {

    //const DIR_SEP = DIRECTORY_SEPARATOR;
    function __construct() {

        parent::__construct();
        $this->template_dir = SMARTY_VIEW_DIR.DIRECTORY_SEPARATOR.'templates';      //这块是放模版的目录
        $this->compile_dir = SMARTY_VIEW_DIR.DIRECTORY_SEPARATOR.'templates_c';     //这块是放模版的缓存目录的
        //$this->caching = true;
        //$this->cache_dir = SMARTY_VIEW_DIR.self::DIR_SEP.'cache';
        $this->left_delimiter  =  '<{';
        $this->right_delimiter =  '}>';
        //$this->cache_lifetime = 3600;
    }
    function init() {}
}

?>
3.然后在config/main.php里配置smarty相关,配置如下
先找到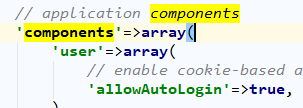
然后在这个方法的最后加上如下代码:
 'smarty'=>array(
            'class'=>'application.extensions.CSmarty',
        ),
完整的这部分代码如下:
    'components'=>array(
        'user'=>array(
            // enable cookie-based authentication
            'allowAutoLogin'=>true,
        ),
        // uncomment the following to enable URLs in path-format
        /*
        'urlManager'=>array(
            'urlFormat'=>'path',
            'rules'=>array(
                '<controller:\w+>/<id:\d+>'=>'<controller>/view',
                '<controller:\w+>/<action:\w+>/<id:\d+>'=>'<controller>/<action>',
                '<controller:\w+>/<action:\w+>'=>'<controller>/<action>',
            ),
        ),
        */
        'db'=>array(
            'connectionString' => 'sqlite:'.dirname(__FILE__).'/../data/testdrive.db',
        ),
        // uncomment the following to use a MySQL database
        /*
        'db'=>array(
            'connectionString' => 'mysql:host=localhost;dbname=testdrive',
            'emulatePrepare' => true,
            'username' => 'root',
            'password' => '',
            'charset' => 'utf8',
        ),
        */
        'errorHandler'=>array(
            // use 'site/error' action to display errors
            'errorAction'=>'site/error',
        ),
        'log'=>array(
            'class'=>'CLogRouter',
            'routes'=>array(
                array(
                    'class'=>'CFileLogRoute',
                    'levels'=>'error, warning',
                ),
                // uncomment the following to show log messages on web pages
                /*
                array(
                    'class'=>'CWebLogRoute',
                ),
                */
            ),
        ),
        'smarty'=>array(
            'class'=>'application.extensions.CSmarty',
        ),

    ),
4.controller 里写测试代码 进行测试,测试代码如下:
public function actionSmarty() {
        Yii::app()->smarty->assign('page_title', 'test1');
        Yii::app()->smarty->assign('body_text', 'test2');

        Yii::app()->smarty->display('site' . DIRECTORY_SEPARATOR . 'smarty.tpl');
        例如:
Yii::app()->smarty->display('index/index.html');
}
5.view模块配置
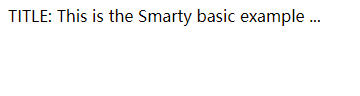
首先就是响应配置文件里的配置里 在view文件夹下添加 templates 文件夹和templates_c文件夹,templates文件夹下就放静态页就可以了,比如我view下新建一个index文件夹,里面跟着建一个index.html文件,里面输出下 后台的变量 例如<{$page_title}>,然后就完事了,
6.浏览器访问下效果 ,例如 我的项目的访问地址http://localhost/yii/cms/index.php?r=index/test2

 浙公网安备 33010602011771号