


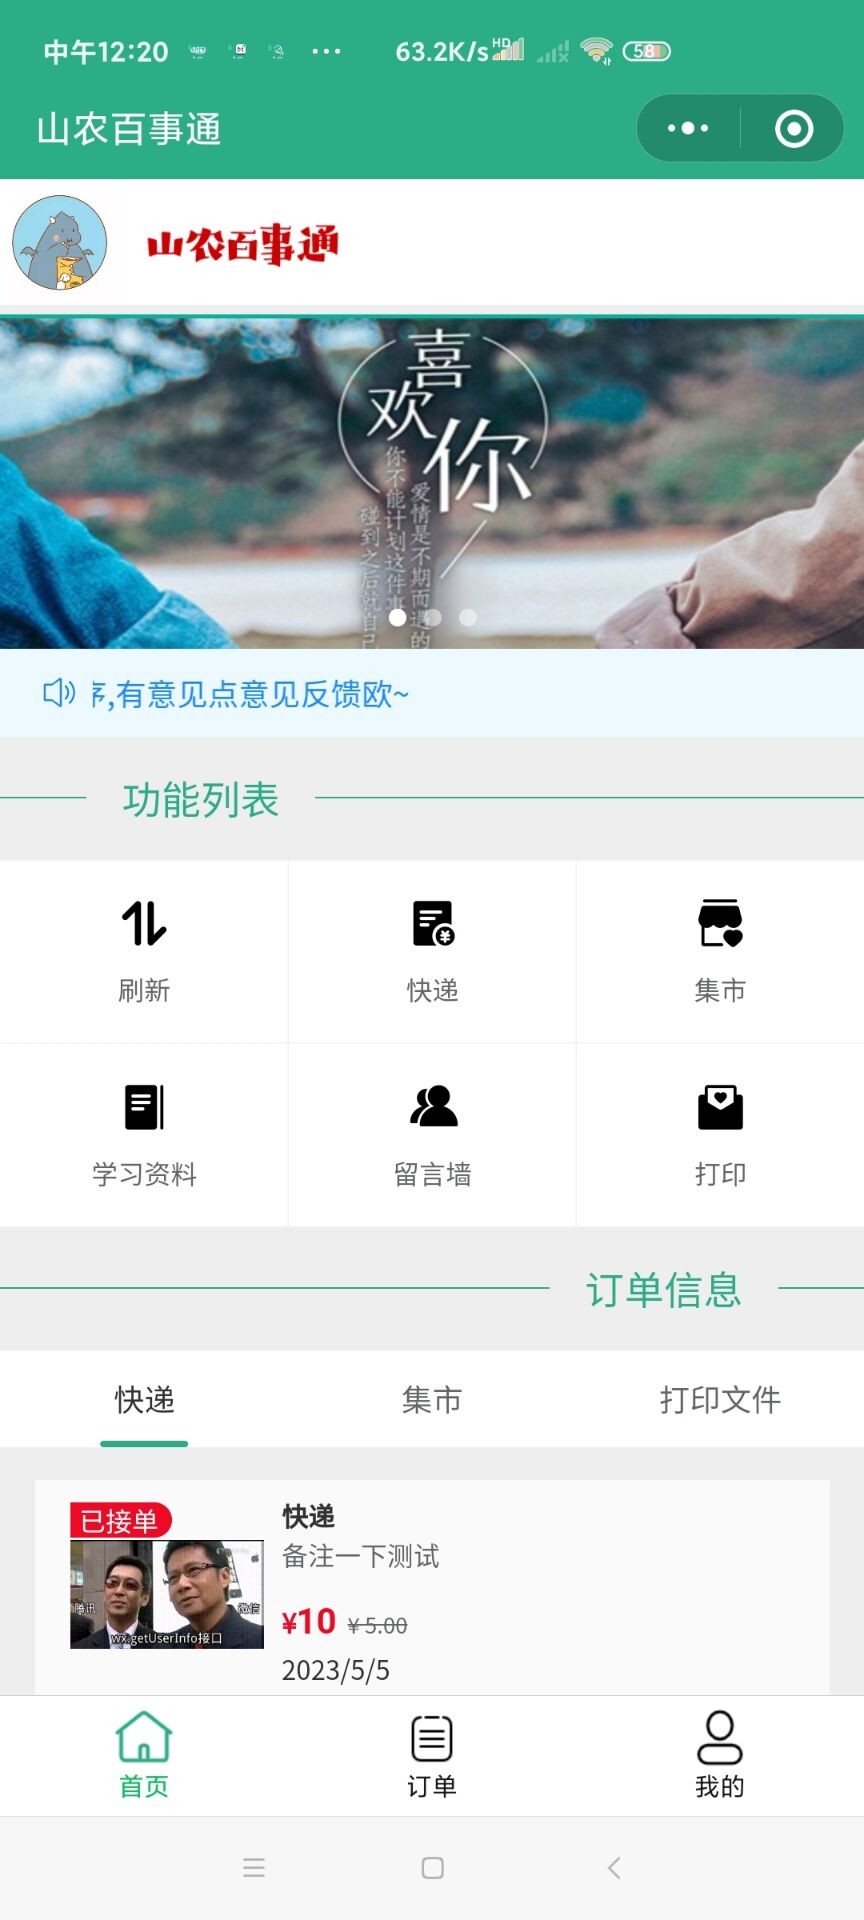
基本的页面的展示用了微信和Vant3中的组件:
1:轮播图:swiper和swiper-item
2:九宫格的页面功能区和公告:
Vant3中的van-divider、van-notice-bar
<!-- 滑动图 -->
<view class="meau_1">
  <view>
  <swiper indicator-dots autoplay interval="3000" circular indicator-color="rgba(255, 255, 255, 0.5)" indicator-active-color="white">
    <swiper-item class="eadg">
      <image src="https://kr.zutuanla.com/file/2021/0512/bc34d7dff0c308fa68ebe7f5b1332c20.jpg"mode="scaleToFill" ></image>
    </swiper-item>
    <swiper-item class="eadg">
      <image src="https://i1.shaodiyejin.com/uploads/tu/201911/9999/1edc3c656b.jpeg"mode="scaleToFill"></image>
    </swiper-item>
    <swiper-item class="eadg">
      <image src="https://kr.zutuanla.com/file/2021/0616/f895e271830eb1de7c174594ca5655cc.jpg" mode="scaleToFill"></image>
    </swiper-item>
  </swiper>
  </view>
</view>
<!-- ------------------------------------------ -->
<!-- 公告 -->
<van-notice-bar
  color="#1989fa"
  background="#ecf9ff"
  left-icon="volume-o"
  scrollable="true"
  text="欢迎大家使用我们的小程序,有意见点意见反馈欧~"
/>
<!-- ------------------------------------------ -->
<!-- 功能列表 -->
<van-divider
  contentPosition="left"
  customStyle="color: var(--themeColor); border-color: var(--themeColor); font-size: 18px;"
>
  功能列表
</van-divider>

<van-grid class="row" column-num="3">
  <van-grid-item icon="sort" text="刷新" bindtap="flash"/>
  <van-grid-item icon="balance-list" text="快递" bindtap="tZ_1"/>
  <van-grid-item icon="shop-collect" text="集市" bindtap="tZ_2"/>
  <van-grid-item icon="column" text="学习资料" bindtap="tZ_3"/>
  <van-grid-item icon="friends" text="留言墙" bindtap="tZ_4"/>
  <van-grid-item icon="invitation" text="打印" bindtap="tZ_5"/>
</van-grid>
<!-- ------------------------------------------ -->
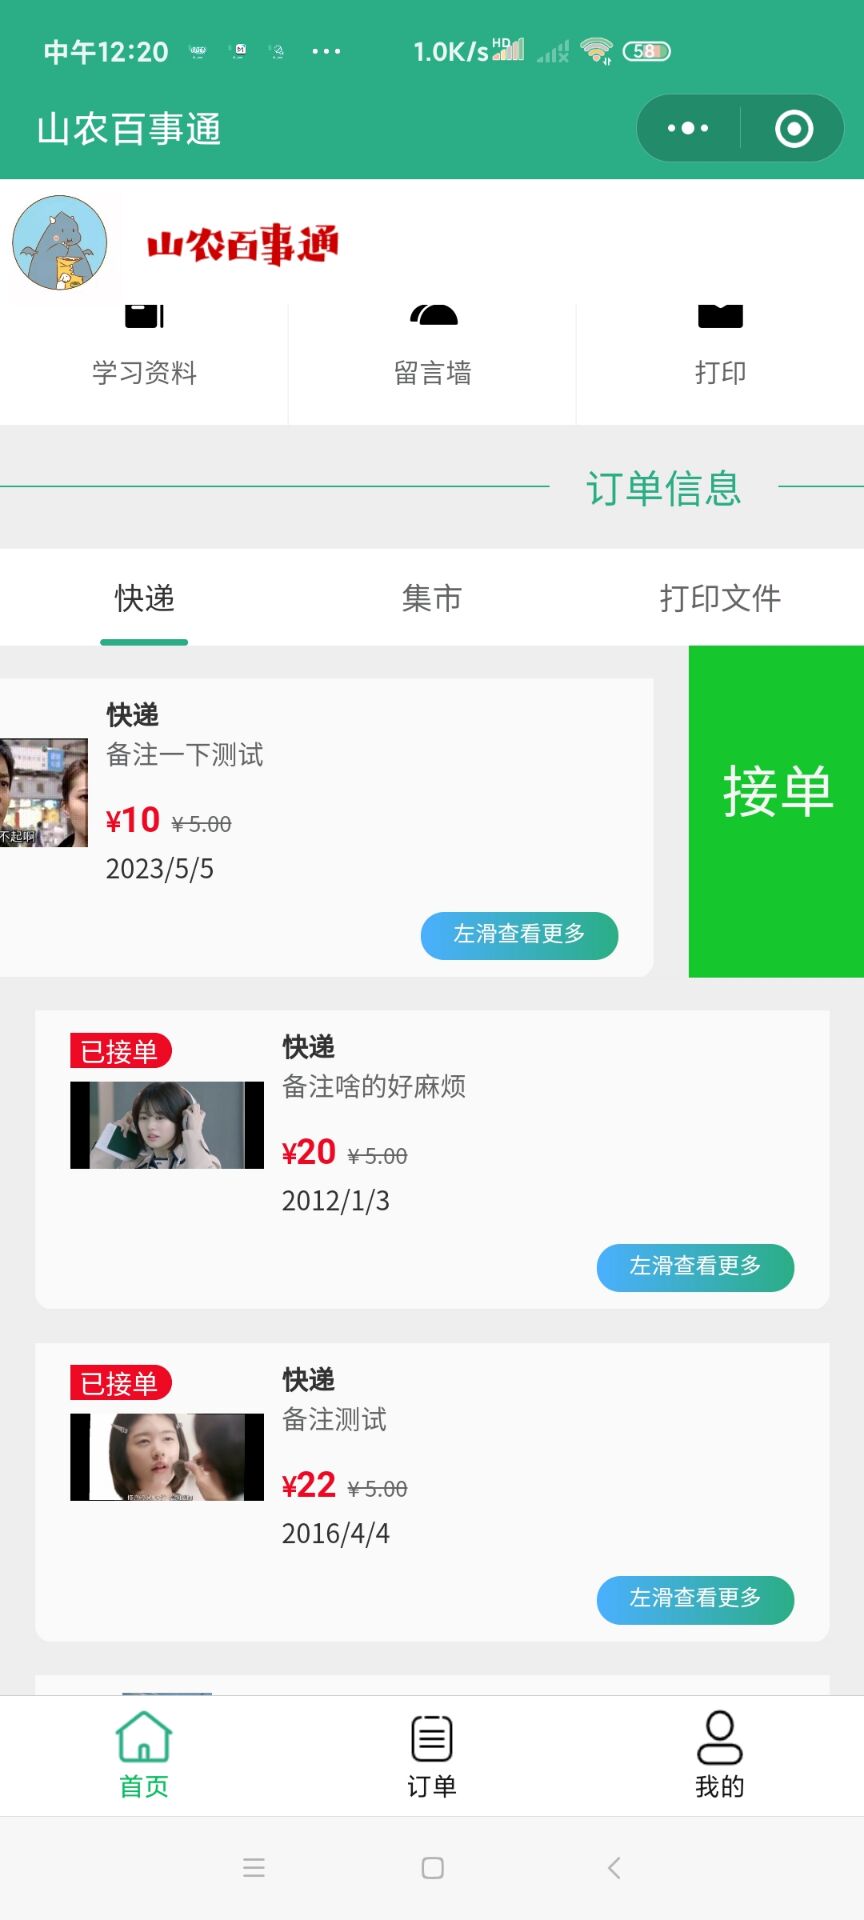
3*:动态类似Ajax的局部二次请求:
采用了Vant3中的van-tabs结构样式和通过对返回值的不同取分别重新对不同的数据库发出查询的请求,然后通过微信自己的数据绑定利用this.setData()来修改page页面中的data里面的数据,相应的数据就会动态的通过微信的wx.for()方法依次遍历完data中对应的数据集。
<van-tabs active="{{ active }}" bind:change="onChange" color = "var(--themeColor)" bind:click="onClick">
 <van-tab title="快递"name="快递"></van-tab>
 <van-tab title="集市" name="集市"></van-tab>
  <van-tab title="打印文件" name="打印文件"></van-tab>
</van-tabs>


 jS_1(e ){
    that = this;
    //判断是否达到底部数据
    wx.cloud.database().collection("jishiData")
    .count()
    .then(res=>{
      that.setData({
        total_1:res.total
      })
    })
    //判断是否拿到了数据
    if(numj>=this.data.total_1){
      wx.showToast({
        title: '数据加载完成',

      })
    }else{
    // //调用云函数拿取数据
    // var that = this;
    // wx.cloud.callFunction({
    //   name:"getjishiData",
    //   success(res){
    //     console.log("拿到数据",res)
    //          that.setData({
    //       ne:res.result.data,
    //       title:res.result.data[0].title,
    //       page:"show_2"
    //     })
    //   },fail(){
    //     console.log("拿取数据失败")
    //   }
    // })
    //使用数据库调运数据
    const db=wx.cloud.database()
    wx.showLoading({
      title: '加载中',
    })
    db.collection('jishiData').skip(numj)
  .limit(10)
  .get()
  .then(res=>{
    wx.hideLoading({})
    // console.log(res)
         that.setData({
          ne:that.data.ne.concat(res.data),
          title:res.data[0].title,
          page:"show_1",
        })
        numj= res.data.length+numj
        return numj
  })
  .catch(console.error)
    }
  }
(注:另外的2个的函数类似只是修改了数据库的名字为:useData、worldData)
4*:对于数据的页面下拉到底的刷新:
利用微信的自带的时间监听下拉触底的监听器onReachBottom方法,由于在初次页面的刷新时会给title赋值上相对应的类型(快递、打印、集市)然后只须用相应的if()else判断重新在调用相应的数据库请求函数即可。中间为每个类型增加判断是否是被显示的boolean值,每次请求都要把对应的非1的结果集给赋值为空防止下一次得到的数据在原有的基础上增加。最后加上用户反馈的提示信息,运用微信的showToast方法。
 /**
   * 页面上拉触底事件的处理函数
   */
  onReachBottom: function () {
    if(this.data.title=="快递"){
      this.kD_1()
    }else if(this.data.title=="集市"){
      this.jS_1()
    }else{
      this.dY_1()
    }
  },


kD_1(e){
    console.log(numk)
    that = this;
    //判断是否达到底部数据
    wx.cloud.database().collection("userData")
    .count()
    .then(res=>{
      that.setData({
        total:res.total
      })
    })
    //判断是否拿到了数据
    if(numk>=this.data.total){
      wx.showToast({
        title: '数据加载完成',

      })
    }else{

    //   //调用云函数拿到数据
    // wx.cloud.callFunction({
    //   name:"getuserData",
    //   success(res){
    //     console.log("拿到数据",res)
    //     that.setData({
    //       ne:res.result.data,
    //       title:res.result.data[0].title,
    //       page:"show_1",
    //       Zpagesize:Math.ceil(res.result.data.length/that.data.size)
    //     })
    //     console.log(that.data.Zpagesize)
    //   },fail(err){
    //     console.log("没有拿到数据")
    //   }
    // })
    //使用数据库调运数据
    const db=wx.cloud.database()
    wx.showLoading({
      title: '加载中',
    })
    db.collection('userData').skip(numk)
  .limit(10)
  .get()
  .then(res=>{
    wx.hideLoading({})
    // console.log(res)
         that.setData({
          ne:that.data.ne.concat(res.data),
          title:res.data[0].title,
          page:"show_1",
        })
        numk= res.data.length+numk
        numj=numd=0
        return numk,numj,numd
  })
  .catch(console.error)
    }
  },
(注:另外的2个的函数类似只是修改了数据库的名字为:useData、worldData)
5*:左滑接单的实现:
利用了Vant3中的组件van-card、van-cell-group然后再跳转到接单页面时,用wx.navigateTo方法(url?+id=_id)的形式,然后在到对应的页面那对应的参数分析处理,来得到对应数据库中的数据。

<van-swipe-cell
  id="swipe-cell2"
  right-width="{{ 80}}"
  name="示例"
  bind:open="onOpen"
  wx:for="{{ne}}"
>
  <van-cell-group>
    <van-cell-group inset>
  <view class="goods">
    <van-card
  tag="{{item.zhuangtai}}接单"
  price="{{item.money}}"
  desc="{{item.beizhu}}"
  title="{{title}}"
  thumb="{{item.image_url}}"
  origin-price="5.00"


>
  <view slot="footer">
    <!-- <navigator url="/pages/{{page}}/{{page}}?id={{item._id}}"> -->
    <van-button  type="mini"round color="linear-gradient(to right, #4bb0ff, #2bae85)" bindtap="">左滑查看更多</van-button>
  </view>
  <view slot="bottom">
    <text>{{item.deadline}}</text>
  </view>
</van-card>
  </view>
</van-cell-group>
  </van-cell-group>
  <view slot="right" class="van-swipe-cell__right"><view class="font" bindtap="delete" data-id="{{item._id}}">接单</view></view>
</van-swipe-cell>
<!-- 页尾 -->

<view class="out_1">
<view class="row_1">
  <view class="little_1"><image src="https://tb1.bdstatic.com/tb/cms/frs/bg/default_head20141014.jpg" mode="widthFix"></image></view>


</view>

//接单
  delete(e){
    const db = wx.cloud.database()
    let that = this

    //找到id
        //删除订单
        let id1 = e.currentTarget.dataset.id
        console.log(id1)
        if(that.data.title=="快递"){
          // console.log("快递")
         wx.navigateTo({
           url: '/pages/jiedan/jiedan?id='+id1,
         })
        }else if(that.data.title=="集市"){
          wx.navigateTo({
            url: '/pages/jiedan_1/jiedan_1?id='+id1,
          })
          // console.log("集市")
        }else{
          // console.log("打印")
          wx.navigateTo({
            url: '/pages/jiedan_2/jiedan_2?id='+id1,
          })
        }
    // console.log(e)
  },

 浙公网安备 33010602011771号